
FIDGET SPINNERS
Engineering Meets Toy-Making
Excite hands and minds while inventing custom Fidget Spinners. Learners of all ages delight in exploring simple machines during exciting toy-making challenges. This is a great activity for any classroom, club or camp and utlizes just basic craft items and re-purposed scrap-parts. It’s also a great project to activate the design process in meaningful and fun ways. And, Fidget Spinners make an awesome addition to Maker parties & events!
-
K-8th Grade
Adult Learners
-
60 min.
20-30 min if you pre-cut parts
-
Engineering
Simple Machines
Design Process
Physical Science
Math
-
In-class, Hybrid or Online Learning
Implementation Steps

Overview
-
Download planners, templates & handouts below. Print any needed resources.
-
Use the Supply Planner below to collect materials and tools for class. We’ve also included links to some of our vendors to order bulk supplies & technology.
-
Explore our gallery of student work for inspiration. Be creative as you customize this program for your community. And, think of ways to integrate with your existing curriculum or units.
-
Watch the tutorials and make several class samples. This allows you to learn the project, extend your ideas & trouble-shoot. We recommend chunking out the activity in phase like the videos.
-
Have a ball creating with your learners. You can show the video tutorials & slideshows in class to help guide you.
Planners, Templates & Handouts
Download Resources
-
-
-
-
Eurekus programs are easy to tailor to meet different learning goals. Here are some ideas of what educators have done to adapt the program and make it their own.
Integrate Fidget Spinners with a simple machines unit.
Incorporate into a physical science investigation.
Use the activity to explore concepts of symmetry.
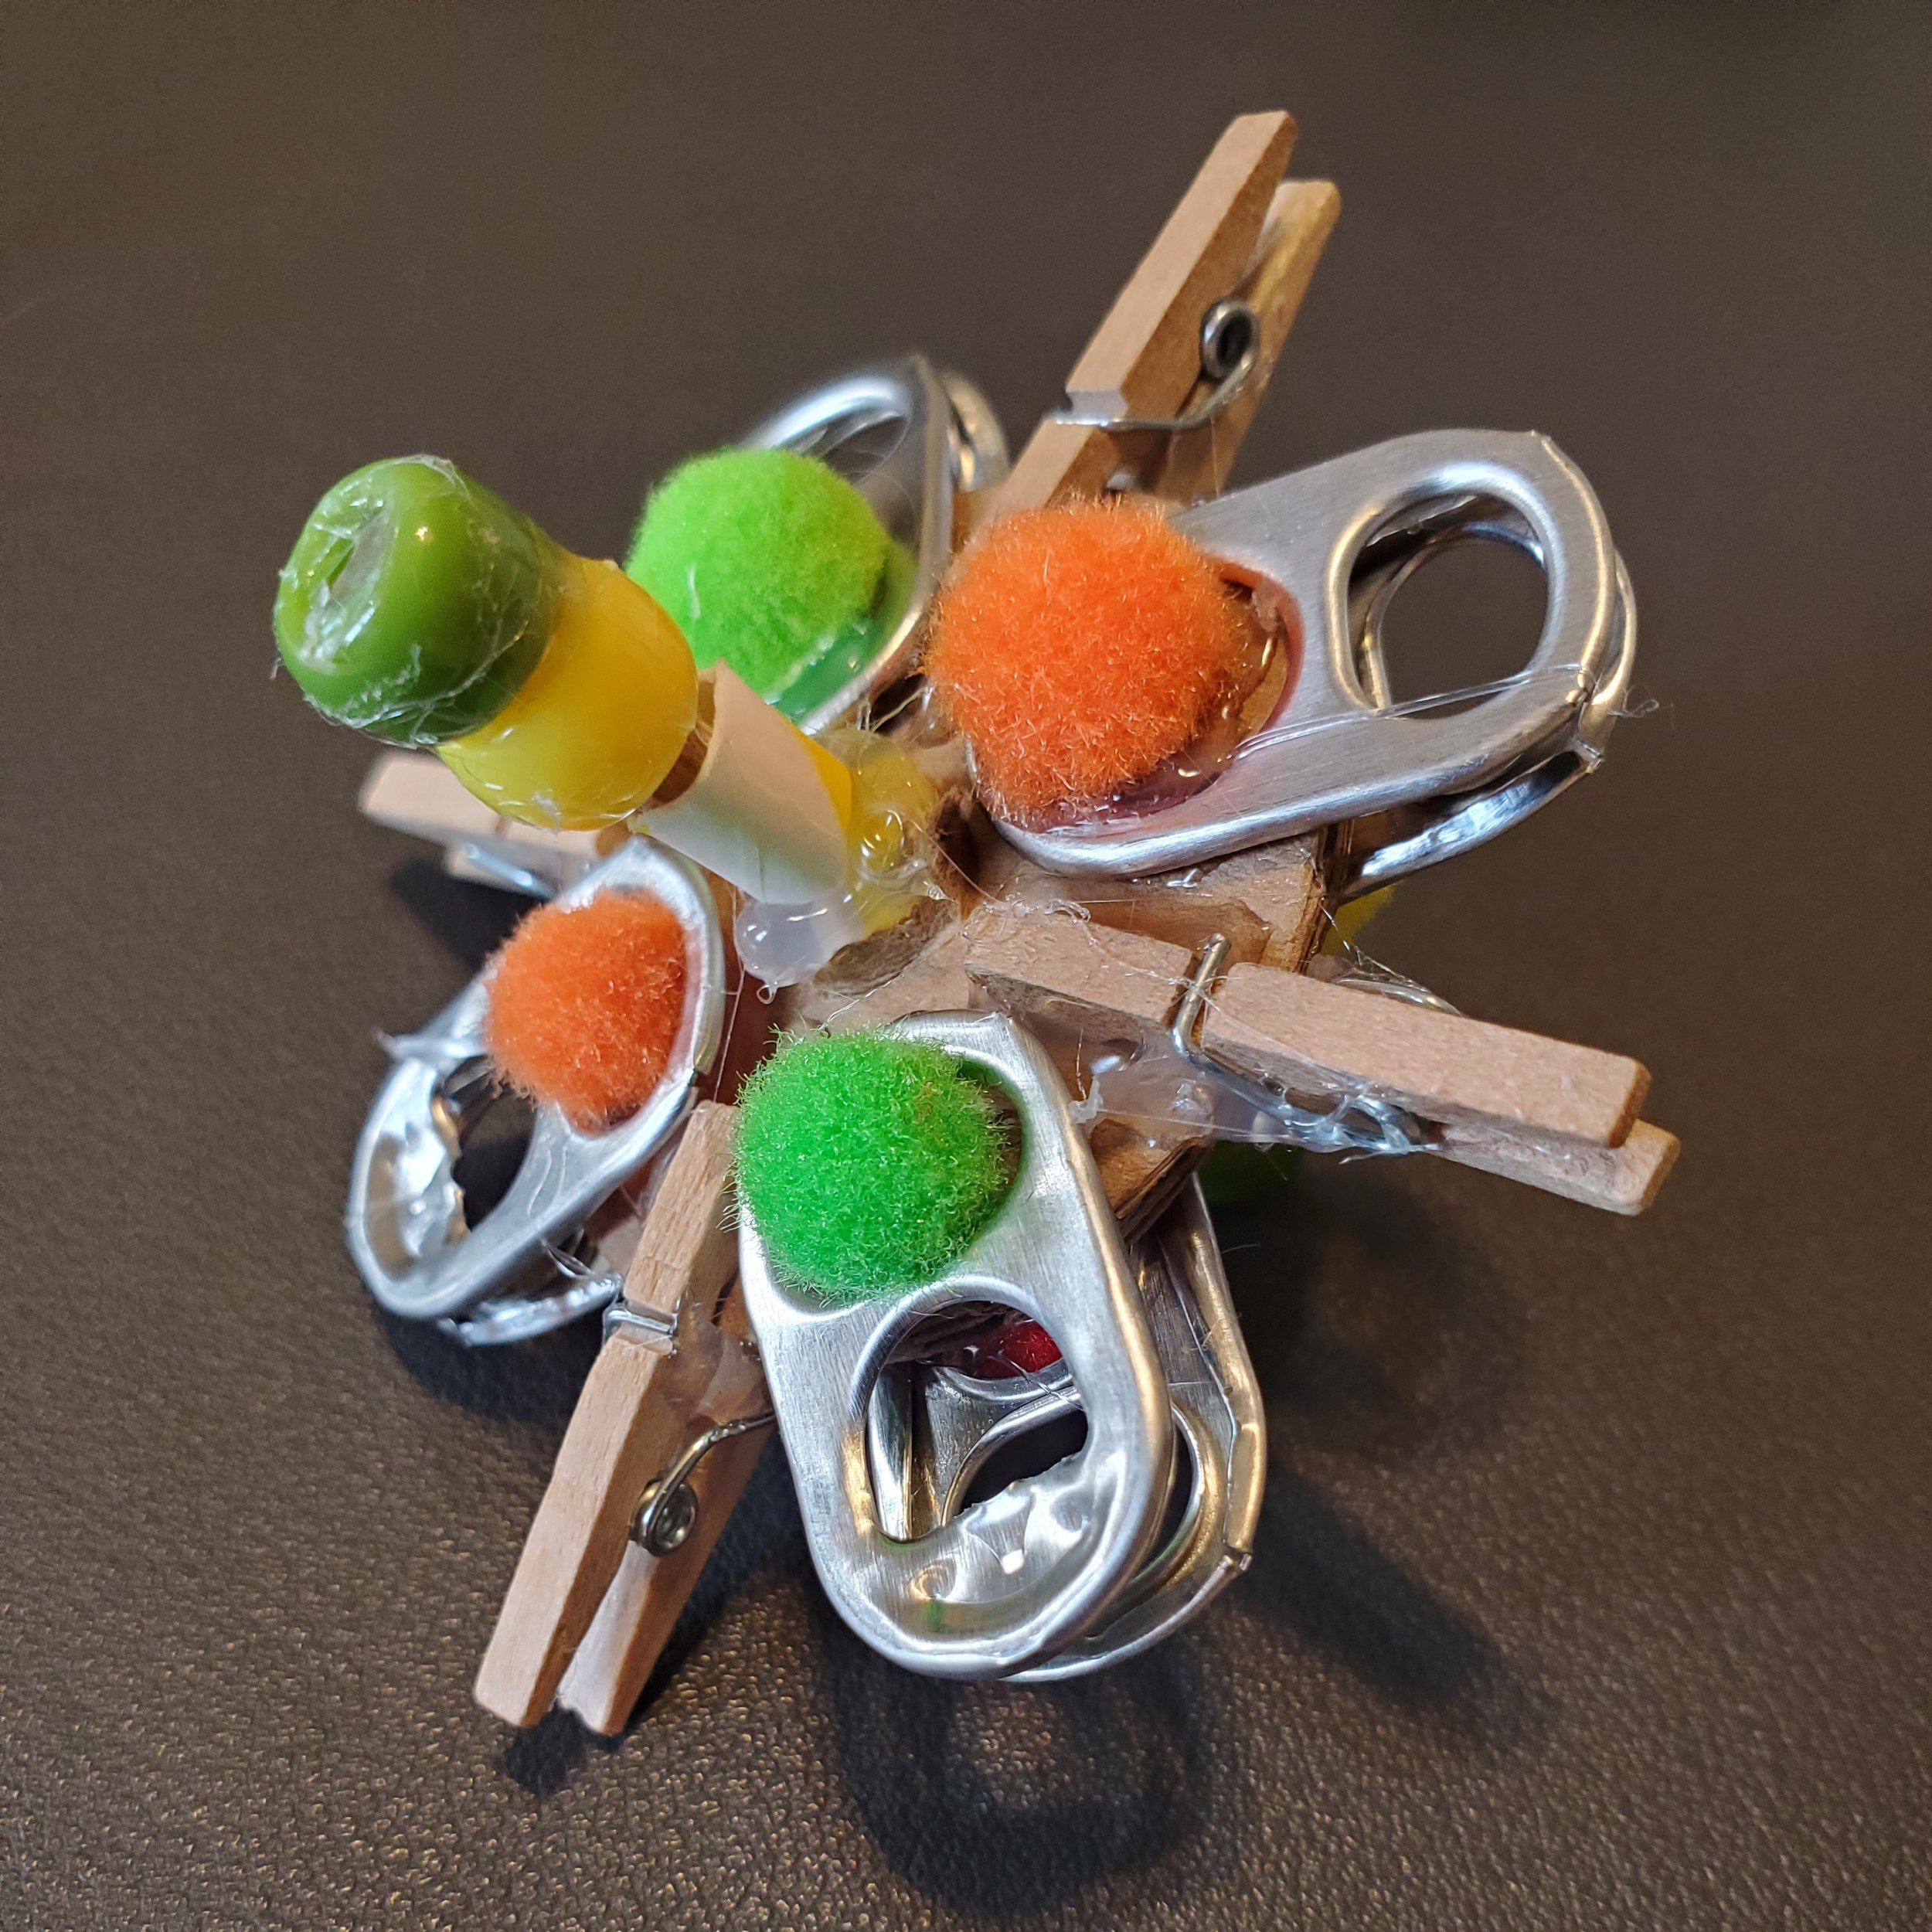
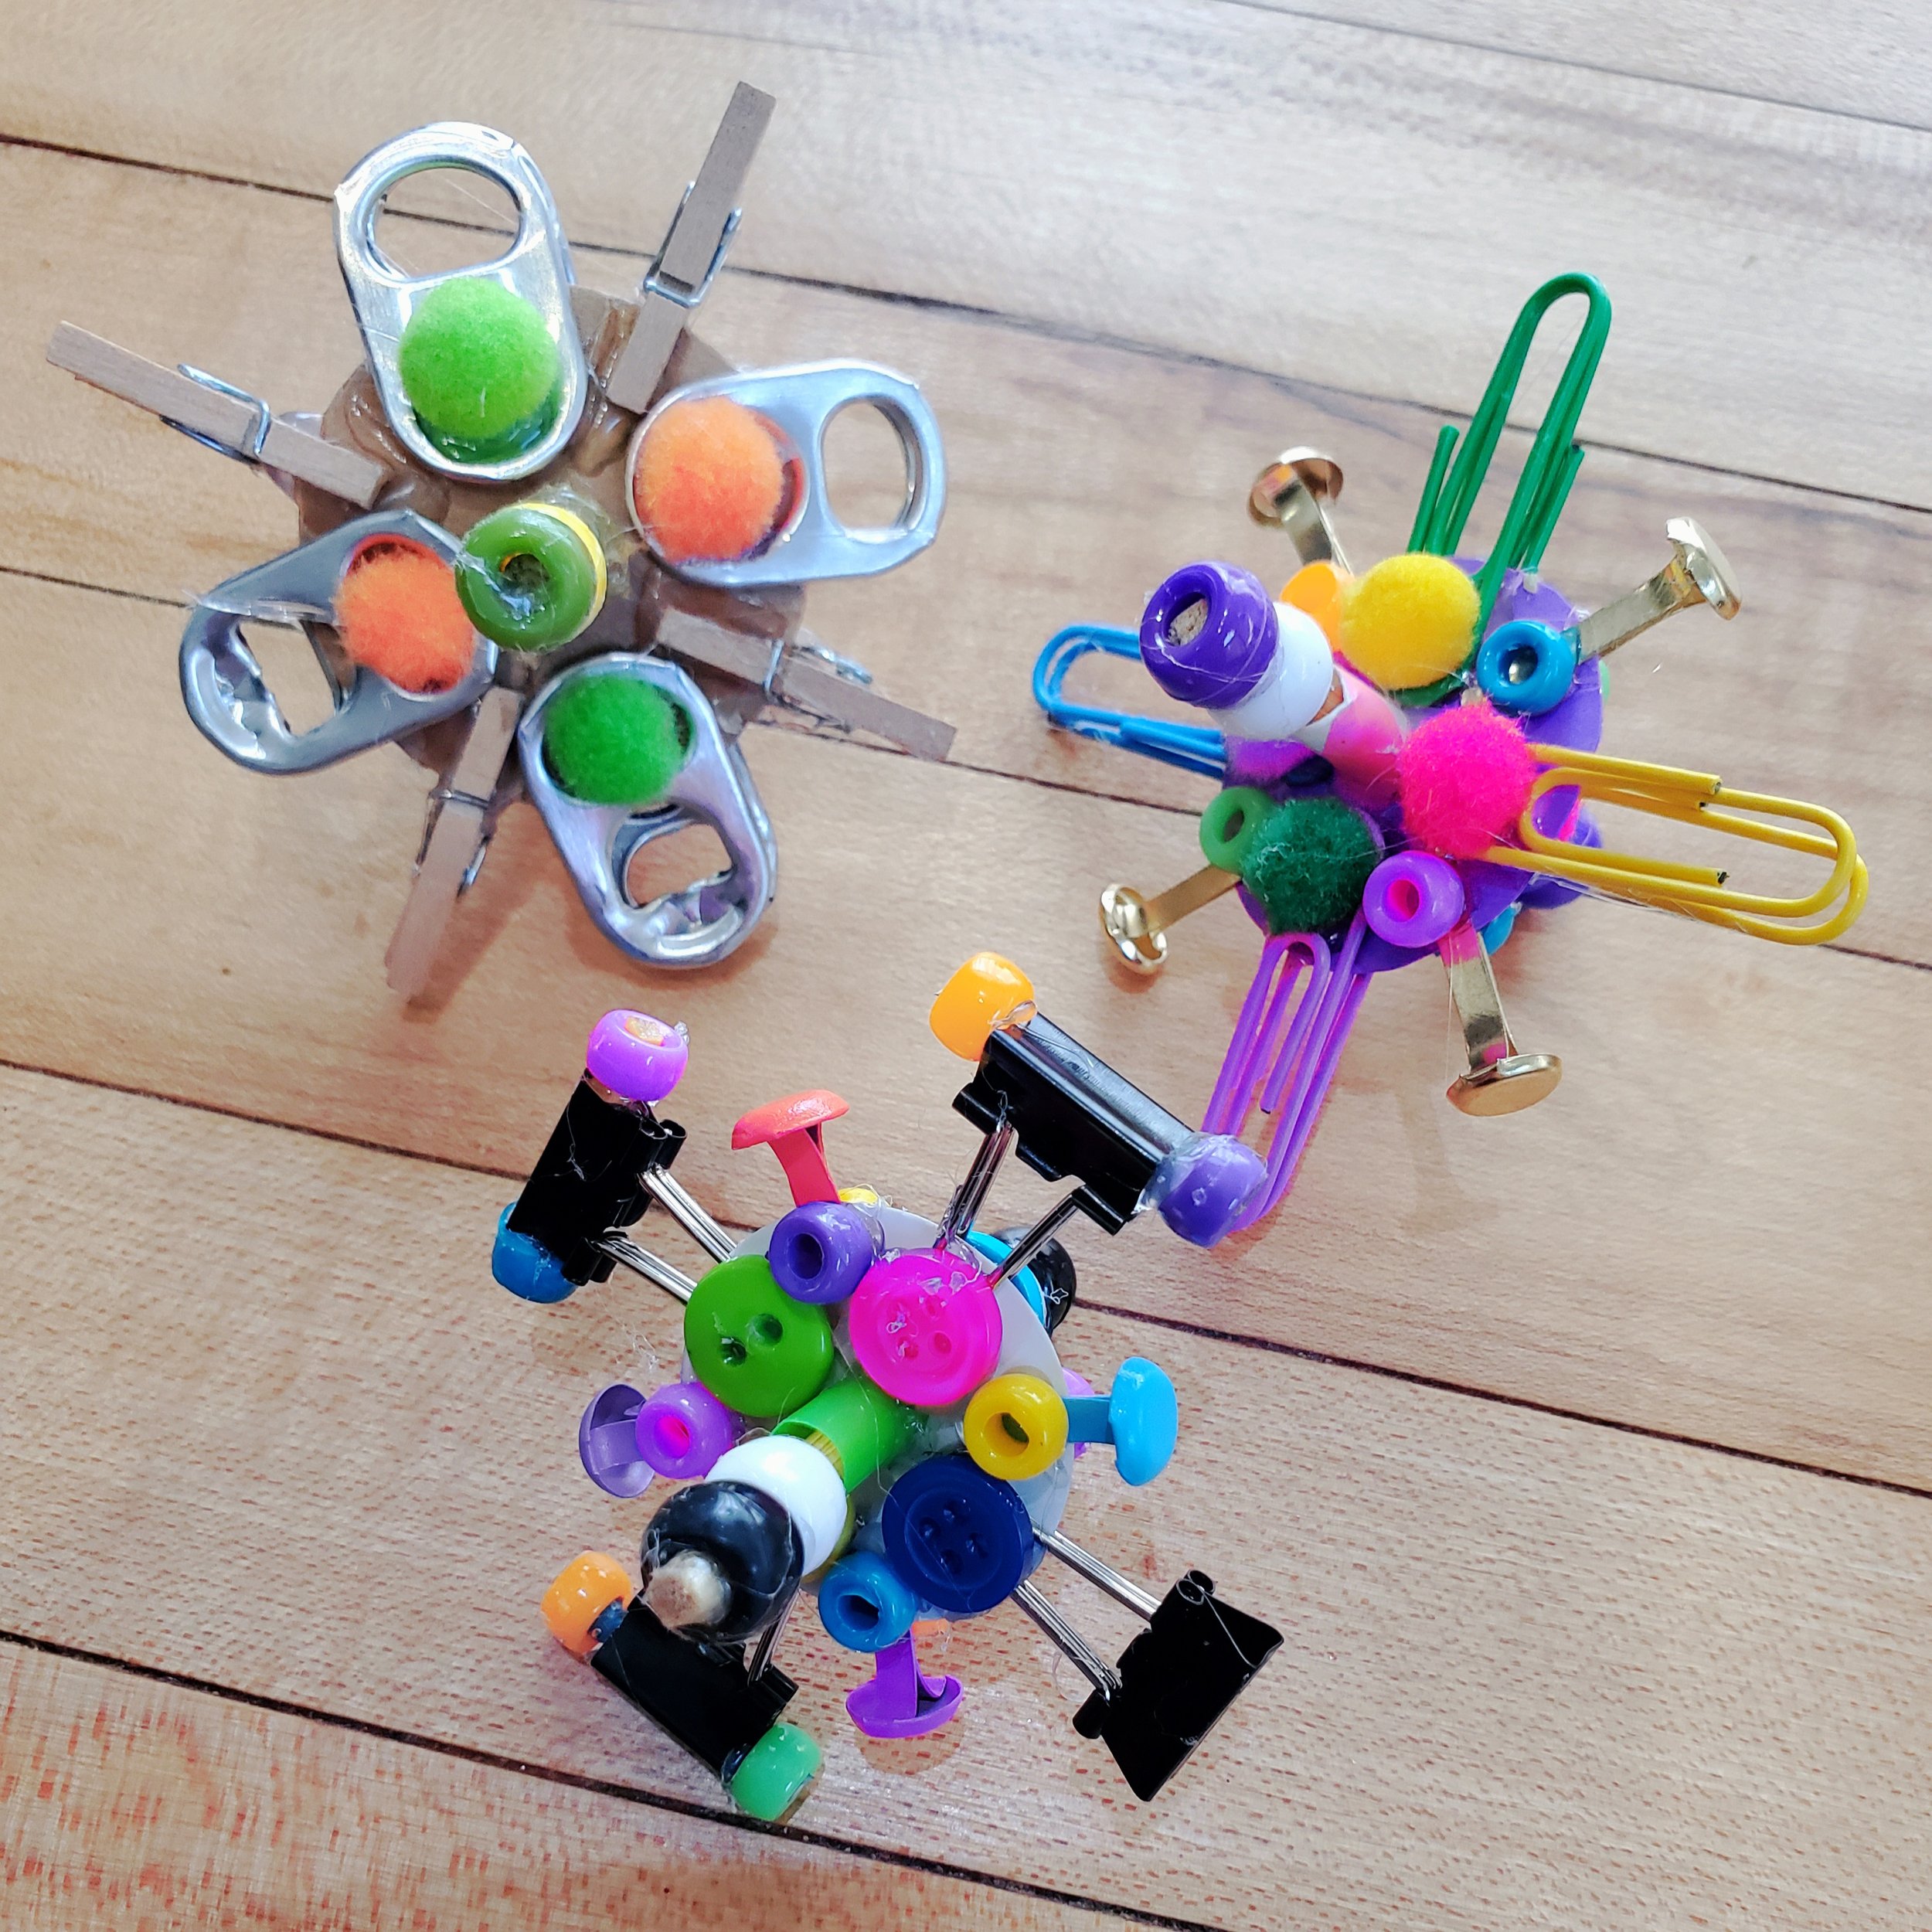
Collect spare parts for a design challenge using re-purposed materials.
Add as a fun activity for community and maker events.
Video Tutorials
Follow these tutorials to make a custom Fidget Spinner using basic and scrap parts. Watch Video 1 to engineer your wheel and axle system. Then watch Videos 2 to add you own creative designs.
1) Engineer A Wheel & Axle
2) Add Custom Creations
Slideshow Instructions
Watch the following slideshows to make your Fidget Spinners. These slideshows are great to project in class and follow along as you make.
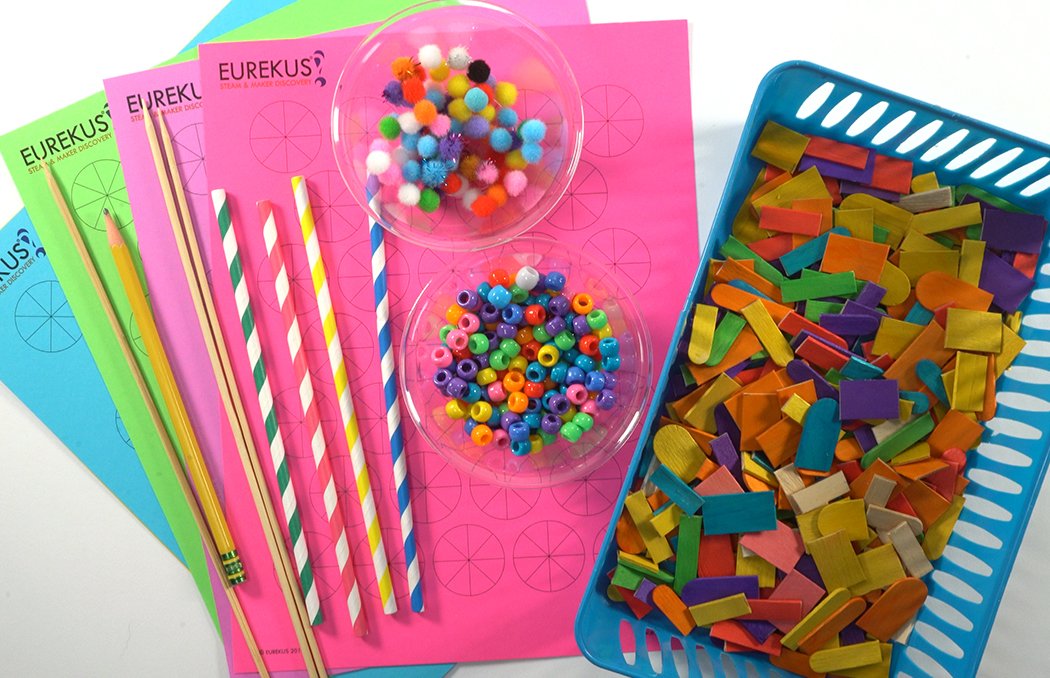
Collect supplies. This is a great project to re-purpose scrap and spare parts.
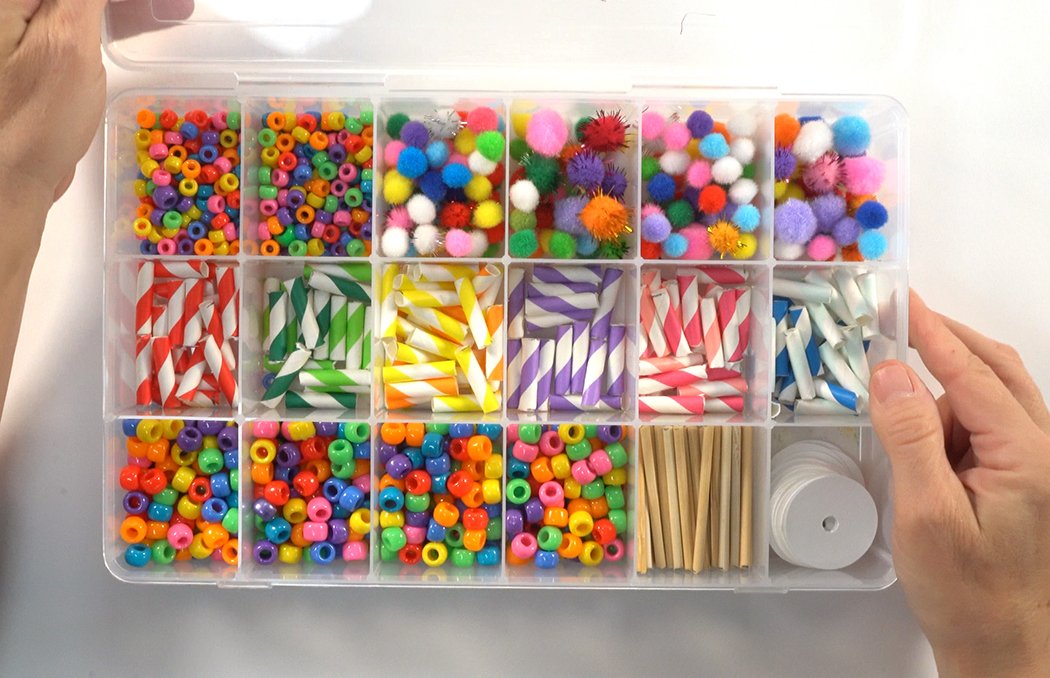
We like to make a bin of pre-cut parts for younger learners and quick maker sessions.
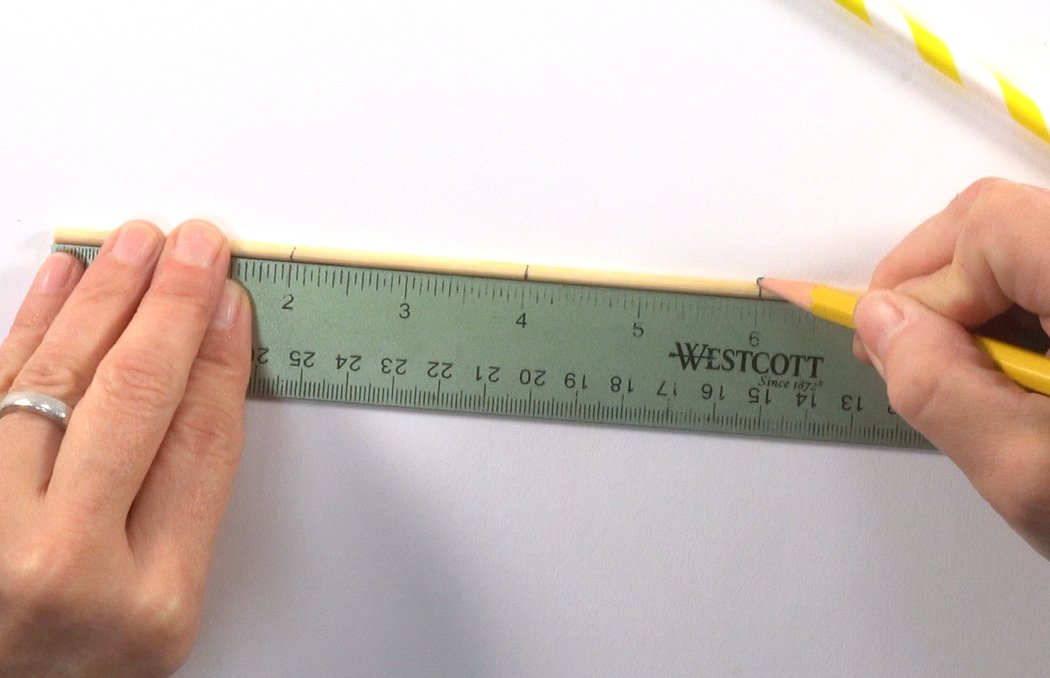
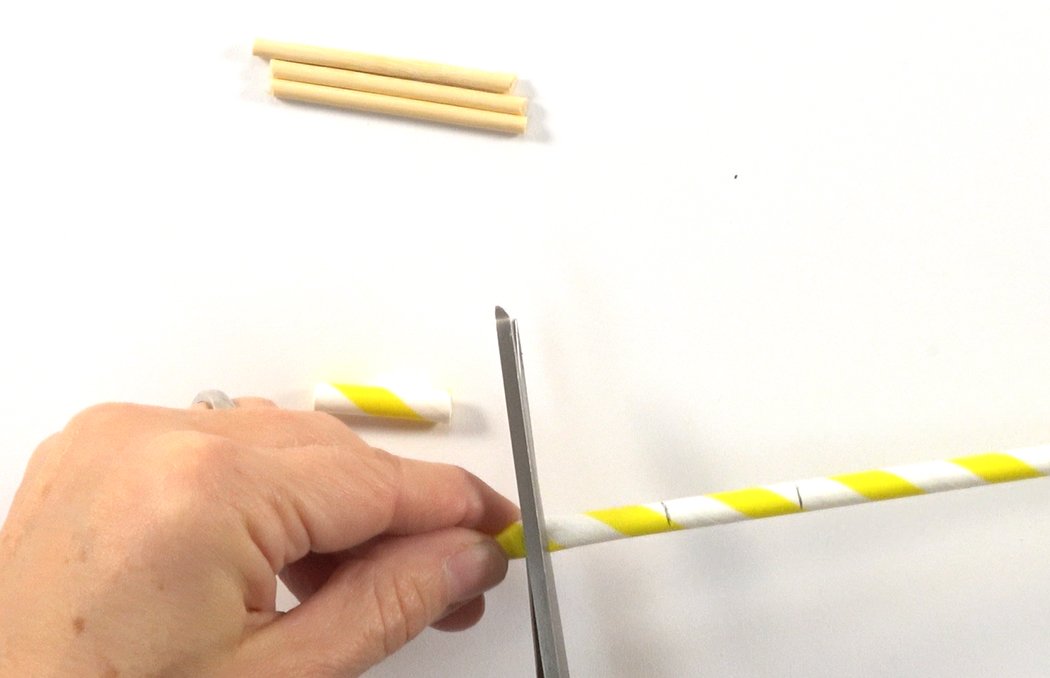
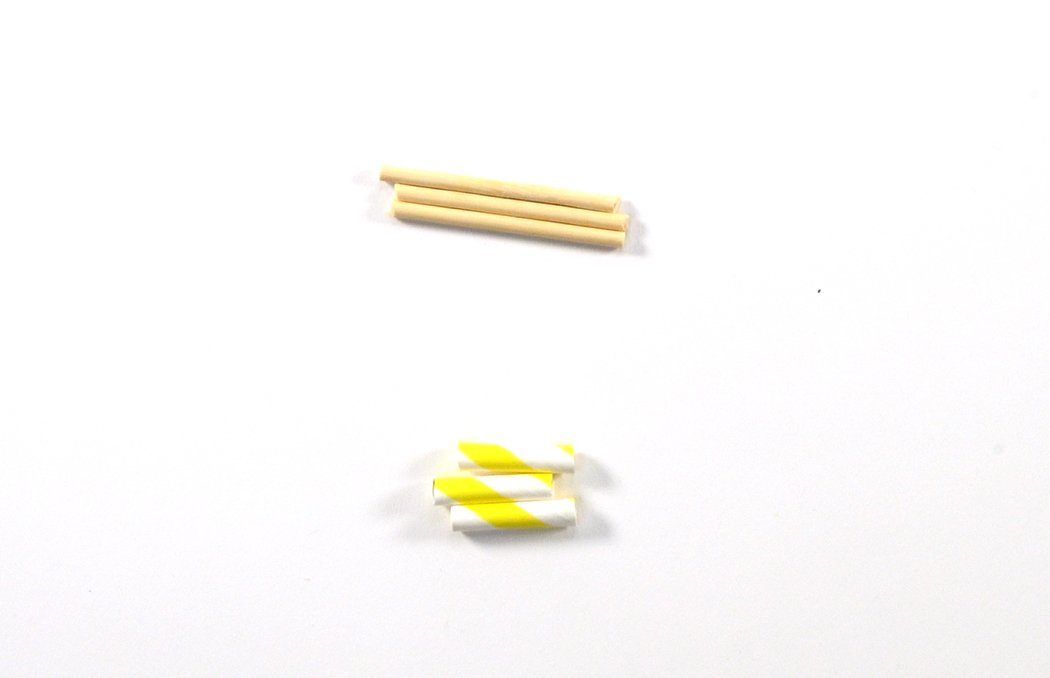
Measure bamboo skewers at 2" lengths to make axles.
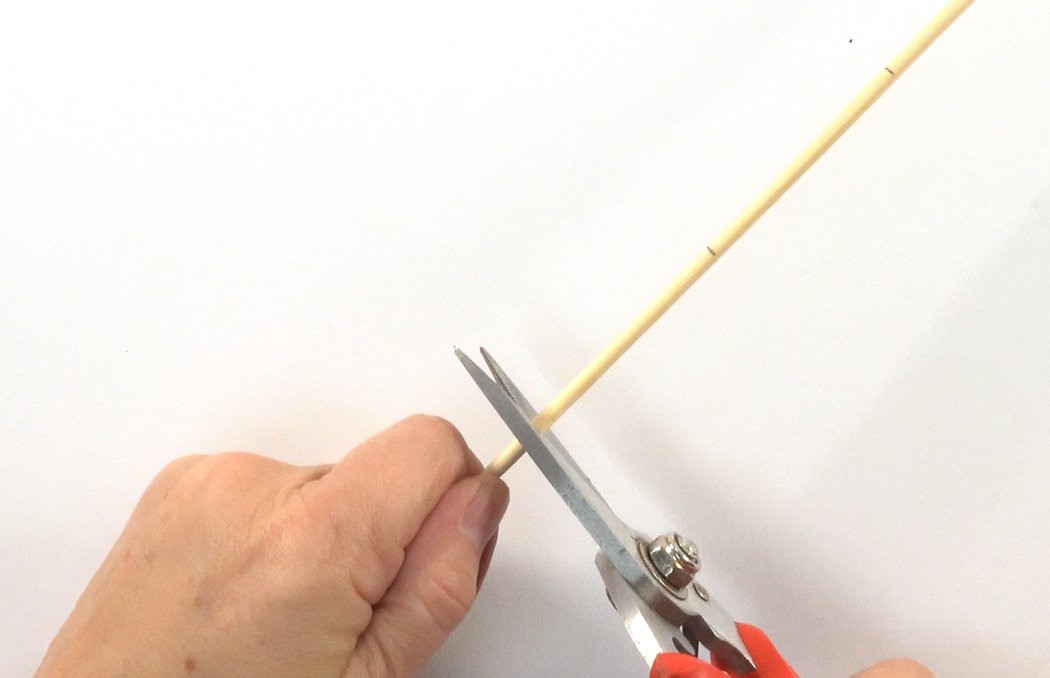
You can use pruning shears, diagonal cutters or large wire cutters to cut wood.
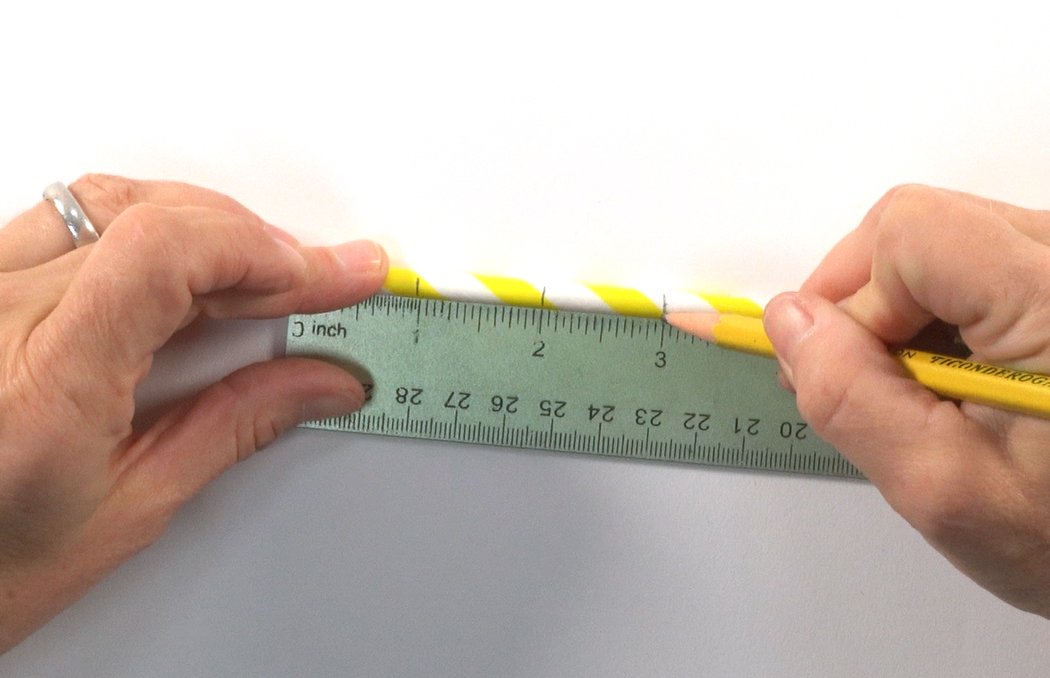
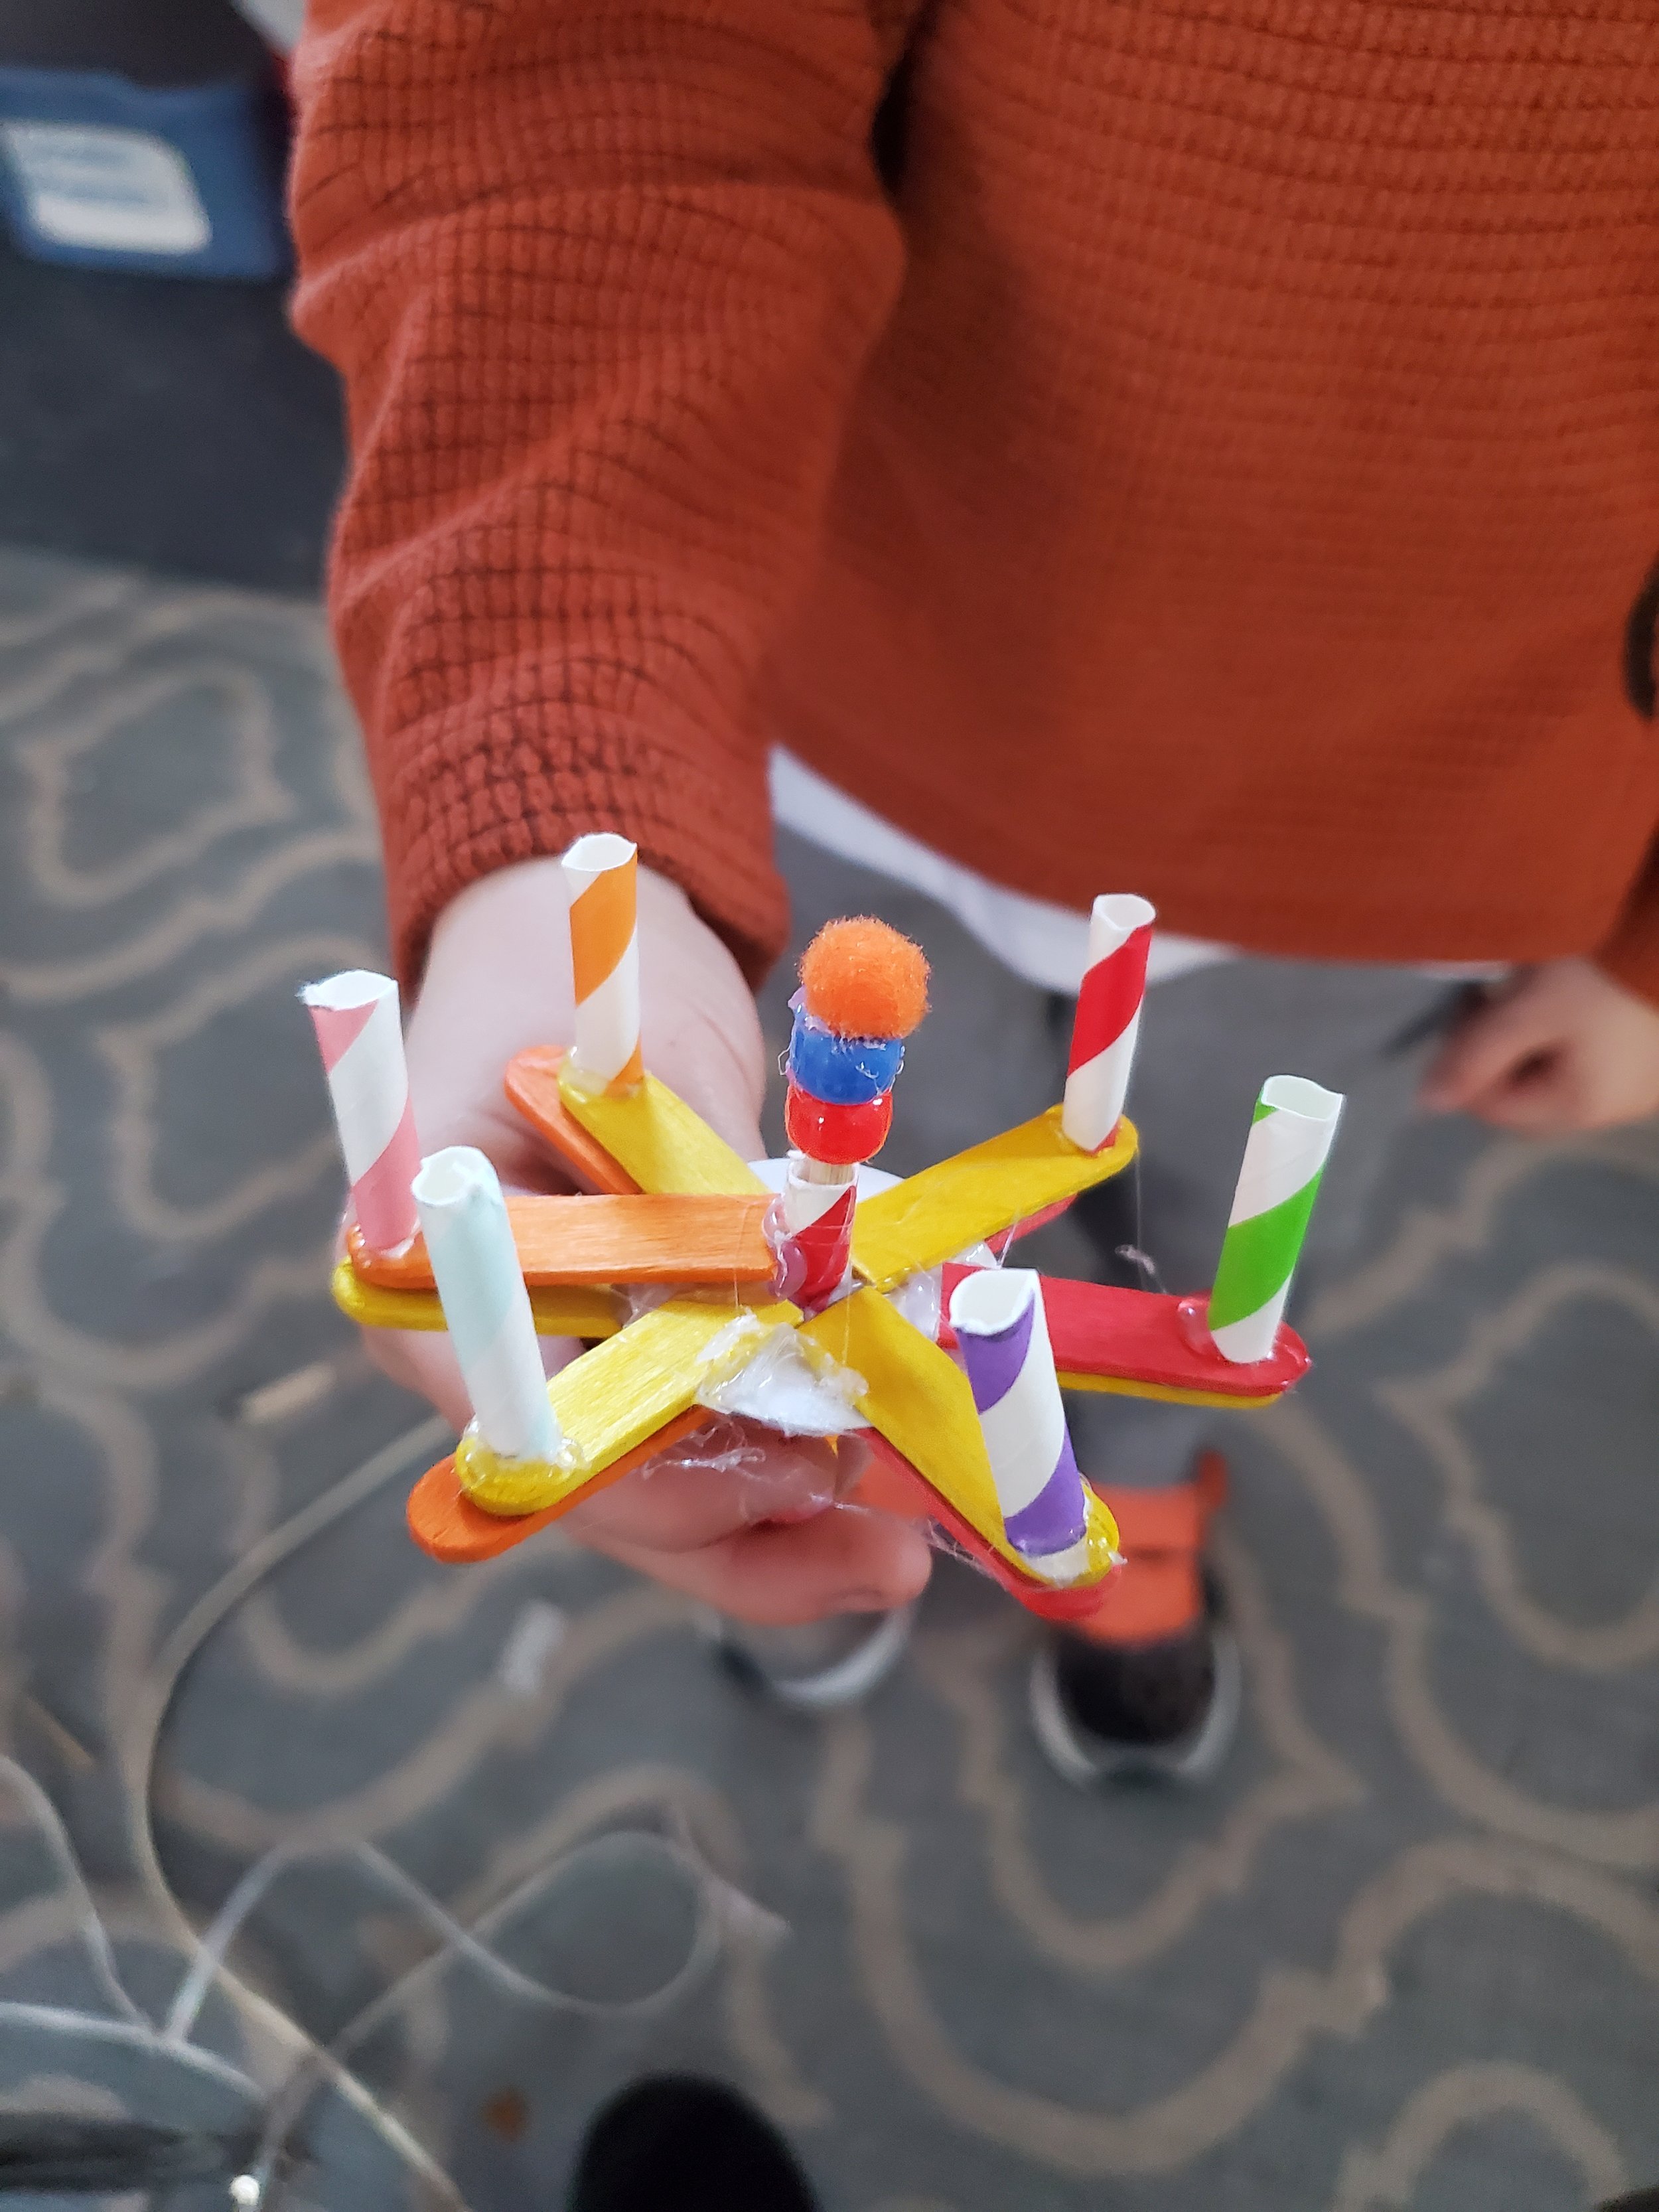
Measure paper straws at 1" lengths to make bearings.
When you cut the straws, the ends with squish.
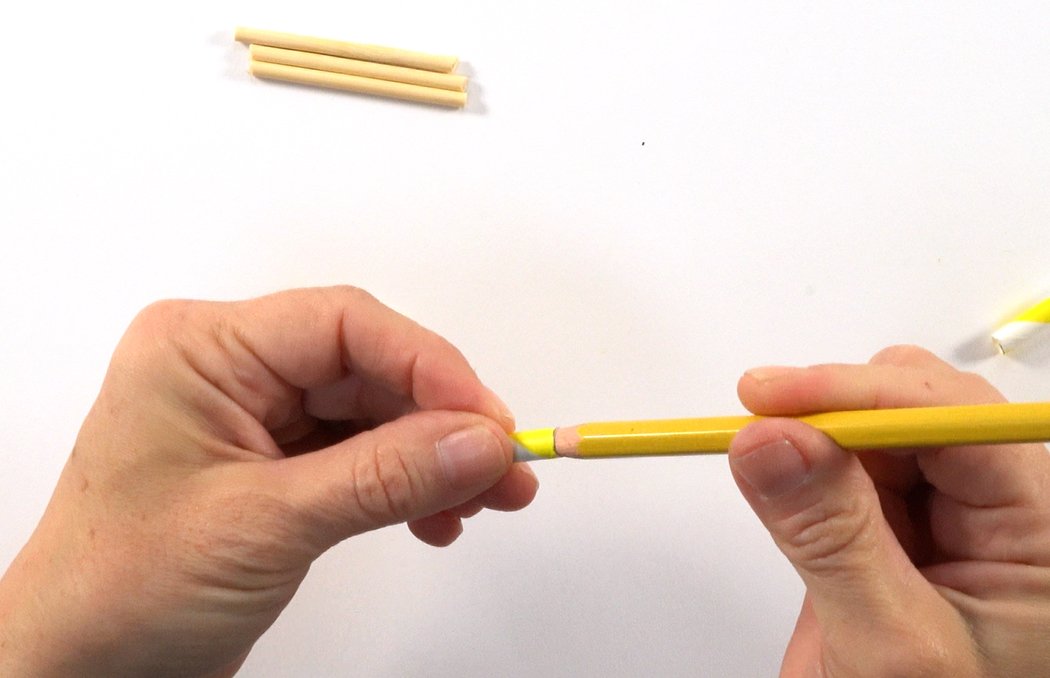
Insert a pencil and twist to make the ends round. (This is called "reaming" and will reduce friction!)
You can pre-cut parts for younger students.
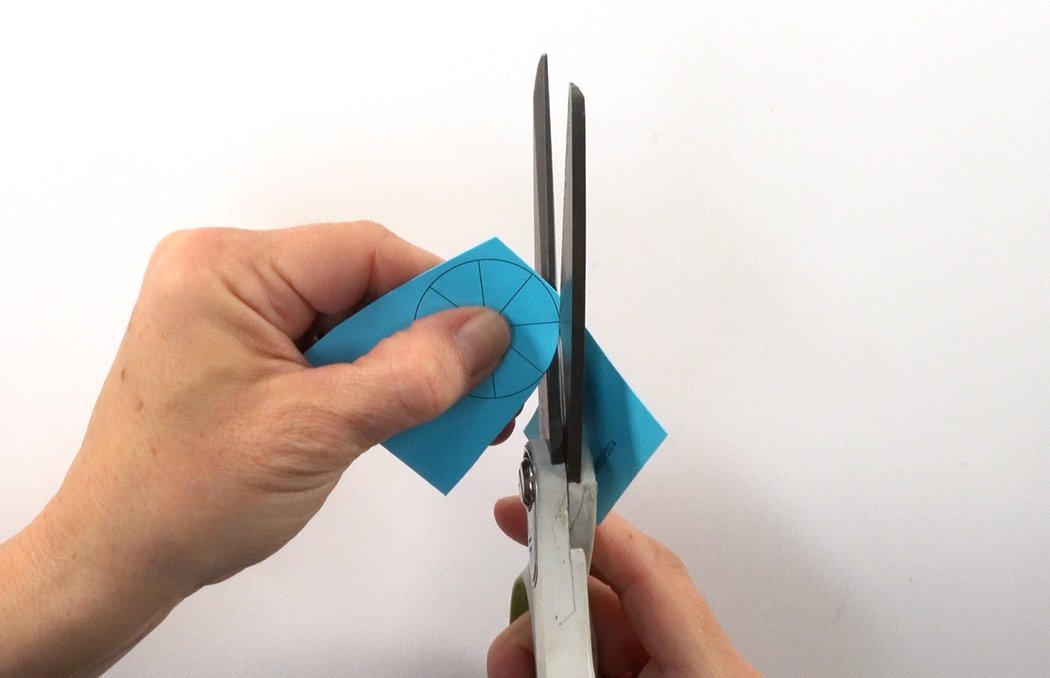
Print our wheel templates onto cardstock. Cut the circles on the solid black lines.
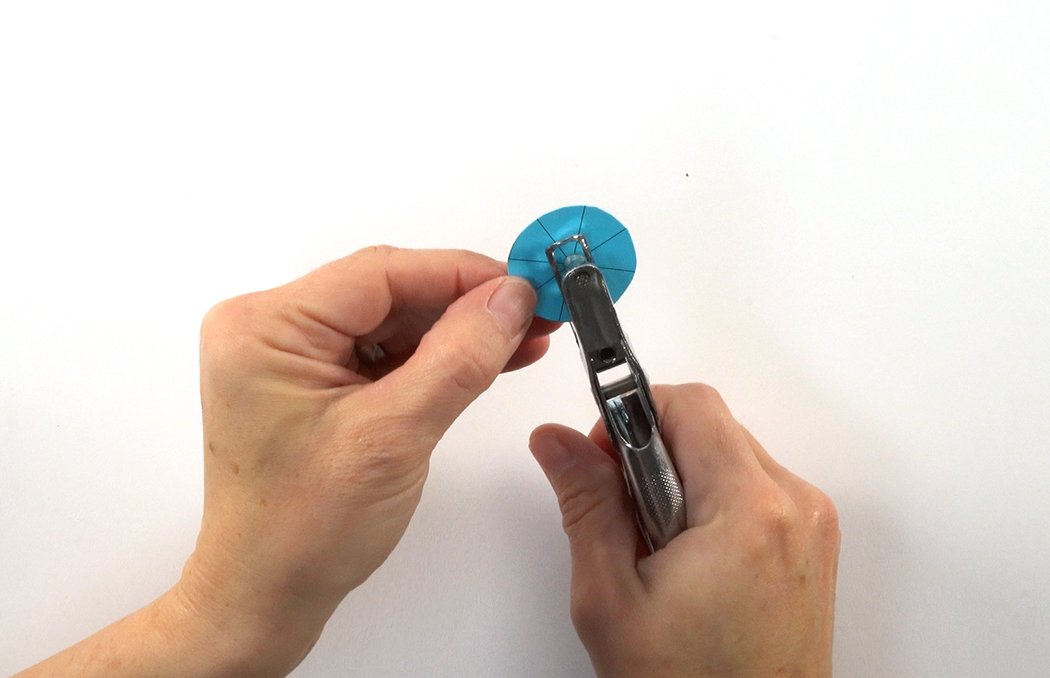
Punch a hole on the center point.
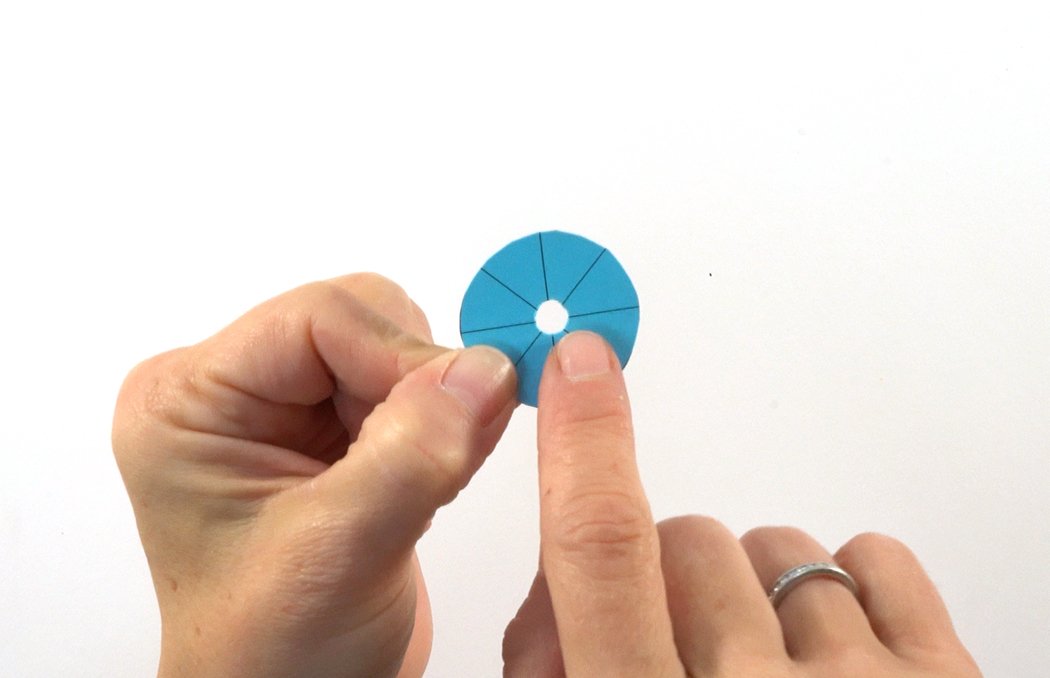
If you use a standard hole punch, the hole will be the correct diameter for your staws.
Insert a paper straw bearing.
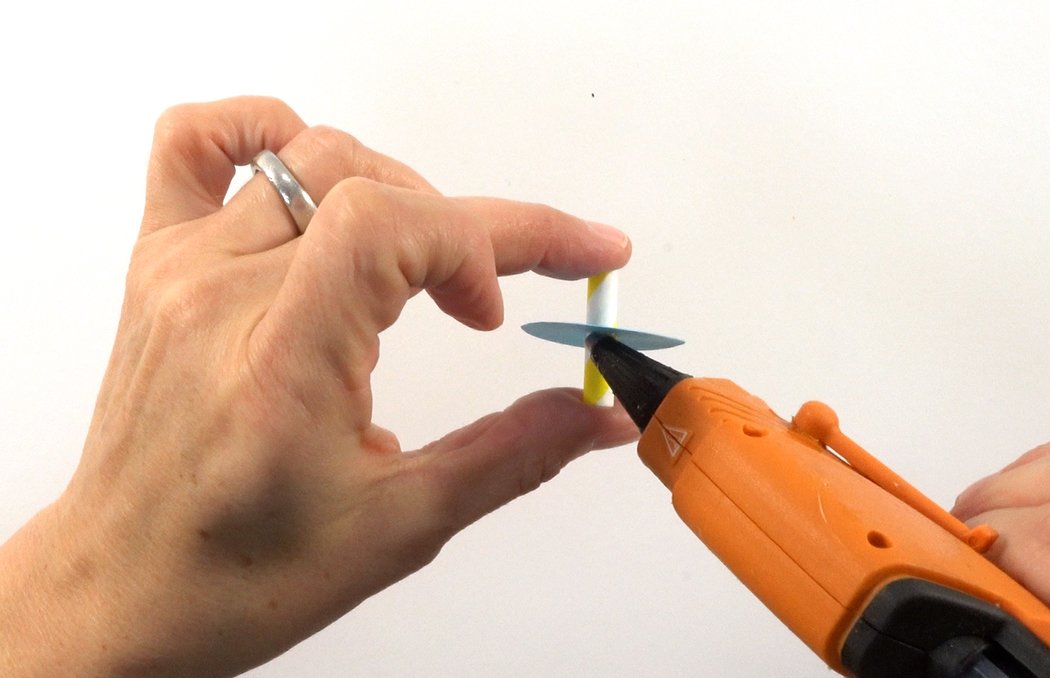
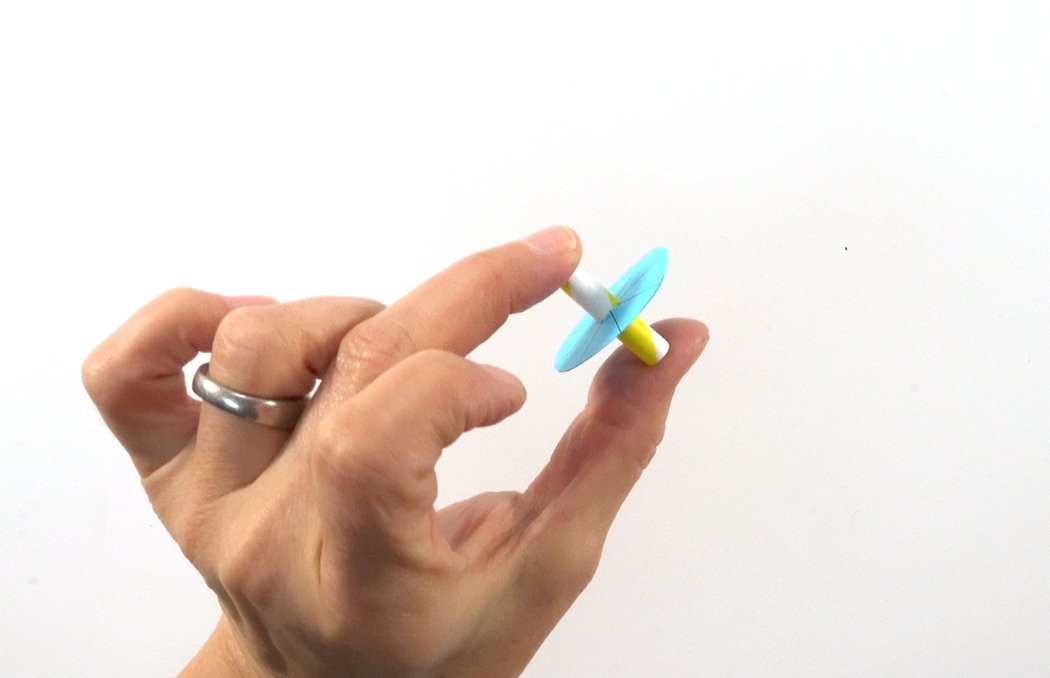
Hot glue the paper straw at a perpendicular angle with the wheel.
Straighten the wheel as it dries.
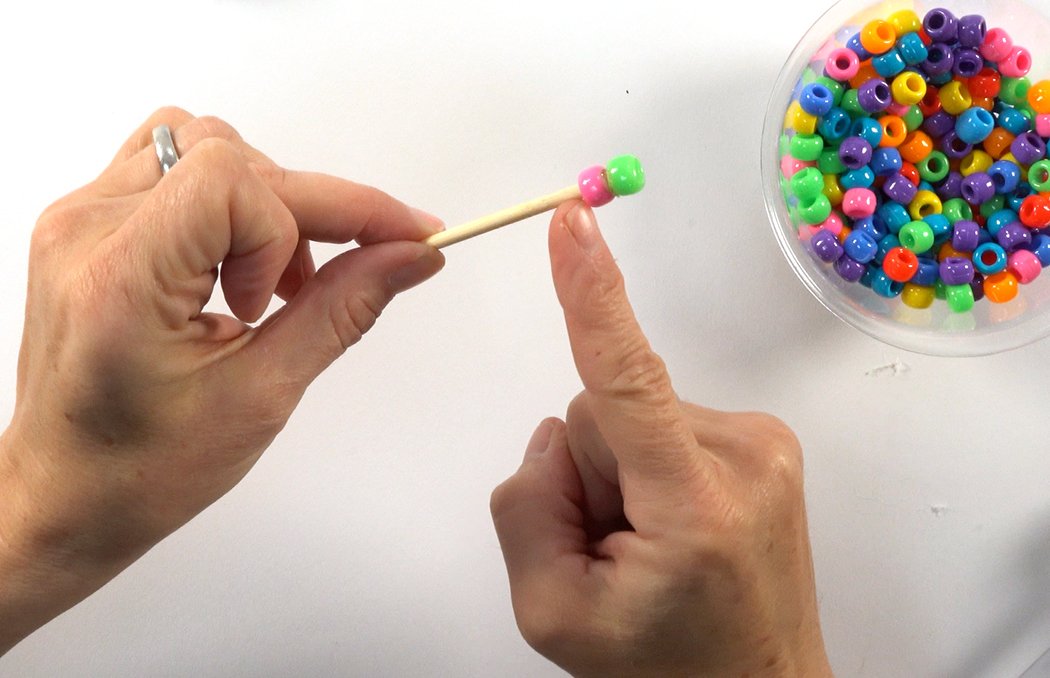
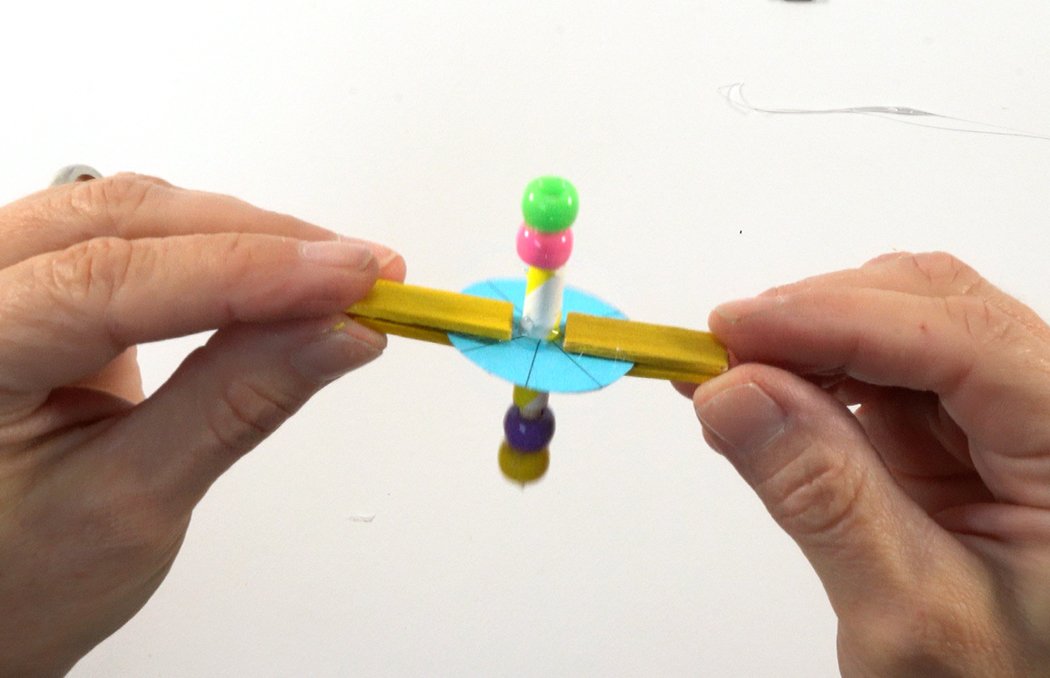
Hot glue 2 pony beads on the end of your axle. Glue between the beads so you don't get sticky stuff on the exposed wood.
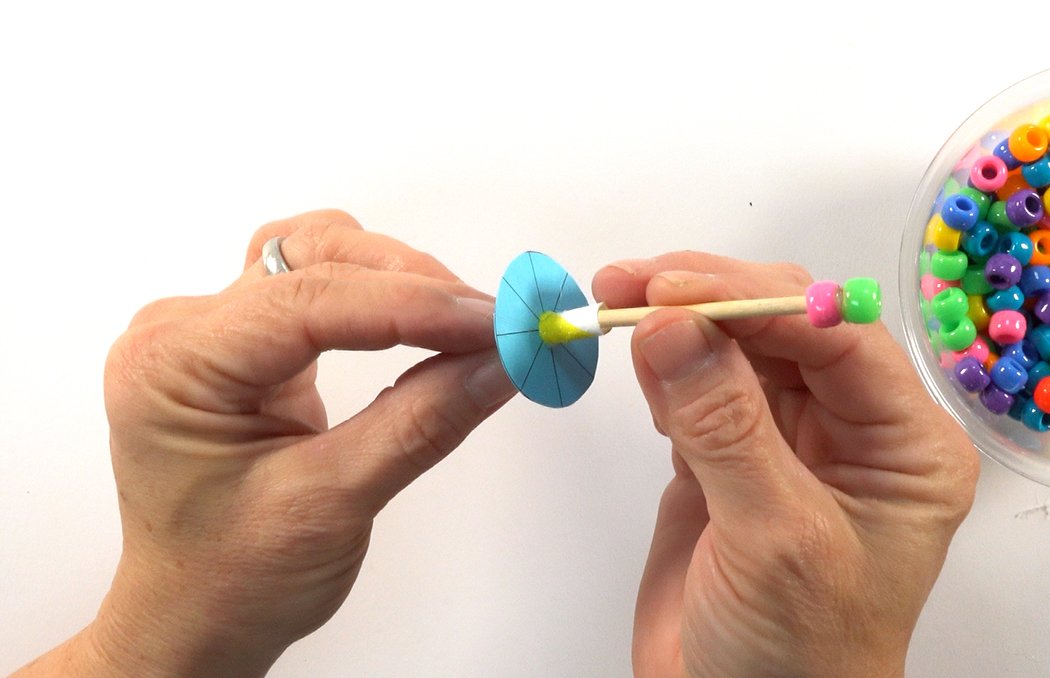
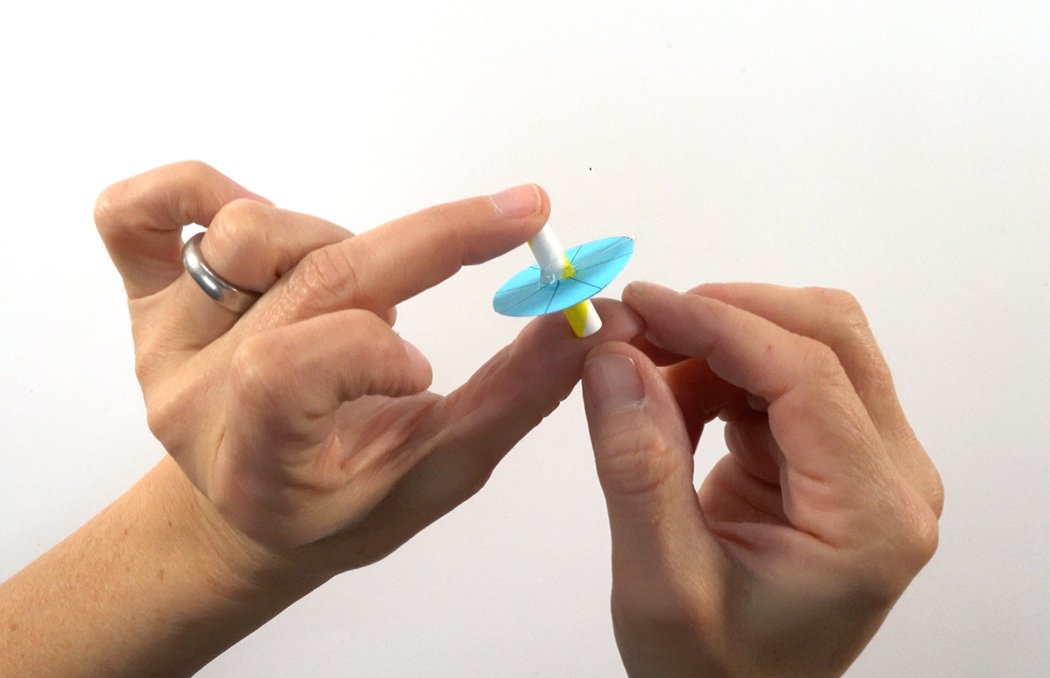
Insert the axle into the paper straw bearing.
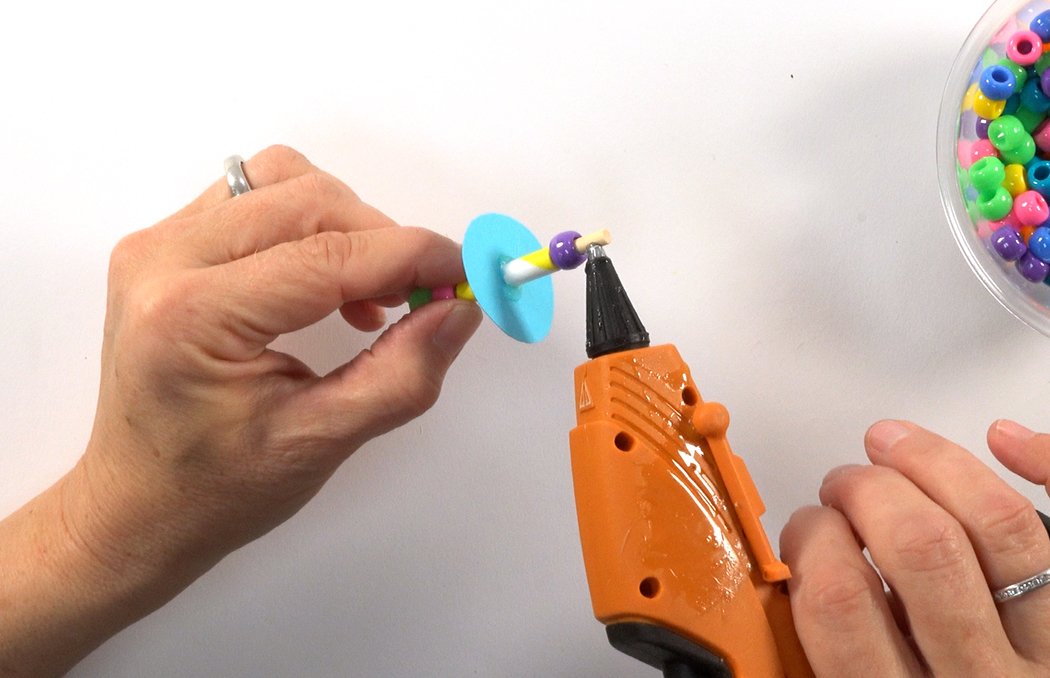
Place a bead on the other end and add hot glue to the tip of the wood.

Make sure to leave a little space between the straws and beads. Test that the wheel spins without friction.
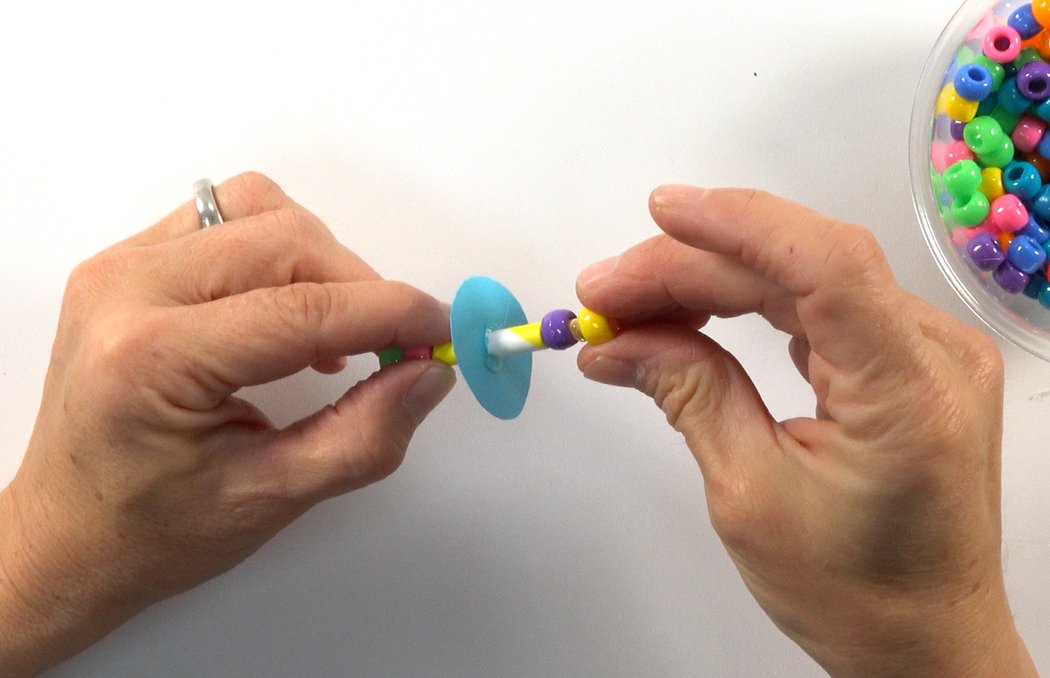
Add a 2nd bead and press the beads together to secure. Remove any glue that is preventing proper spinning.
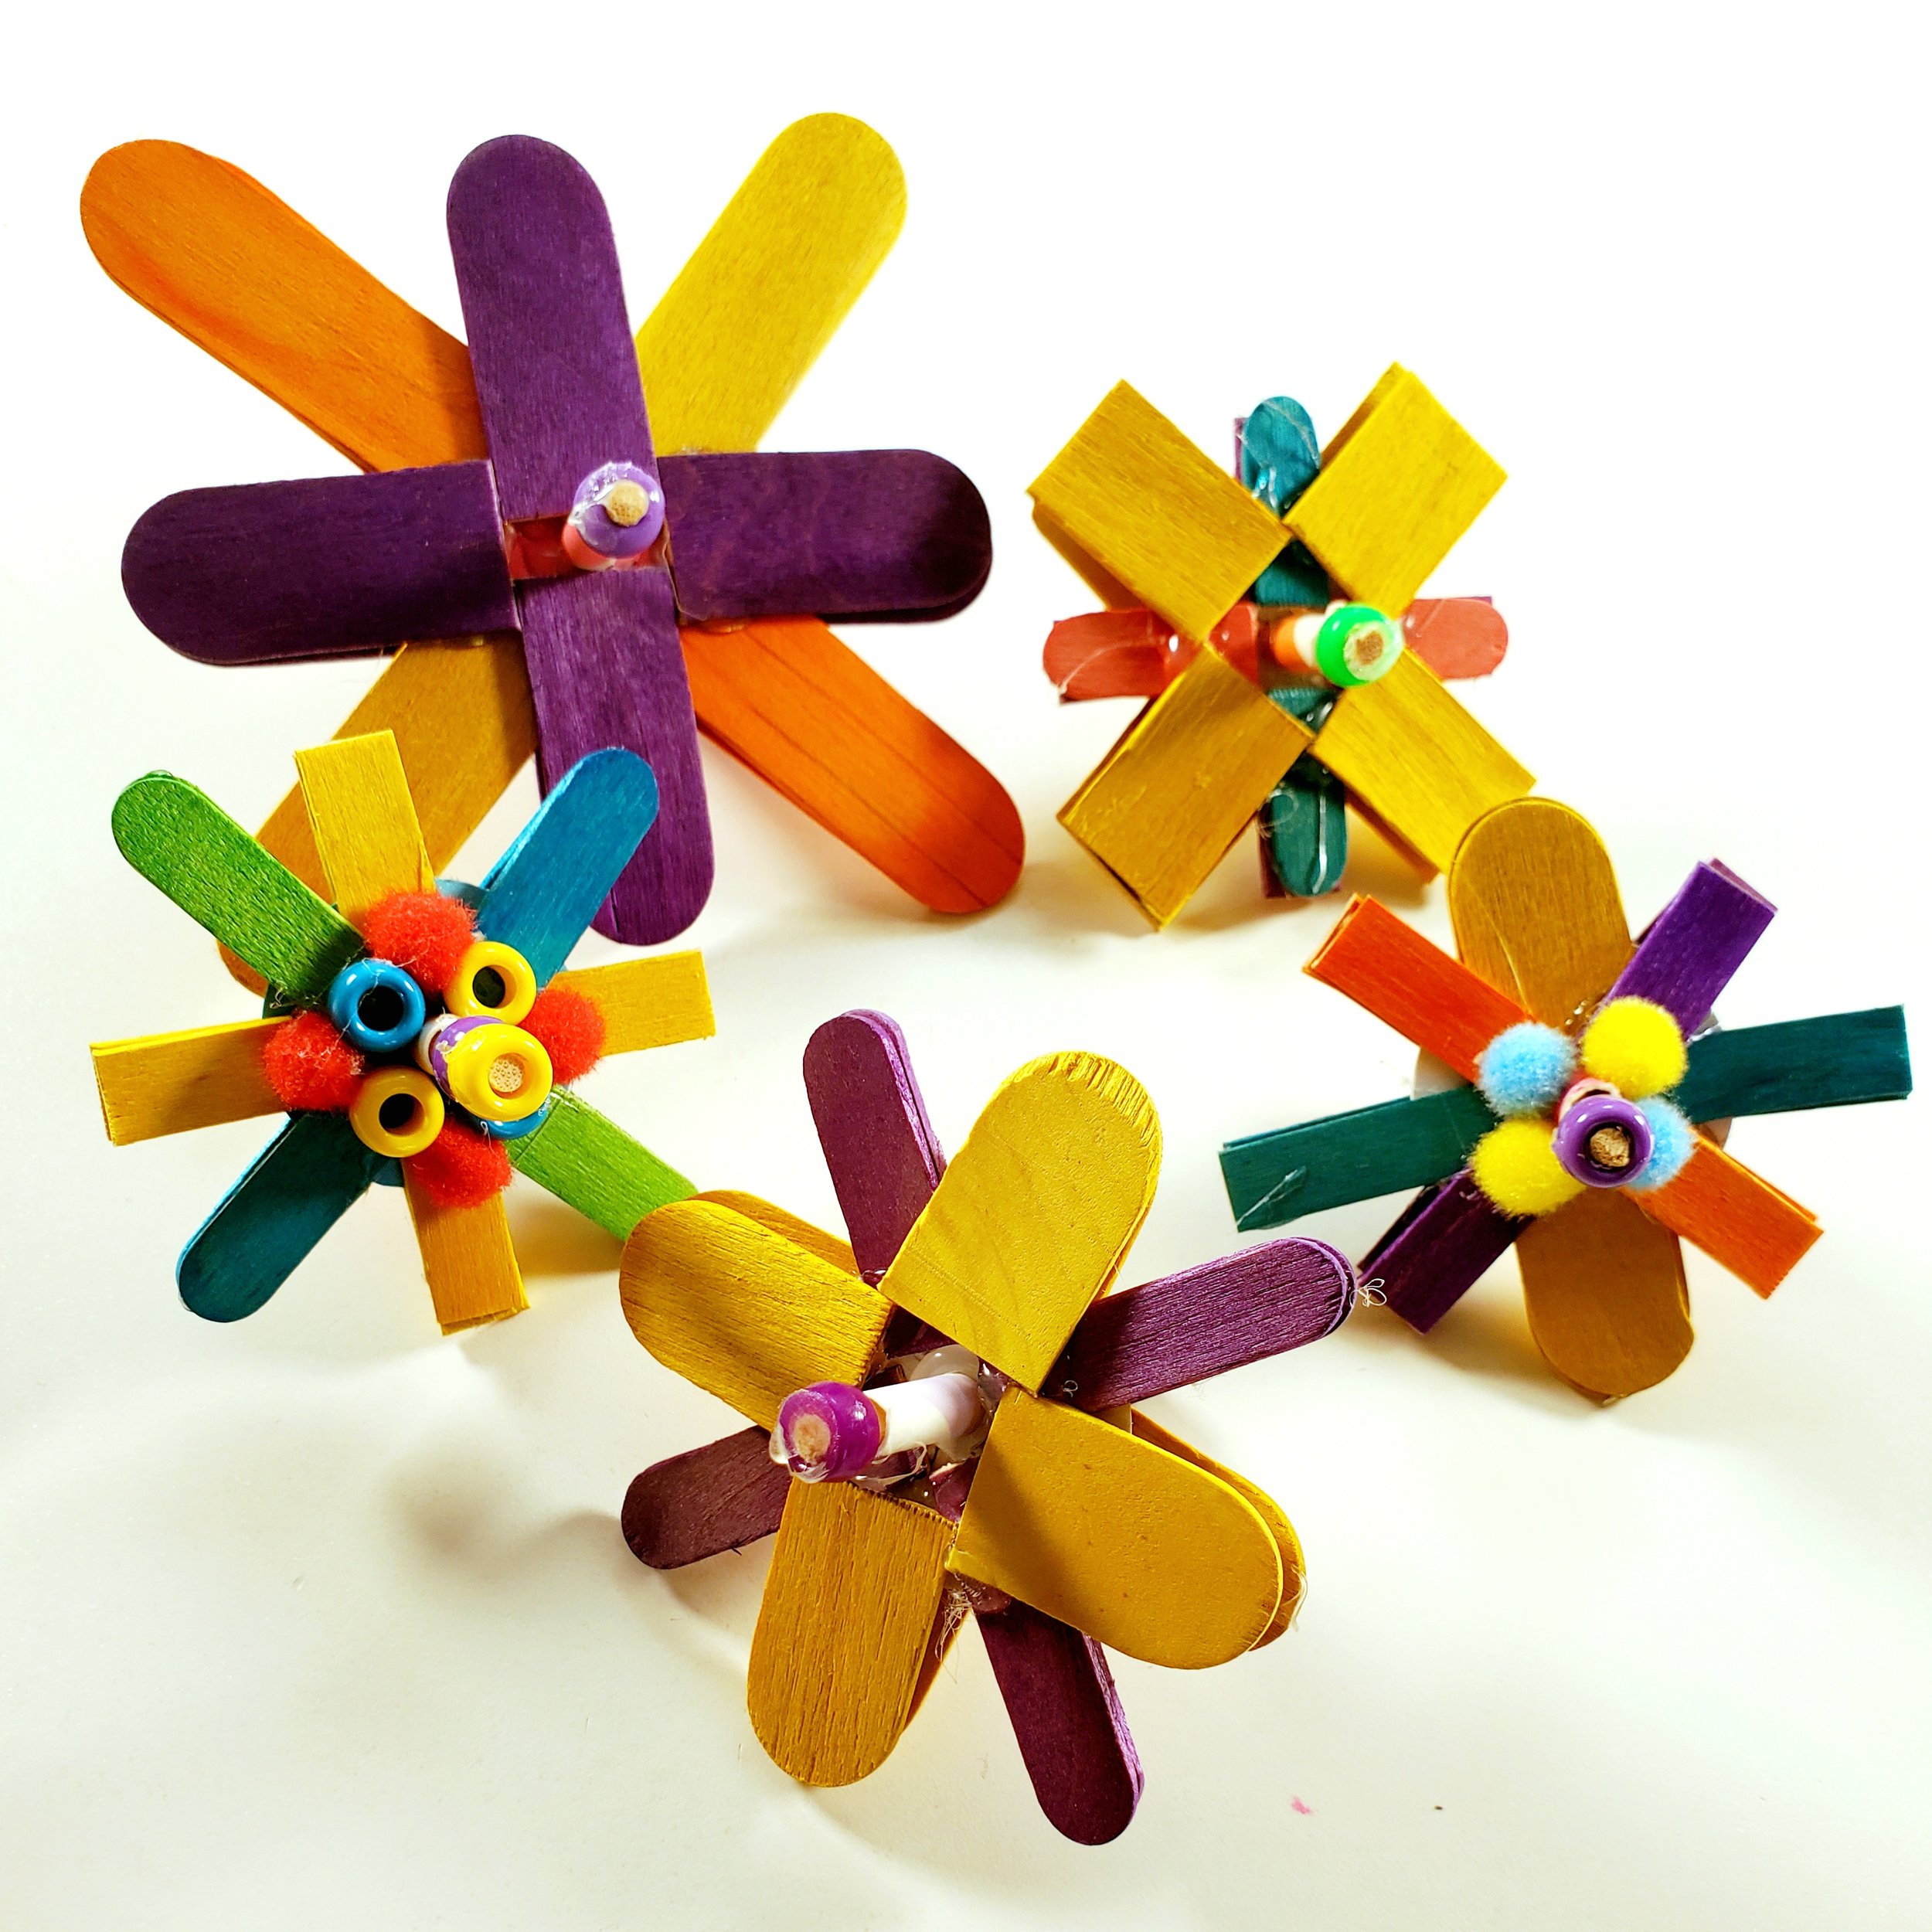
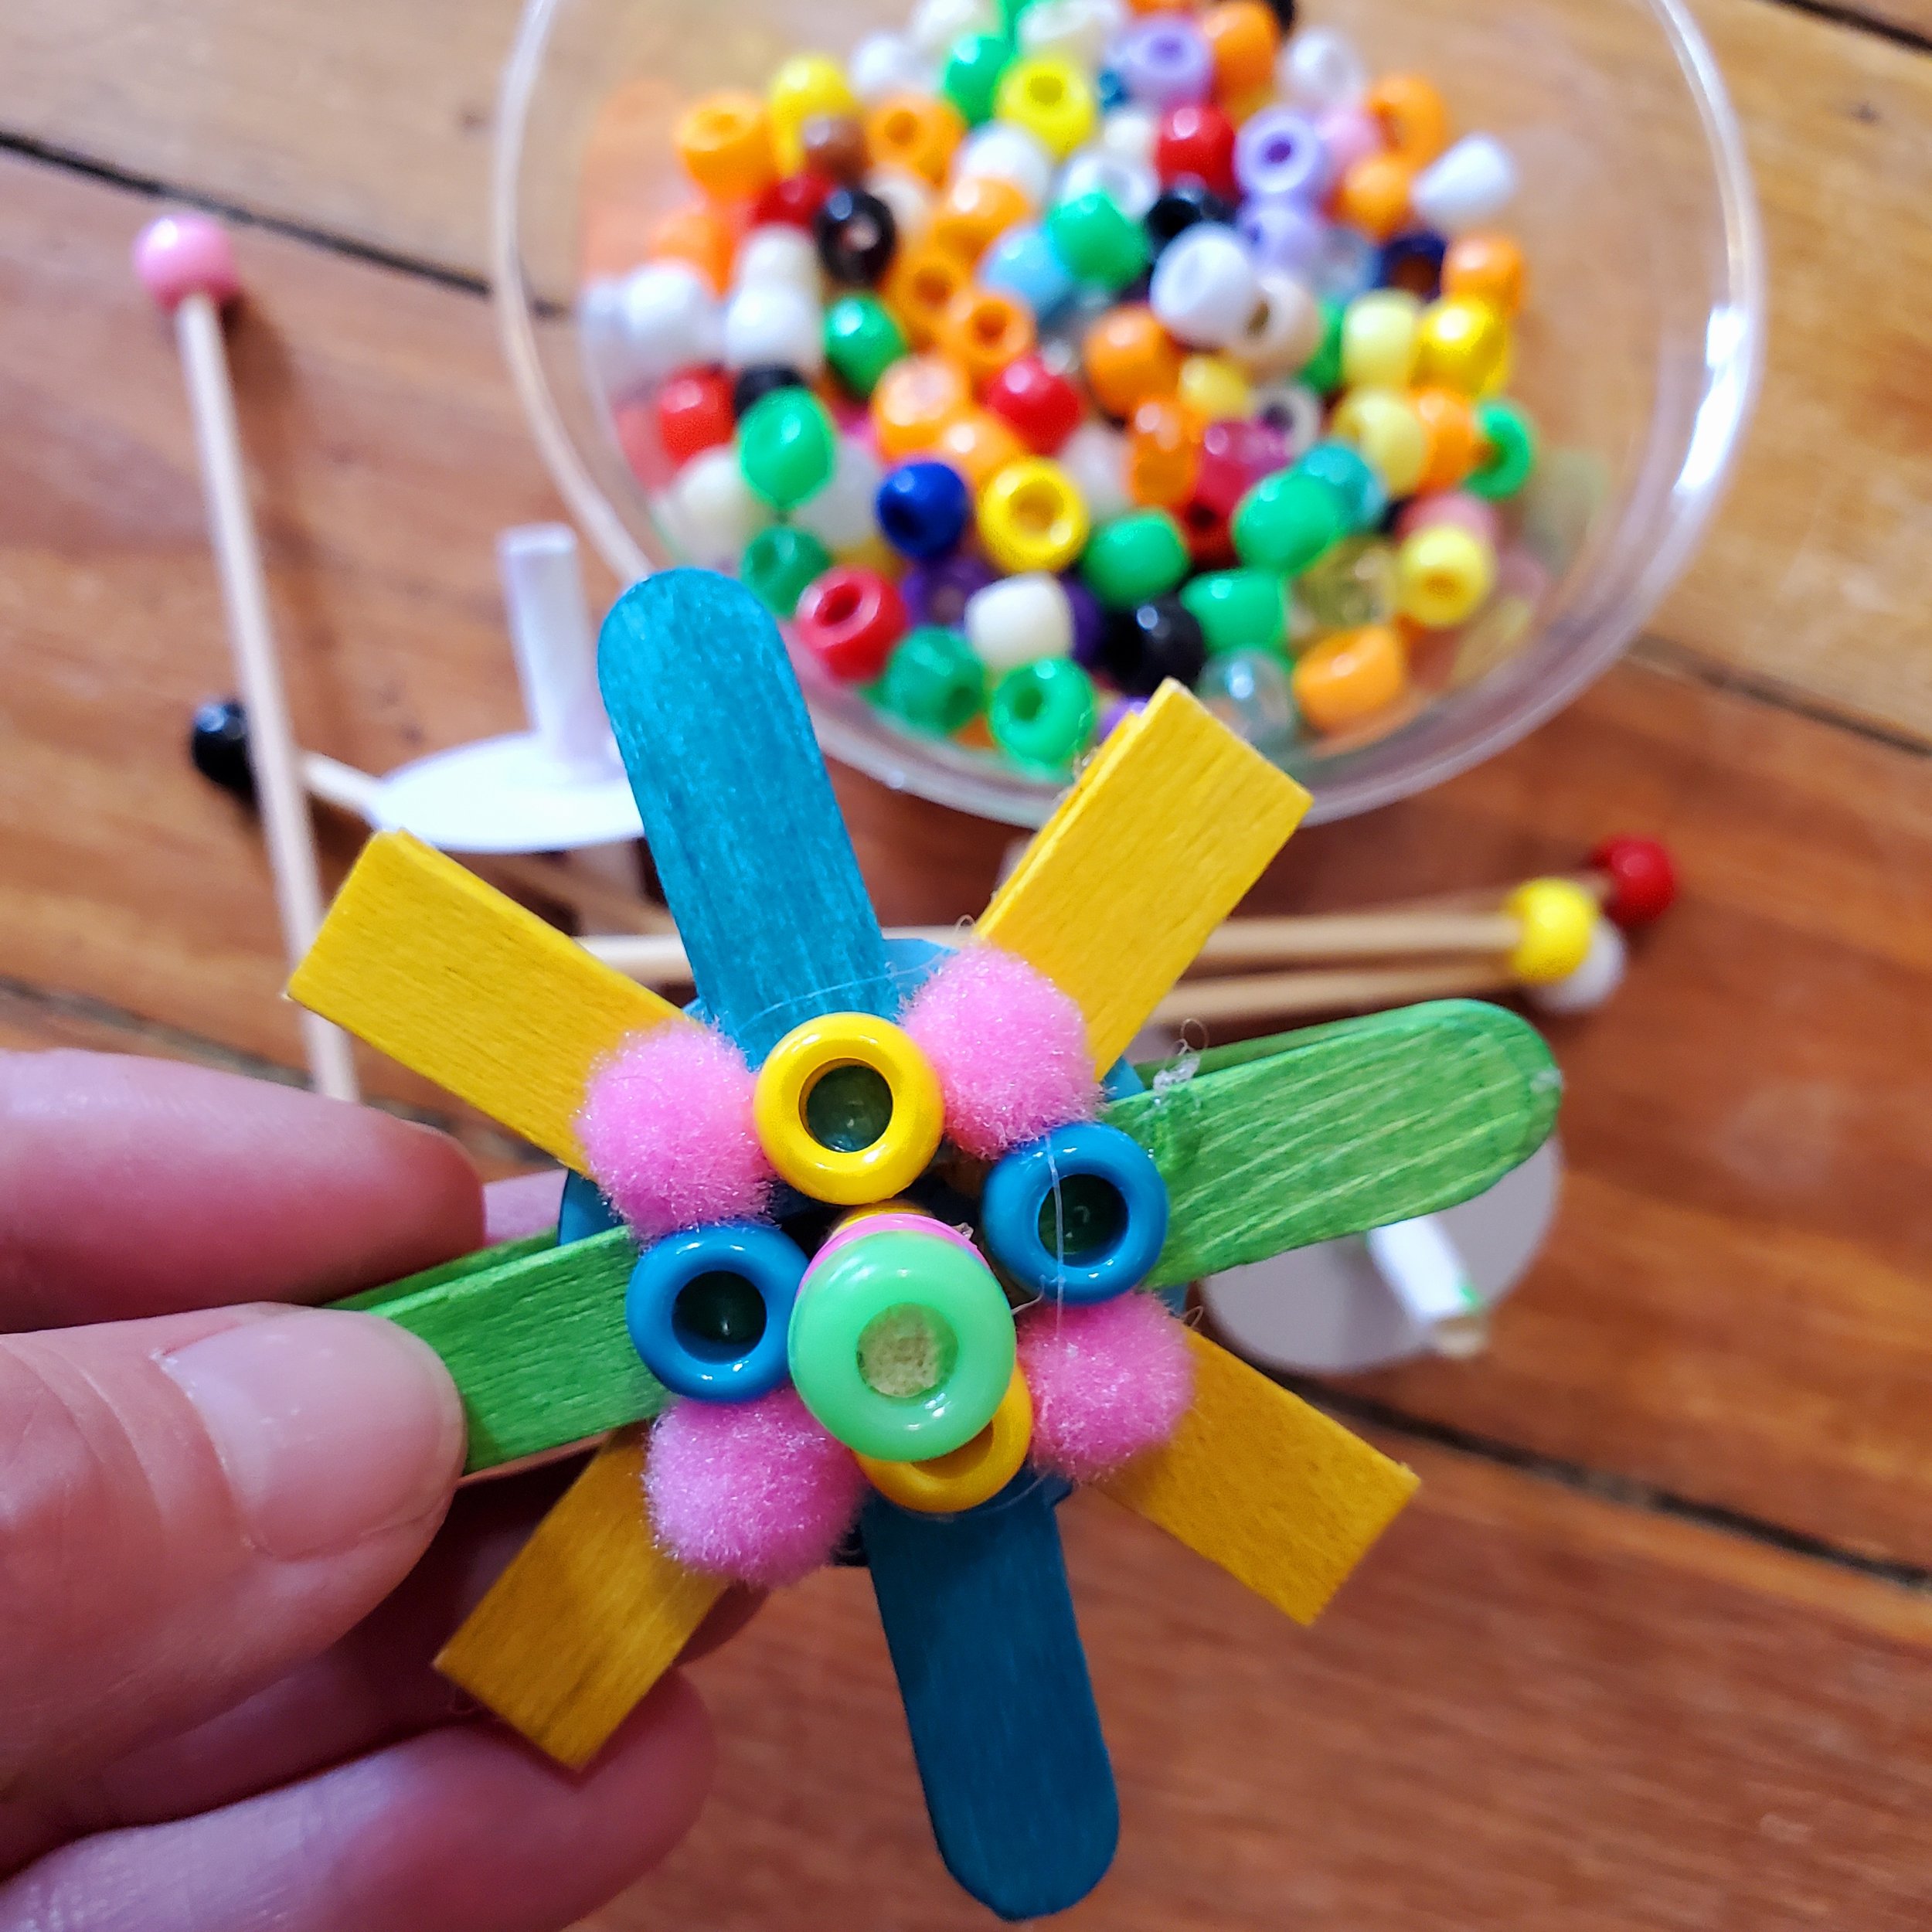
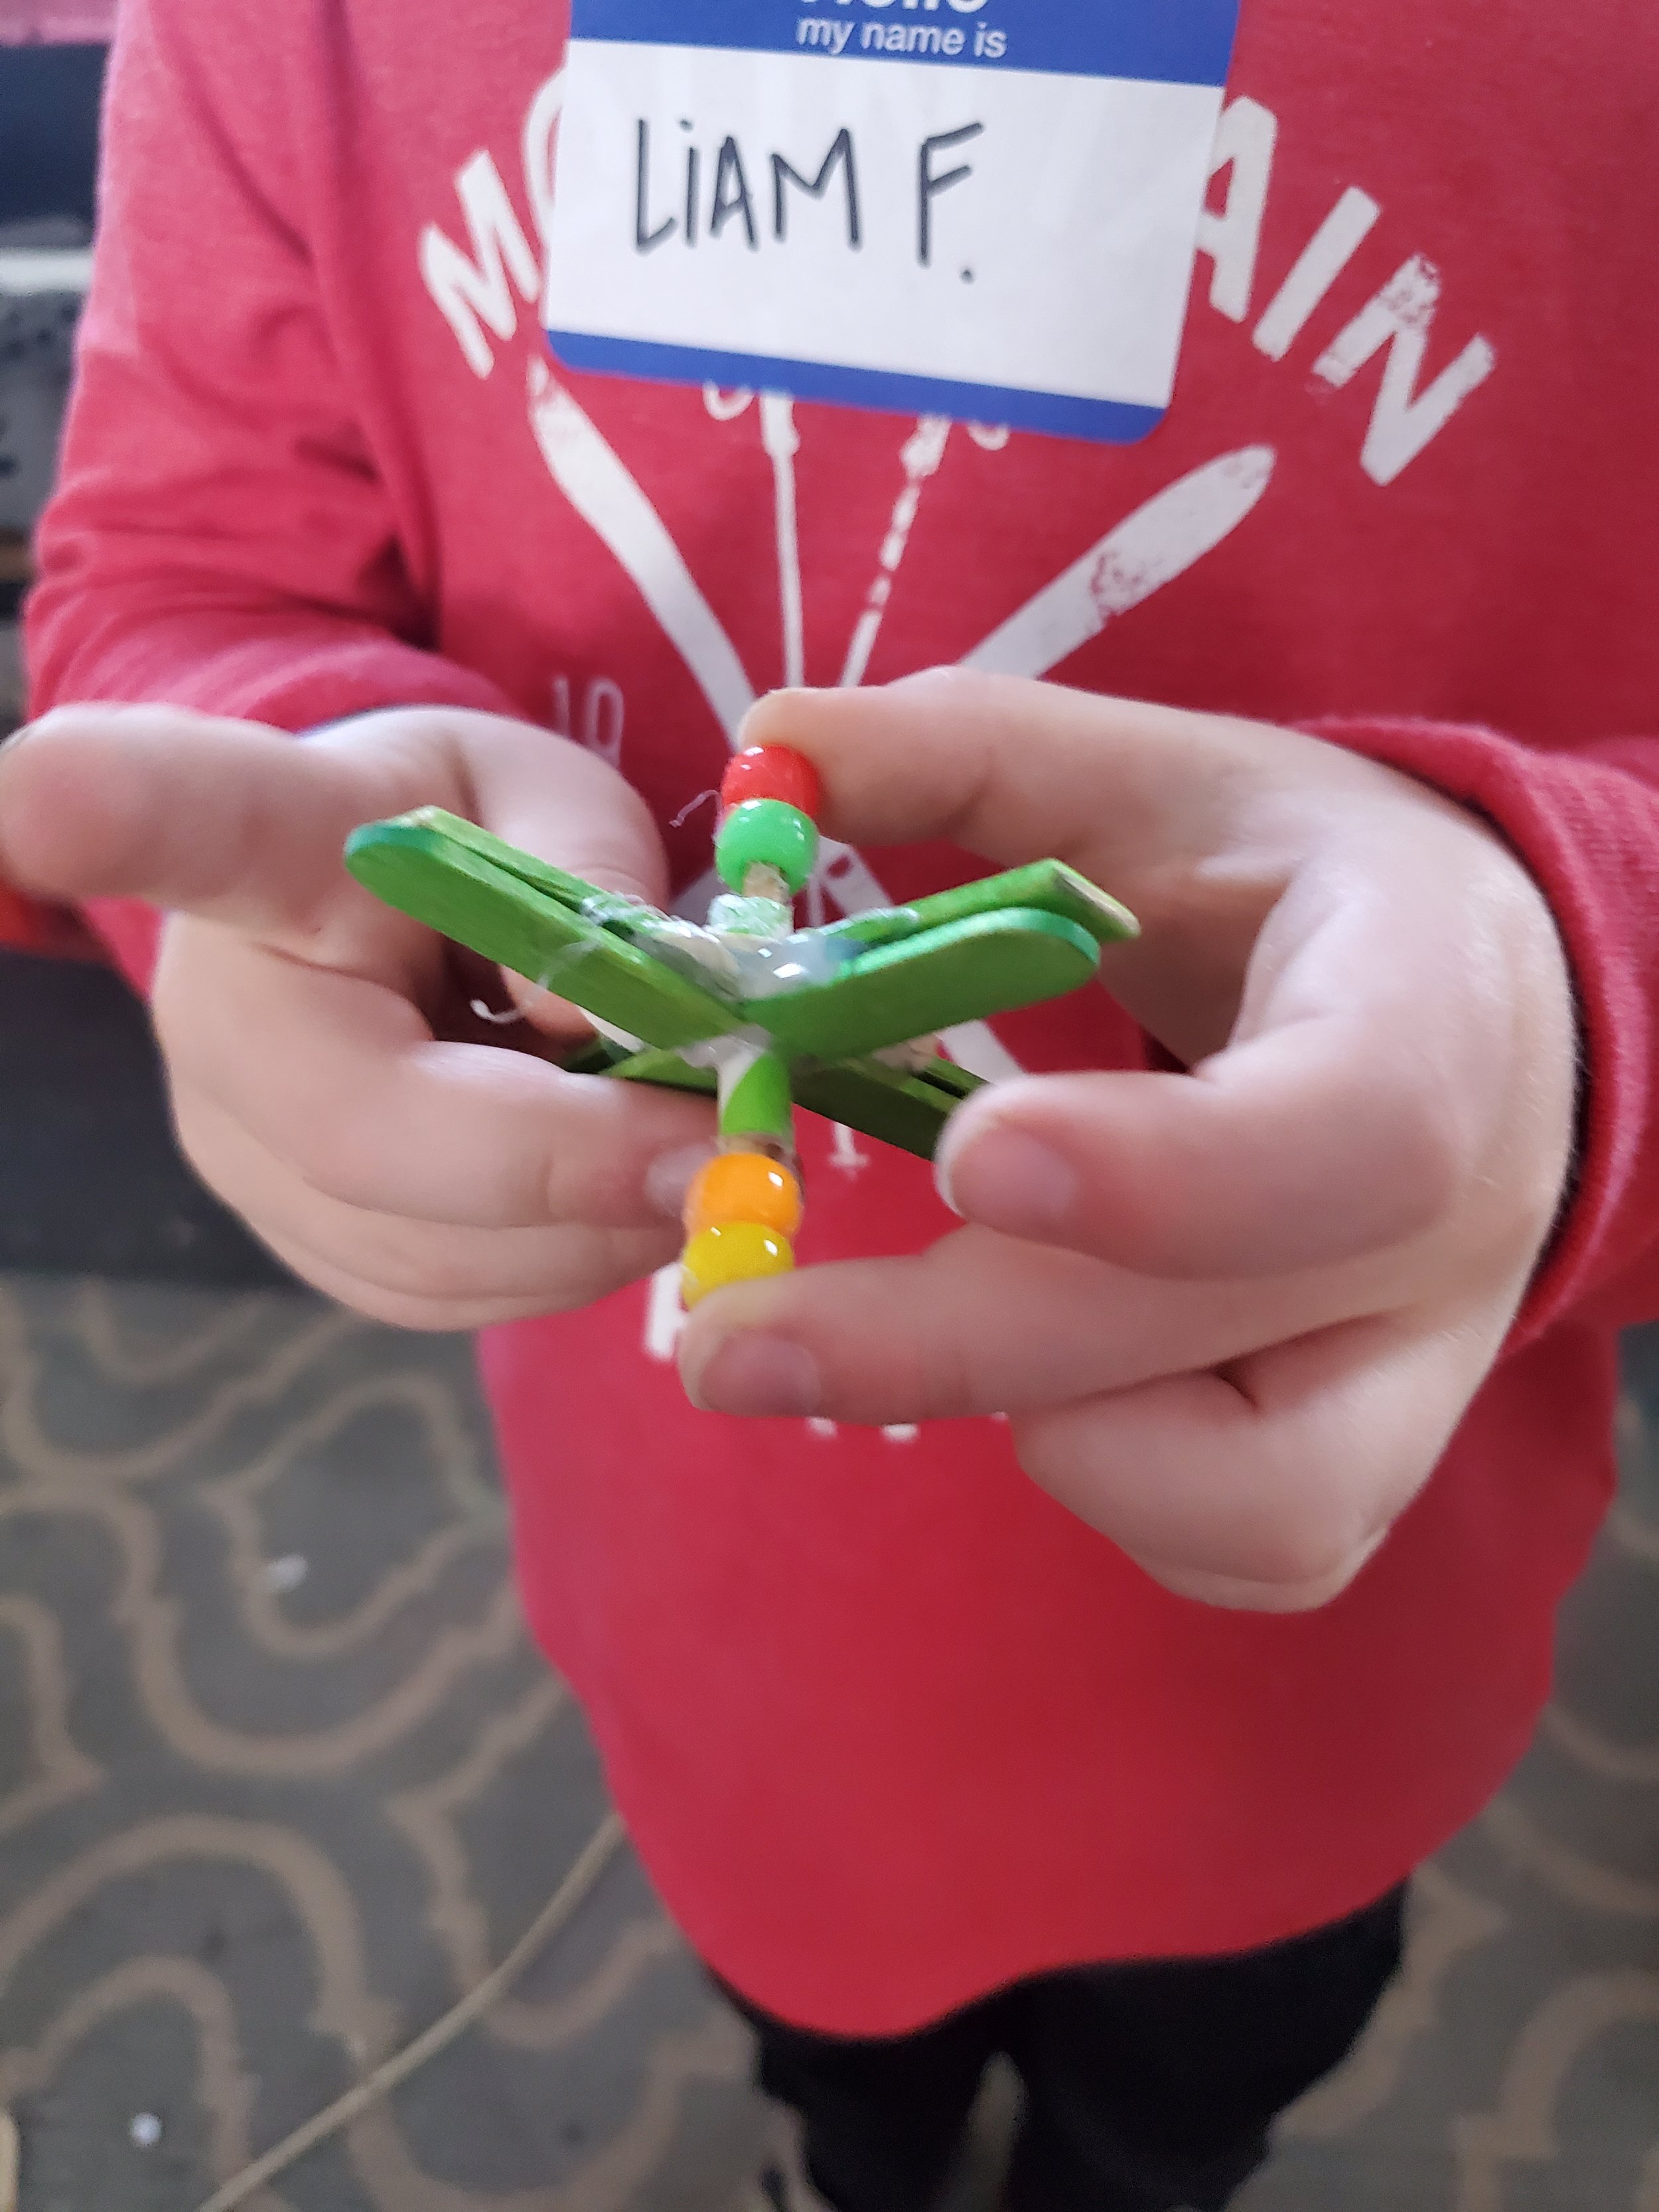
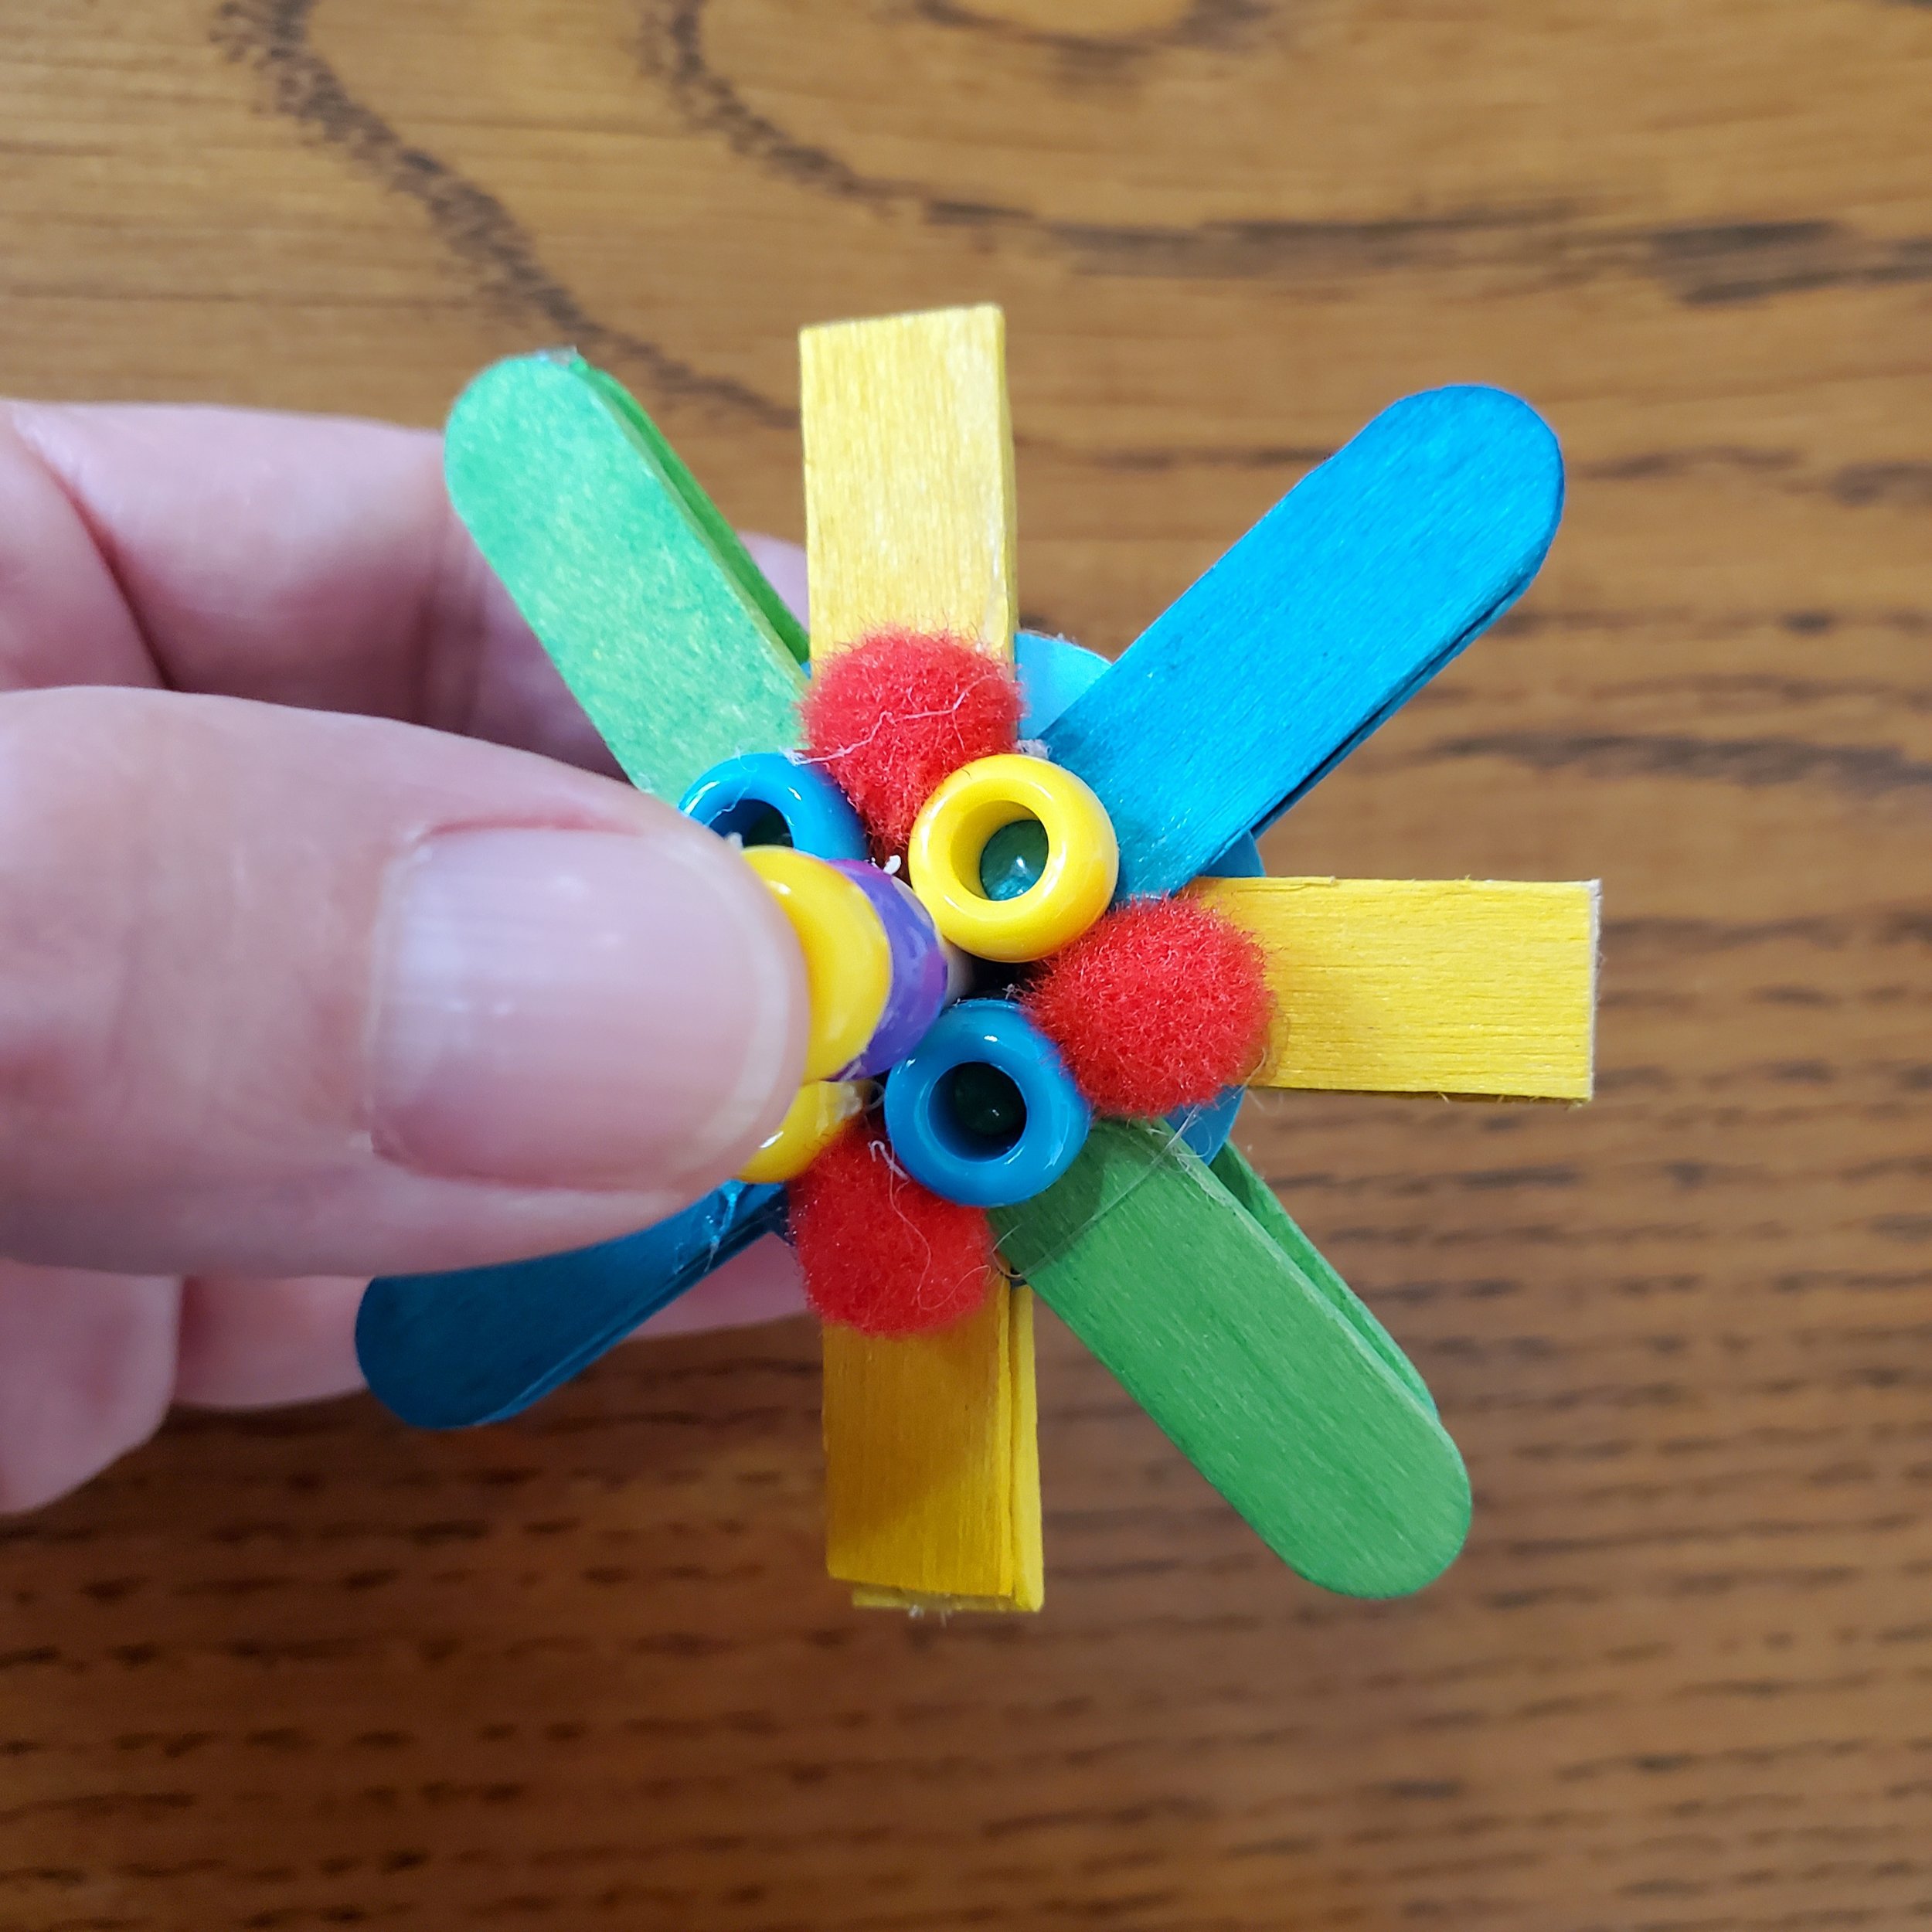
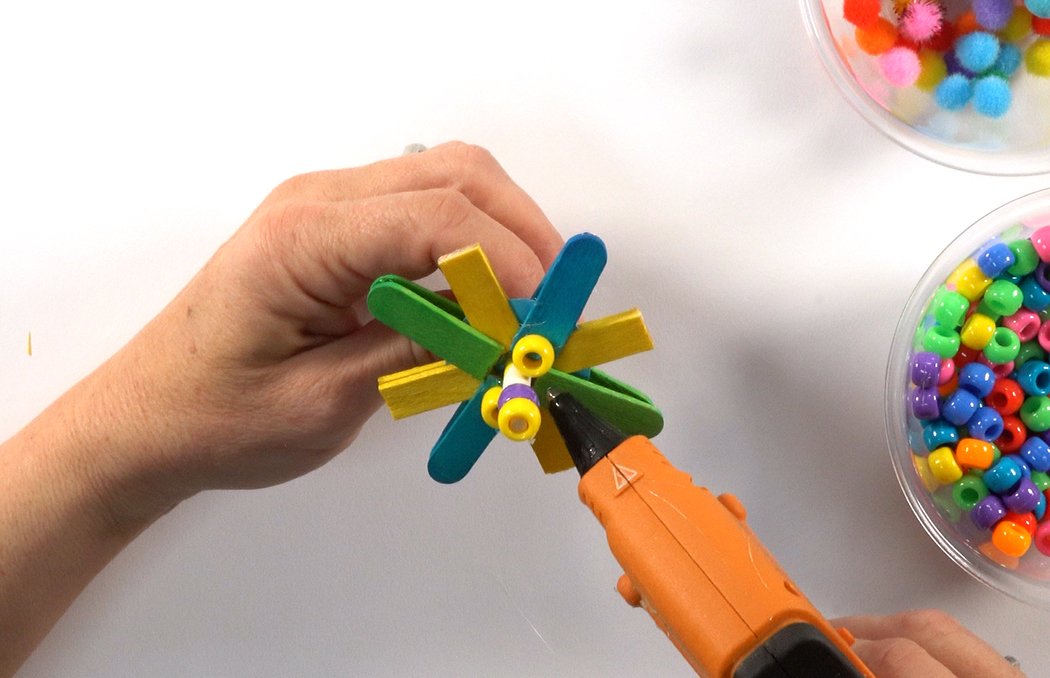
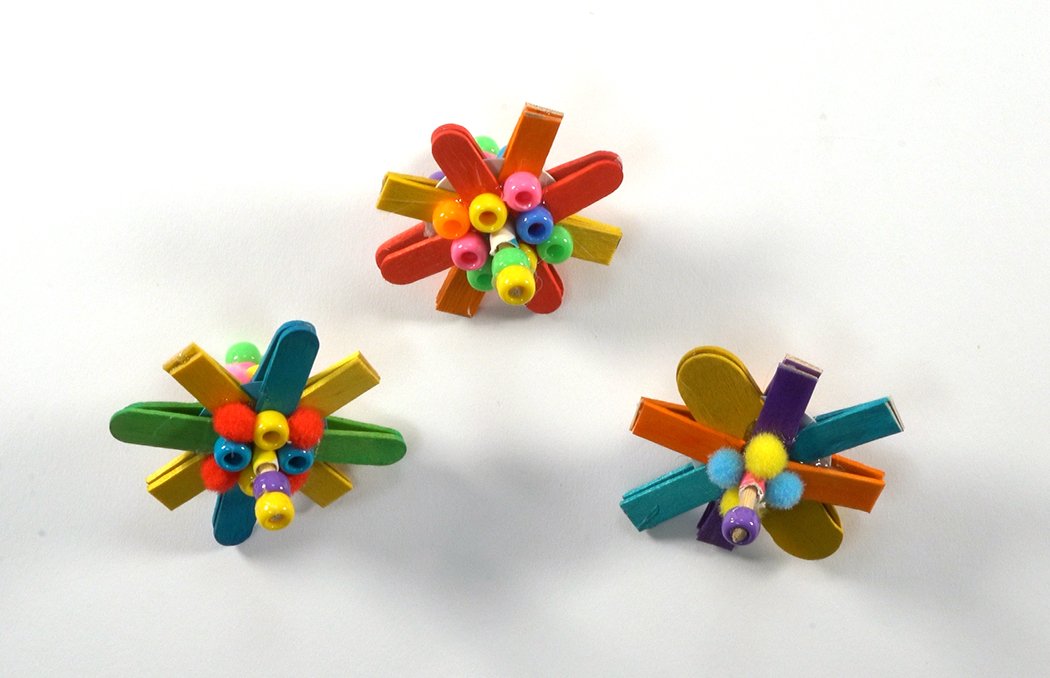
When you add sticks, you want symmetry and balance. This will greatly aid the spinning motion.
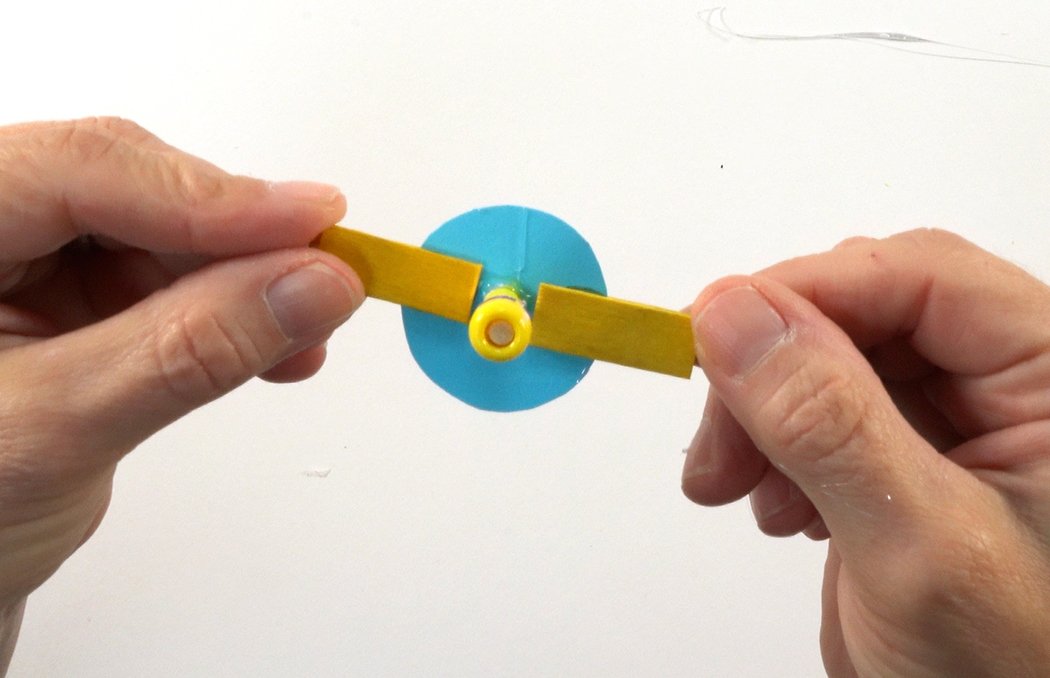
Repeat to make the same design on the opposite side of your wheel.
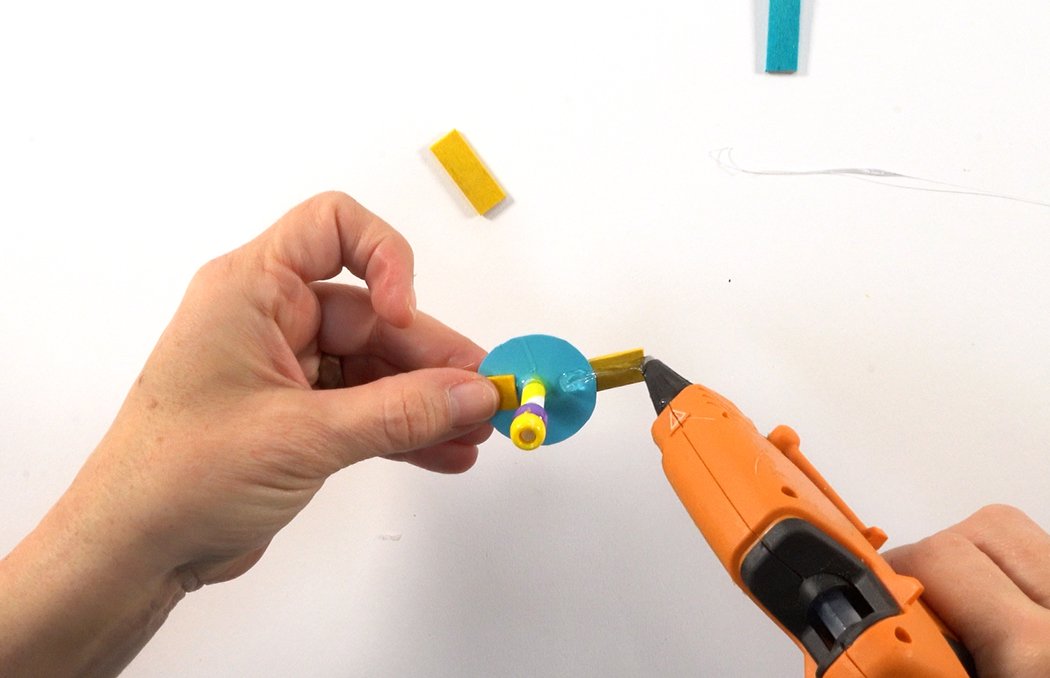
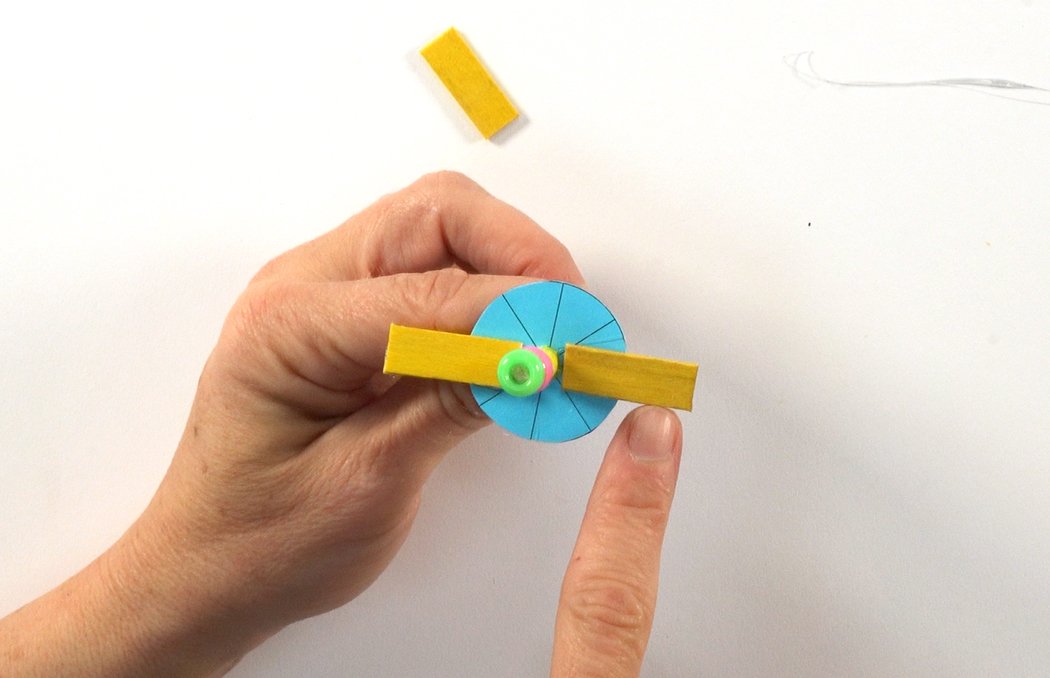
Cut and hot glue 1" to 1.5" sticks on the top and bottom of your wheel. Use the spoke lines to guide you.
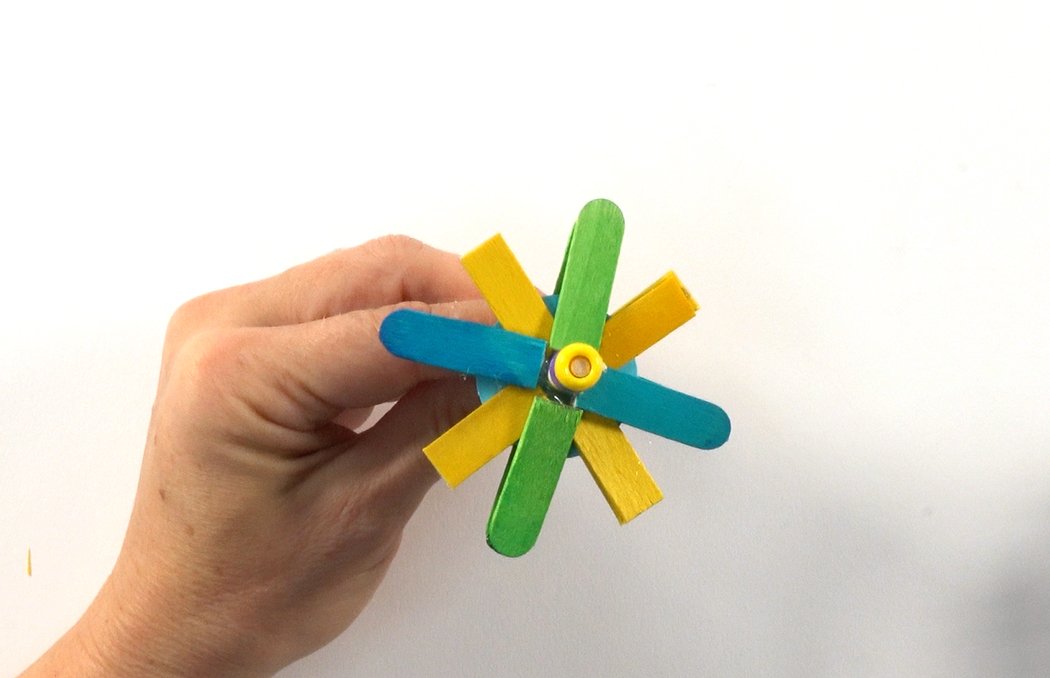
Your designs should be the same on the top & bottom and side & side.
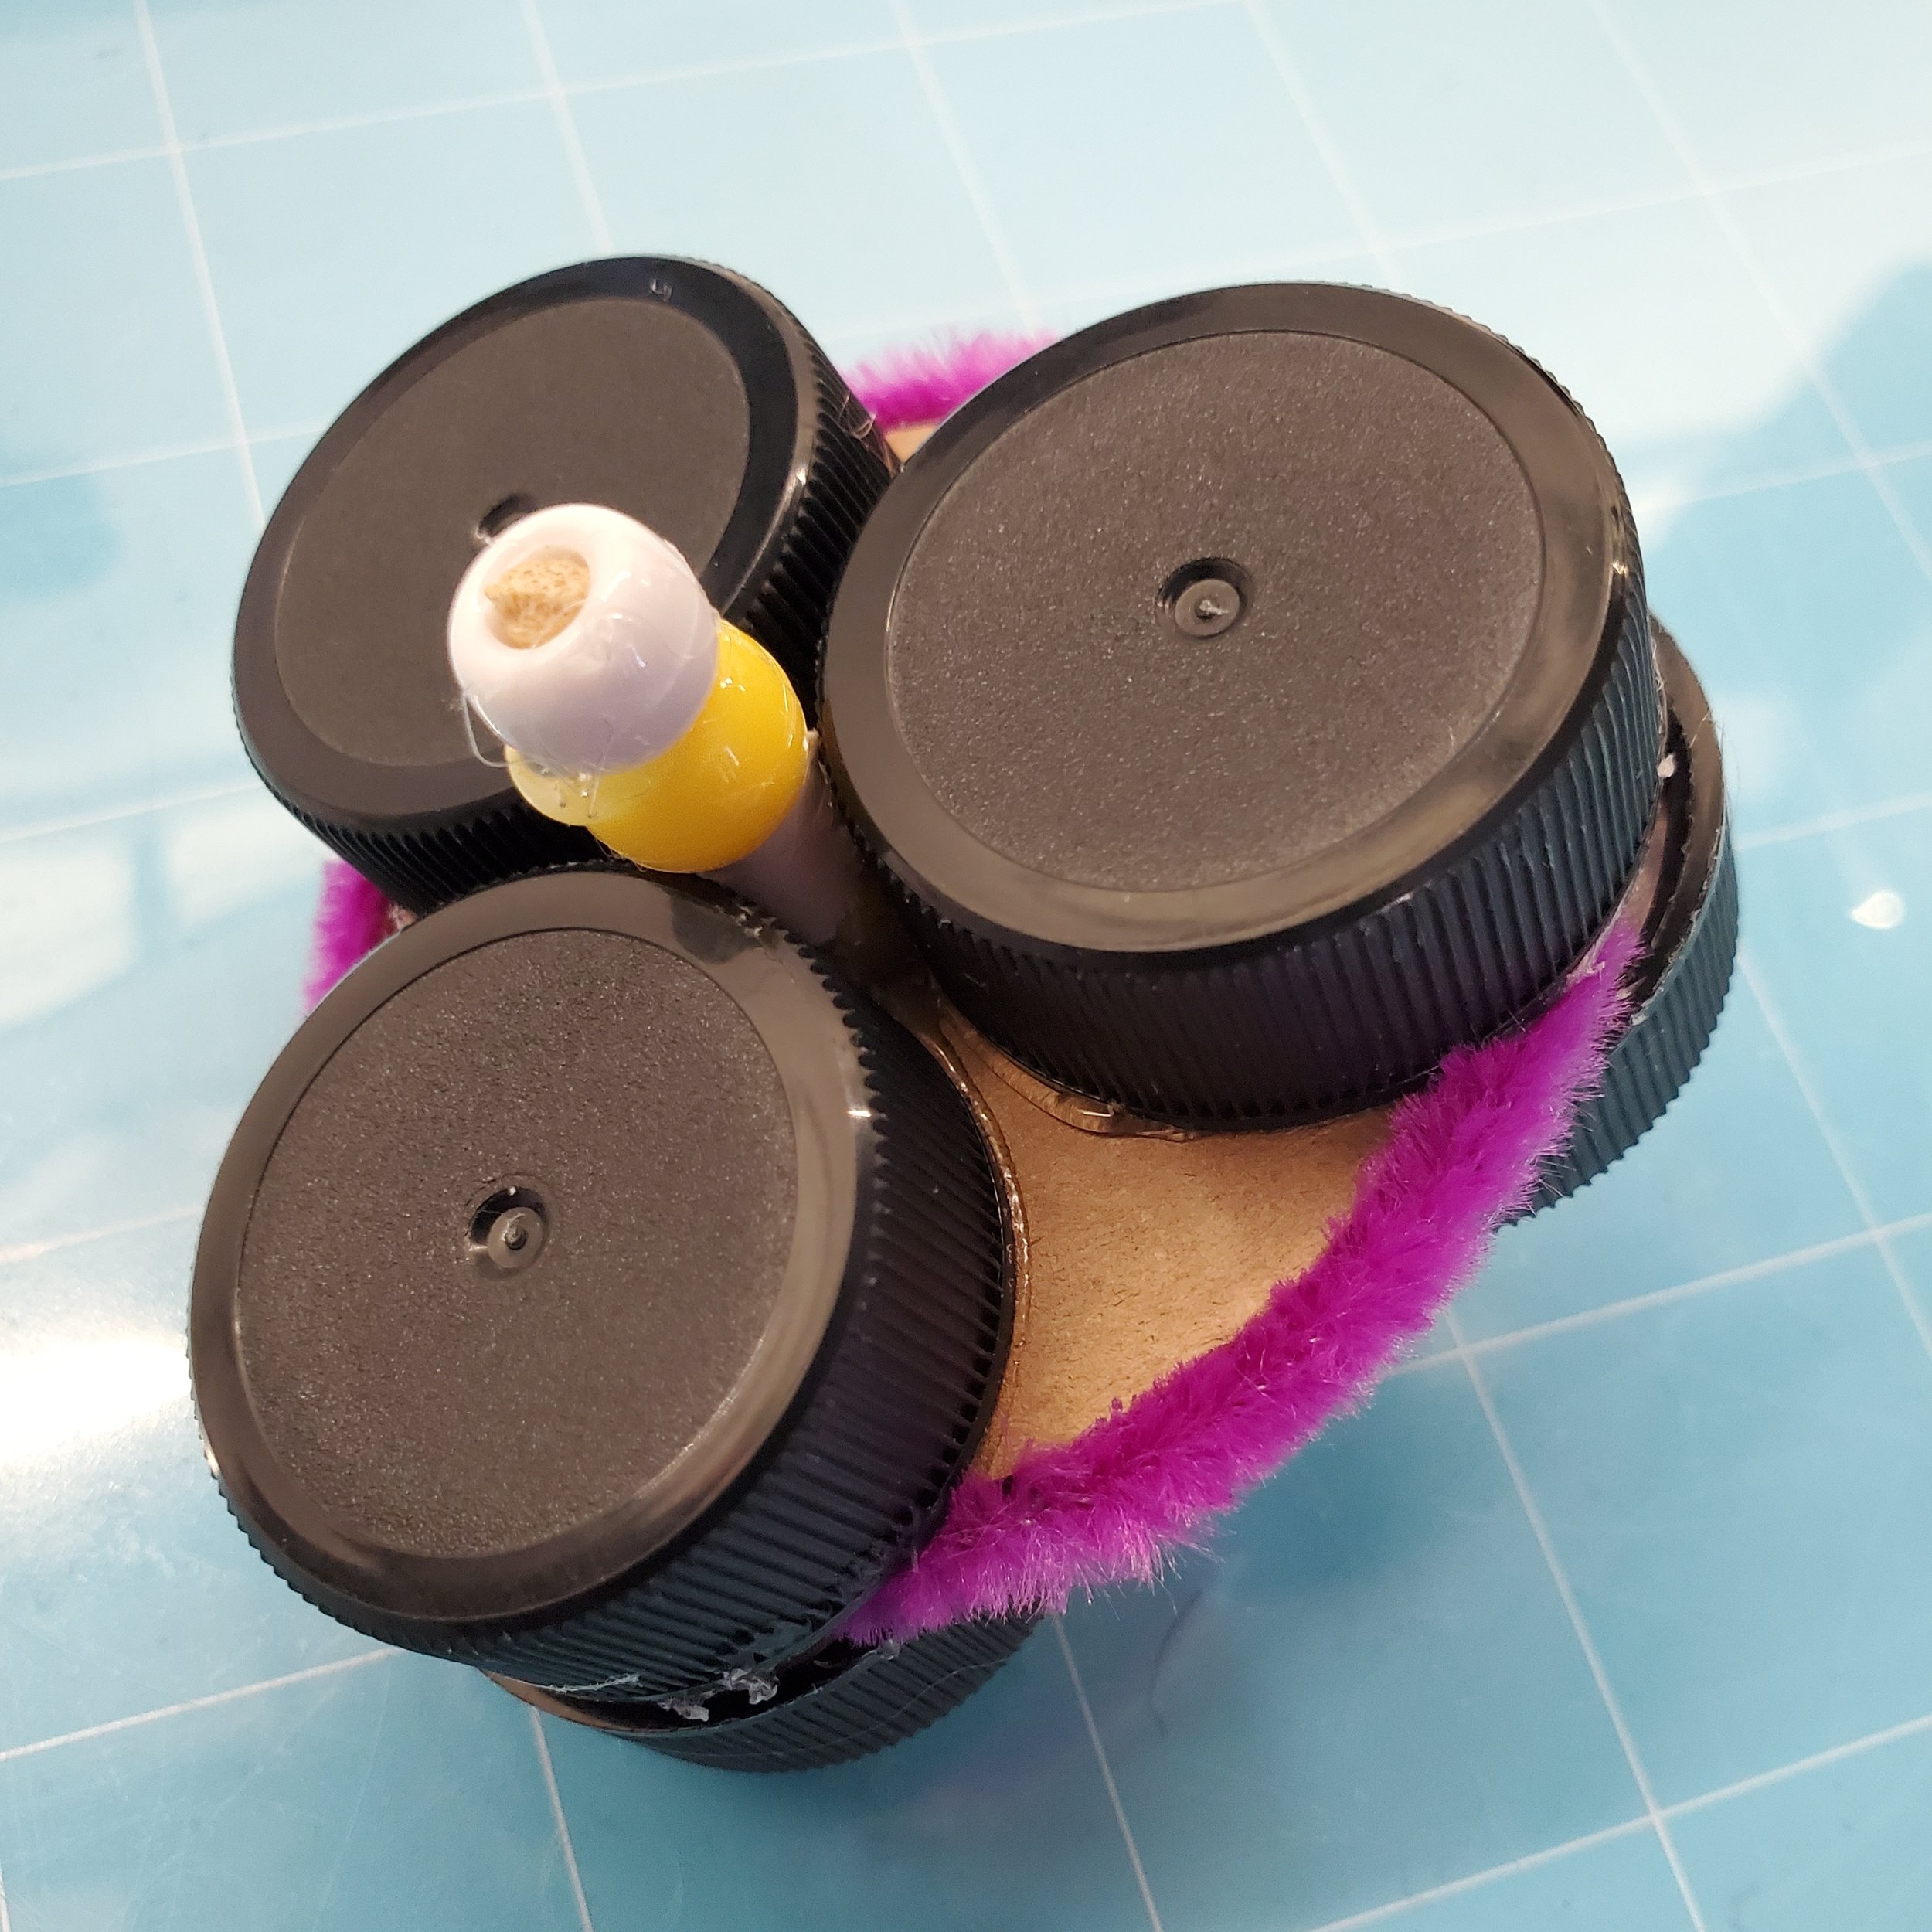
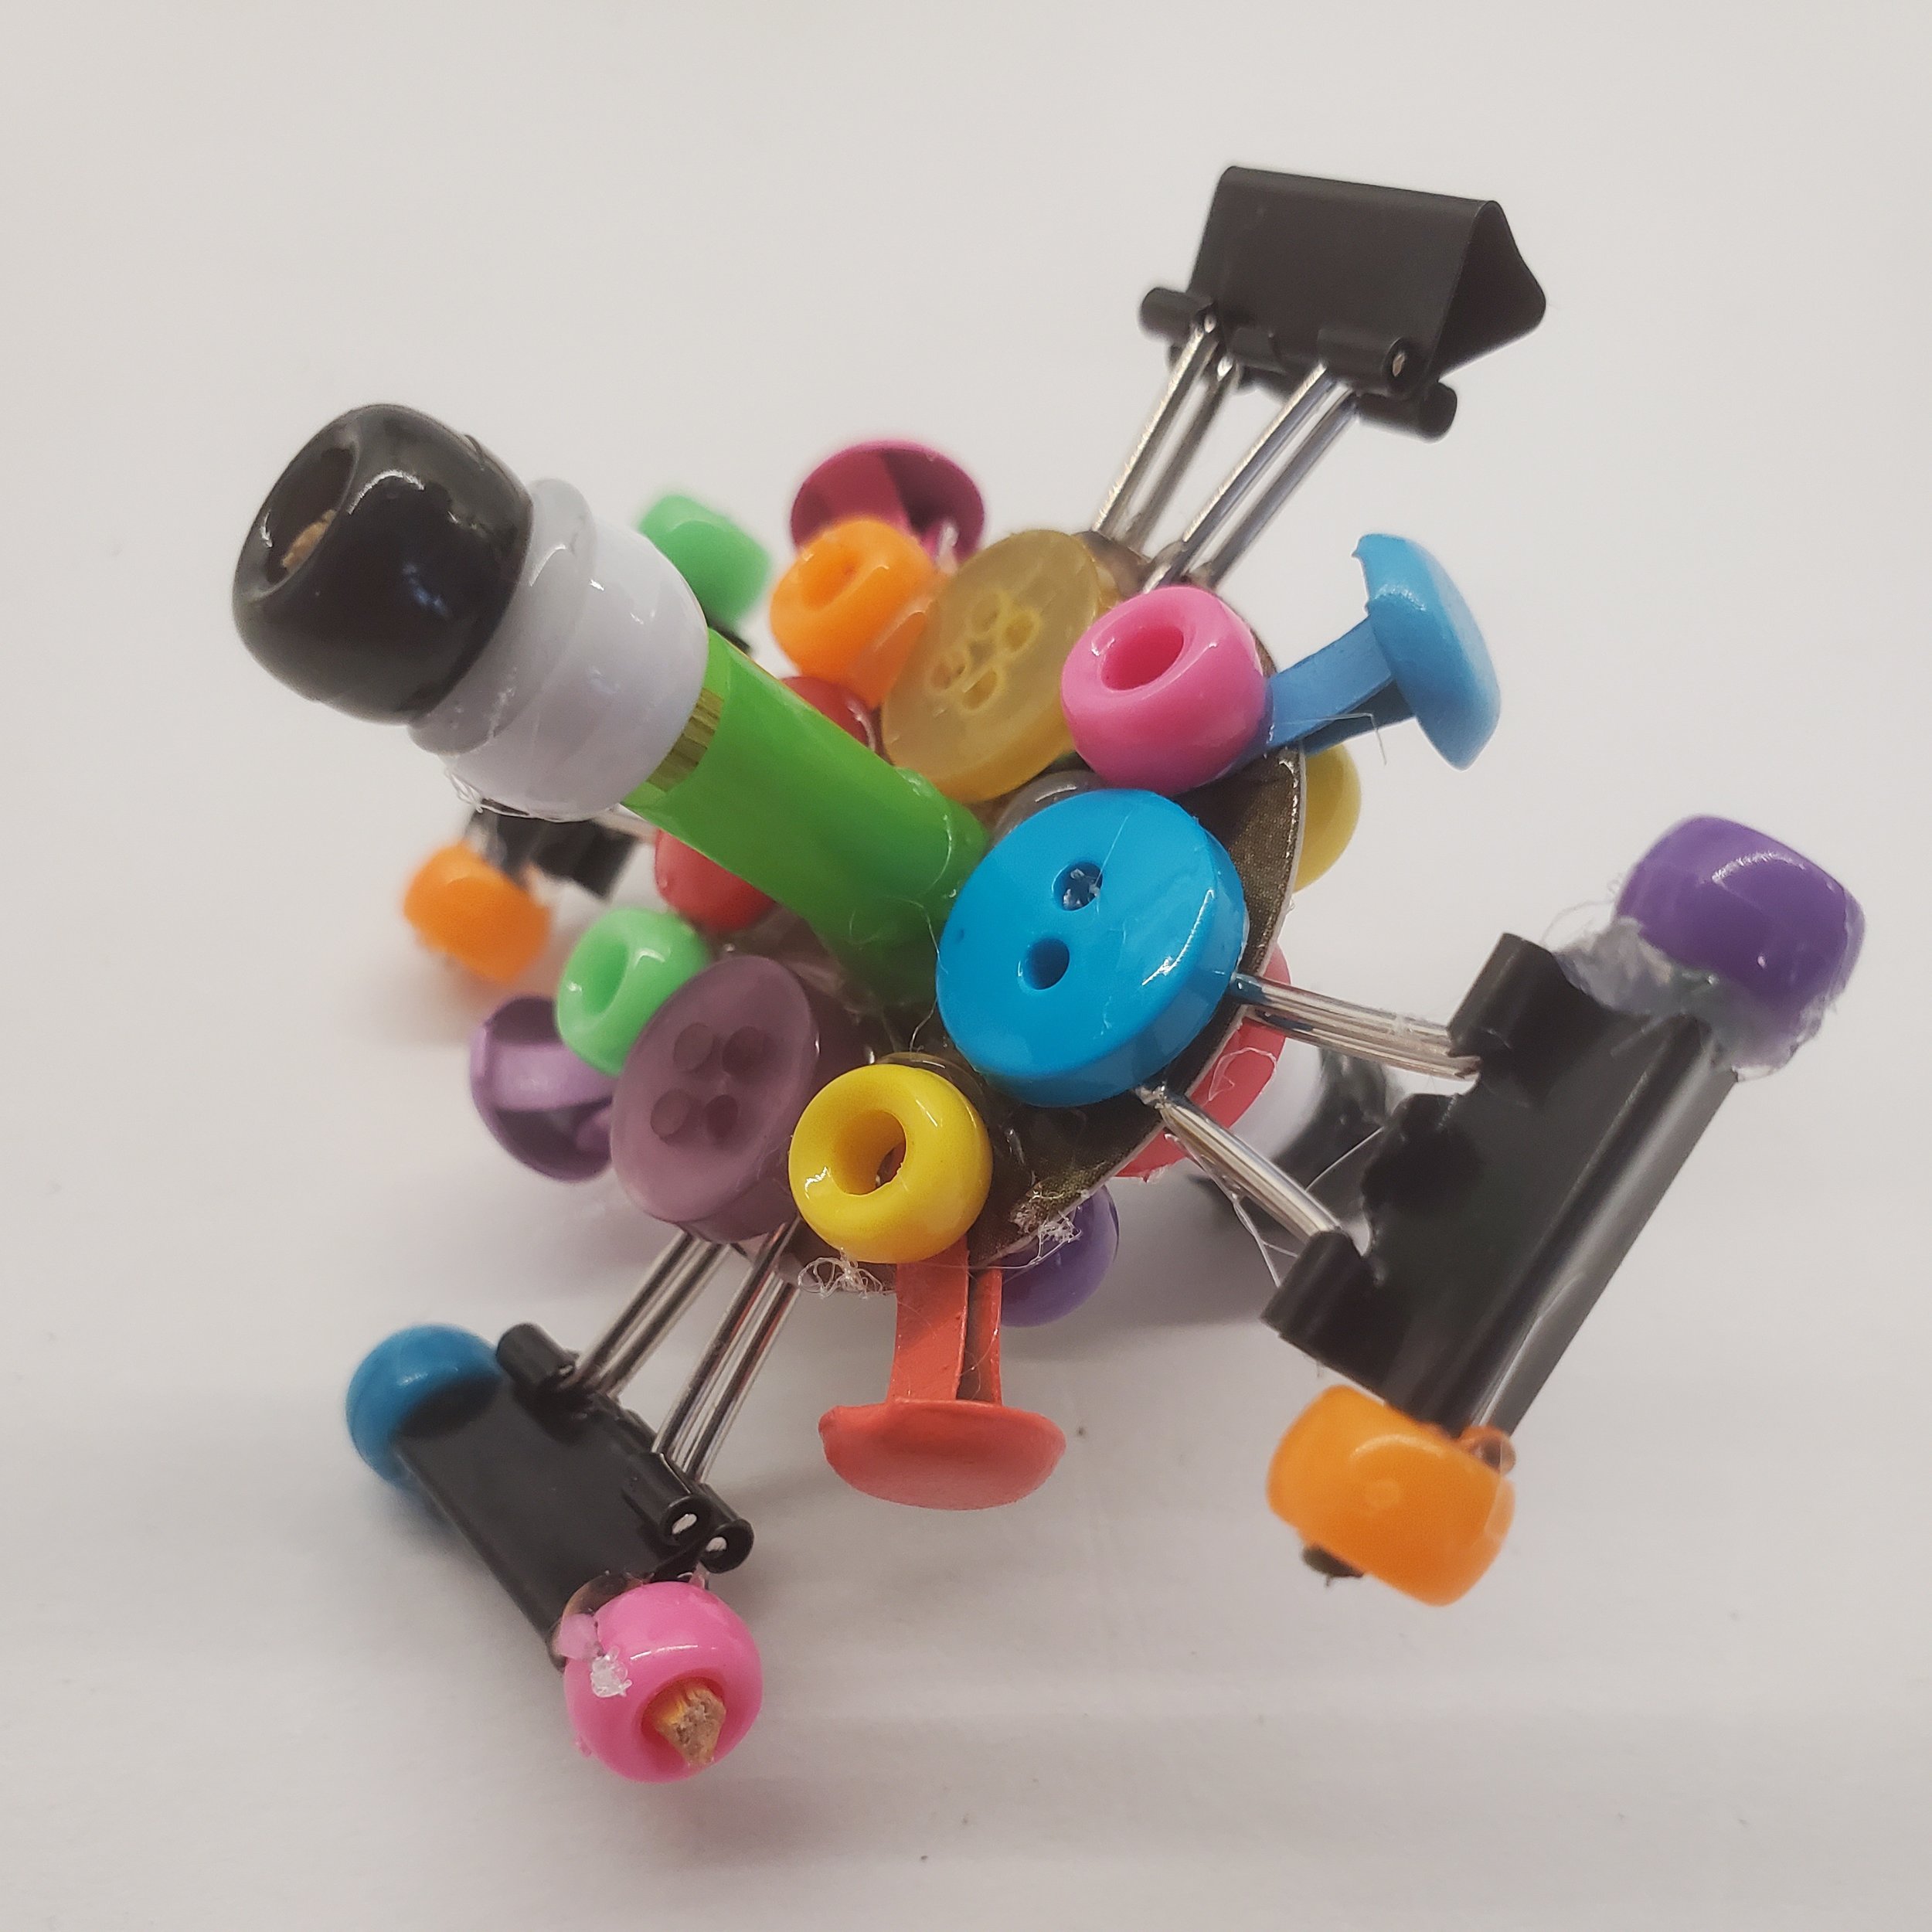
You can also add decoration like beads and pom poms. Make sure to keep your creations balanced and symmetrical.
Add sticks to make a cross shape. Then add sticks along the diagonal. We like to re-purpose all our scrap parts to create cool spinner designs.
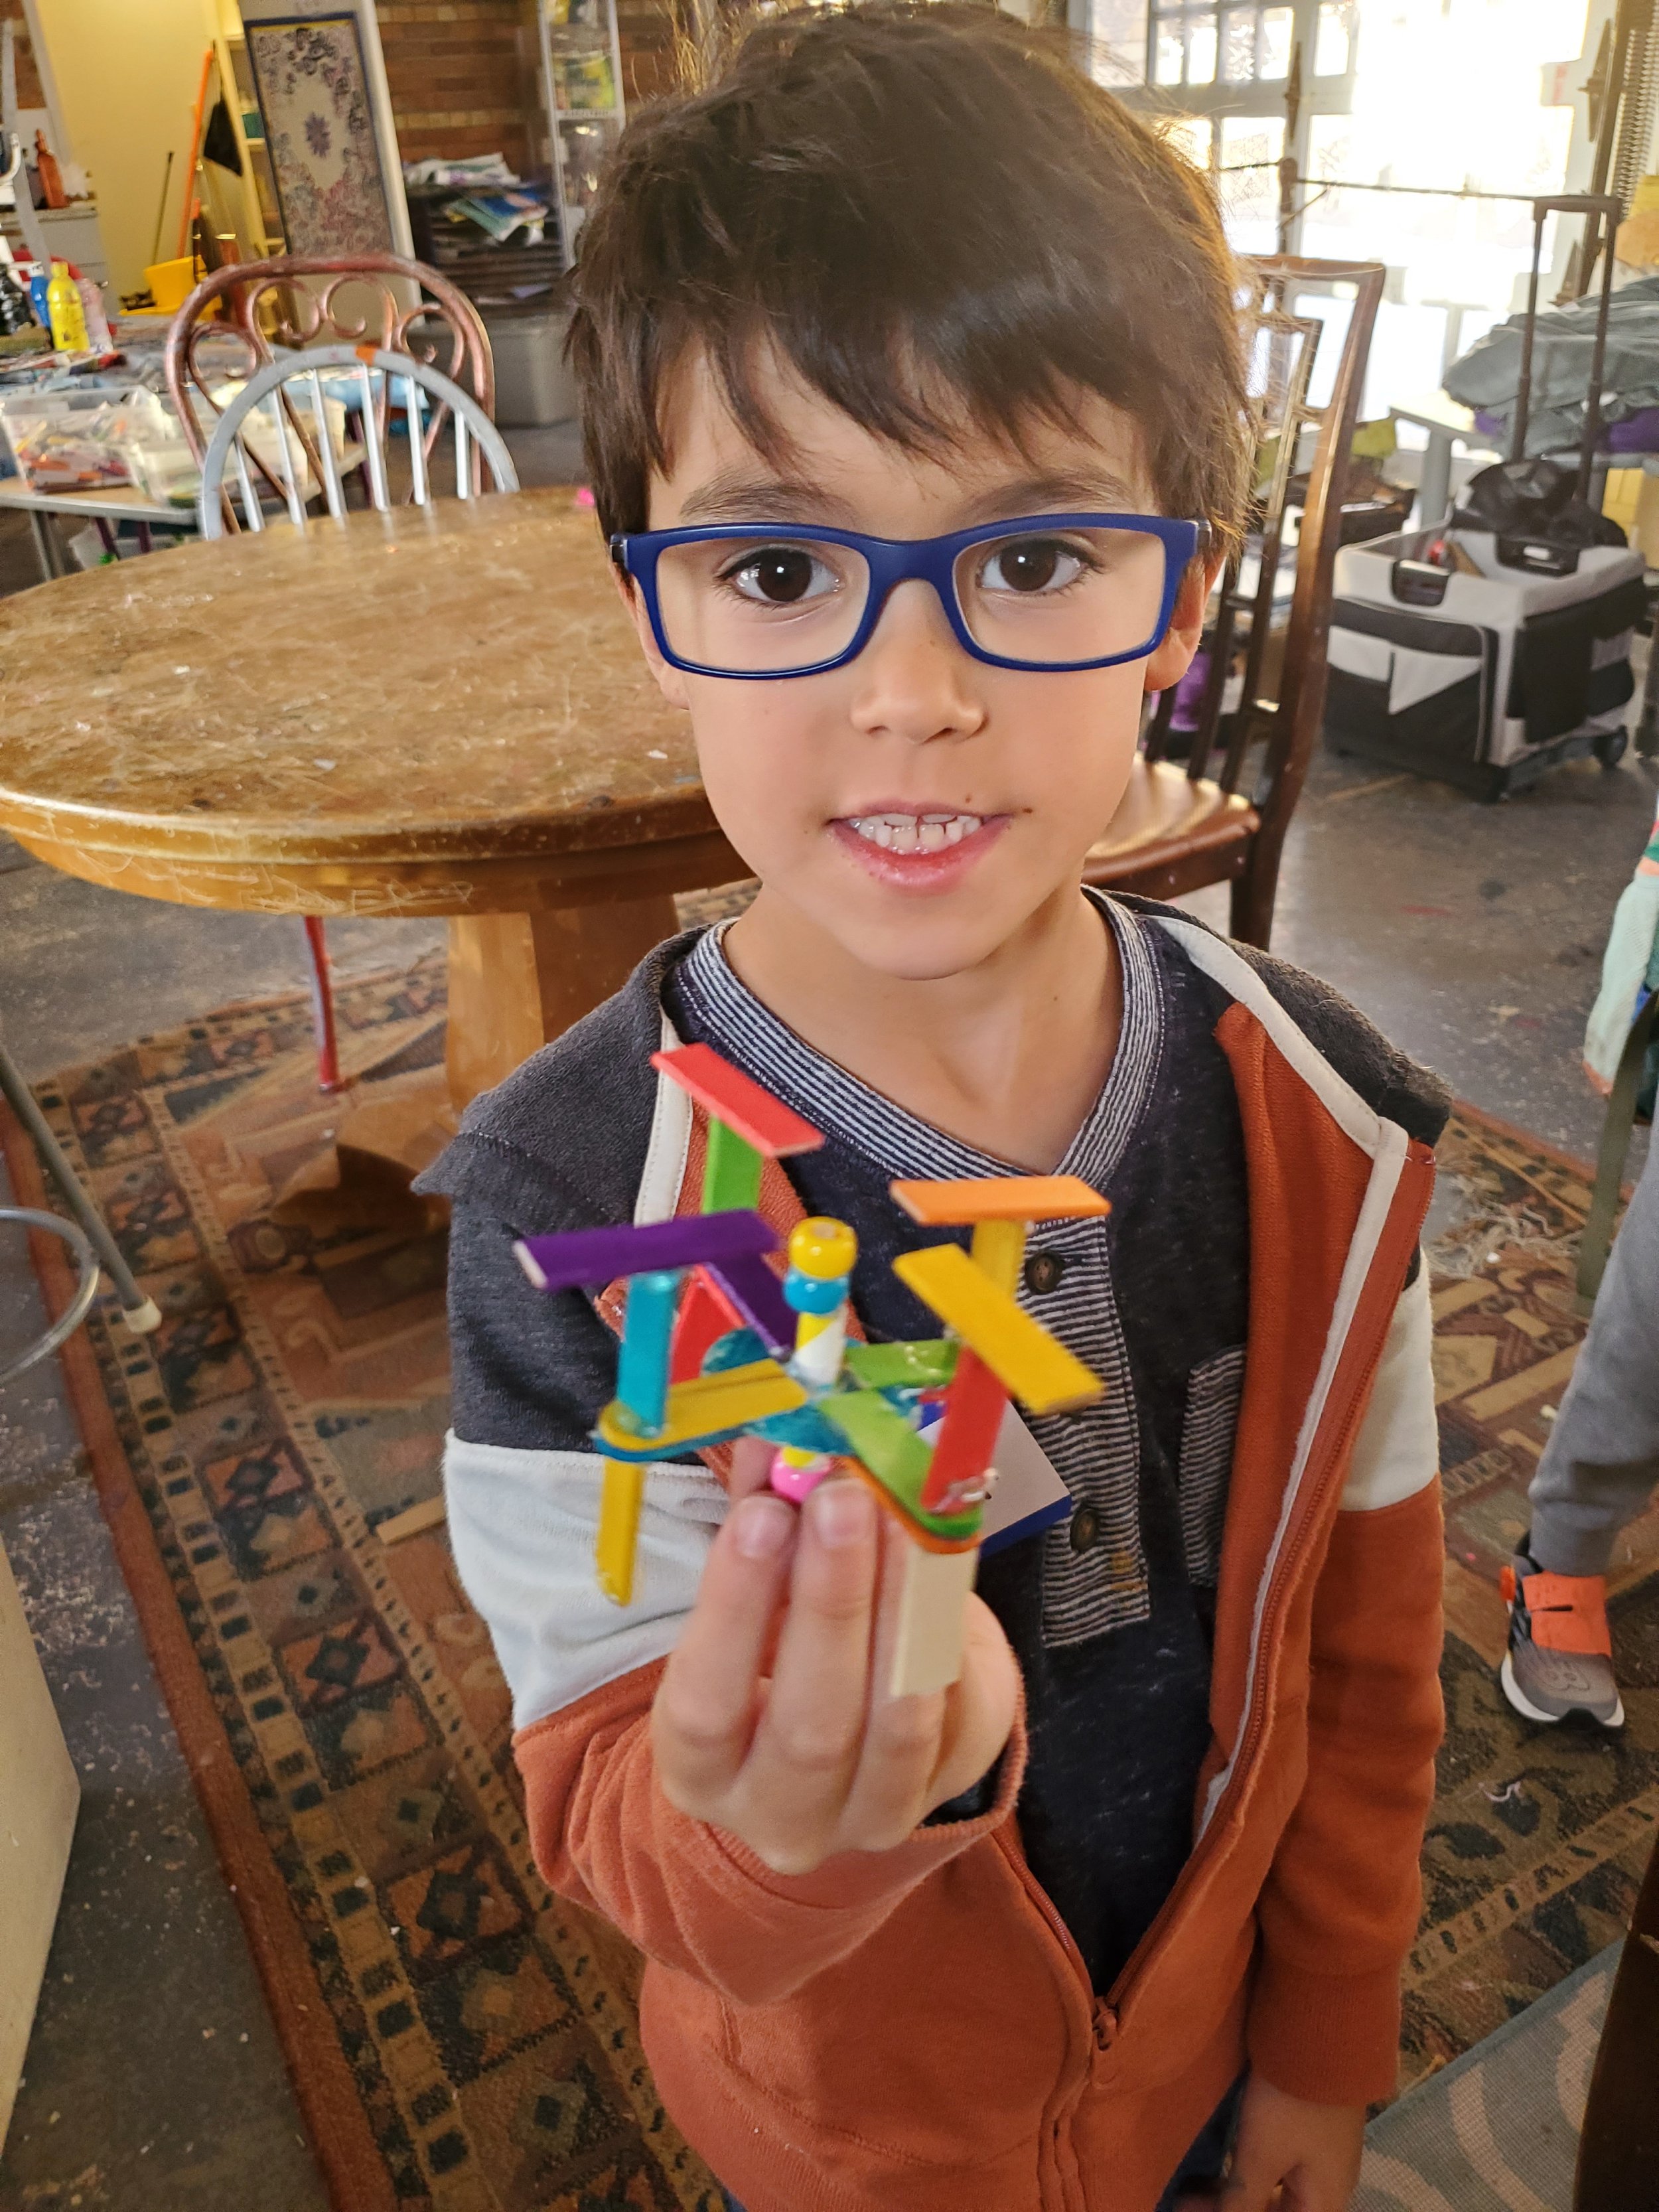
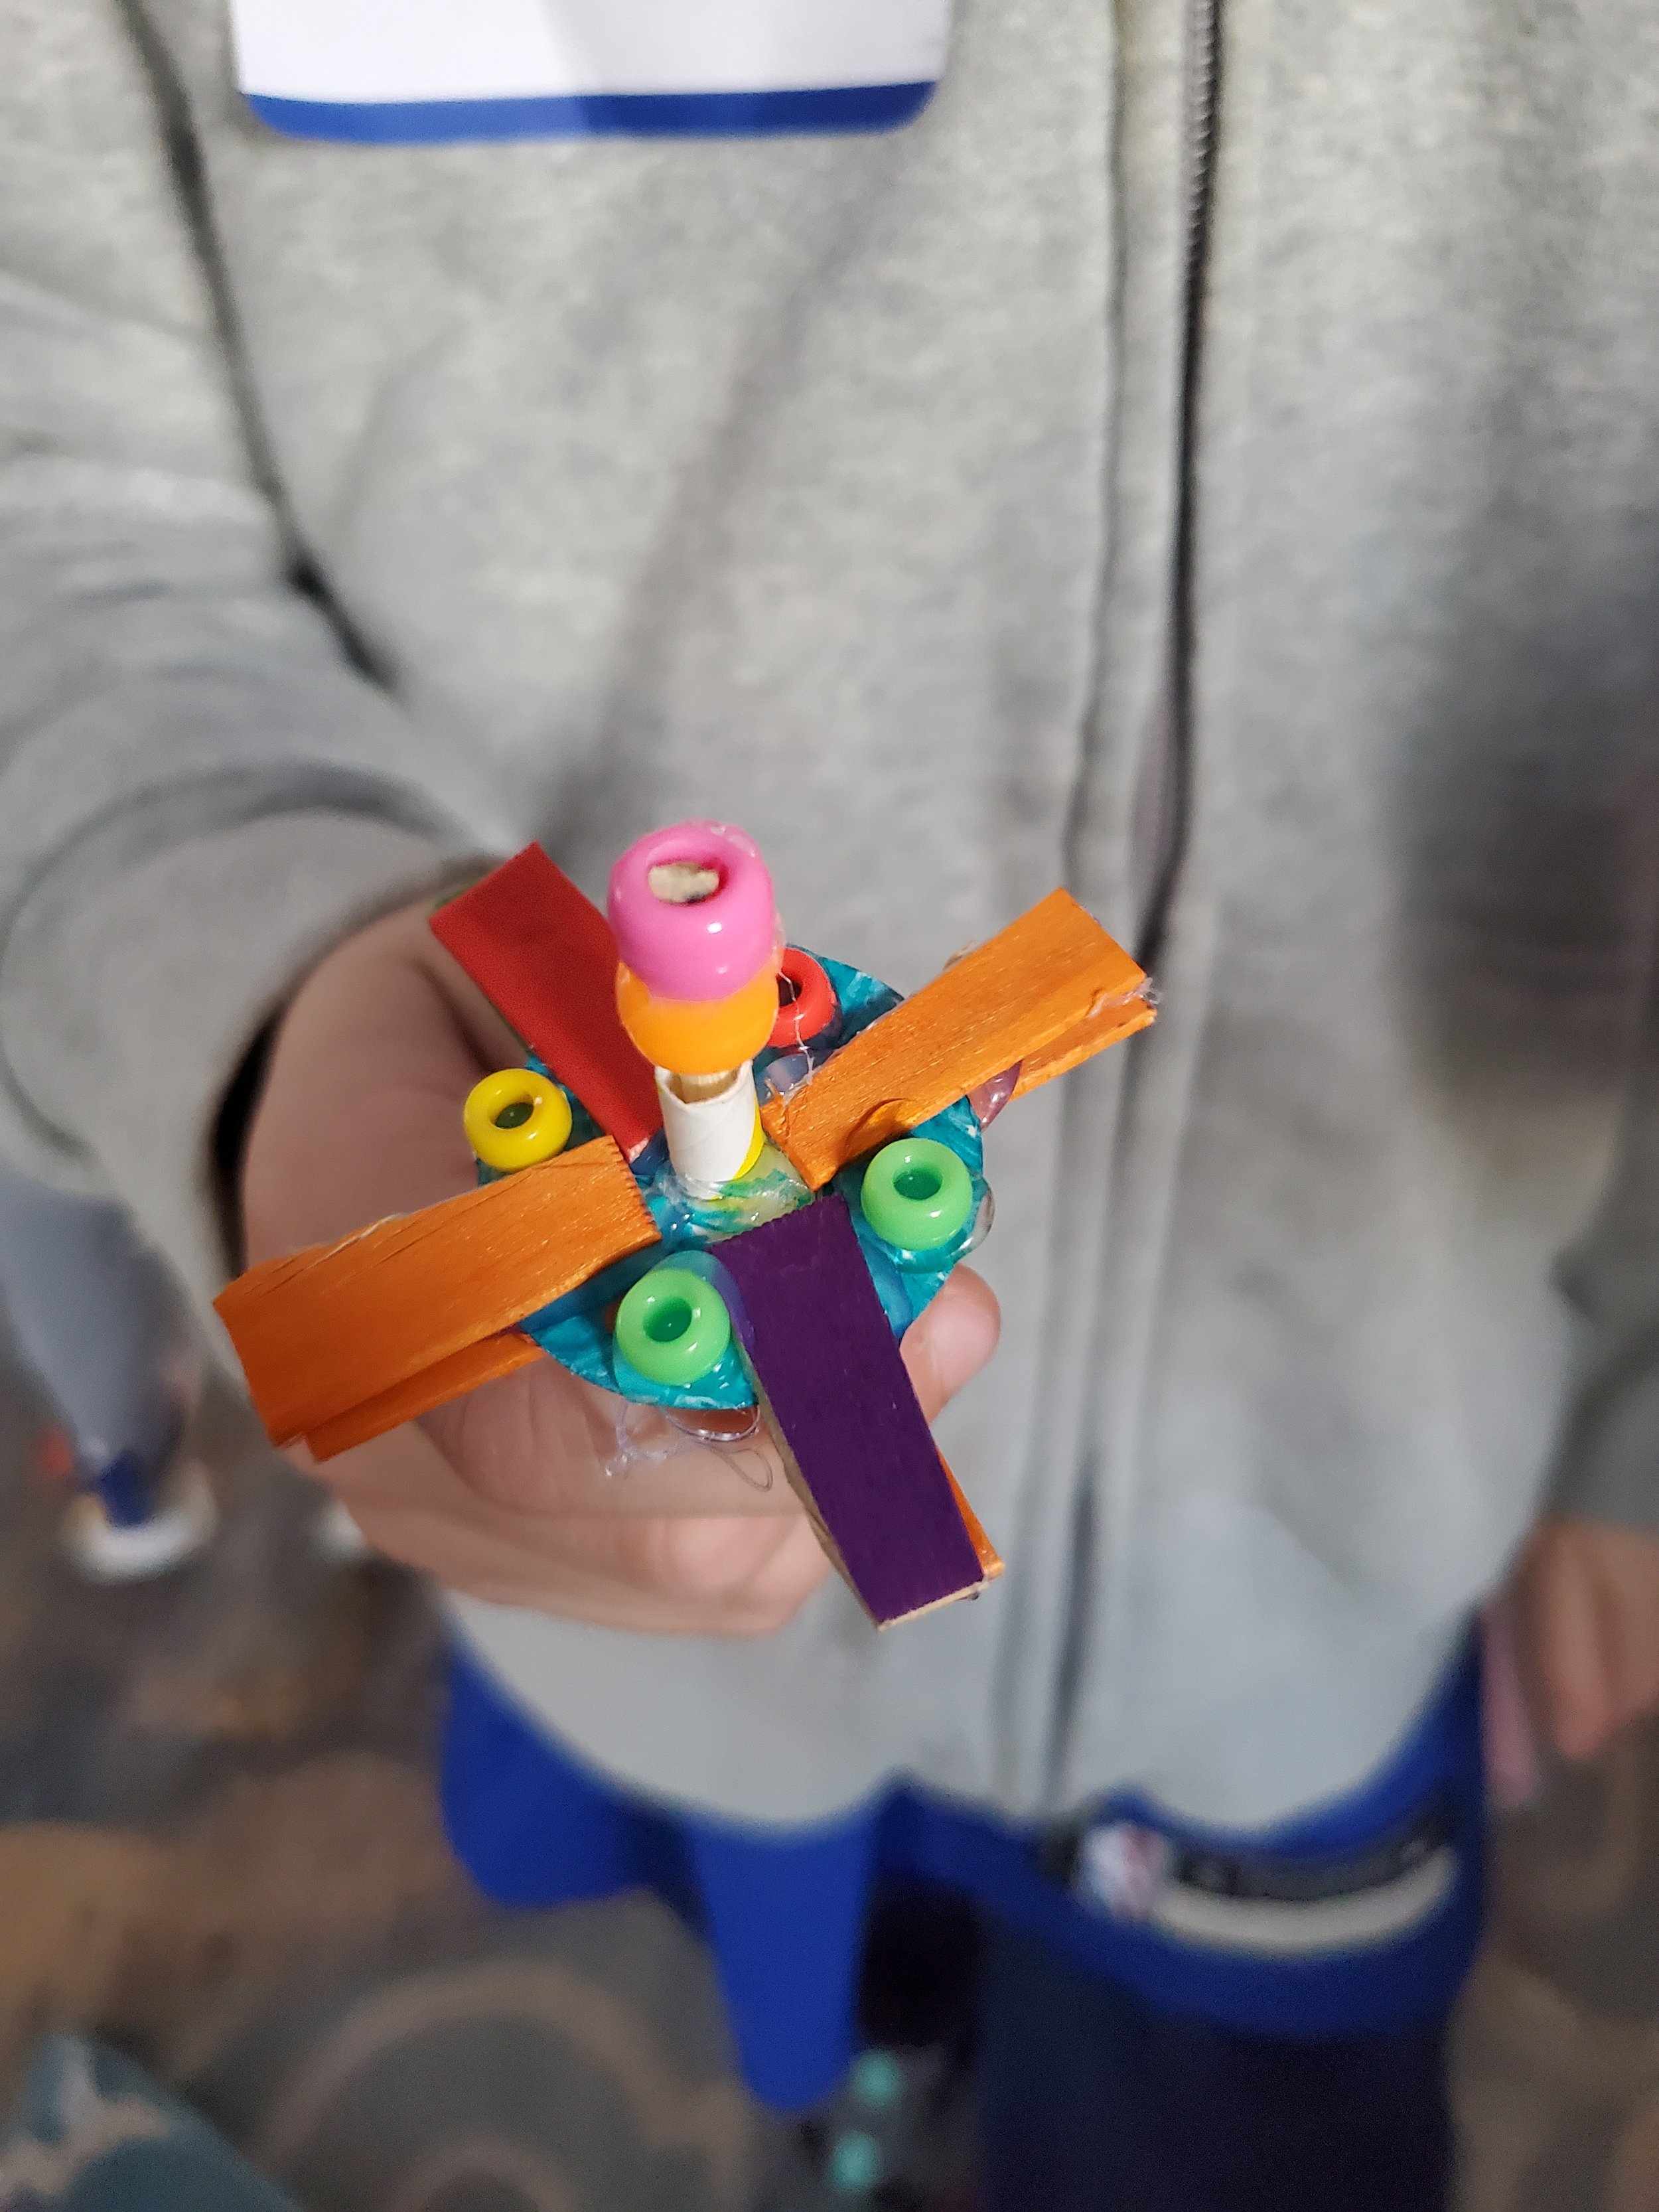
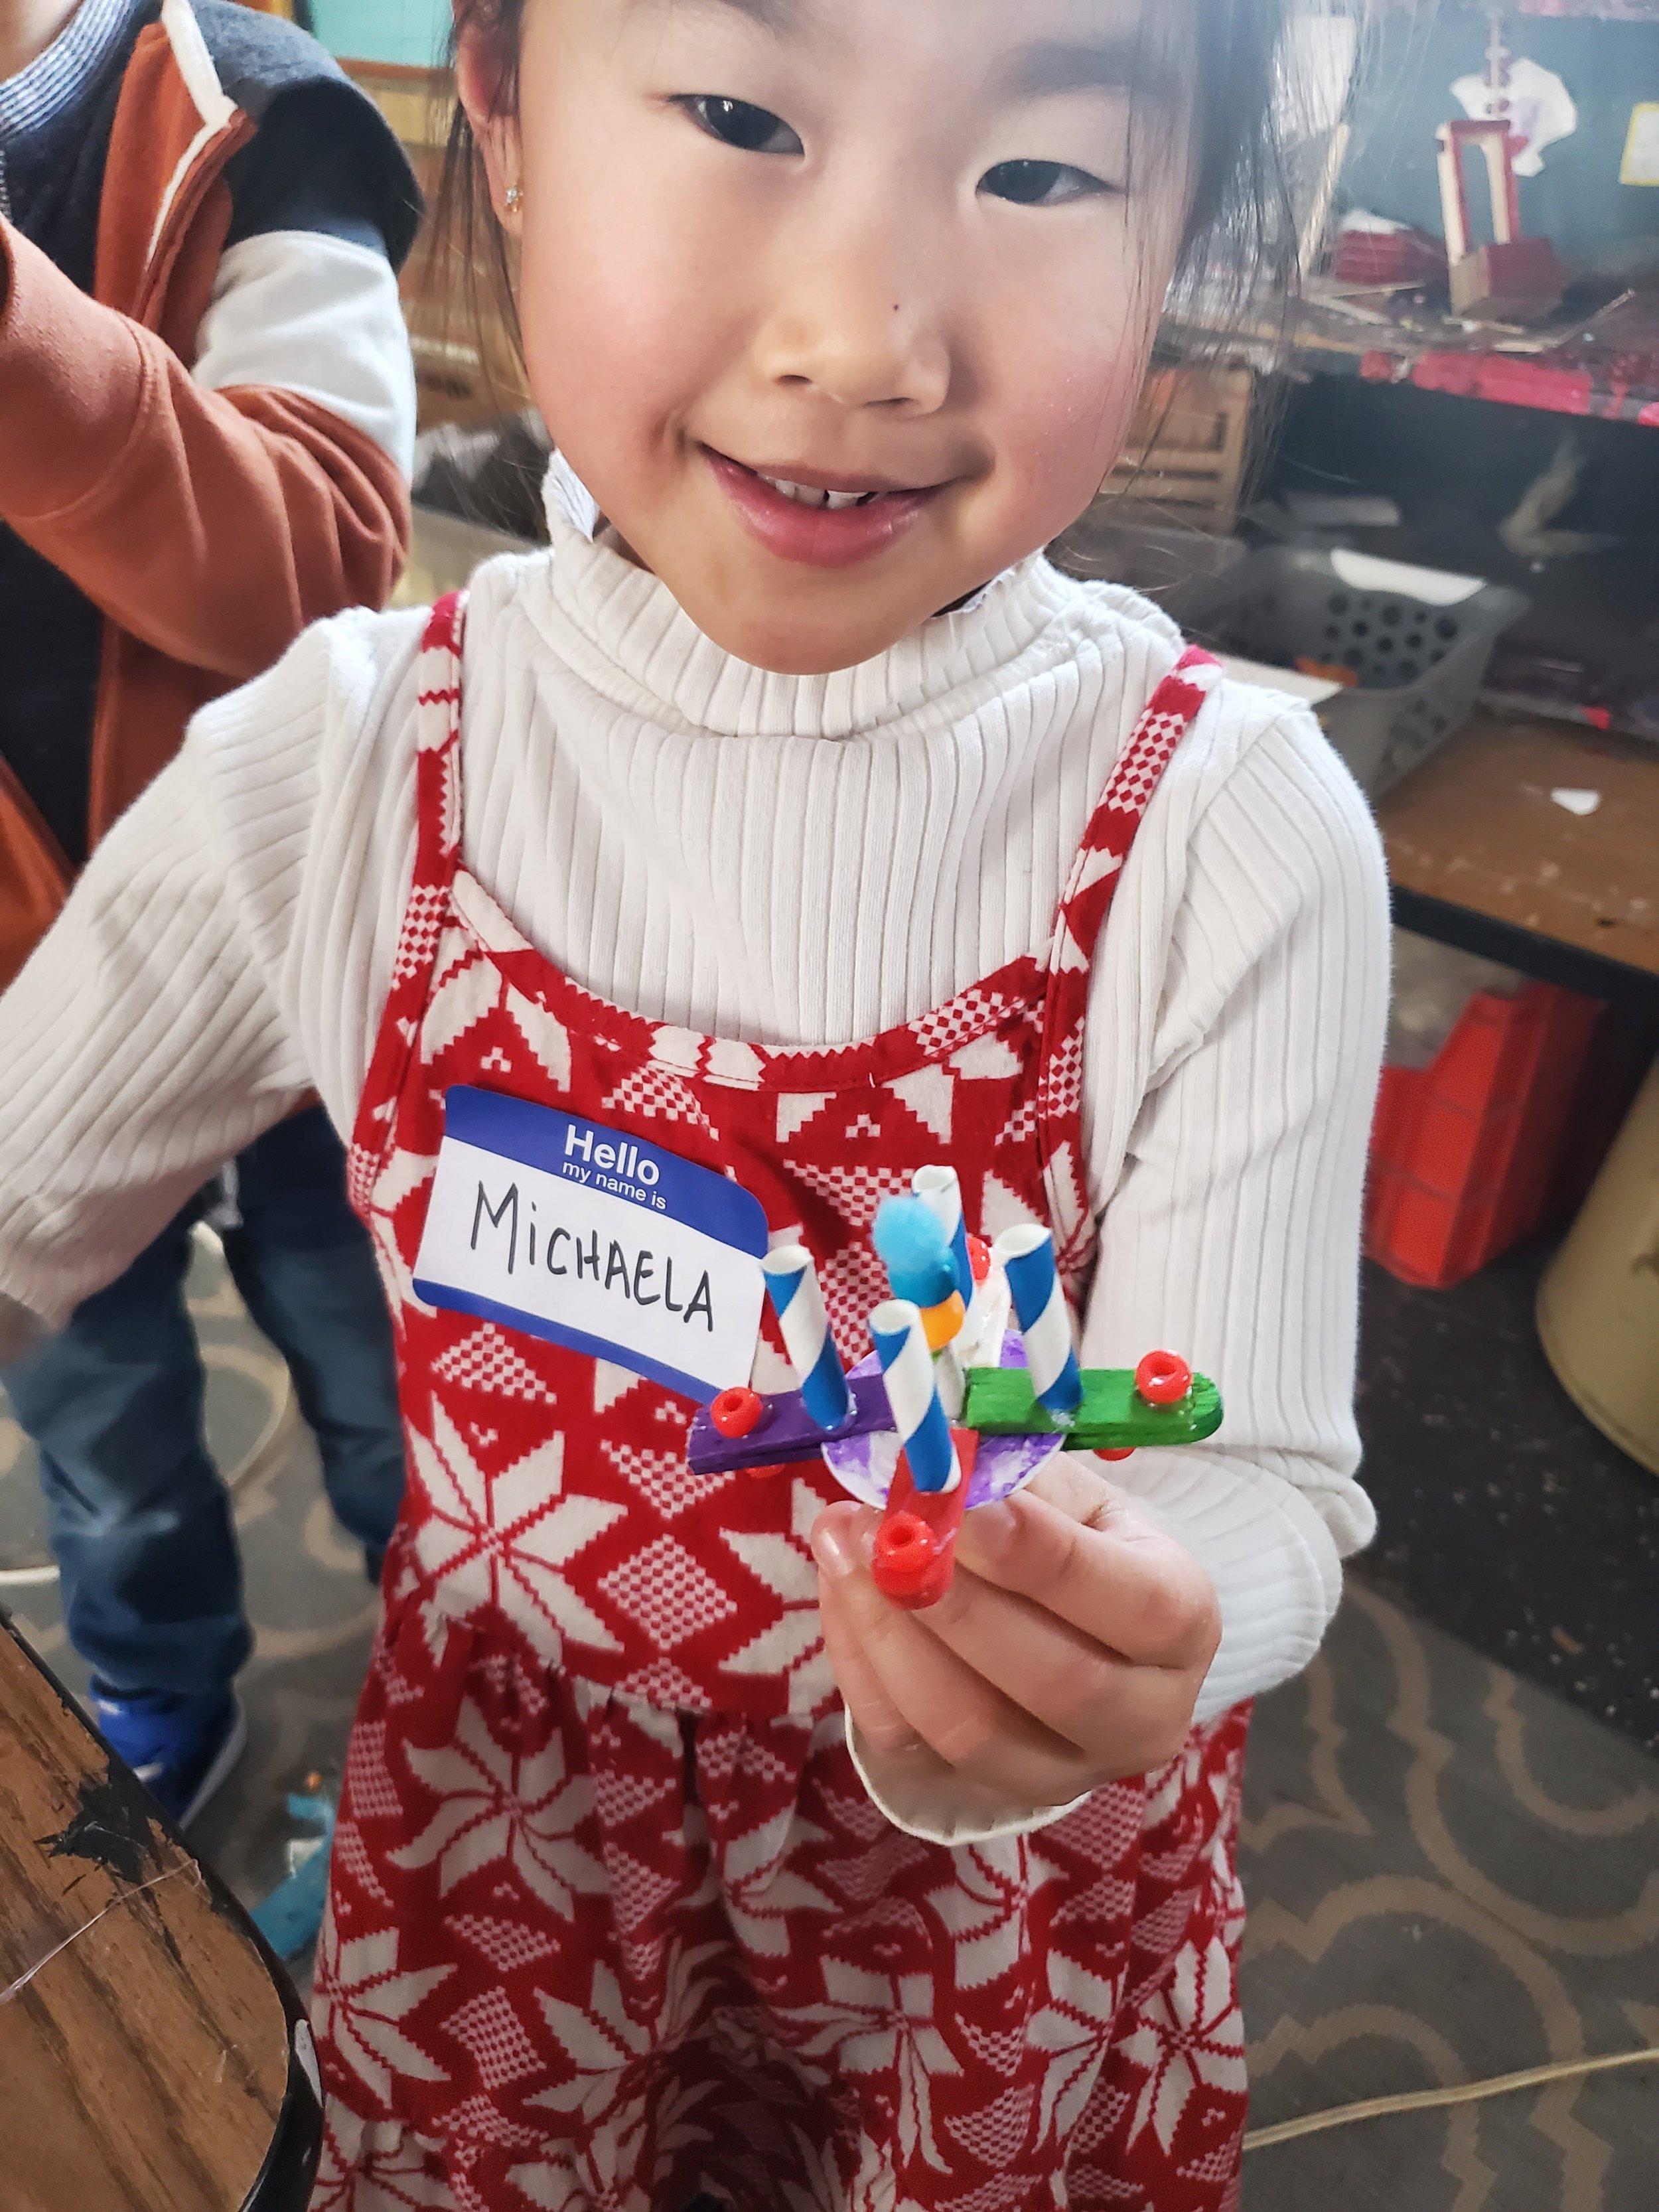
Test, evaluate and re-design your inventions. And, have a ball playing with your creations!
STEAM IN ACTION
COPYRIGHT NOTICE:
This curriculum is developed and owned by Eurekus LLC and is intended for educational purposes only. No portion of the instructional webpage or associated materials can be copied, distributed or edited for commercial purposes without the express written consent from Eurekus LLC.
© EUREKUS LLC 2022