
INTERACTIVE BOOKS
Elevate Content Through Making
Learn to make charming hand-made books to excite any investigation. Students dive deep into arts-integrated storytelling to activate imaginative research, creative writing and journaling. Watch the following tutorials to make (3) enchanting book designs ~ Accordion Books, Expandable Books and Sewn Books. Explore cool techniques for adding 2D & 3D elements to extend ideas and expression. Plus, learn to make a Circuit Card and enhance creations with LED lights.
-
K-12th Grade
Adult Learners
-
3-6 hours depending on design complexity
Chunk out in phases like video tutorials below
-
Integrates with any topic or investigation
-
In-class, Hybrid or Online Learning
Implementation Steps


Overview
-
Interactive Books are highly flexible to scale for different grades and content areas. We’ve included resources for (3) book designs ~ Accordion Books, Expandable Books & Sewn Books. There are also resources for making a Circuit Card to add LED lights to your design.
-
Download planners, templates & handouts below. Print any needed resources.
-
Use the Supply Planner below to collect materials and tools for class. We’ve also included links to some of our vendors to order bulk supplies & technology.
-
Explore our gallery of student work for inspiration. Be creative as you customize this program for your community. And, think of ways to integrate with your existing curriculum or units - creative writing, social studies, life science, etc.
-
Watch the tutorials and make several class samples. This allows you to learn the project, extend your ideas & trouble-shoot. We recommend chunking out the activity in phase like the videos.
-
Have a ball creating with your learners. You can show the video tutorials & slideshows in class to help guide you.
Planners, Templates & Handouts
Download Resources
-
-
Sewn Book Templates (Print on Plain Paper Only)
Pockets, Windows & Inserts Templates (Print on Plain Paper or Cardstock)
Circuit Card Template (Print On Cardstock Only)
-
Interactive Books can easily scale for K-12 and integrate with any content area. Thus, they are a great project to enhance any investigation and can align with many Standards across grade levels. They also meet NGSS Standards for Engineering & Design.
-
Eurekus programs are easy to tailor to meet different learning goals. Here are some ideas of what educators have done to adapt the program and make it their own.
Integrate with creative writing & poetry units.
Explore life science topics ~ life cycle of a frog, plant and chicks.
Explore human senses with 3D elements.
Create books to illustrate the timeline of Earth’s history & the fossil record.
Design books to explore the weather.
Make books to activate social studies topics ~ researching countries, states and cultures.
Create interactive books for class journals.
Make books to catalog the Design Process - used for planning, testing, evaluating and re-design.
Explore paper engineering and pop-ups to add more robust design challenges.
Design Circuit Cards or custom circuits to enhance books with LED lights.
Get Inspired
Explore some of these fantastic book designs. Think of exciting content and artistic elements you can add to your own creations. Then follow the video tutorials below to design your own Interactive Book. We have (3) book designs to scale for different ages and class needs ~ Accordion Books, Expandable Books & Sewn Books.

Interactive Books are a great way to enhance research, writing and creative learning across topic areas. These Sewn Books were used as journals for planning & reflection all semester long.
Books can be any size and shape and relate to any content investigation. They can also scale for any grade level. You can add more complex research and engineering/design elements to scale for different learners.
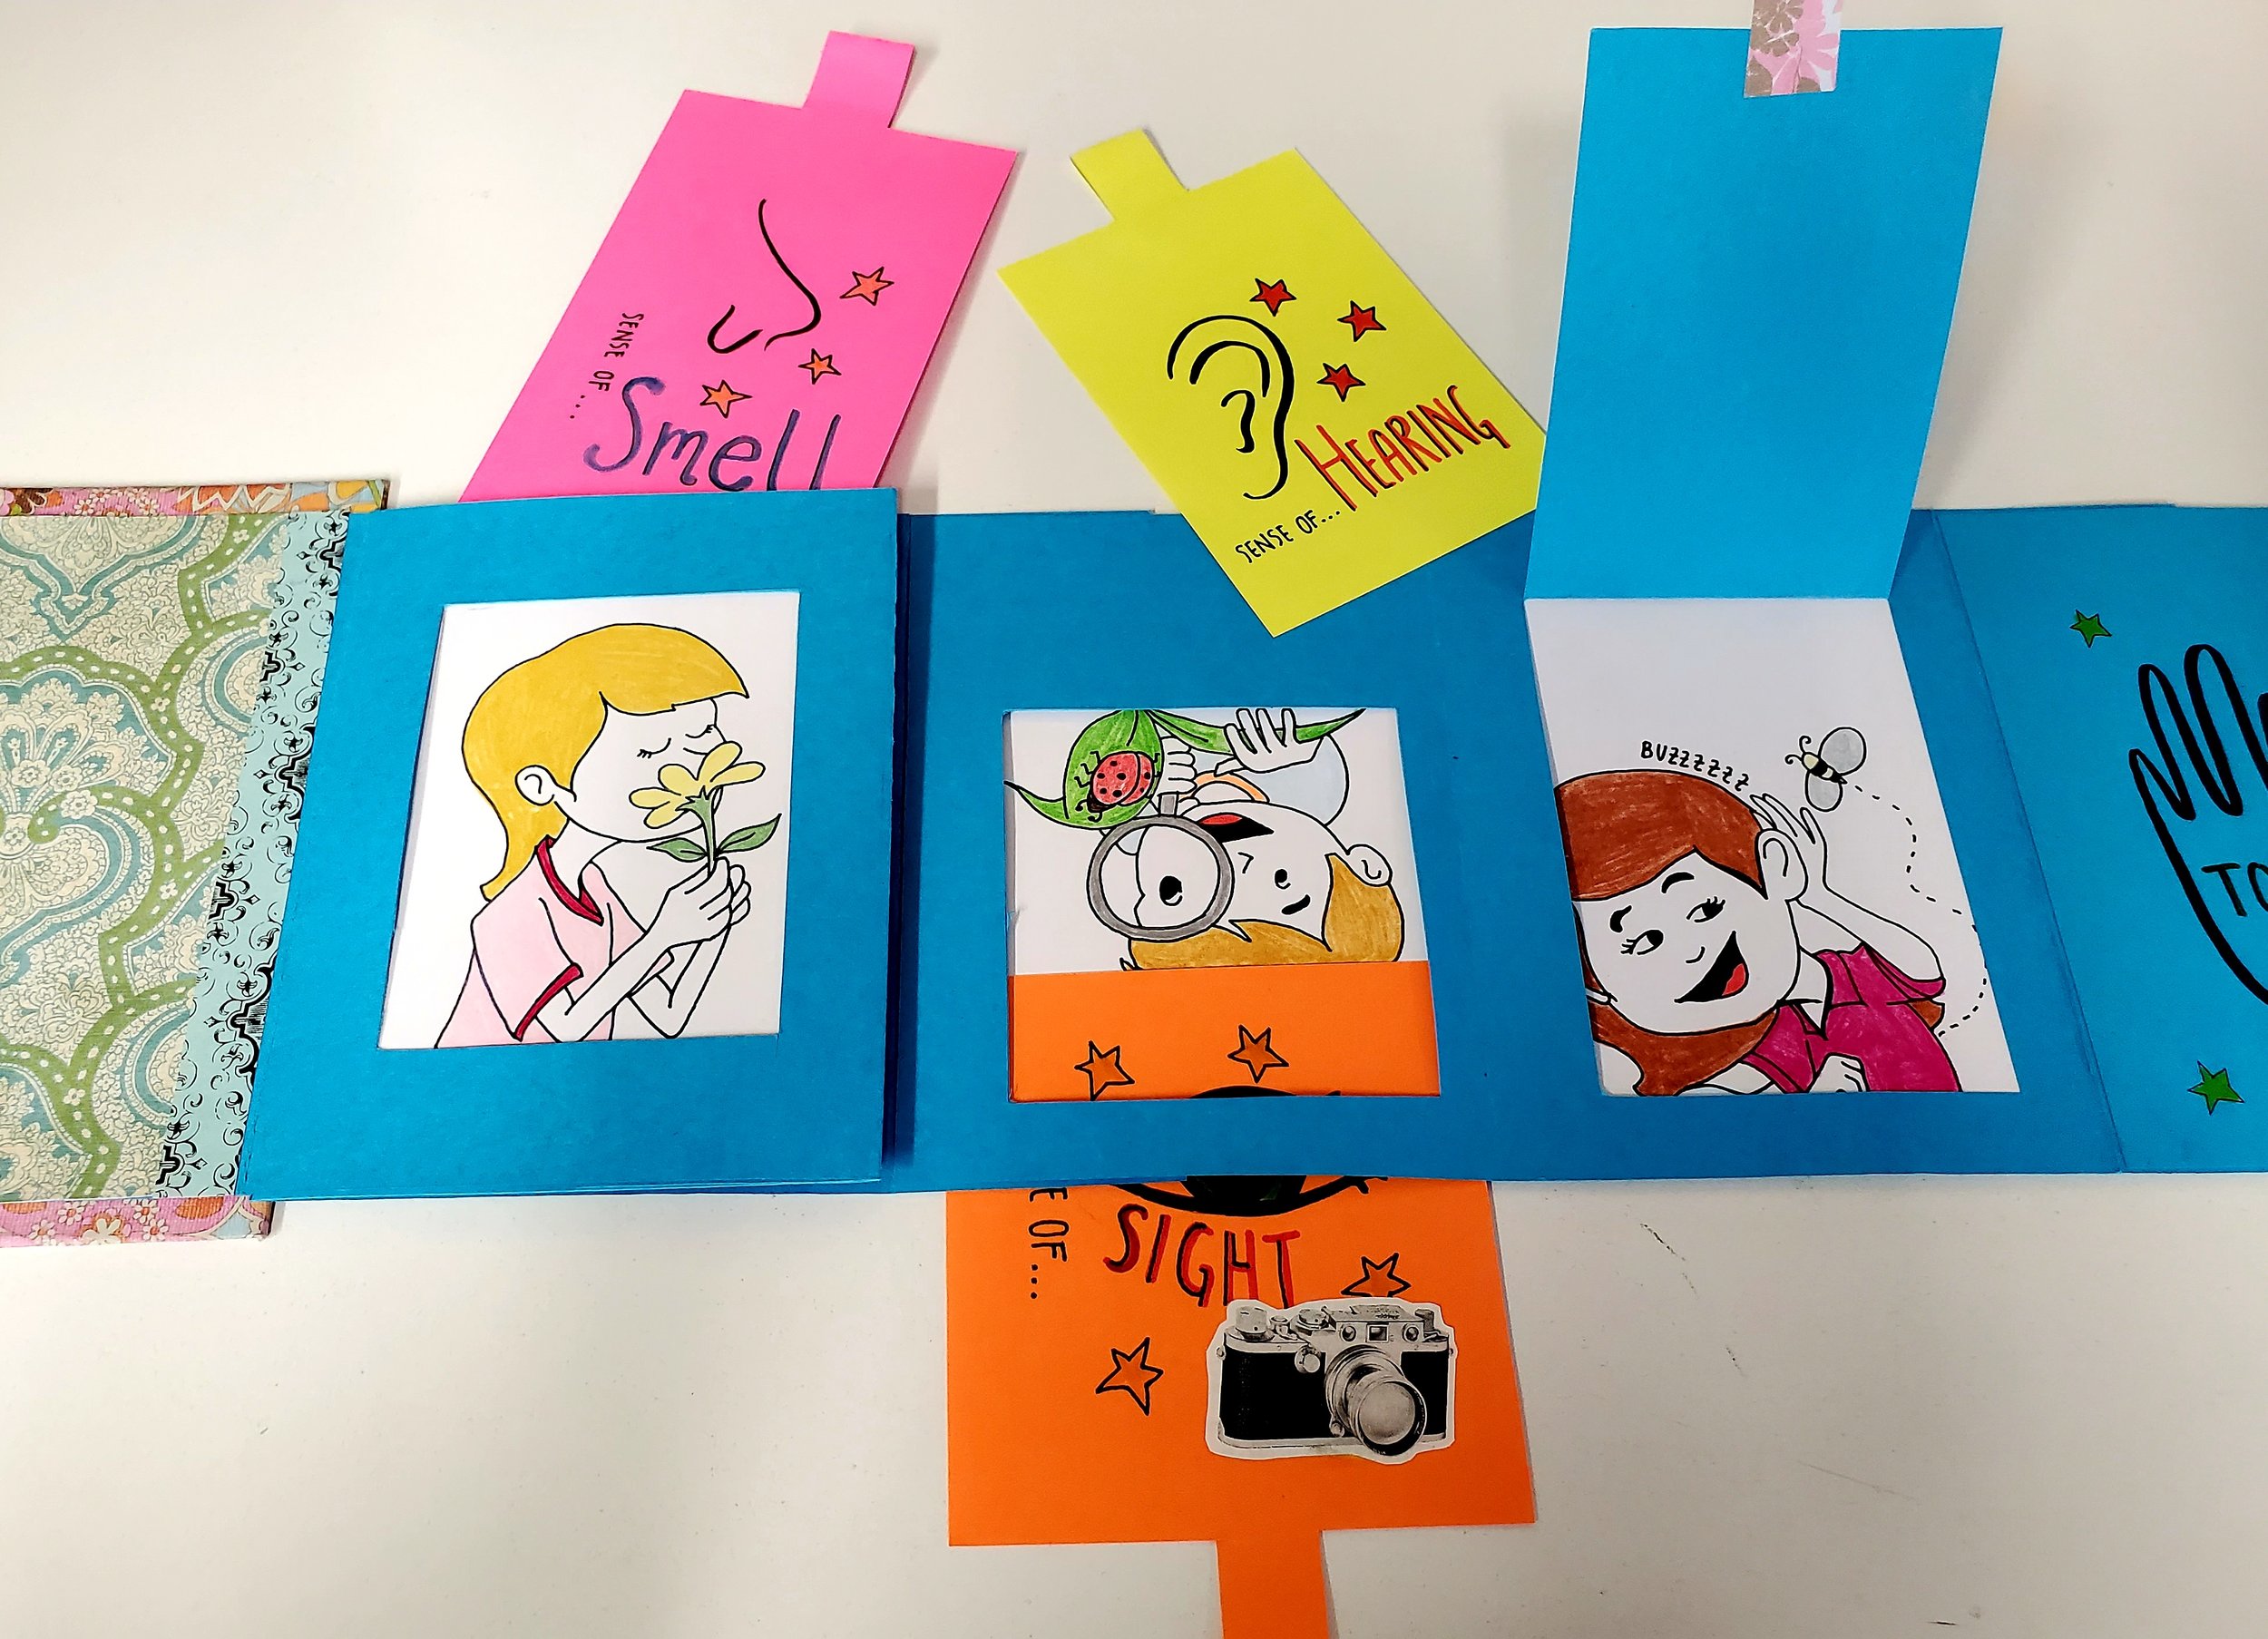
This book explores the senses. This high school student wanted to create a children's book for art class. She designed many secret windows for interactive illustrations.

Pockets and pull-tabs made for visual interest and fun engagement.
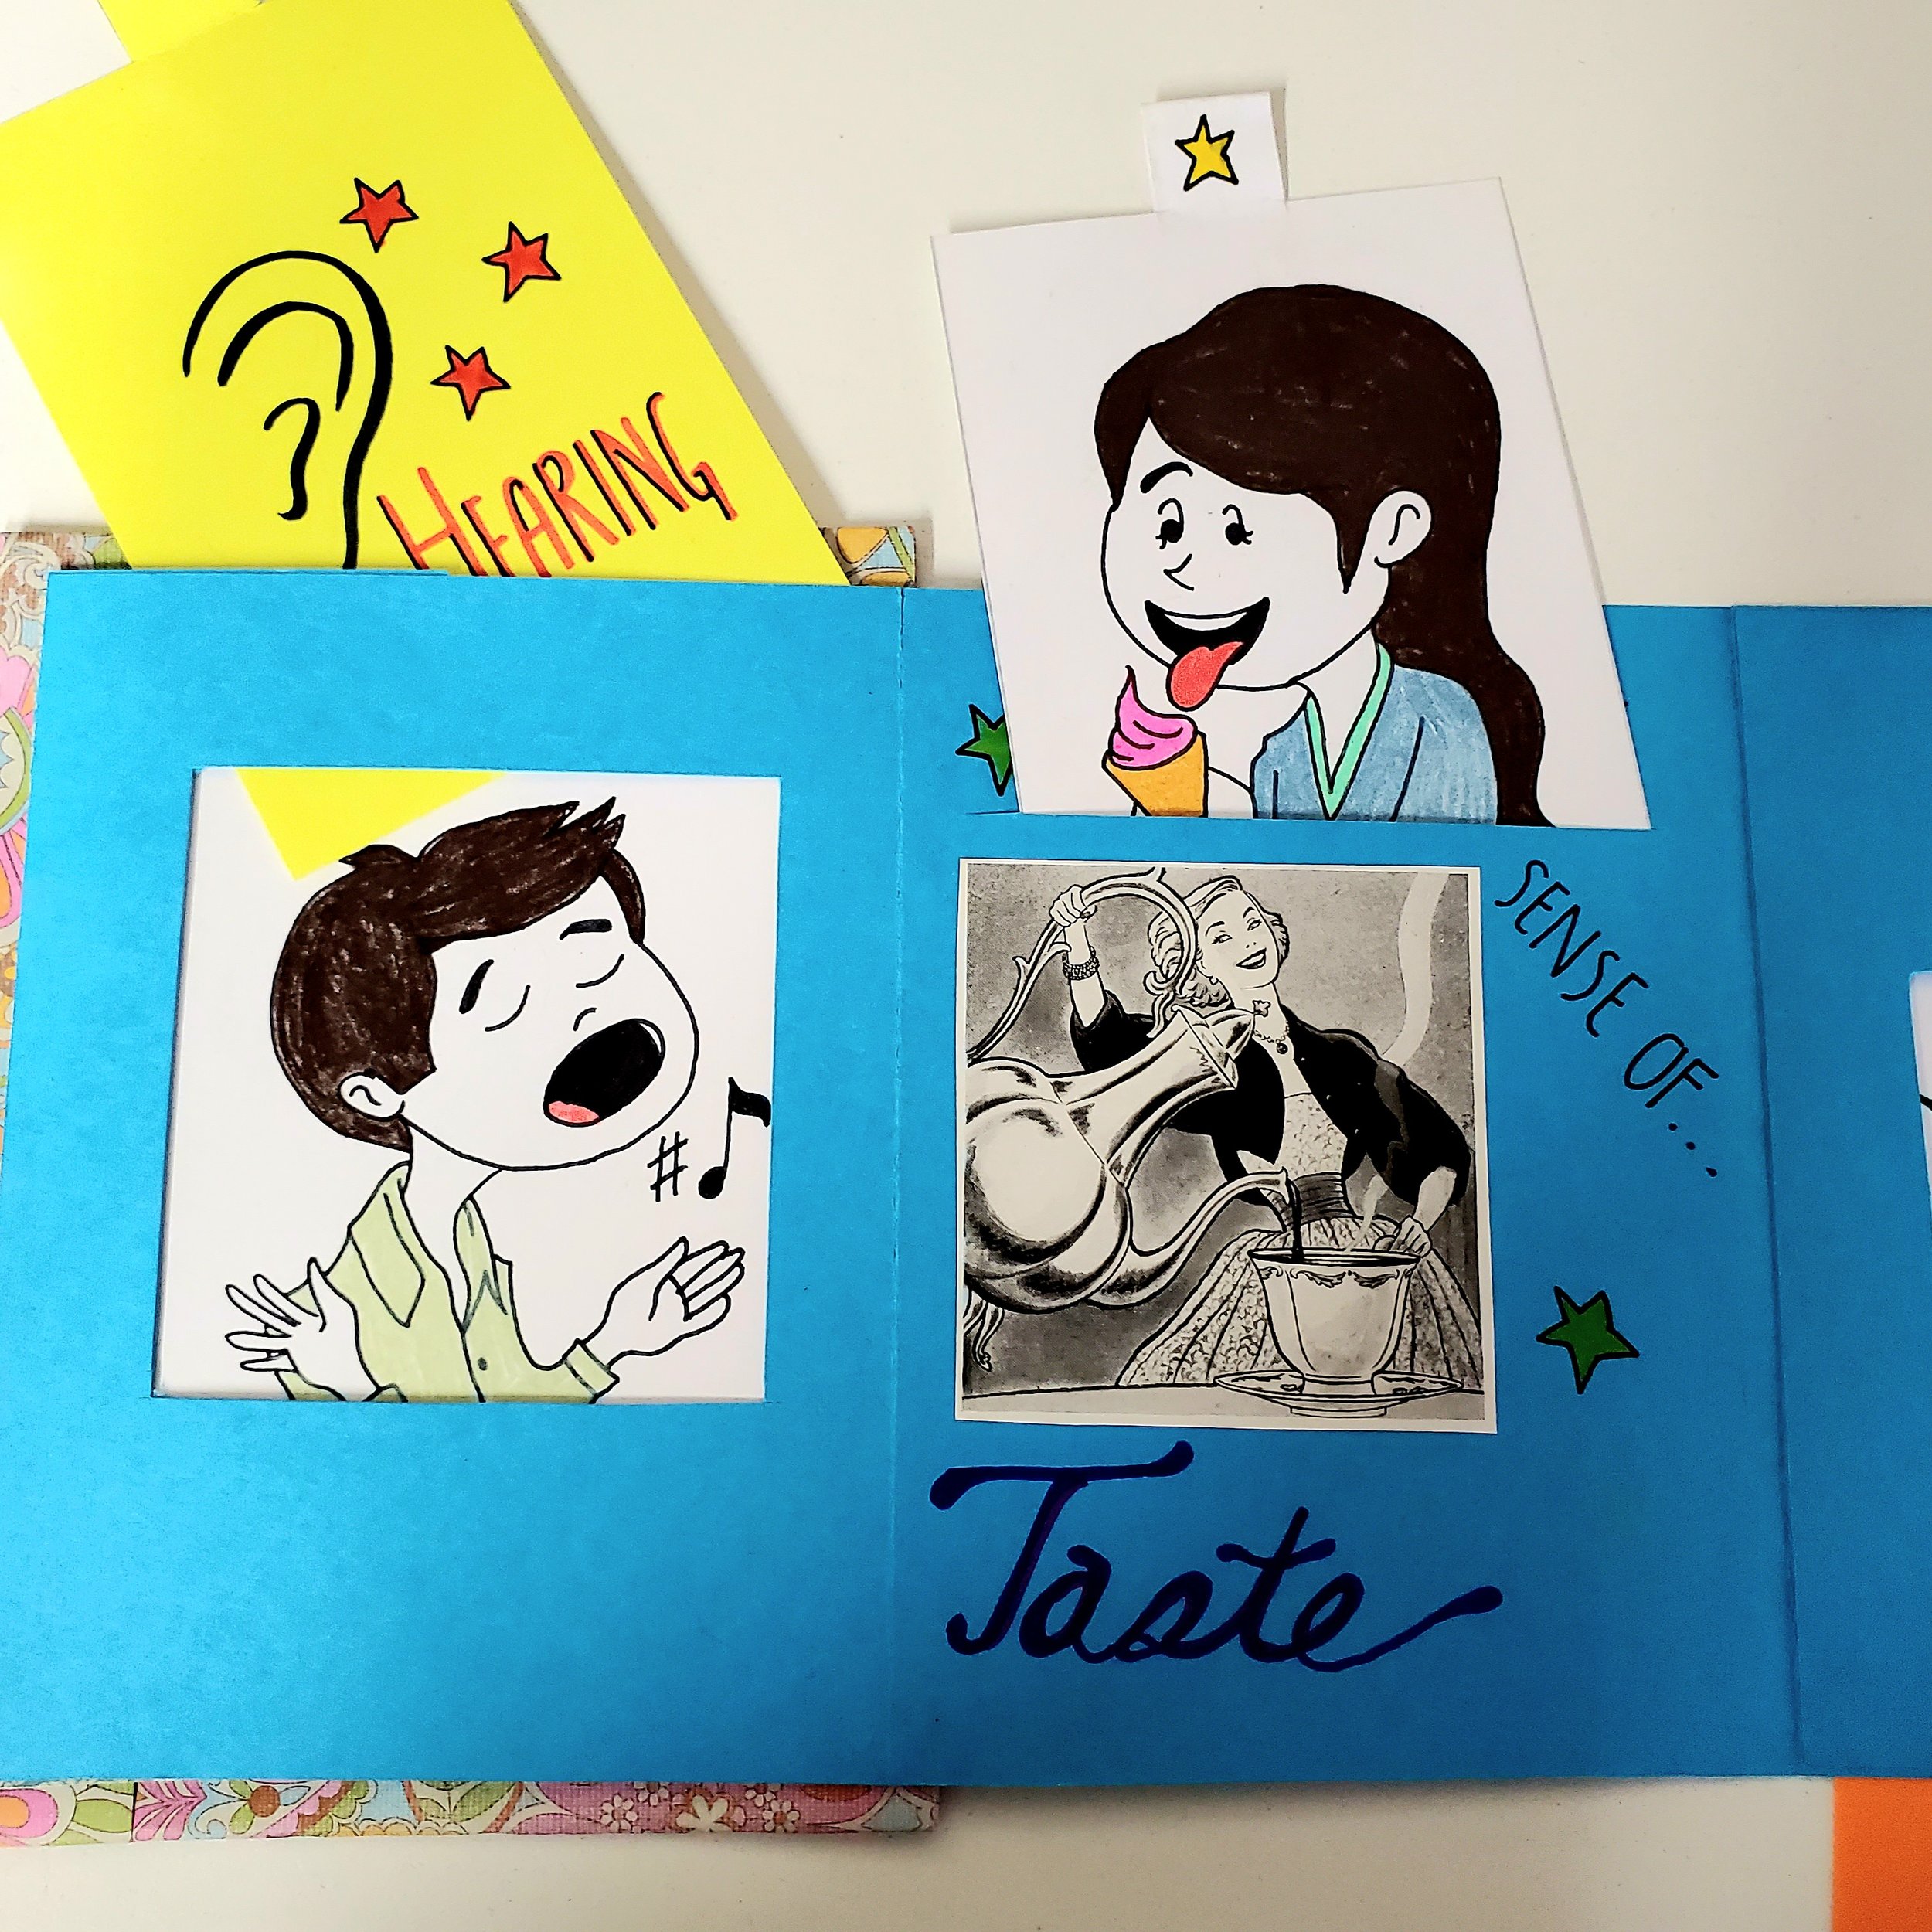
Hand-drawn illustrations, found images and collage elements make great details.

Pop-up pieces make cool artistic features and meaningful engineering challenges.

Taste is illustrated here with paper collage & a pop-up tongue.

You can use a variety of 3D textures like paper, felt & string.
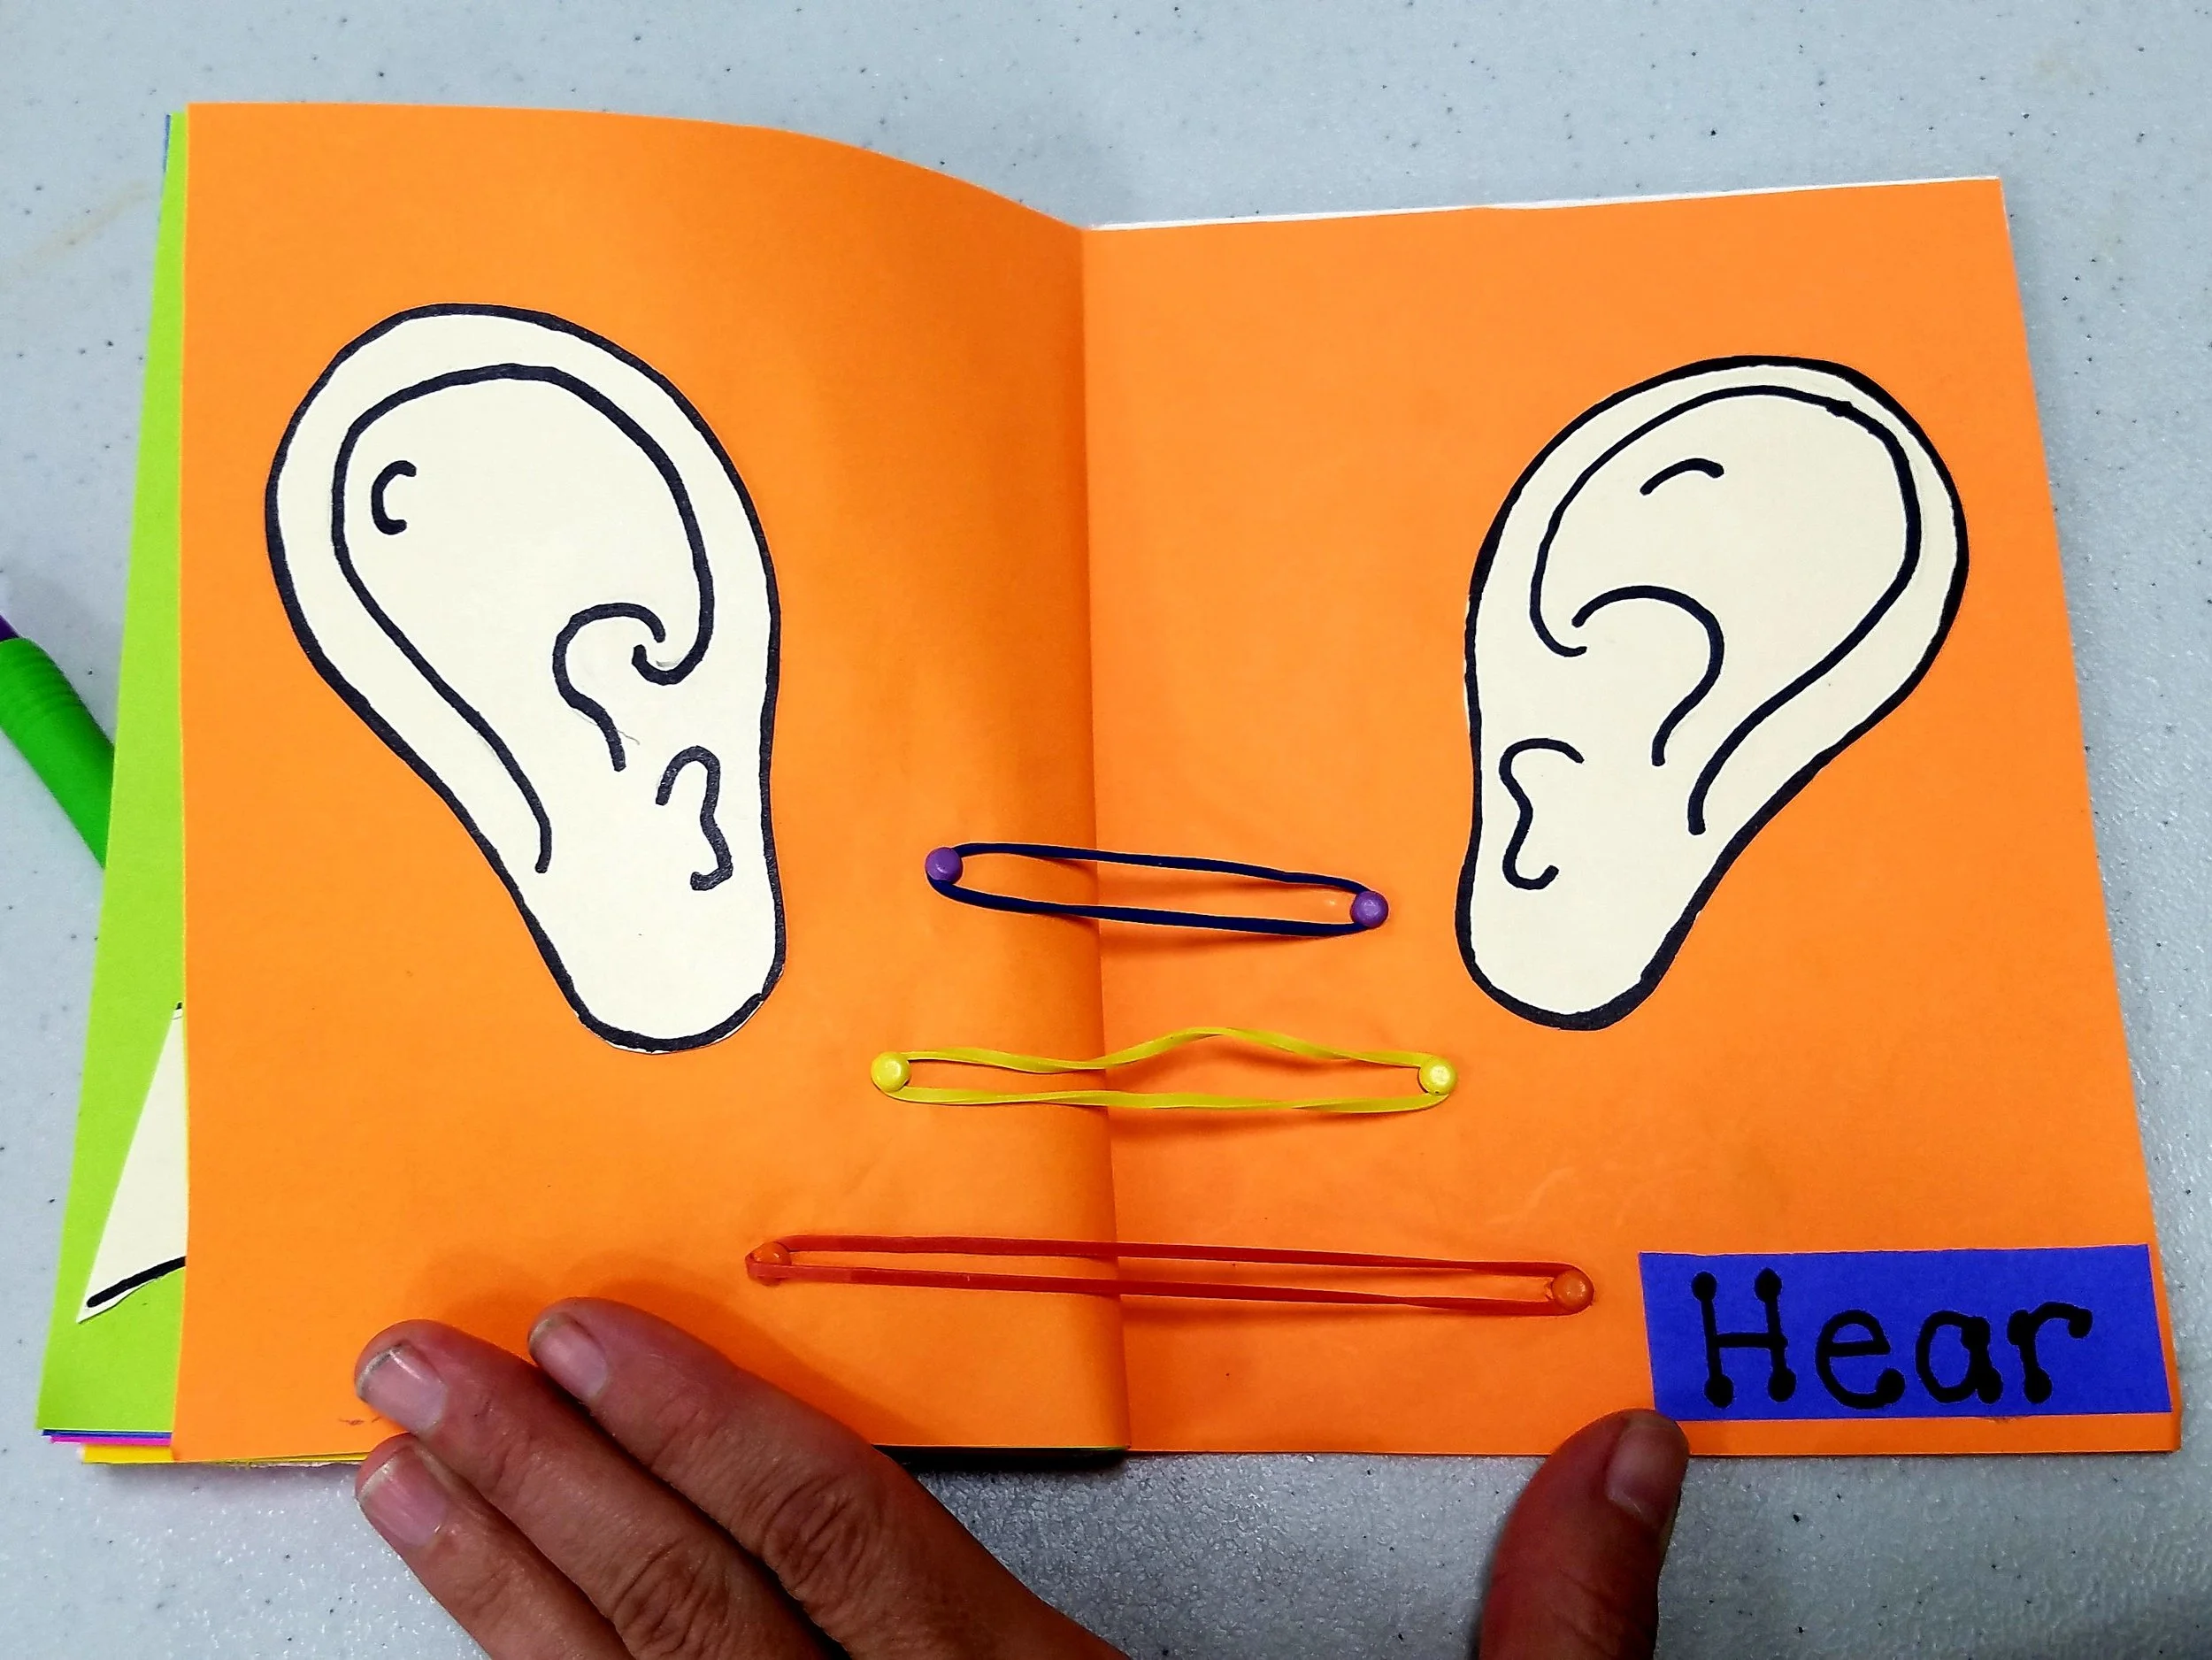
Here, rubberbands make interactive sounds to illustrate hearing.

Sandpaper is used to create great texture for this kitty tongue.

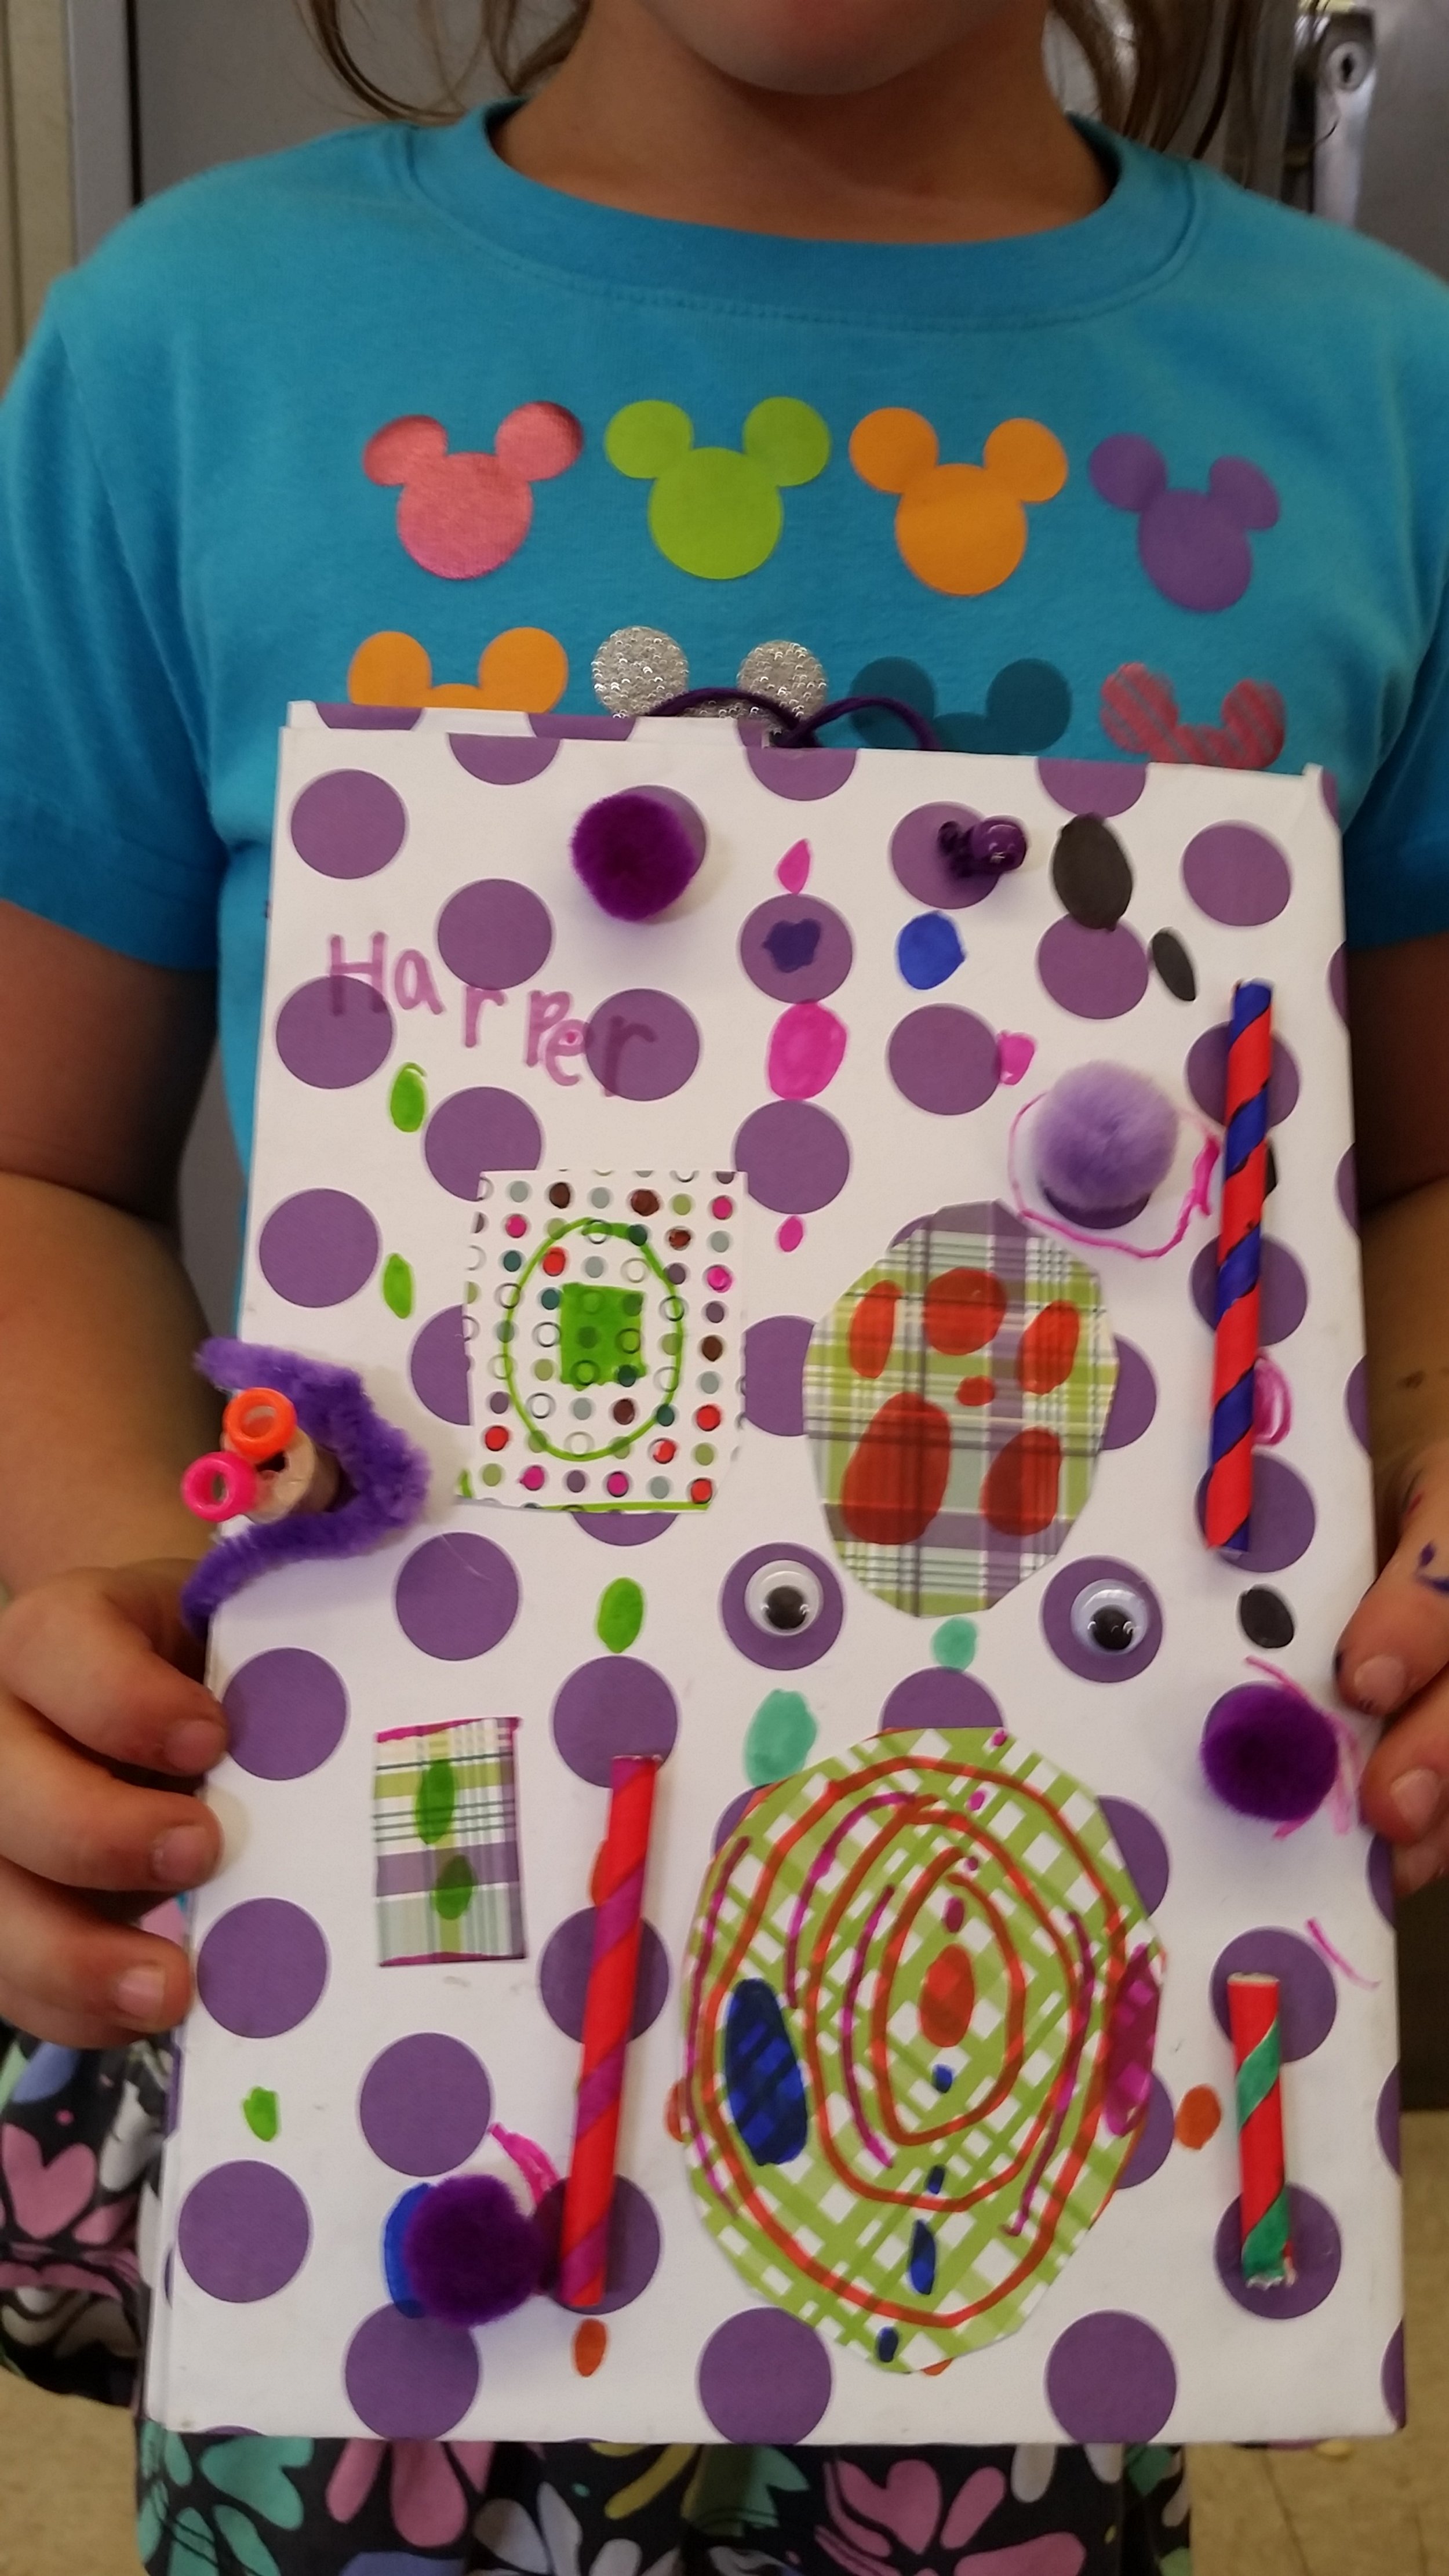
Books can help capture and document student engagement in the Design Process. This "Brain Book" was used in STEM club.

Folded grid paper is great for sketching and planning ideas.

Students can even add cool custom circuits and LED lights. See the tutorials below for making Circuit Cards.
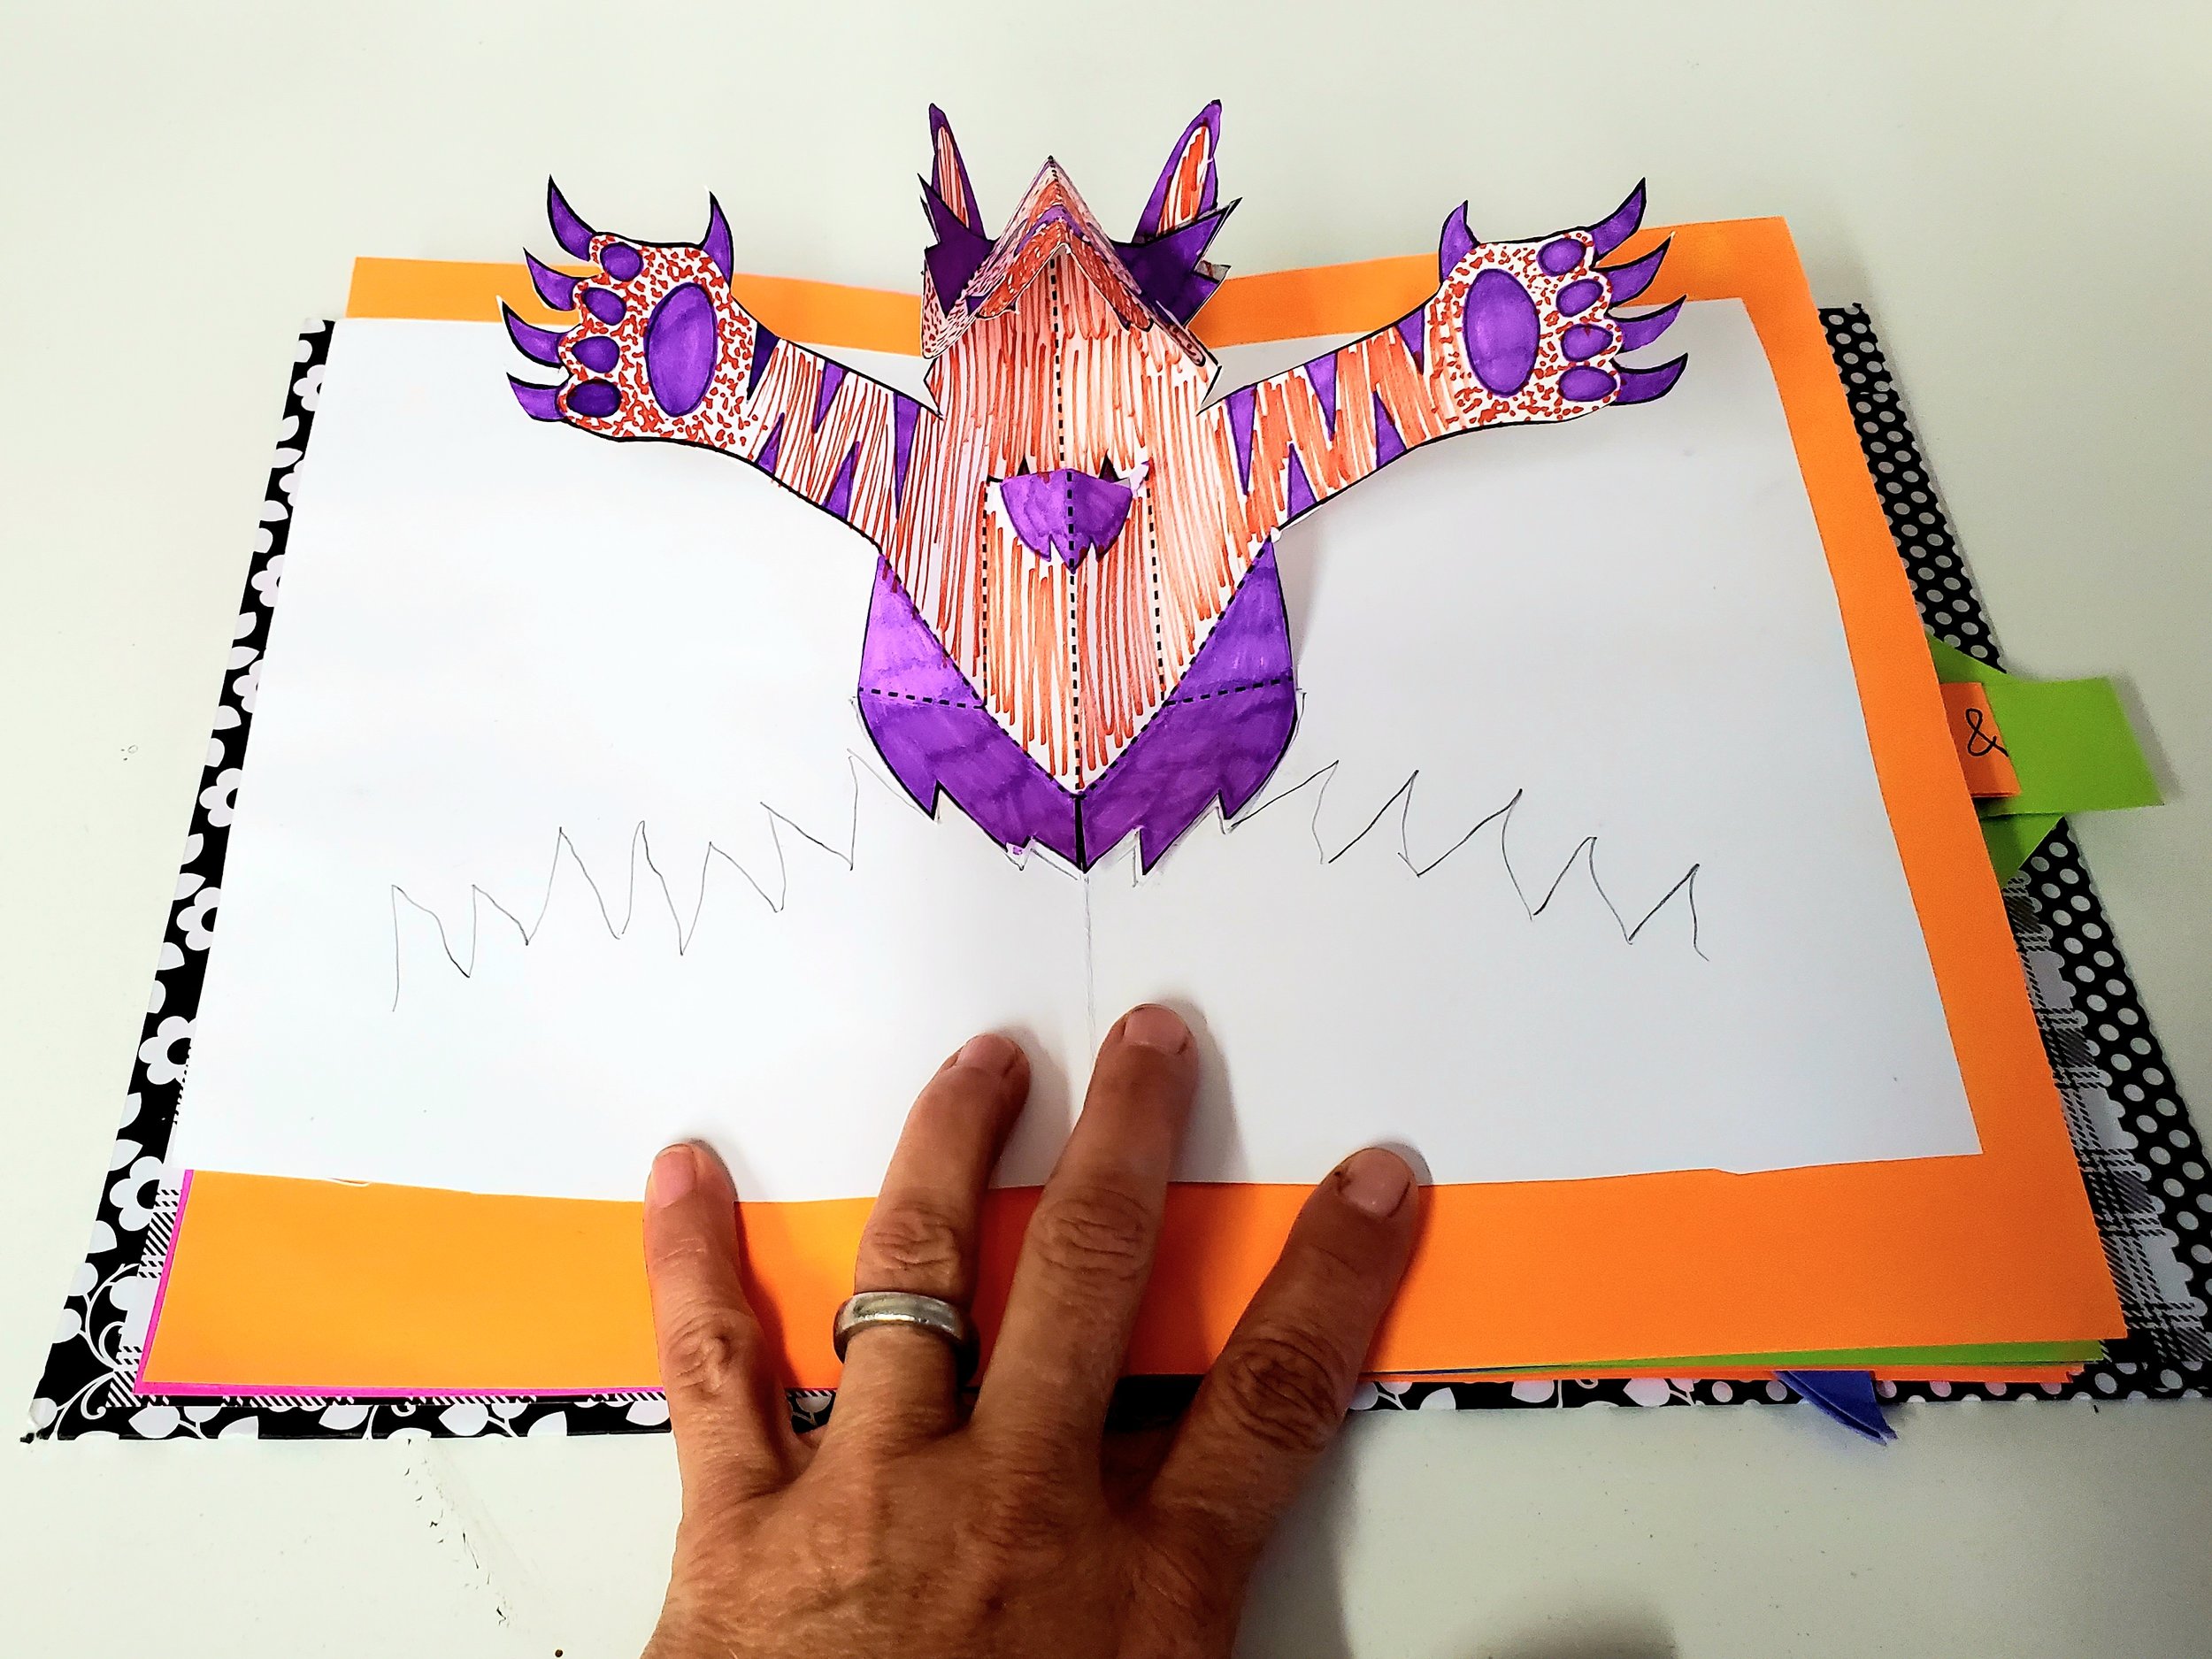
You can also download pop-up creature templates for awesome additions.

Or, you can make origami folded pieces for your own pop-up delight.

Accordion books are great for young kids, too.

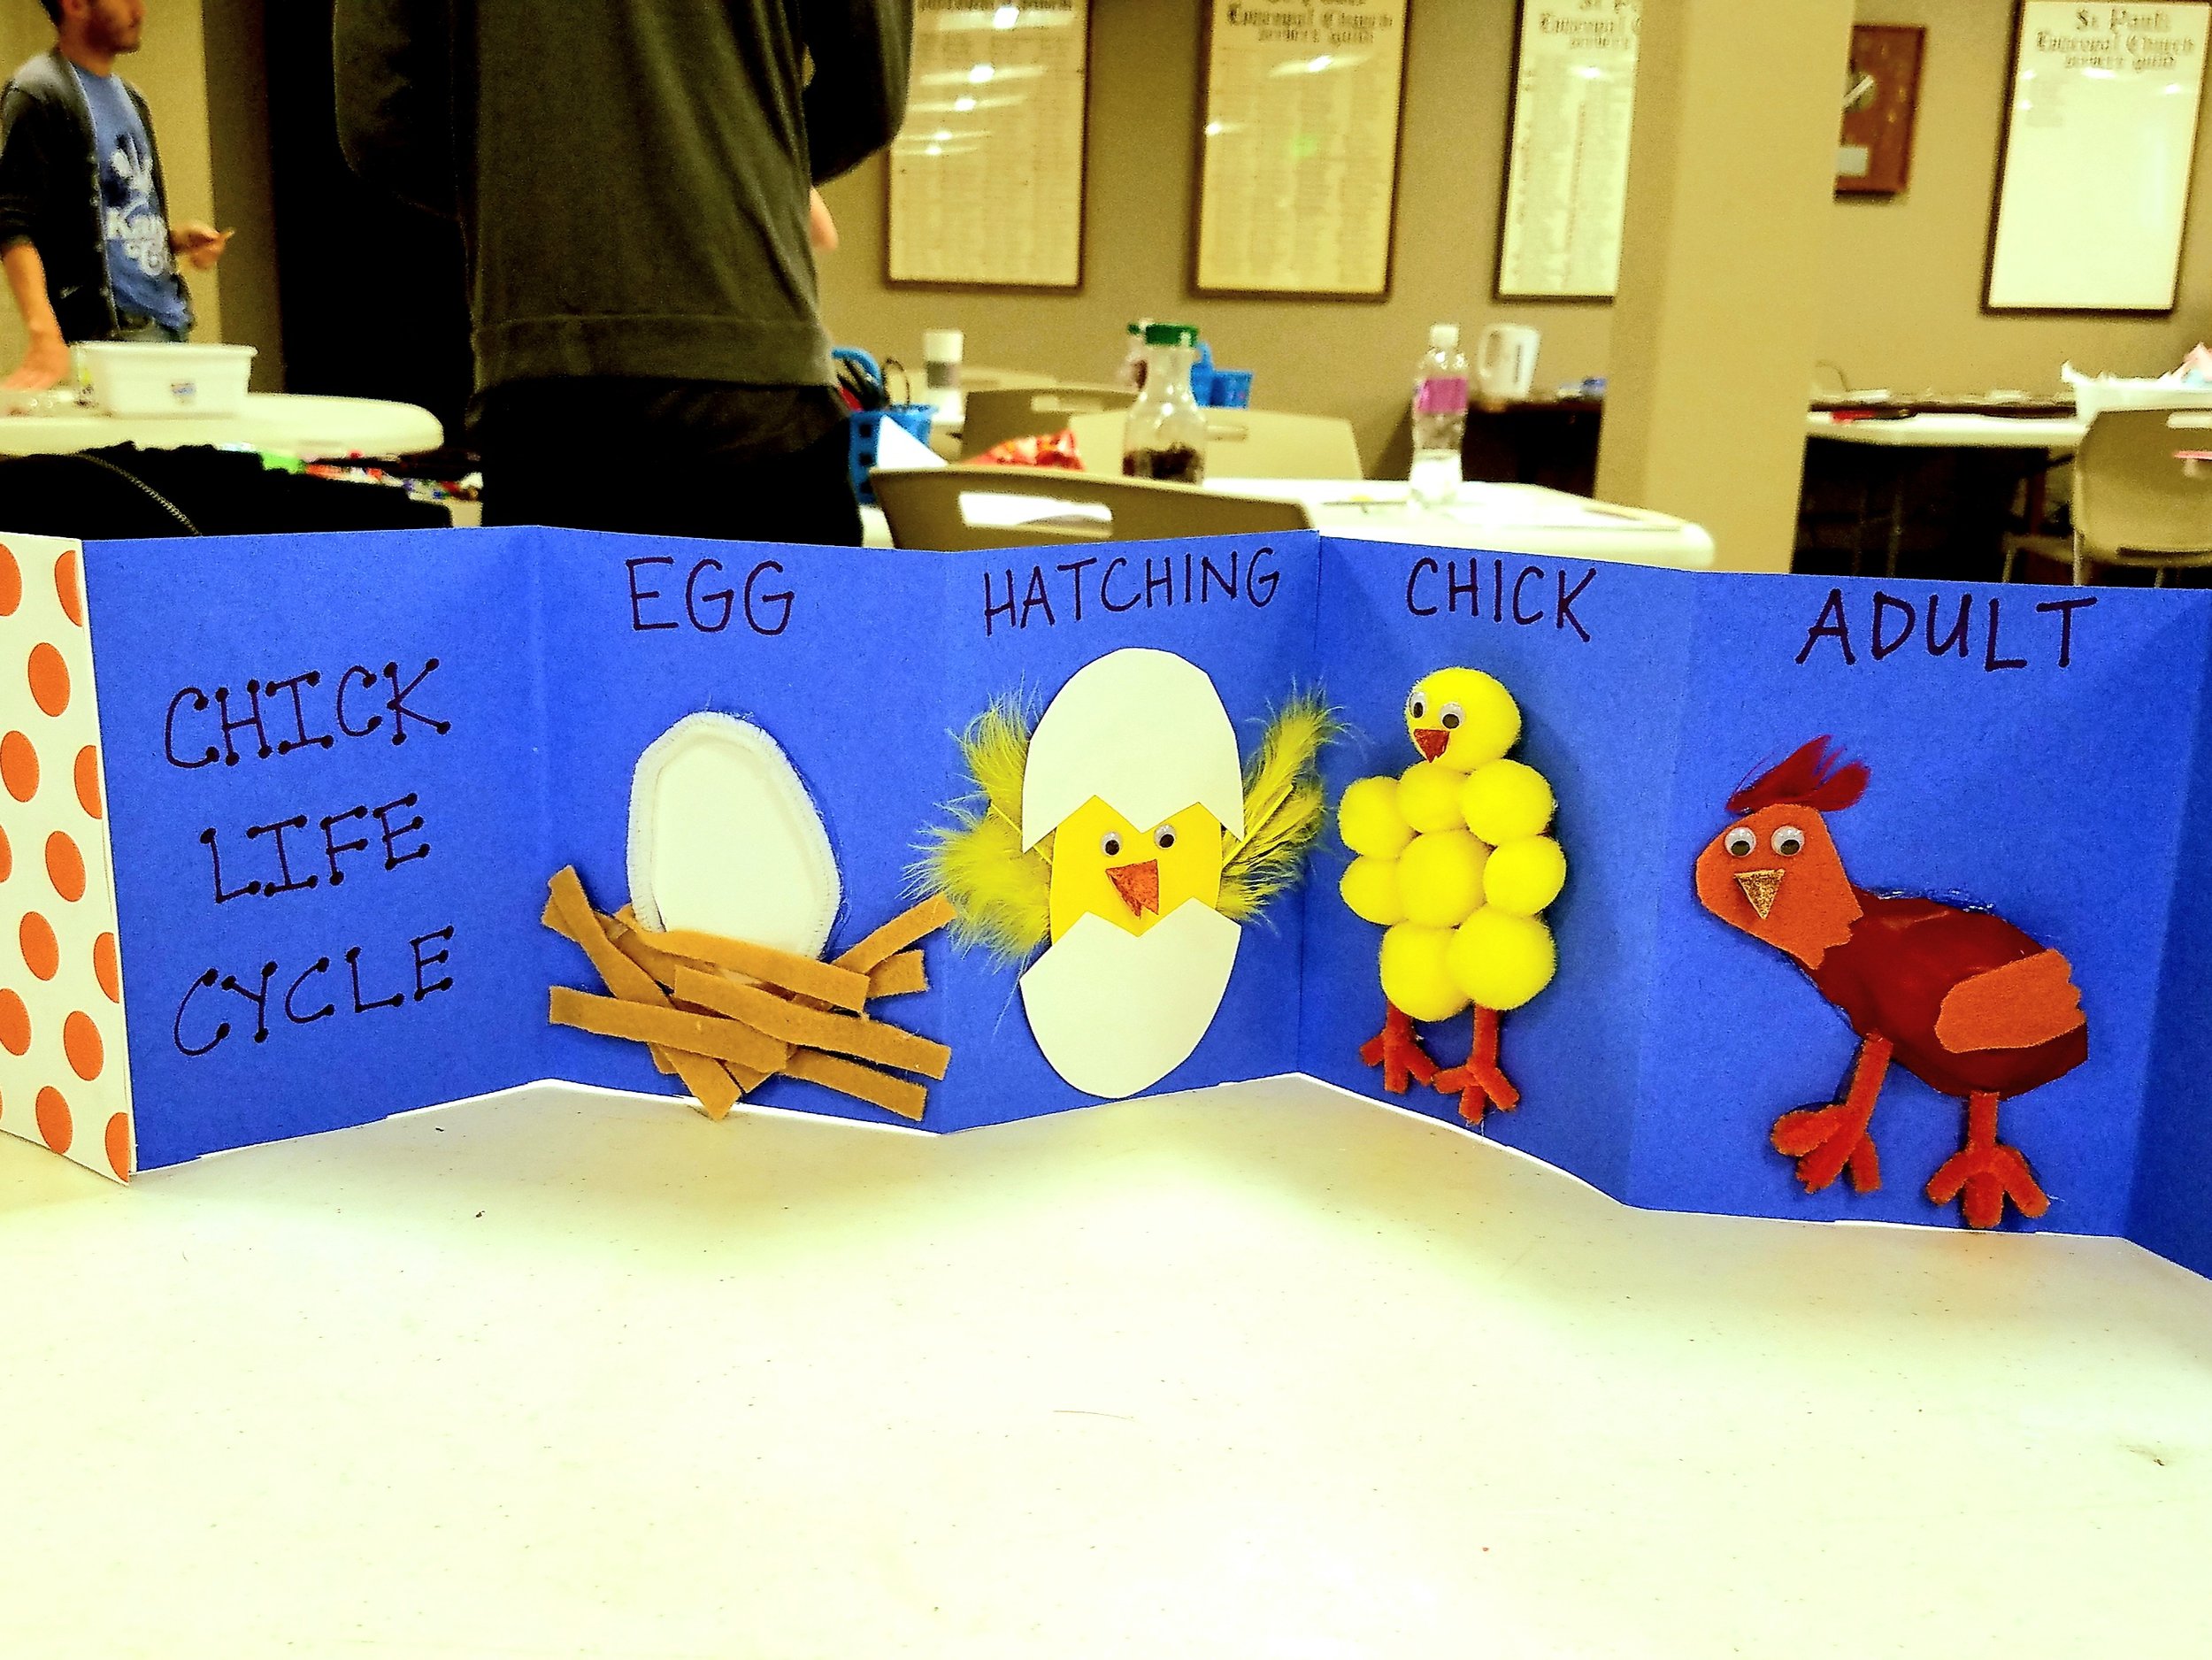
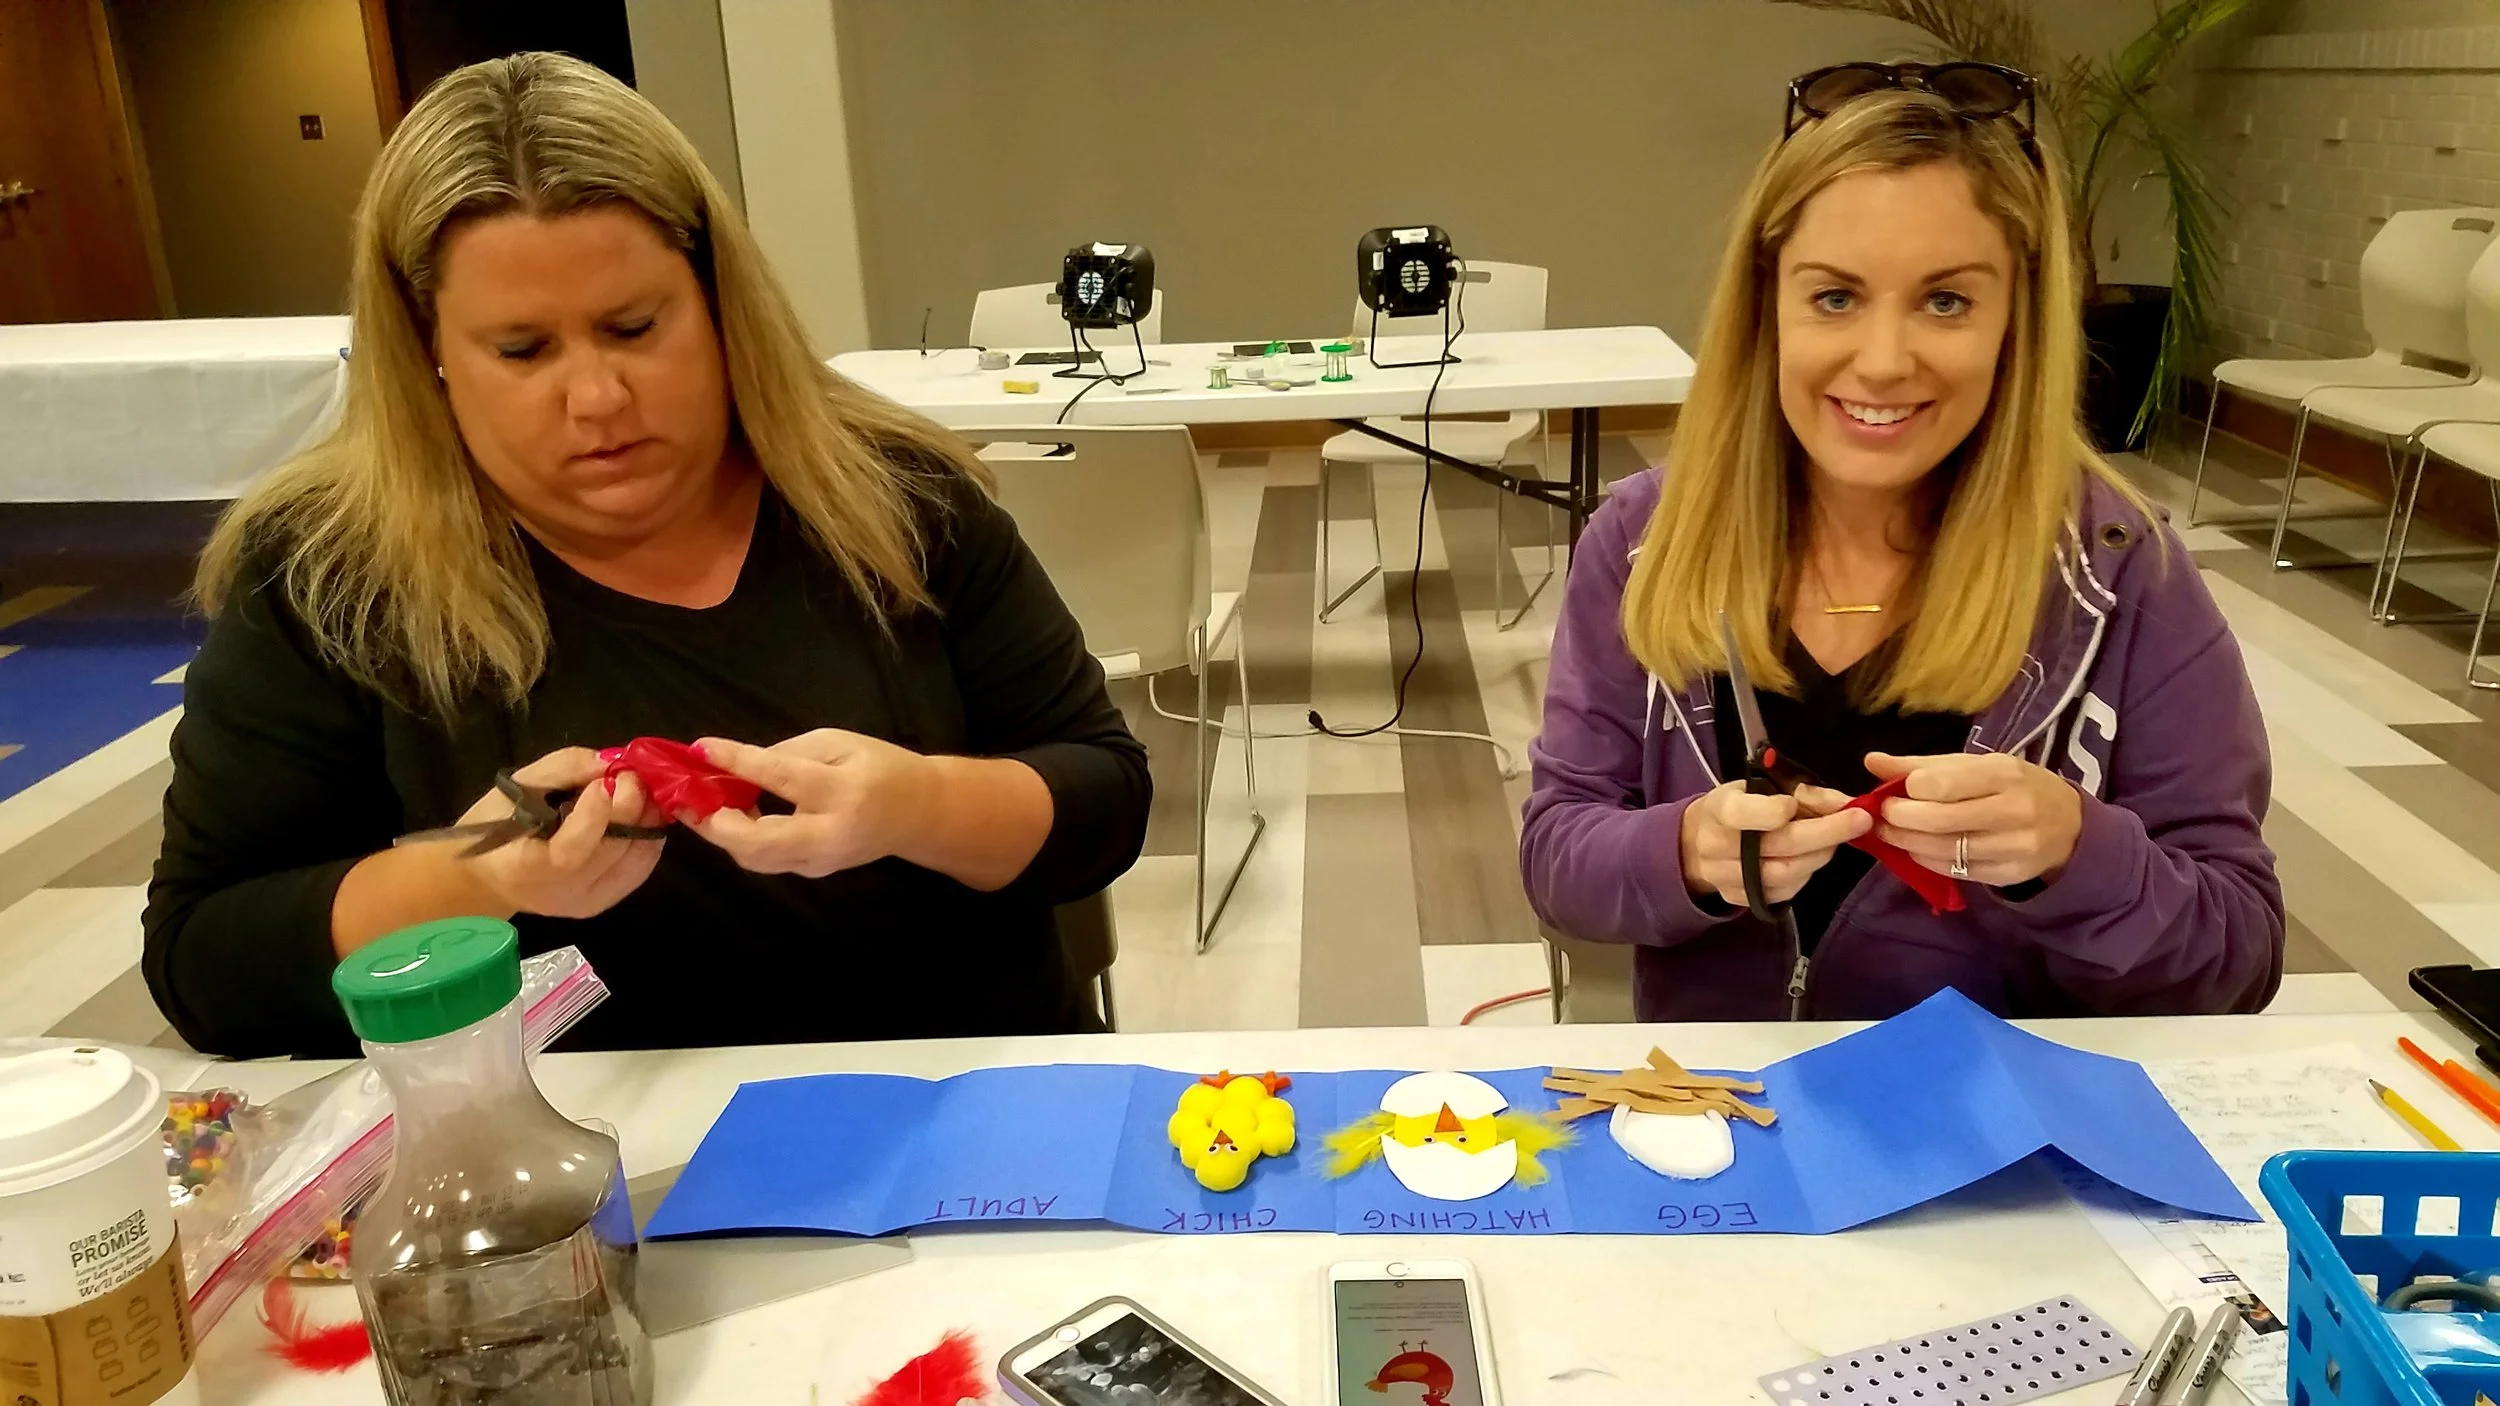
These Kindergarten kids raised chicks and made books to illustrate the life cycle of a chick.

They added many 3D sculptural elements using craft materials. They also made a Circuit Card to add LED lights to their eggs.
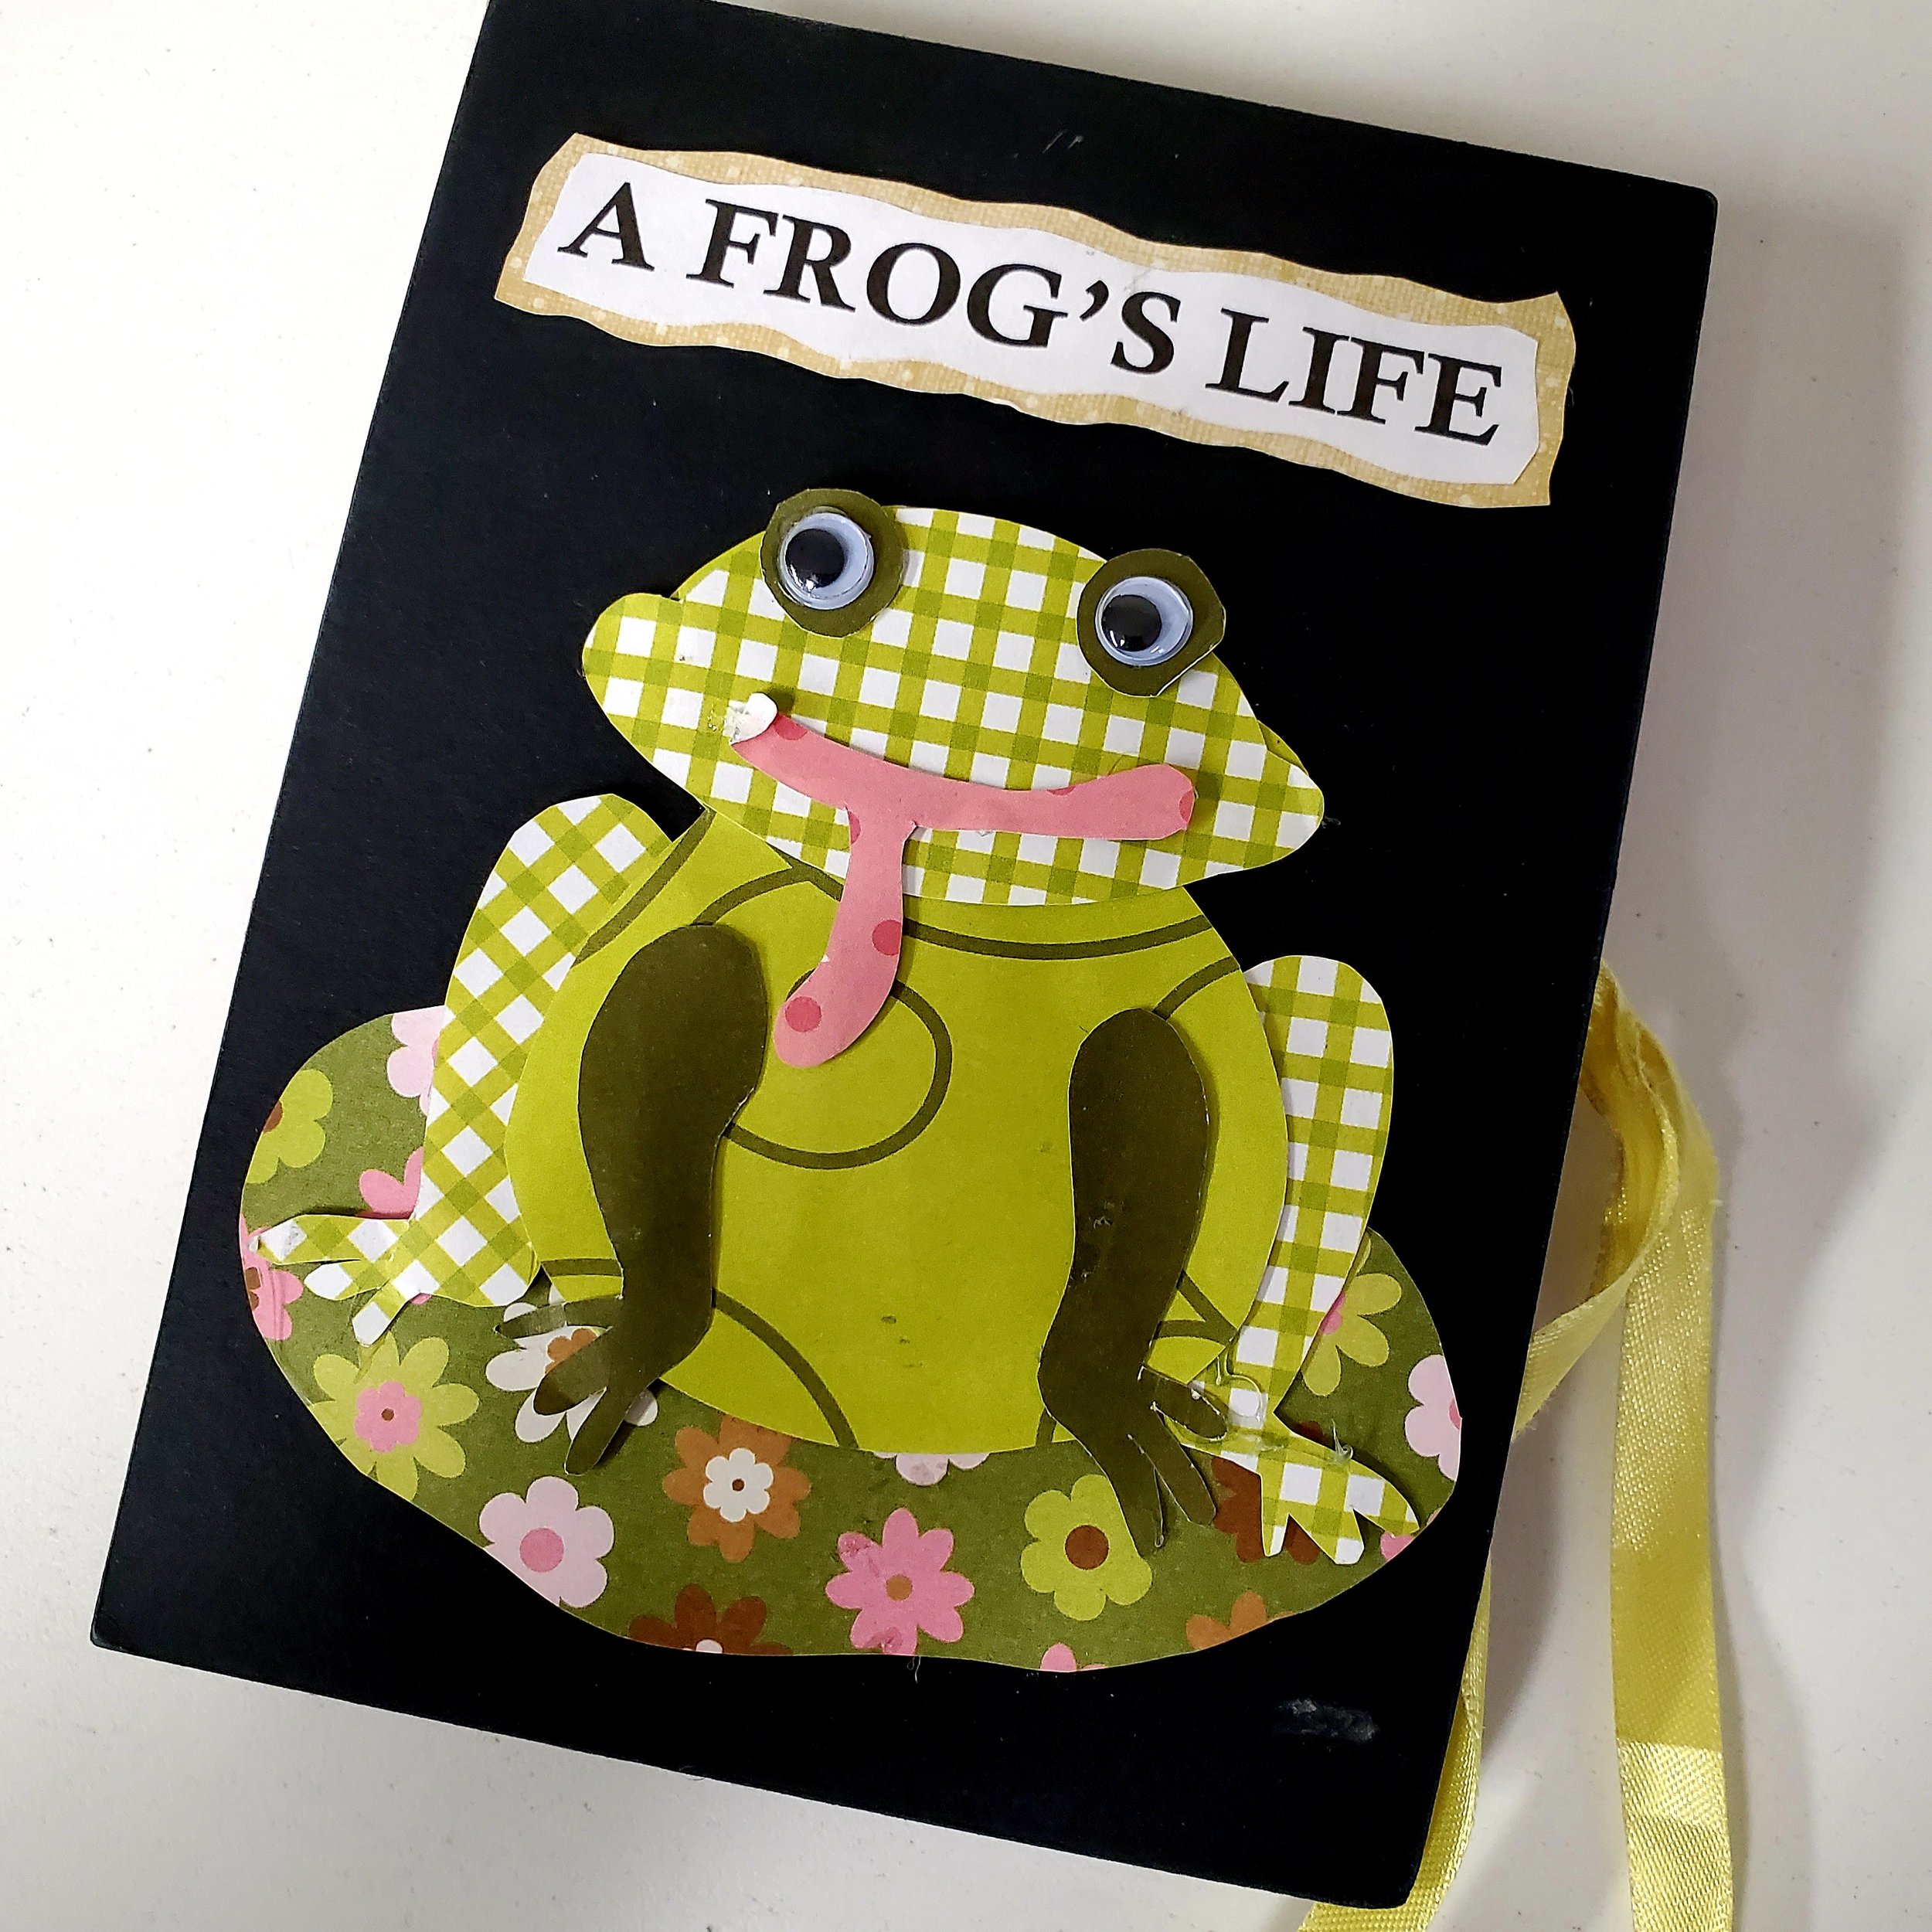
Books are great for any academic investigation ~ life science, Earth science, space science, history, geography, etc.

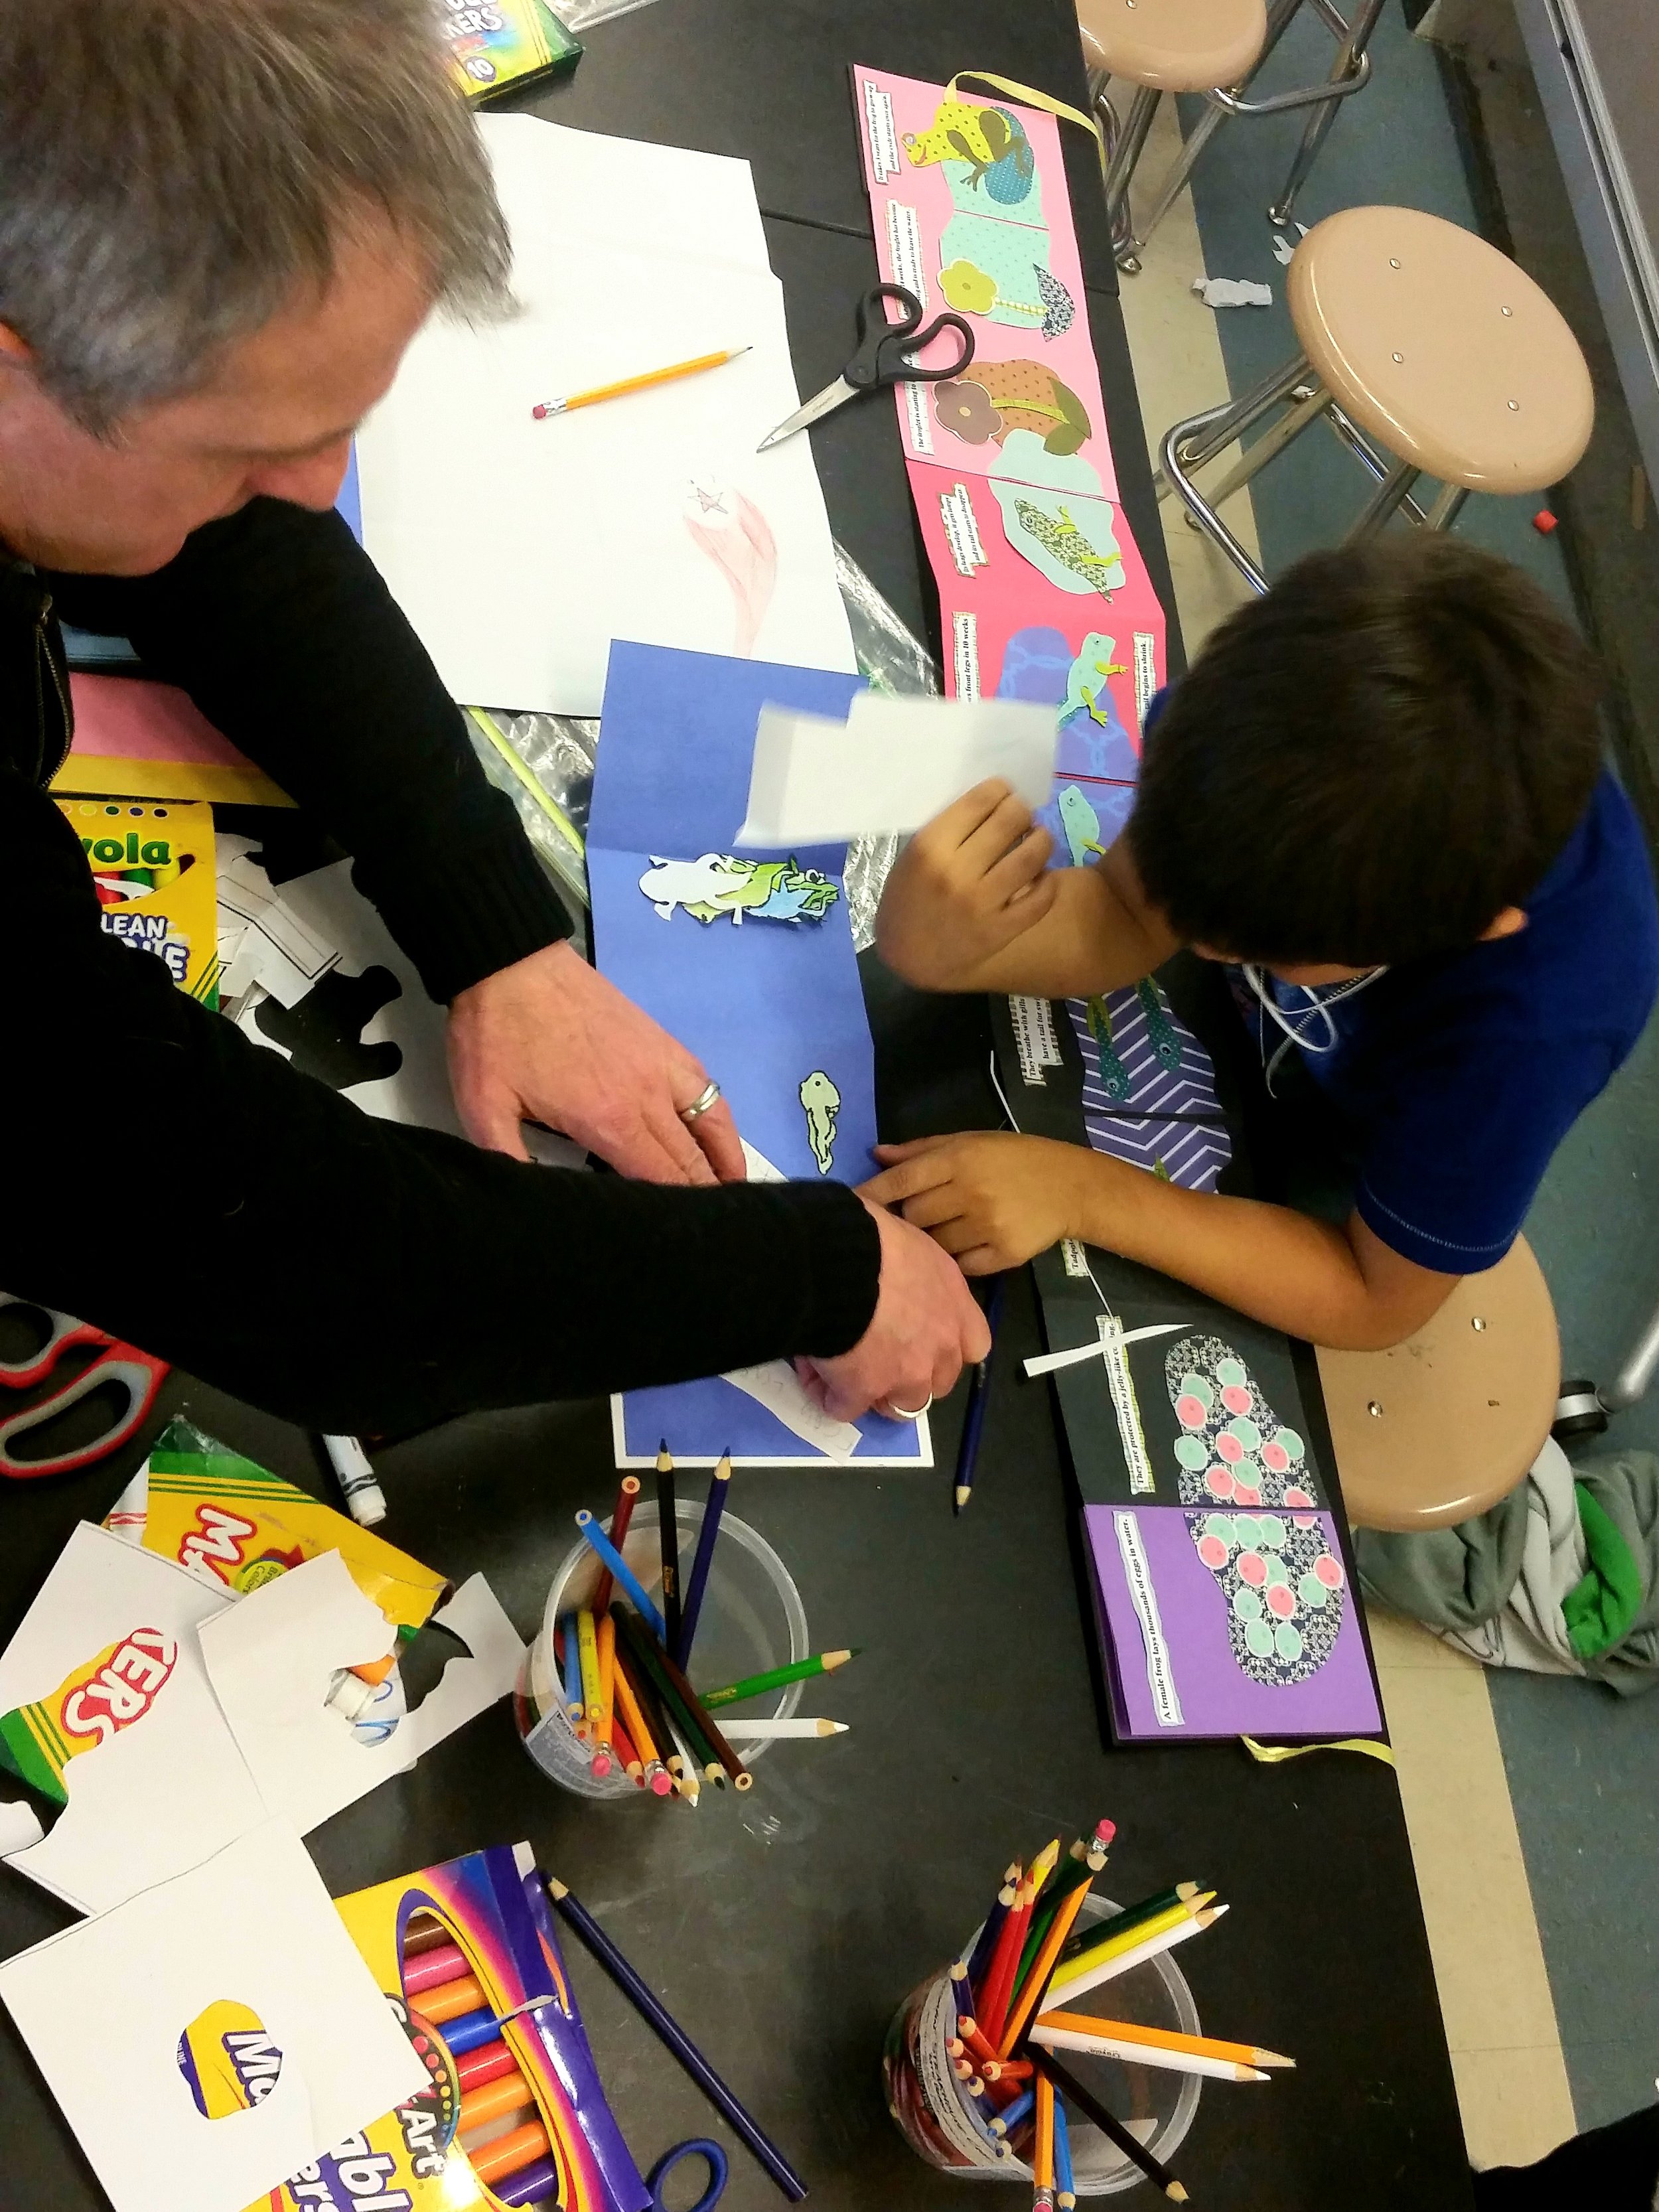
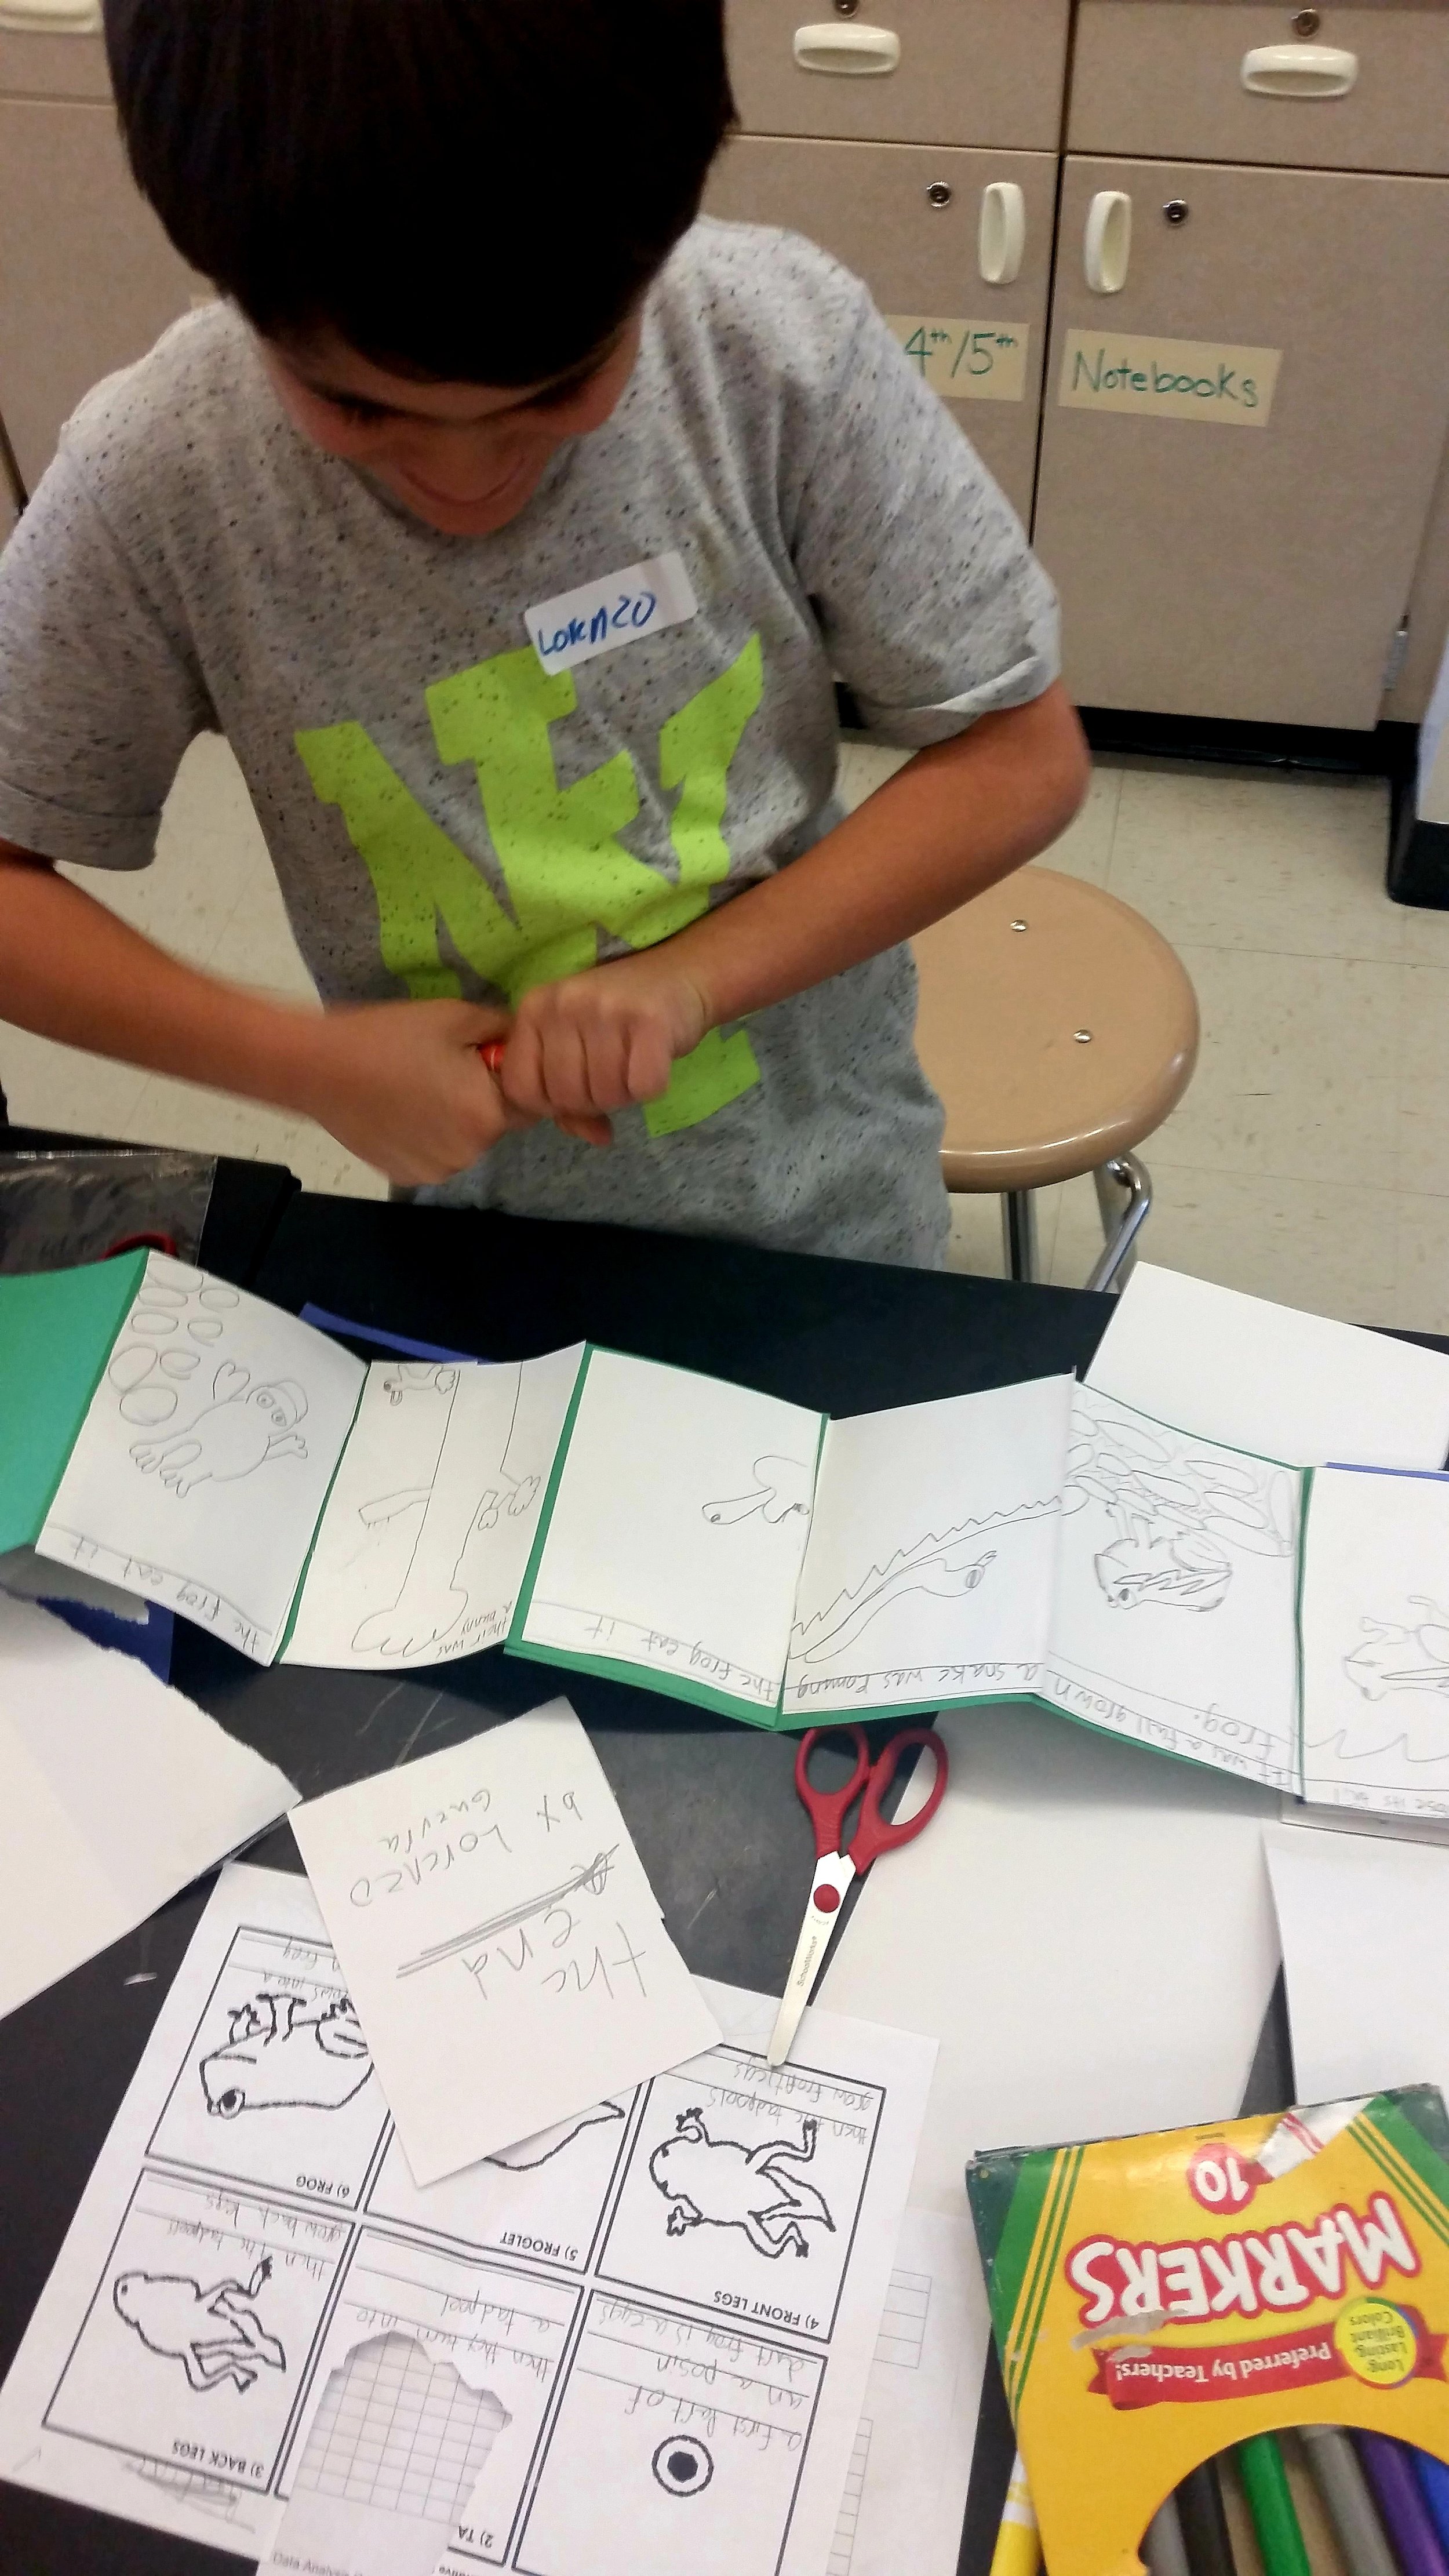
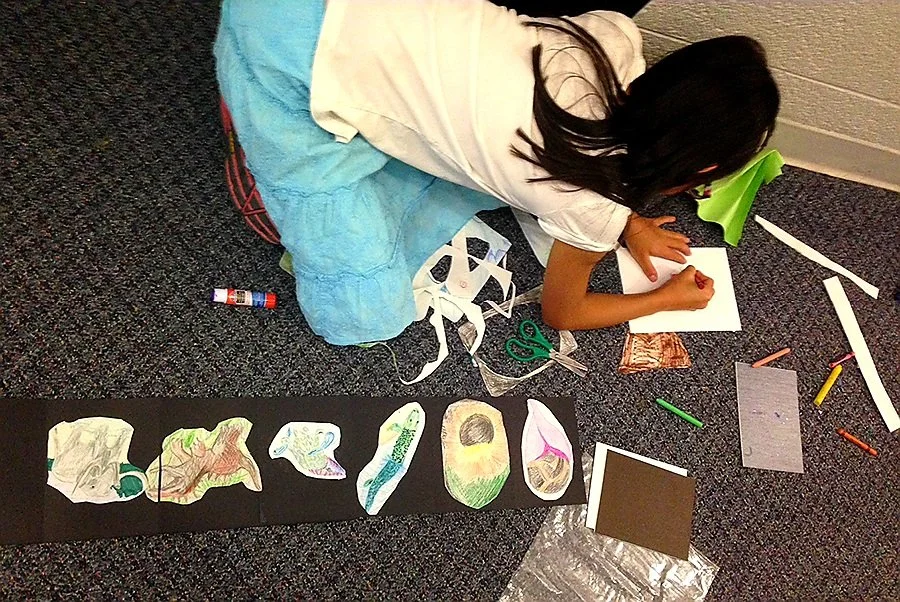
This 3rd grader is illustrating the life-cycle of a frog with sketches and text panels.

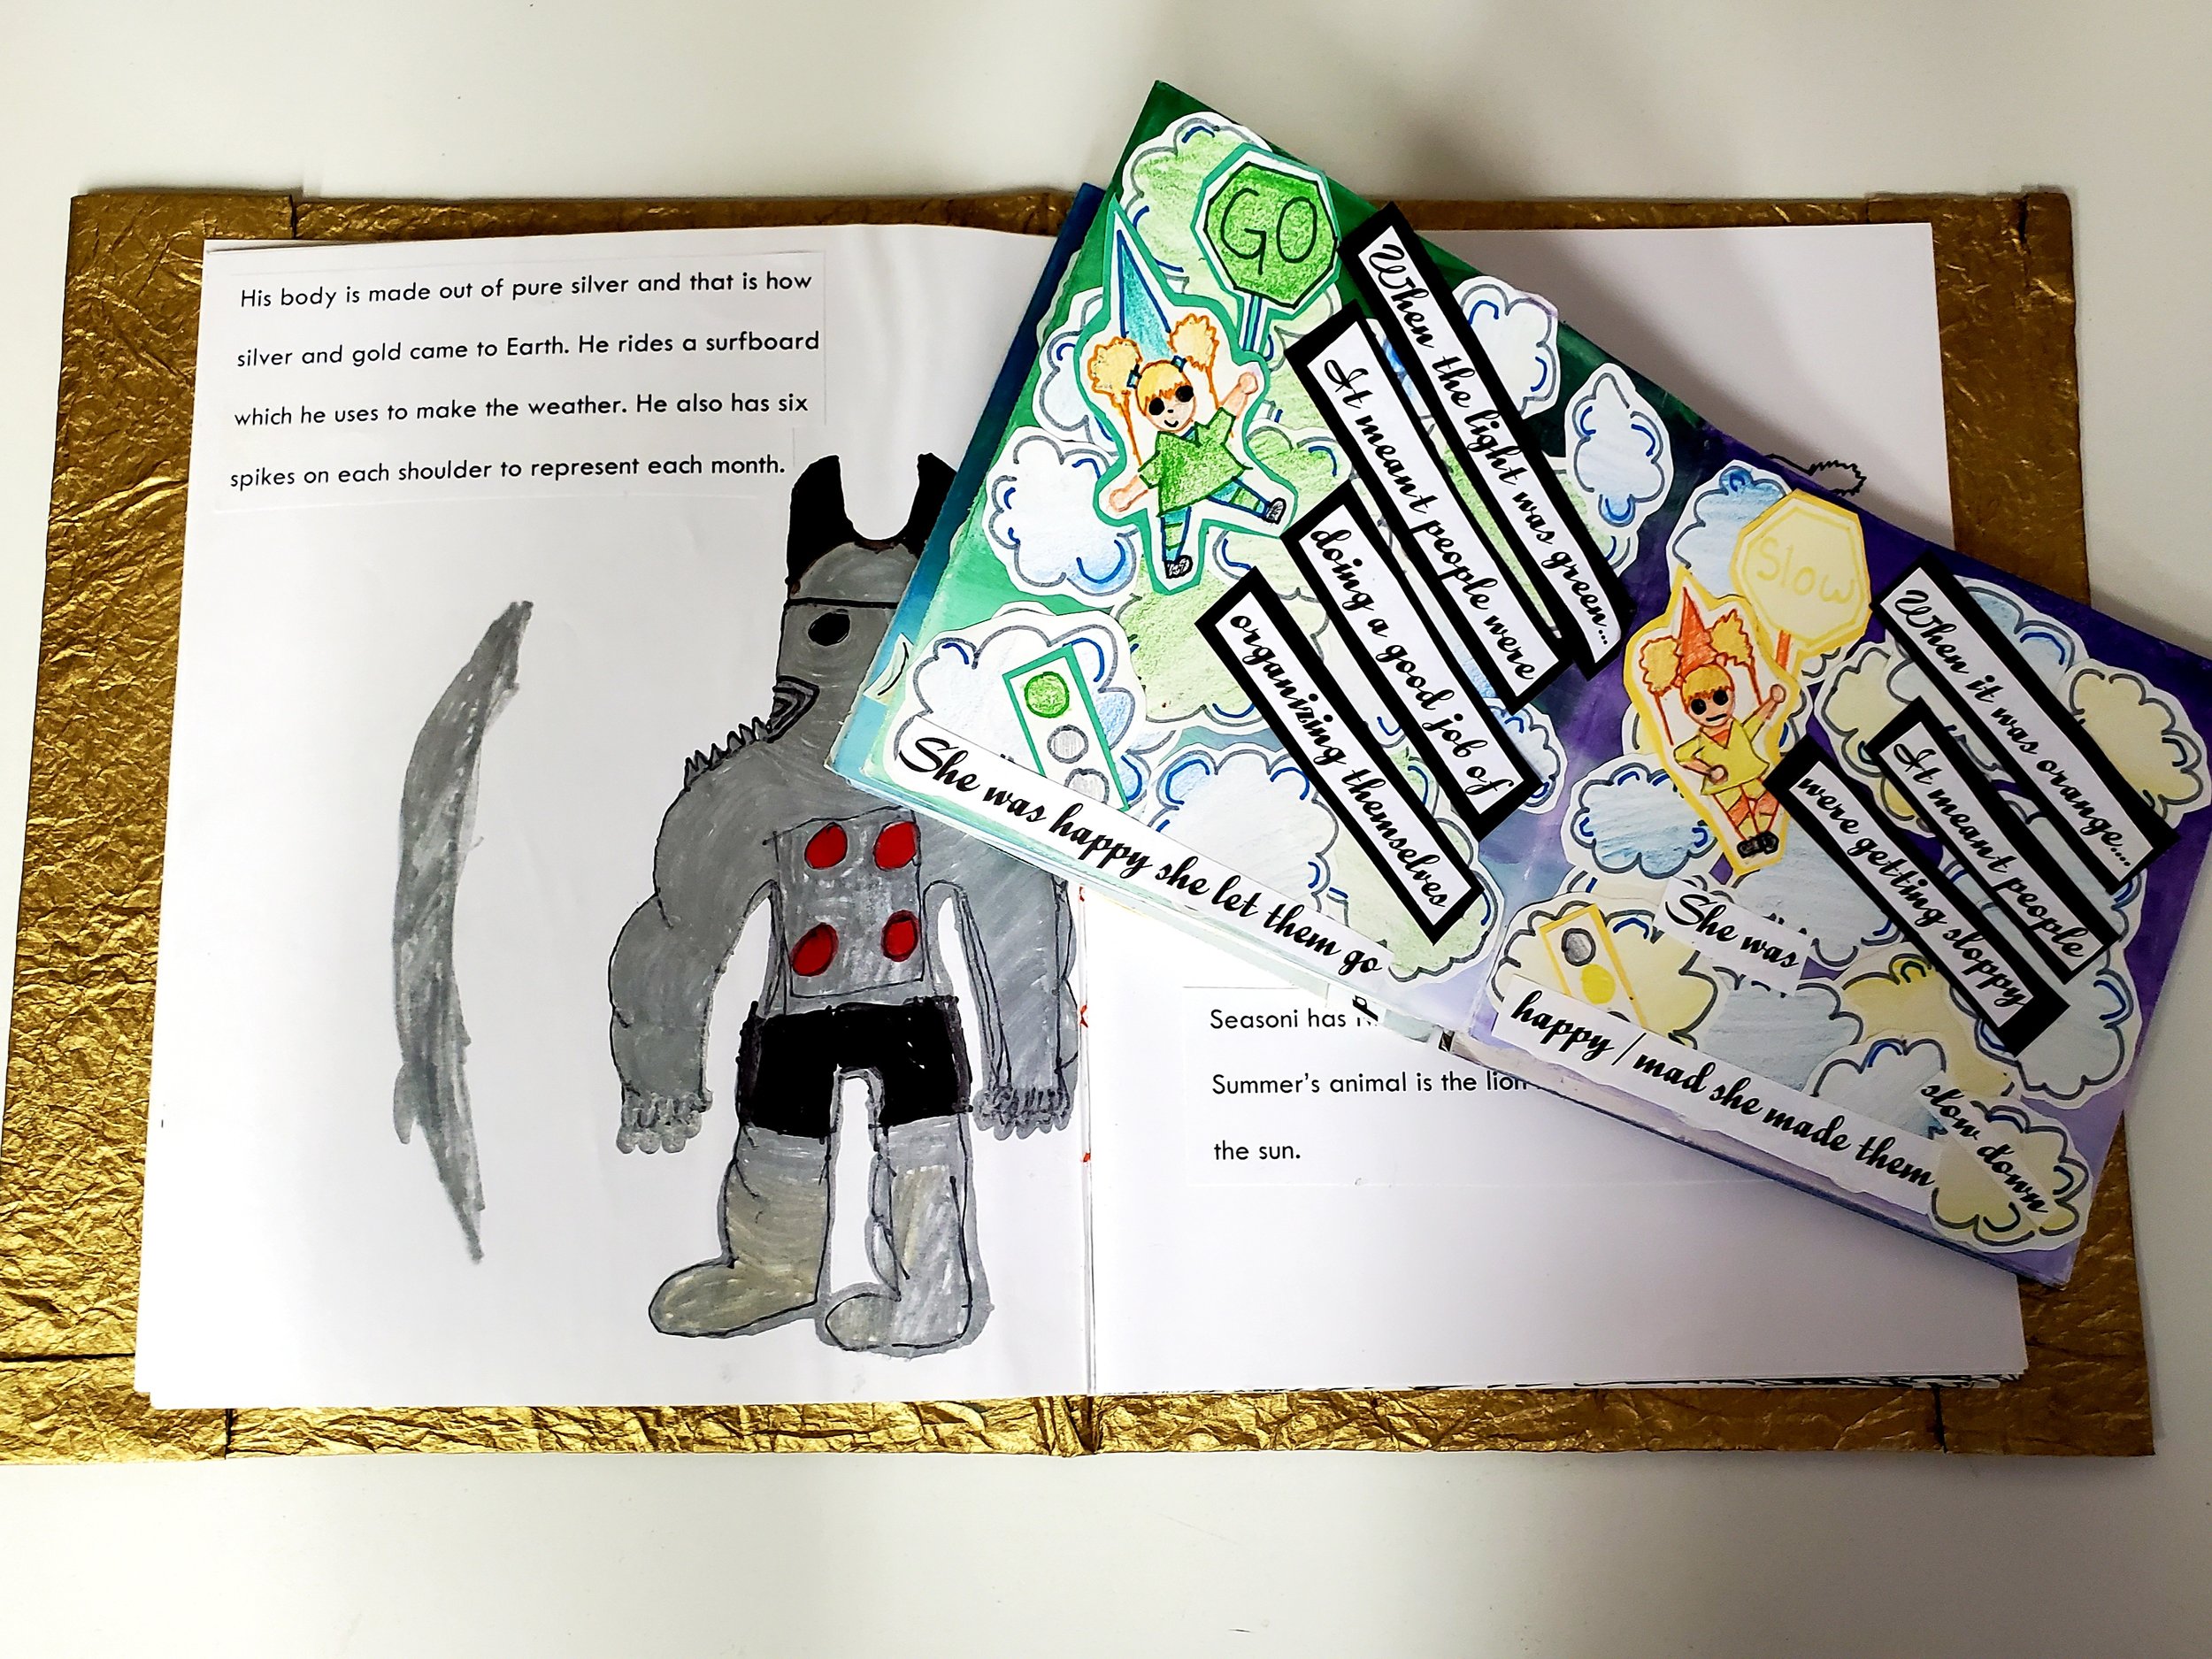
This student is using collaged paper and printed type to capture their writing.

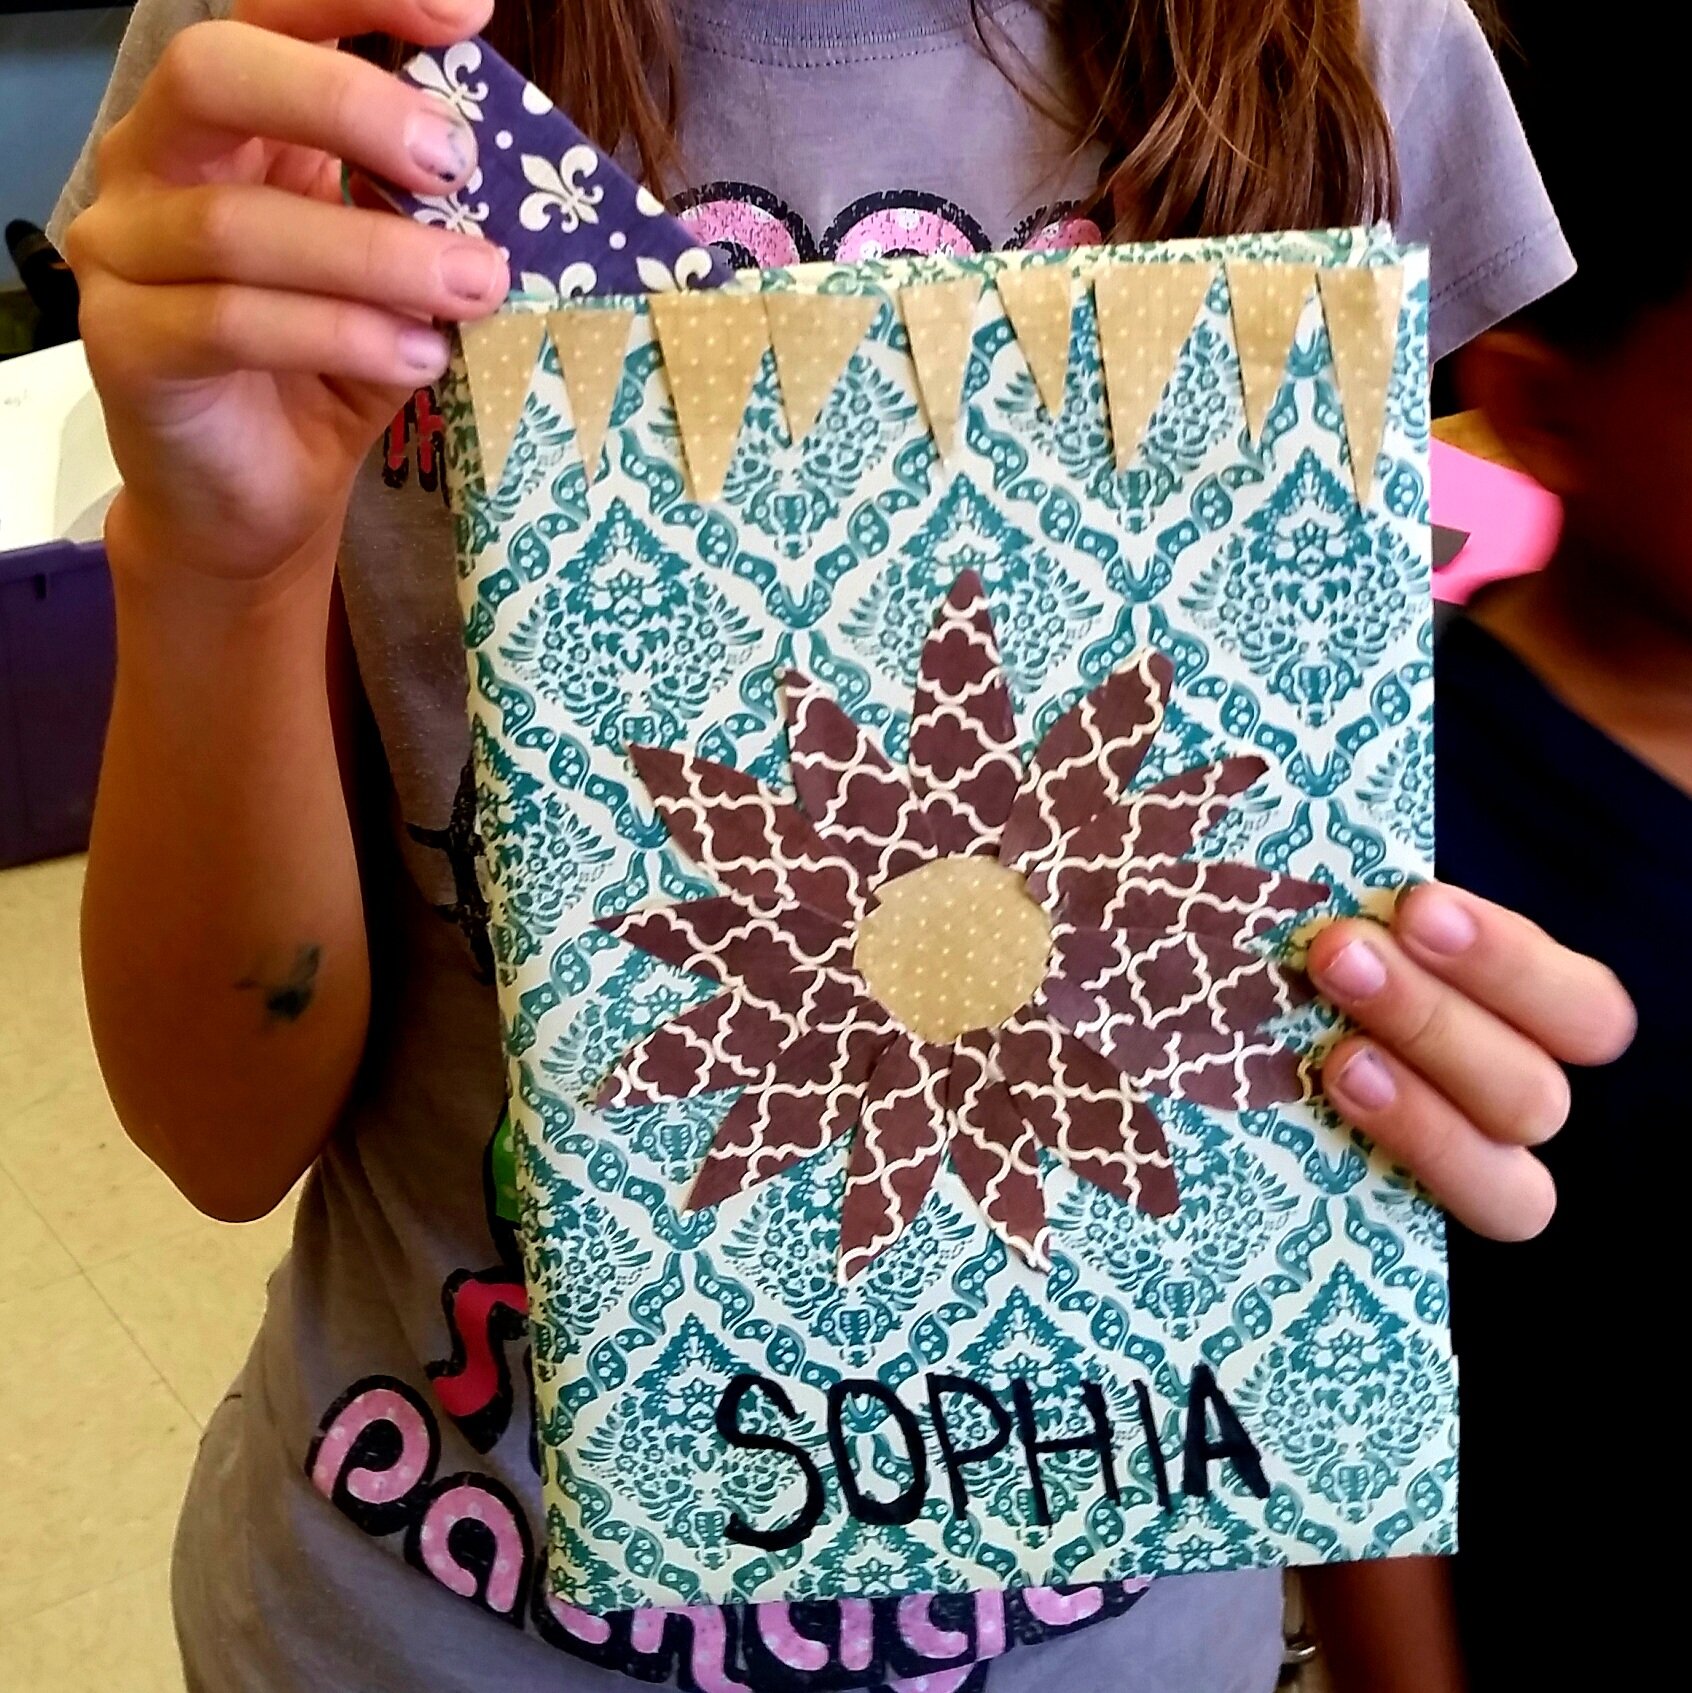
This 3rd grader combined a variety of elements to express her work and scientific learning beautifully.
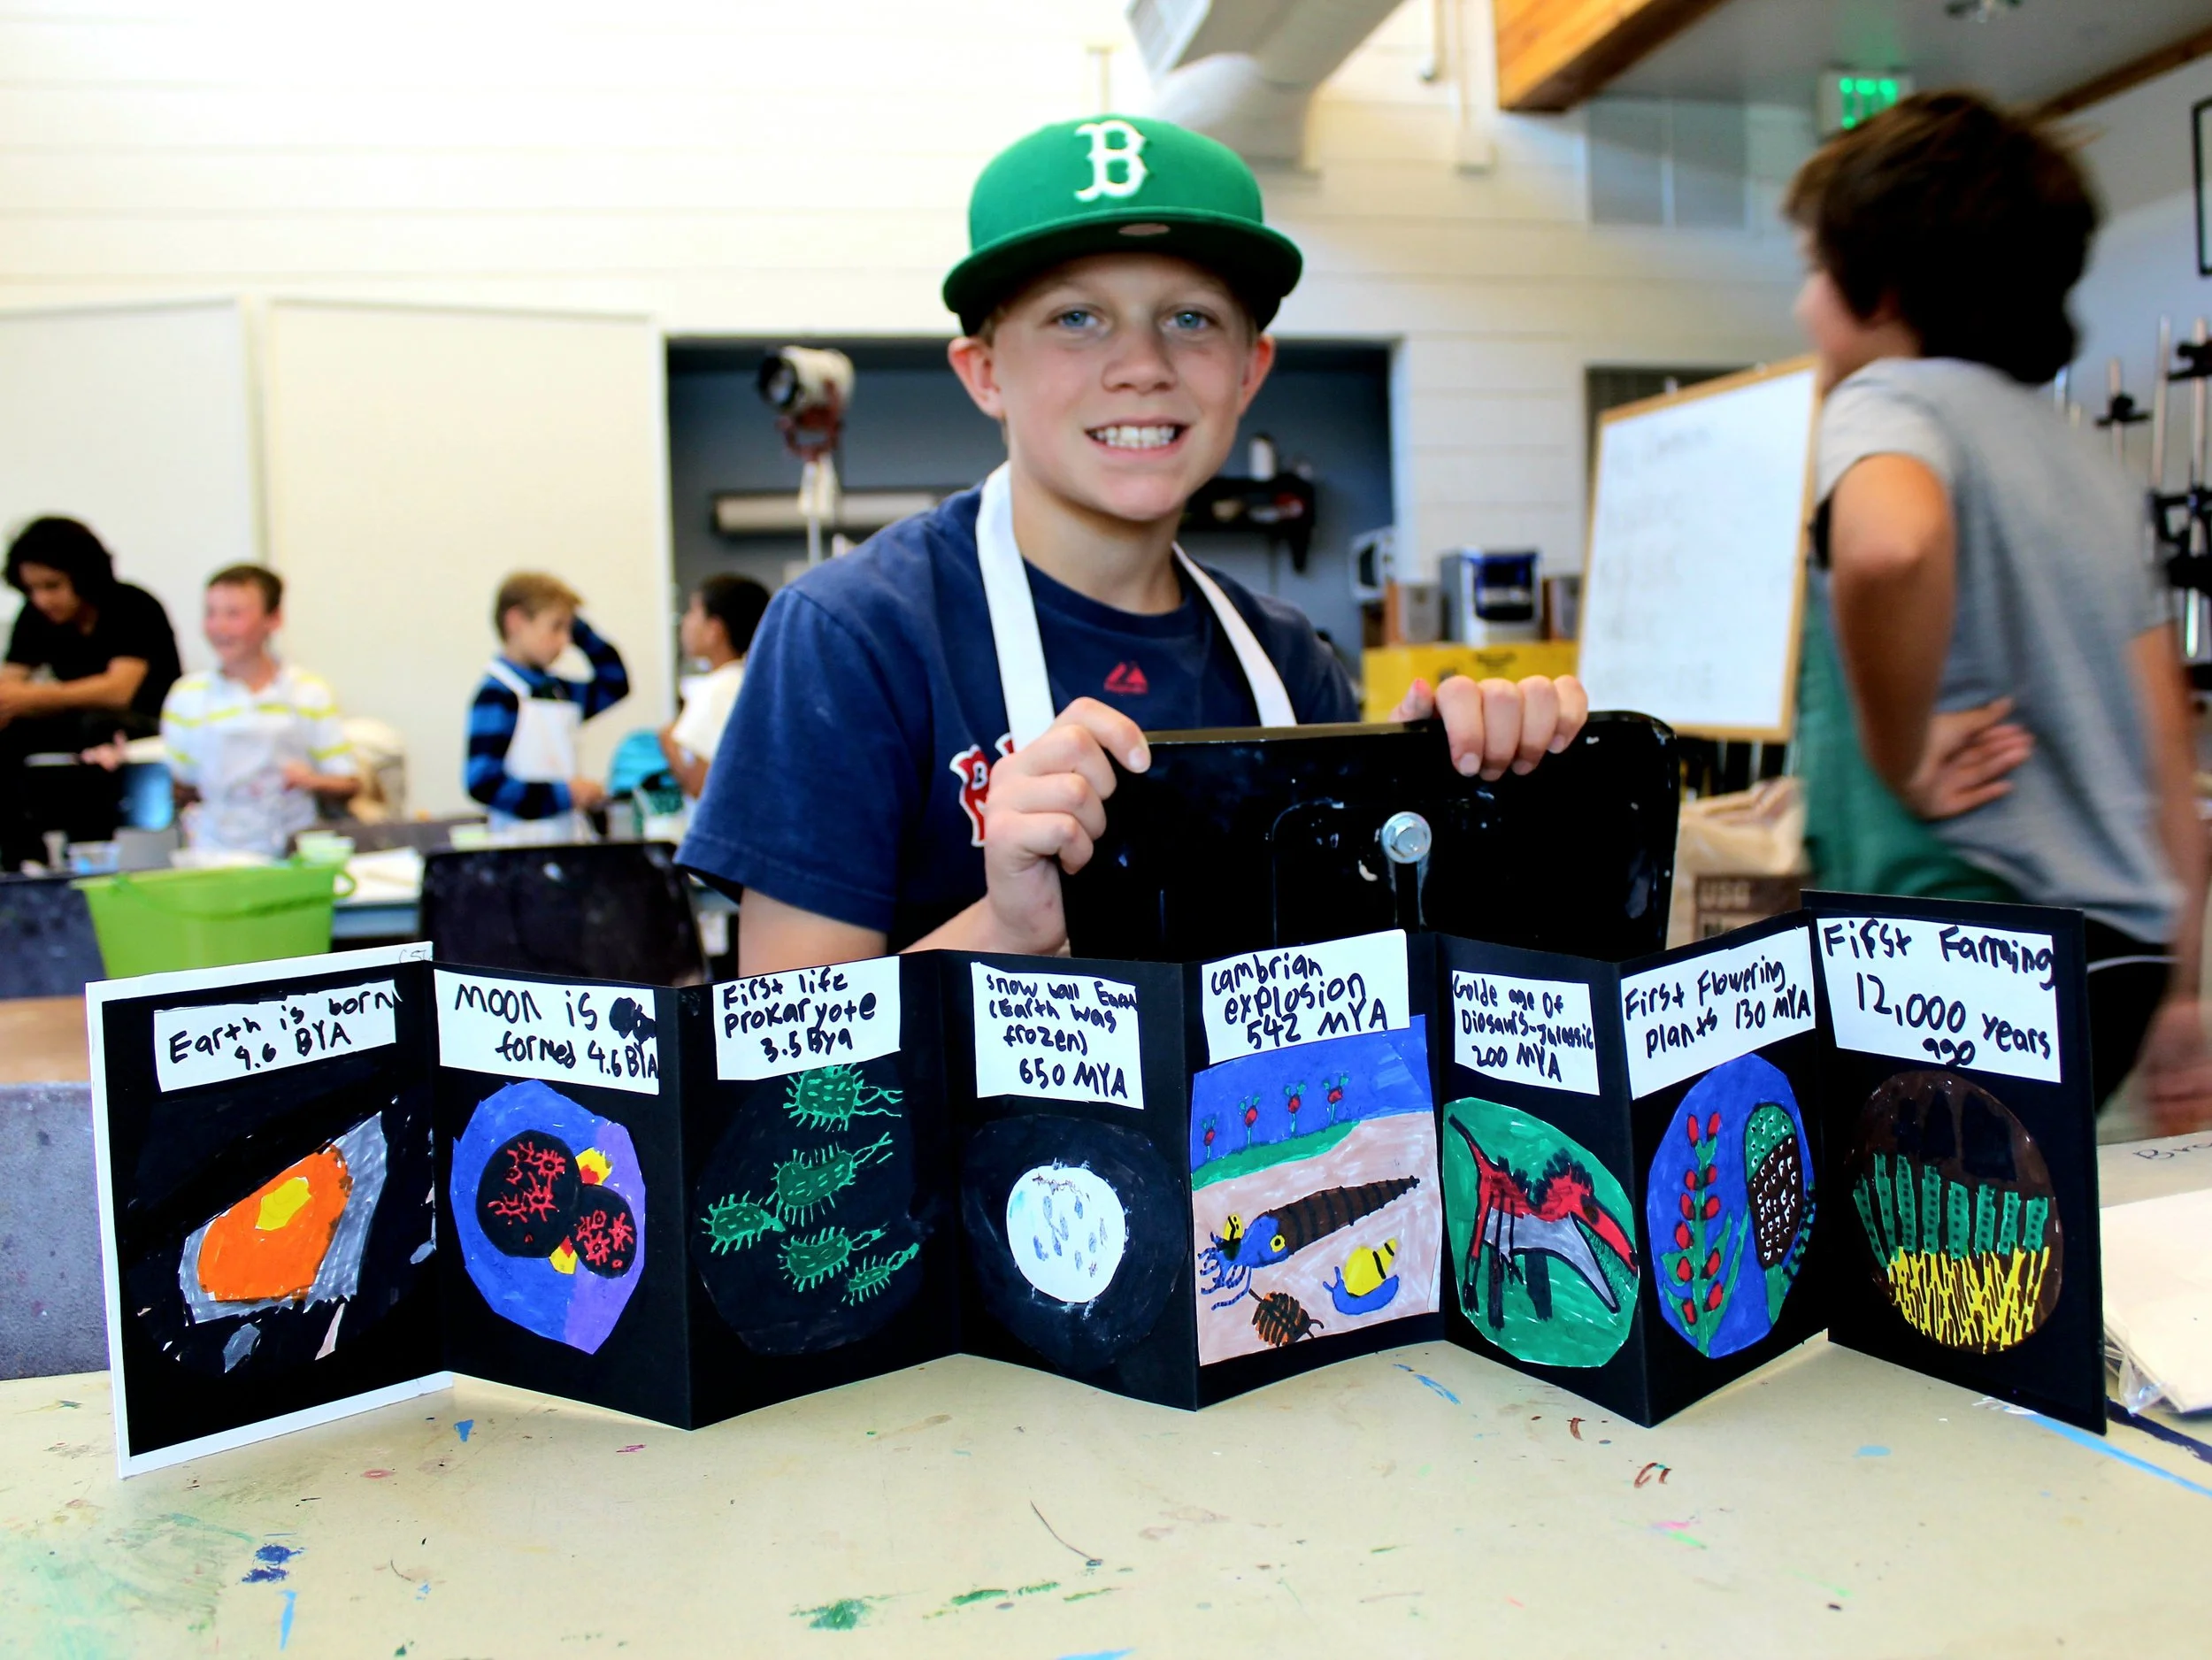
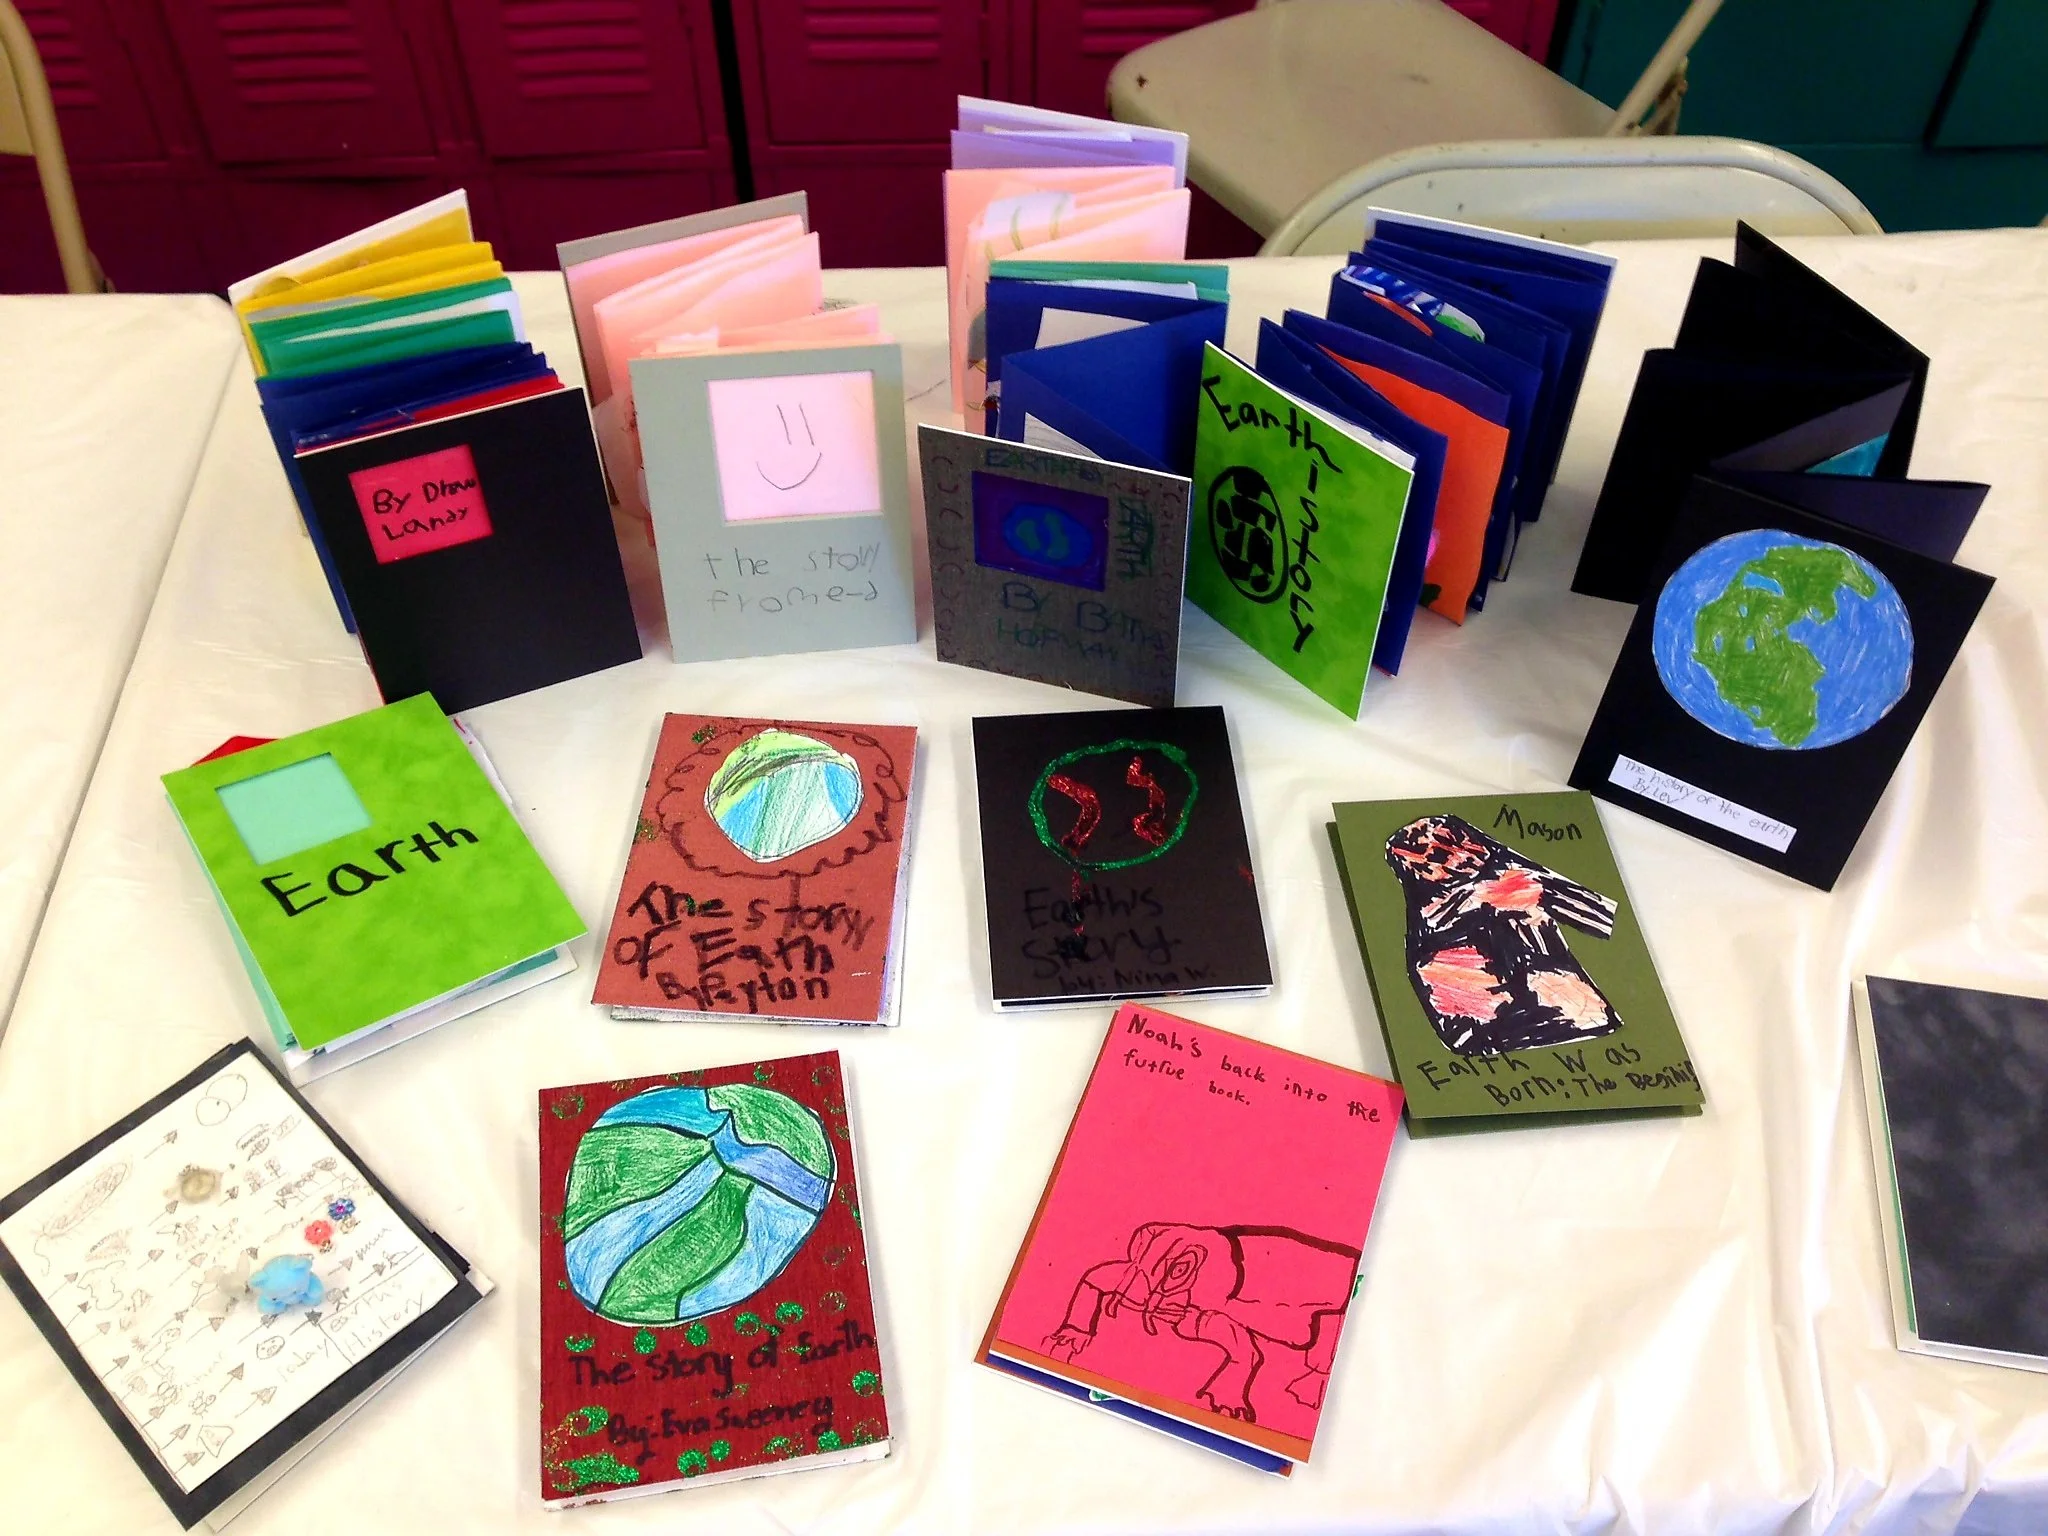
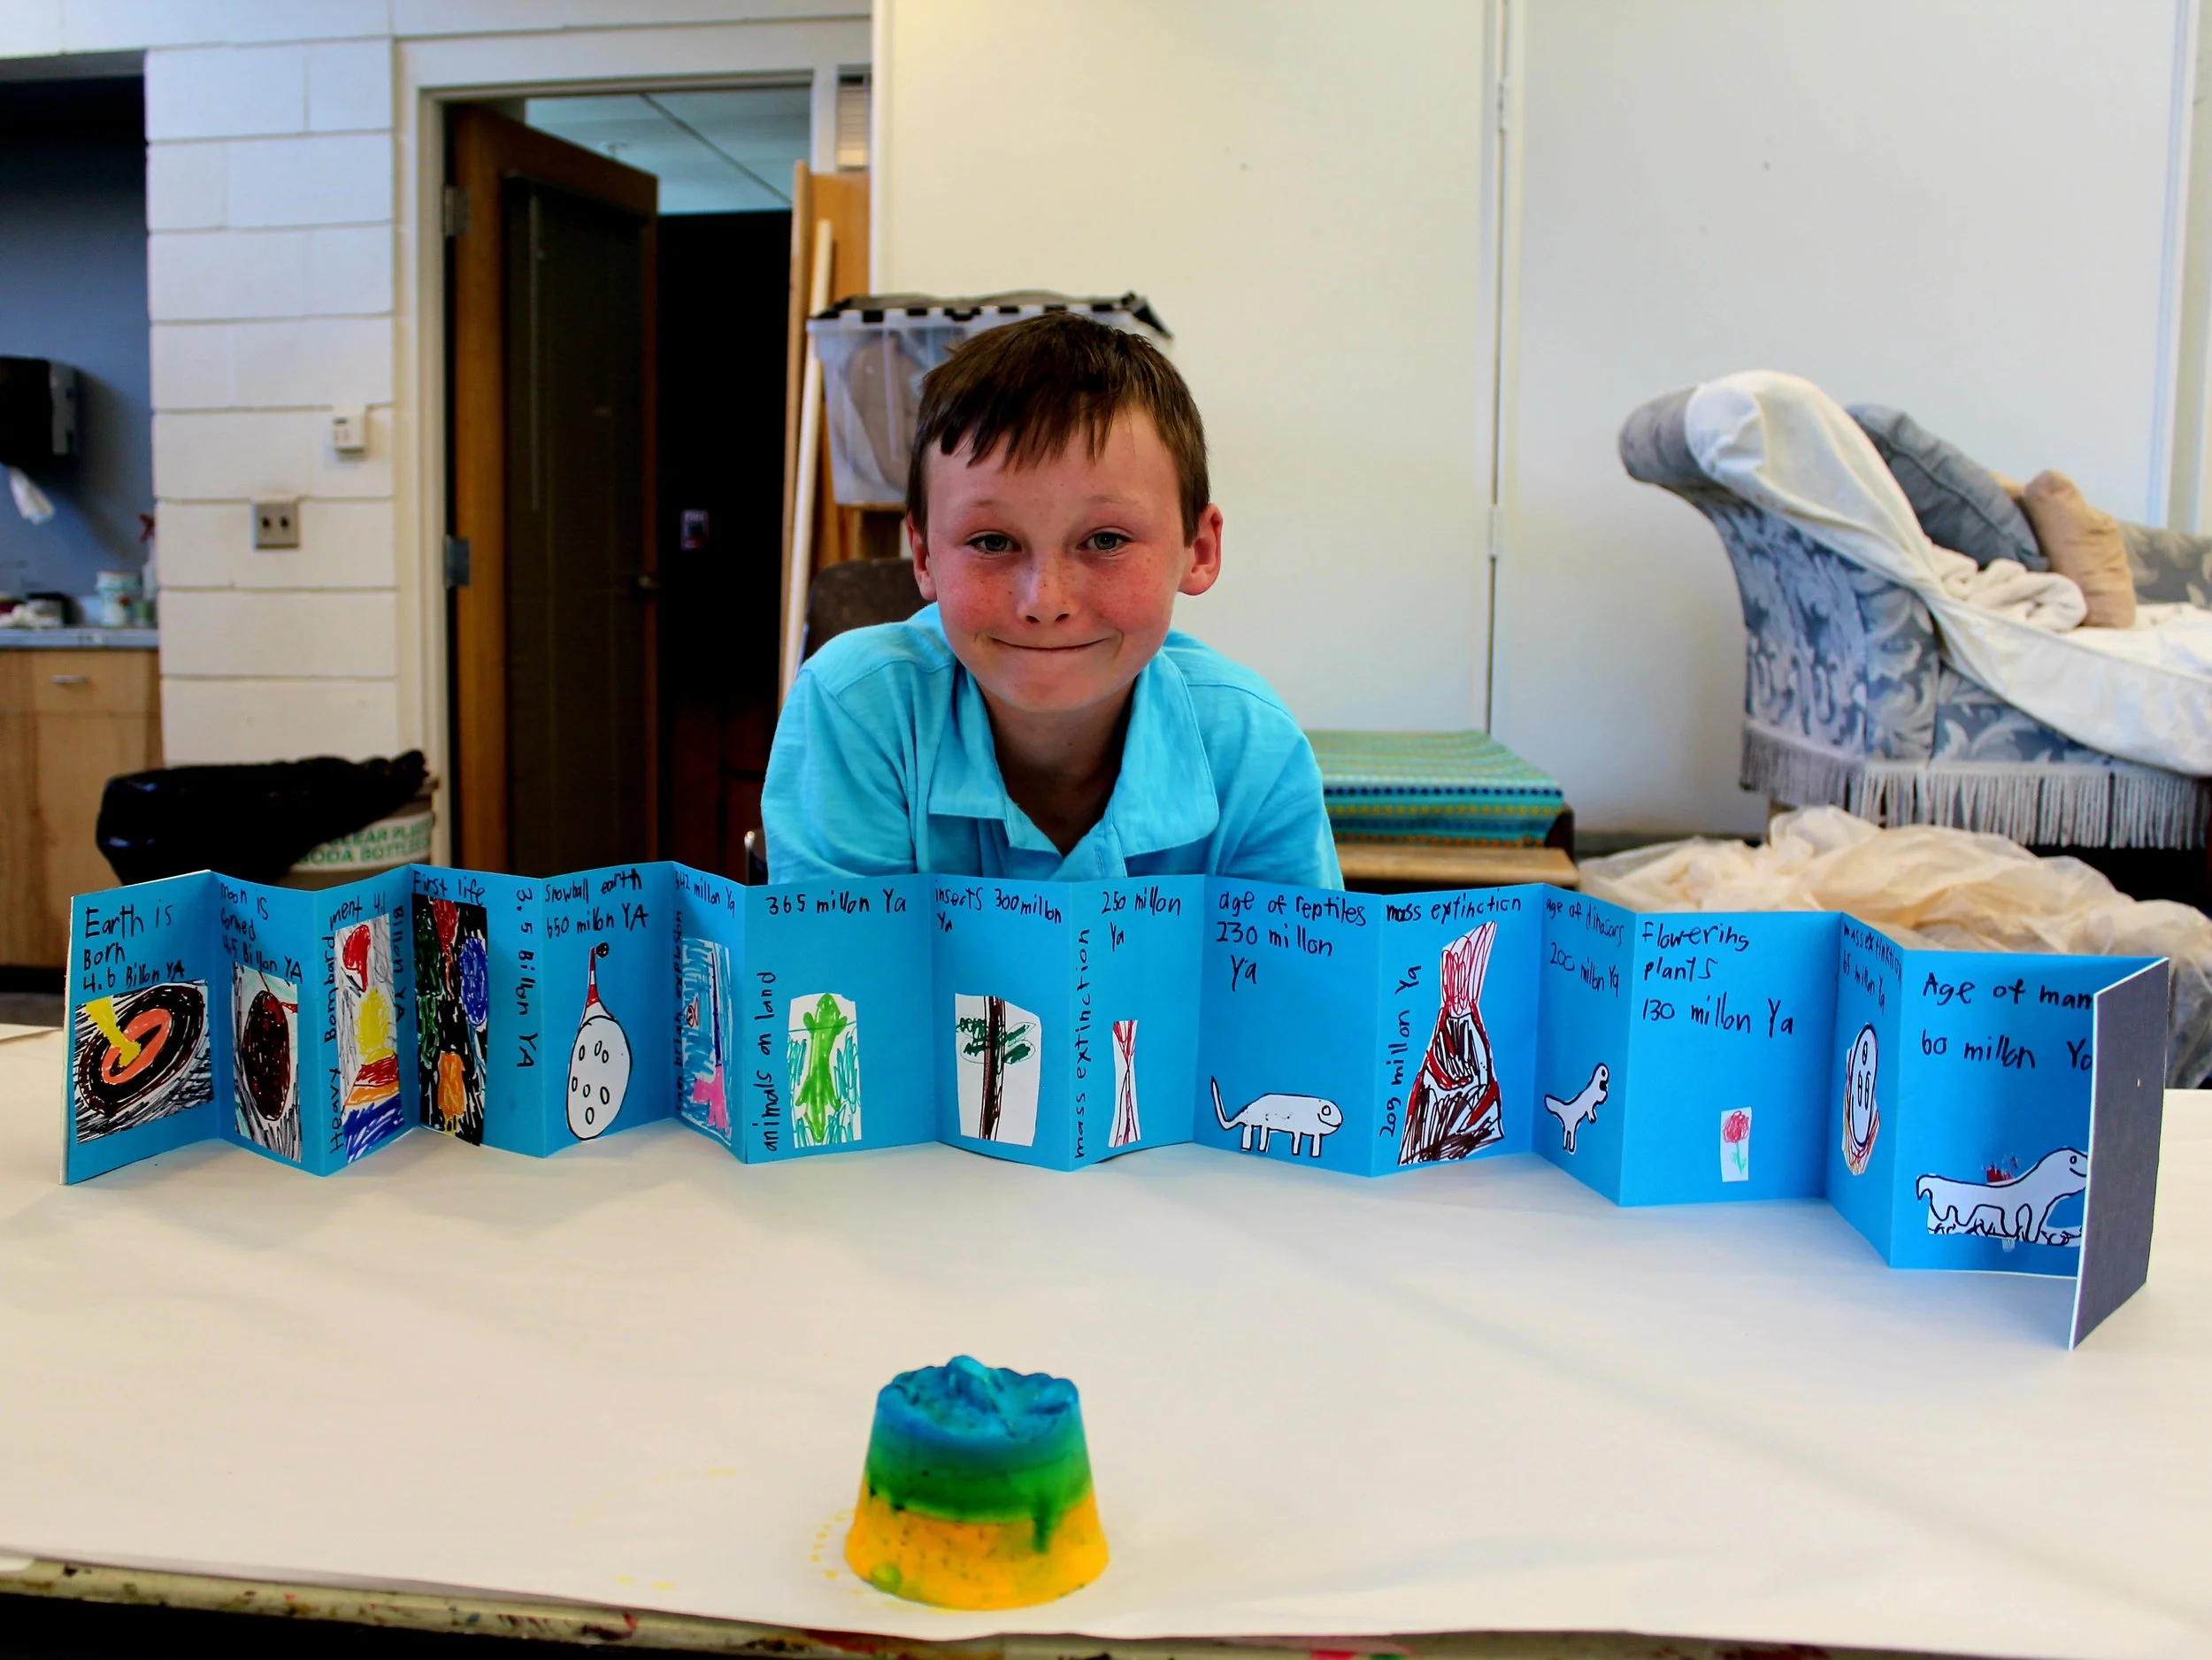
Books are great for investigations that have categories & timelines.

This amazing Accordion Book documents major events in Earth's history with charming illustrations & text.

This is a great opportunity for students who like to draw and doodle to express their learning.
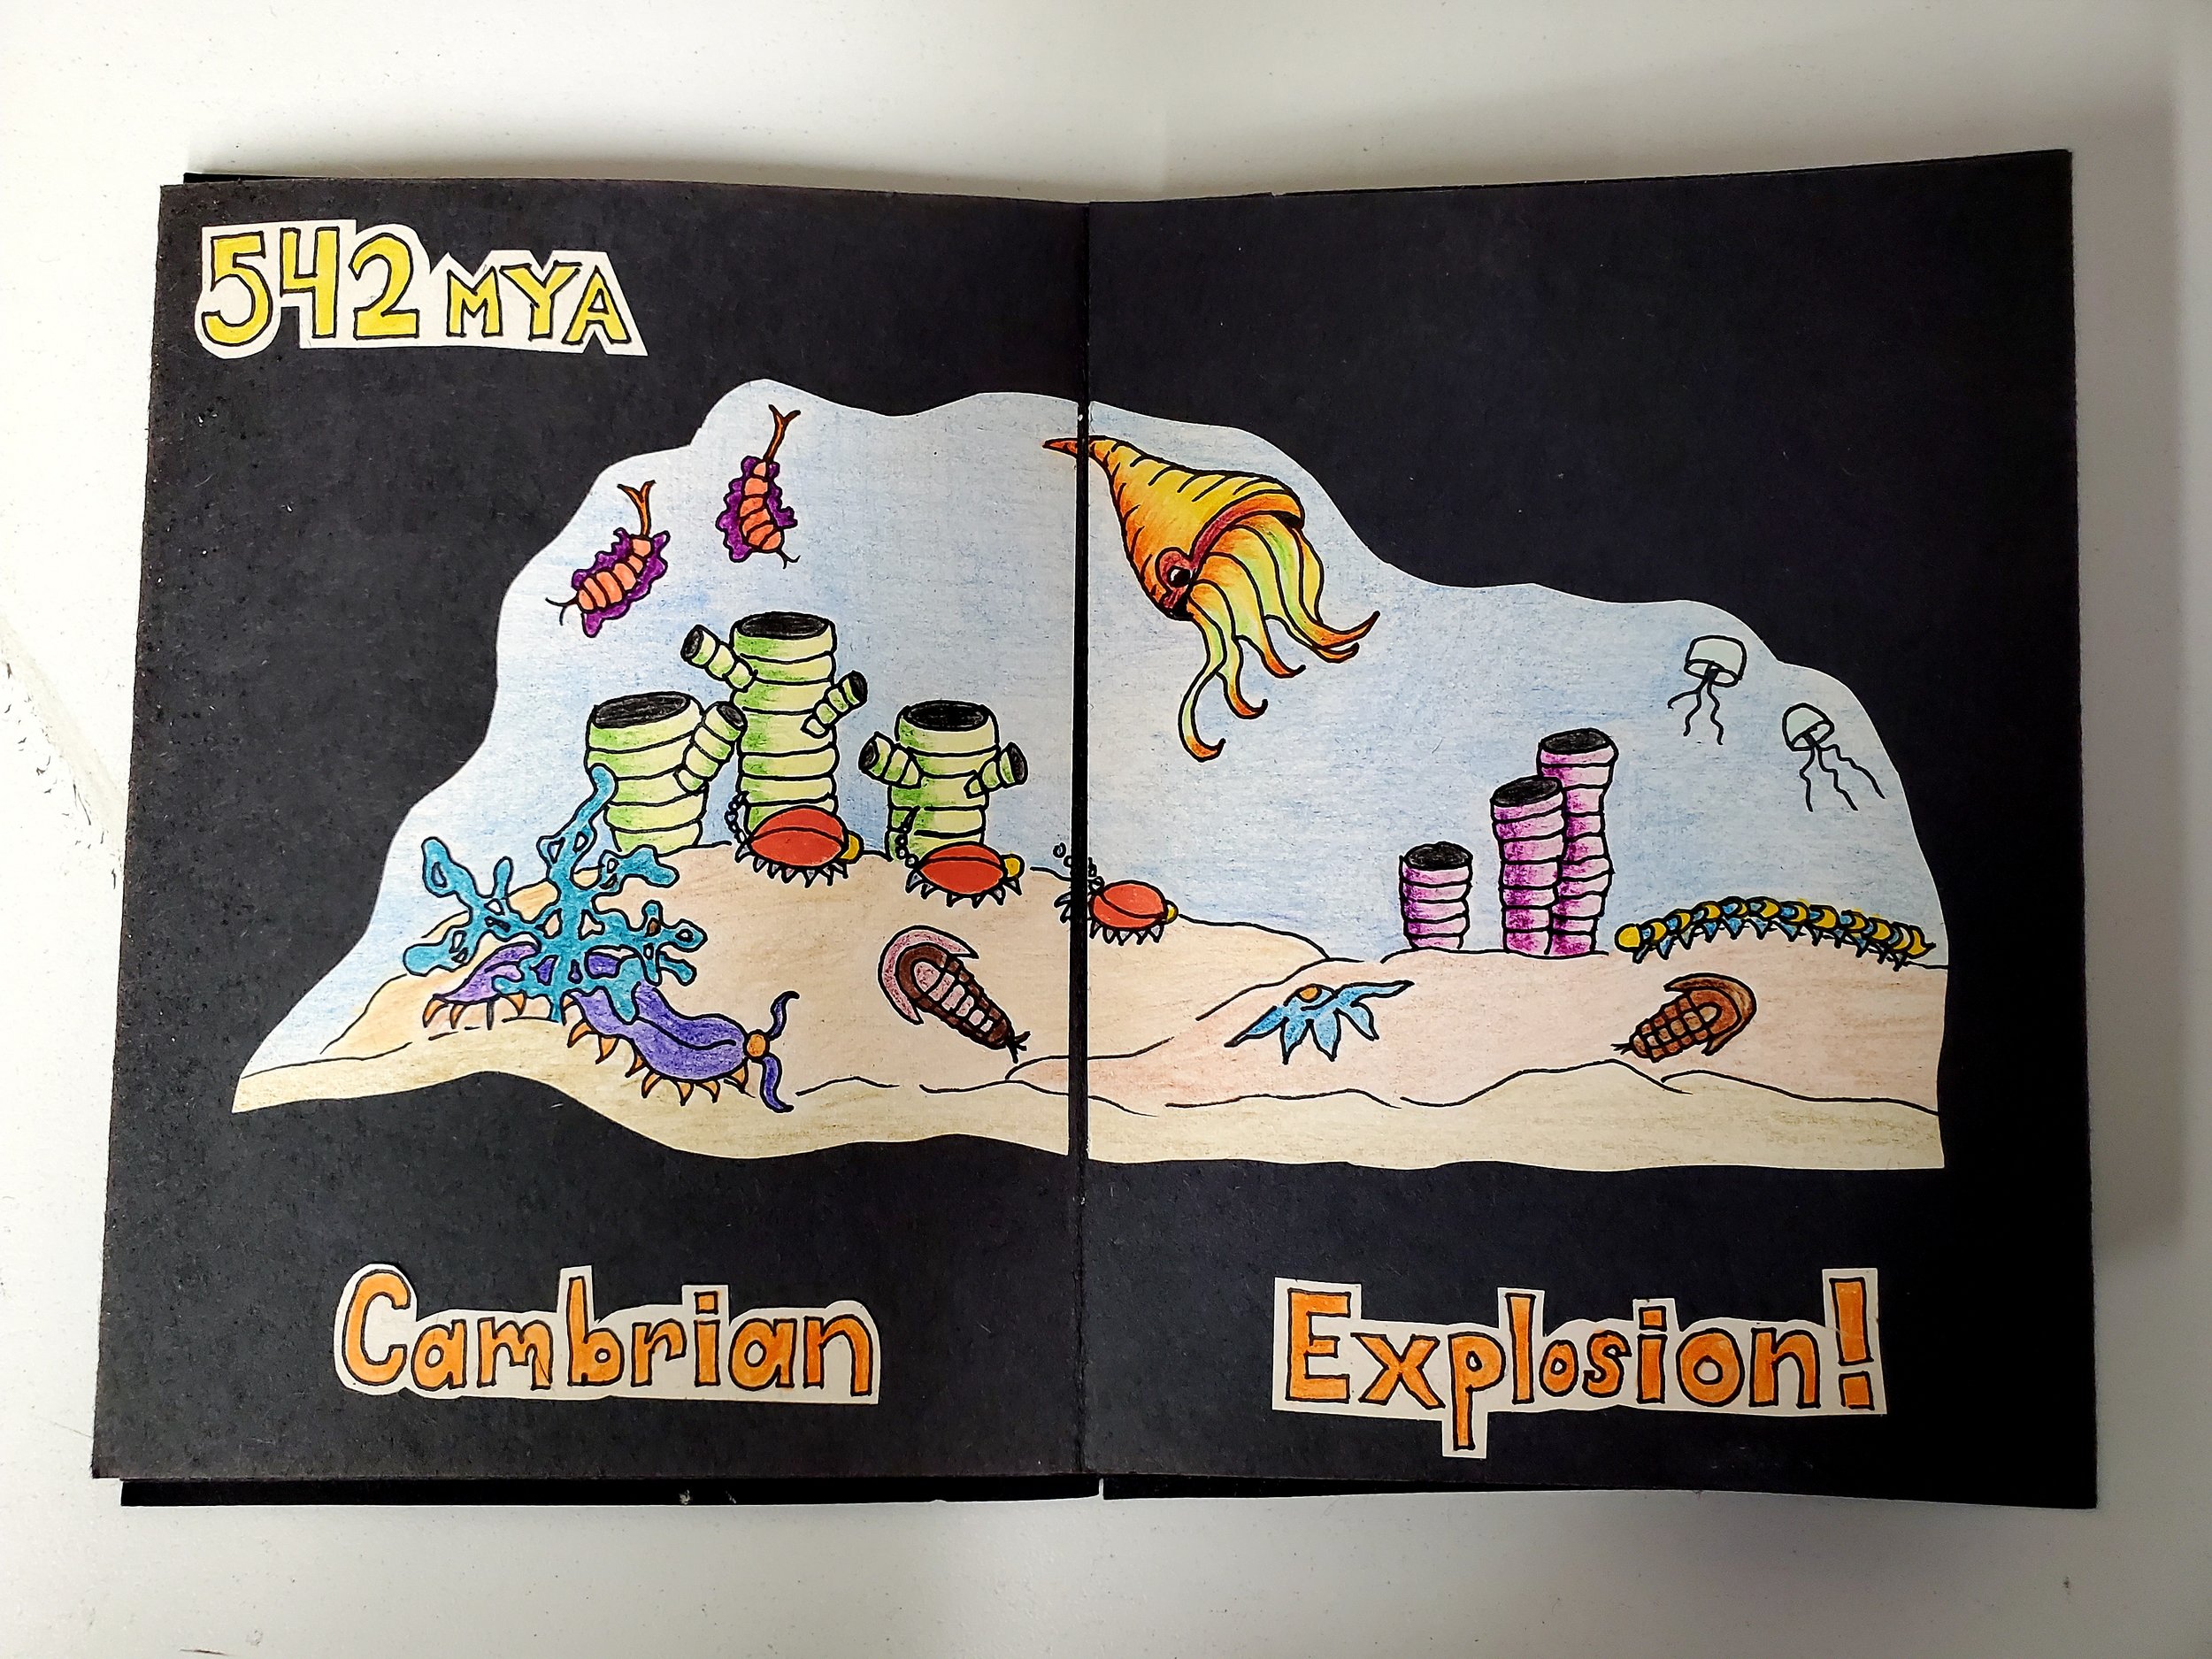
You can also use any media ~ drawing, painting, collage, found objects, fiber, upcycled materials, etc.

Think about how 3D elements can enhance your storytelling and engage your readers.

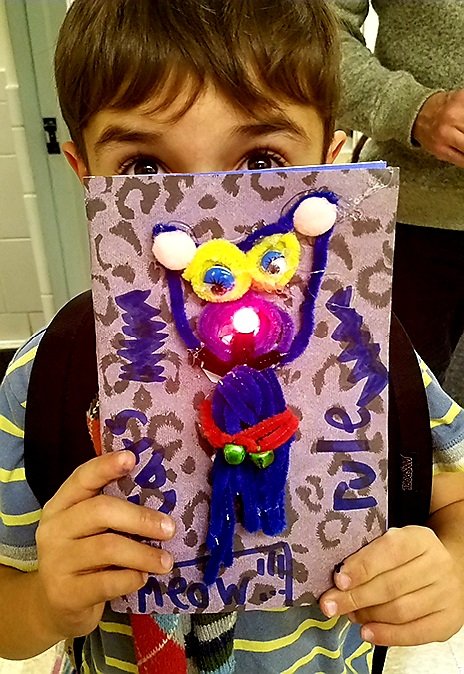
You can add great 3D mini sculptures to the cover.

LEDs are also great to add interest and cool engineering challenges. Our Circuit Card activity is a great way to add LEDs to any project design.

This student invented his own country. He also added an LED to show the capital on the map.
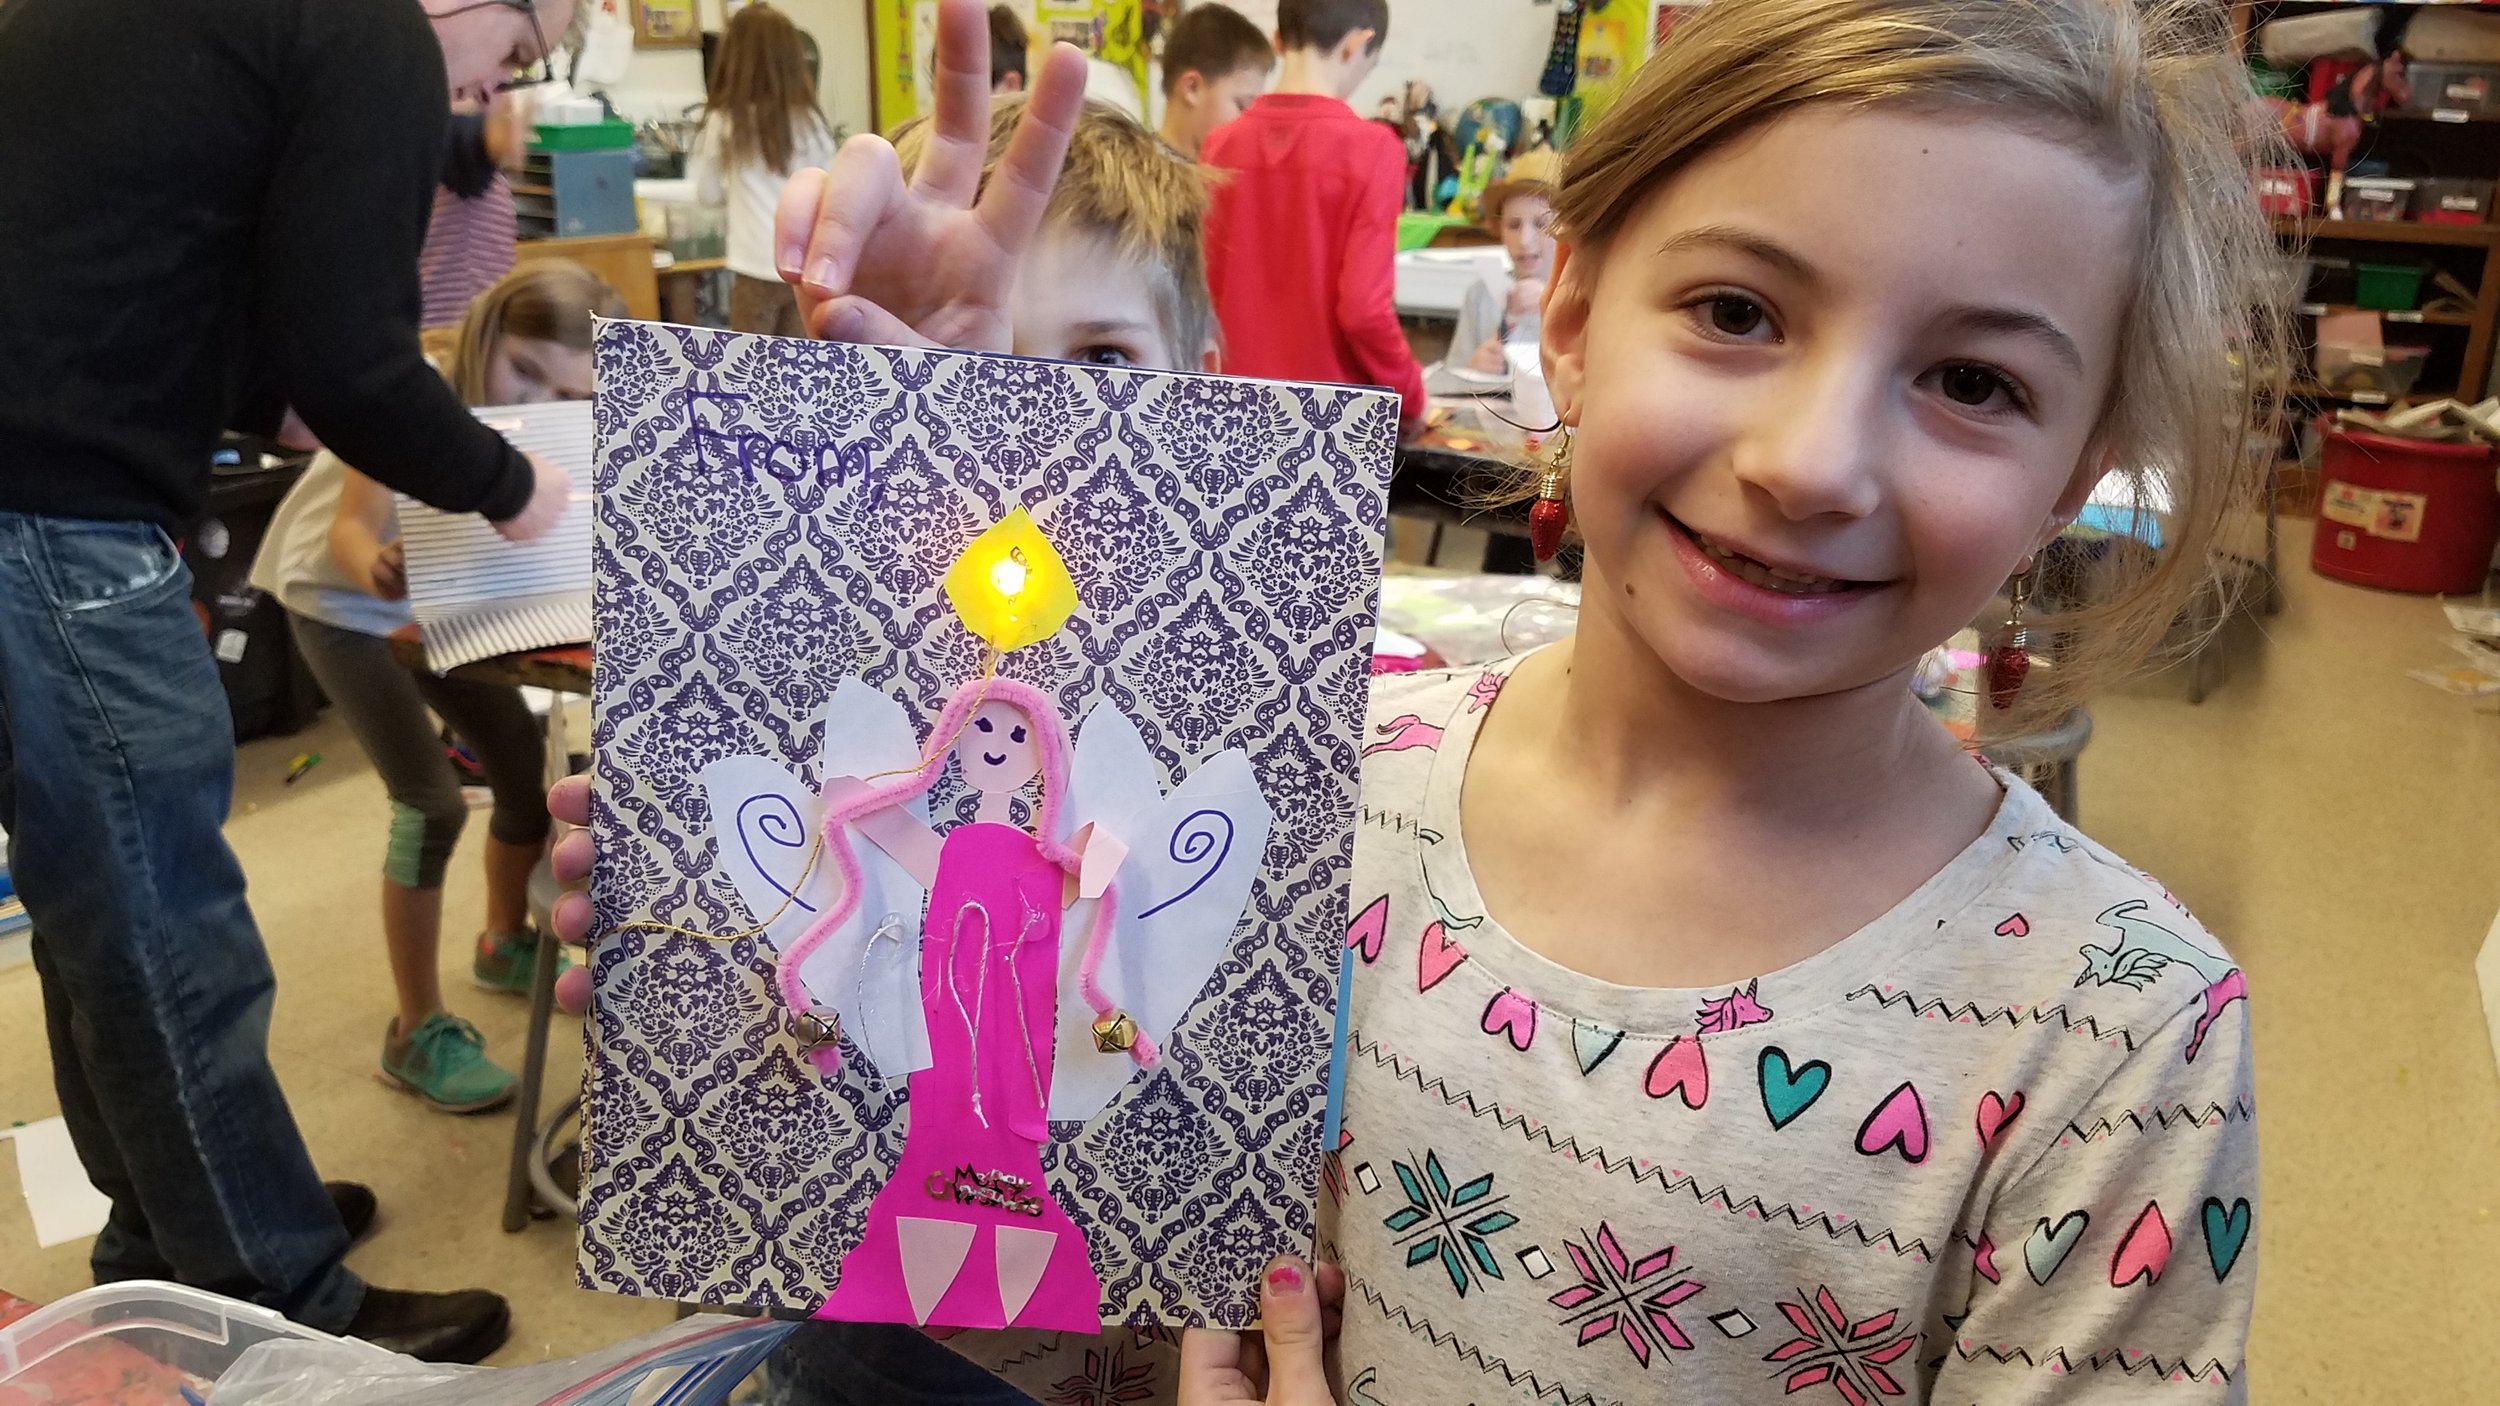
This student made a darling holiday book and enhanced her creation with a festive LED light.
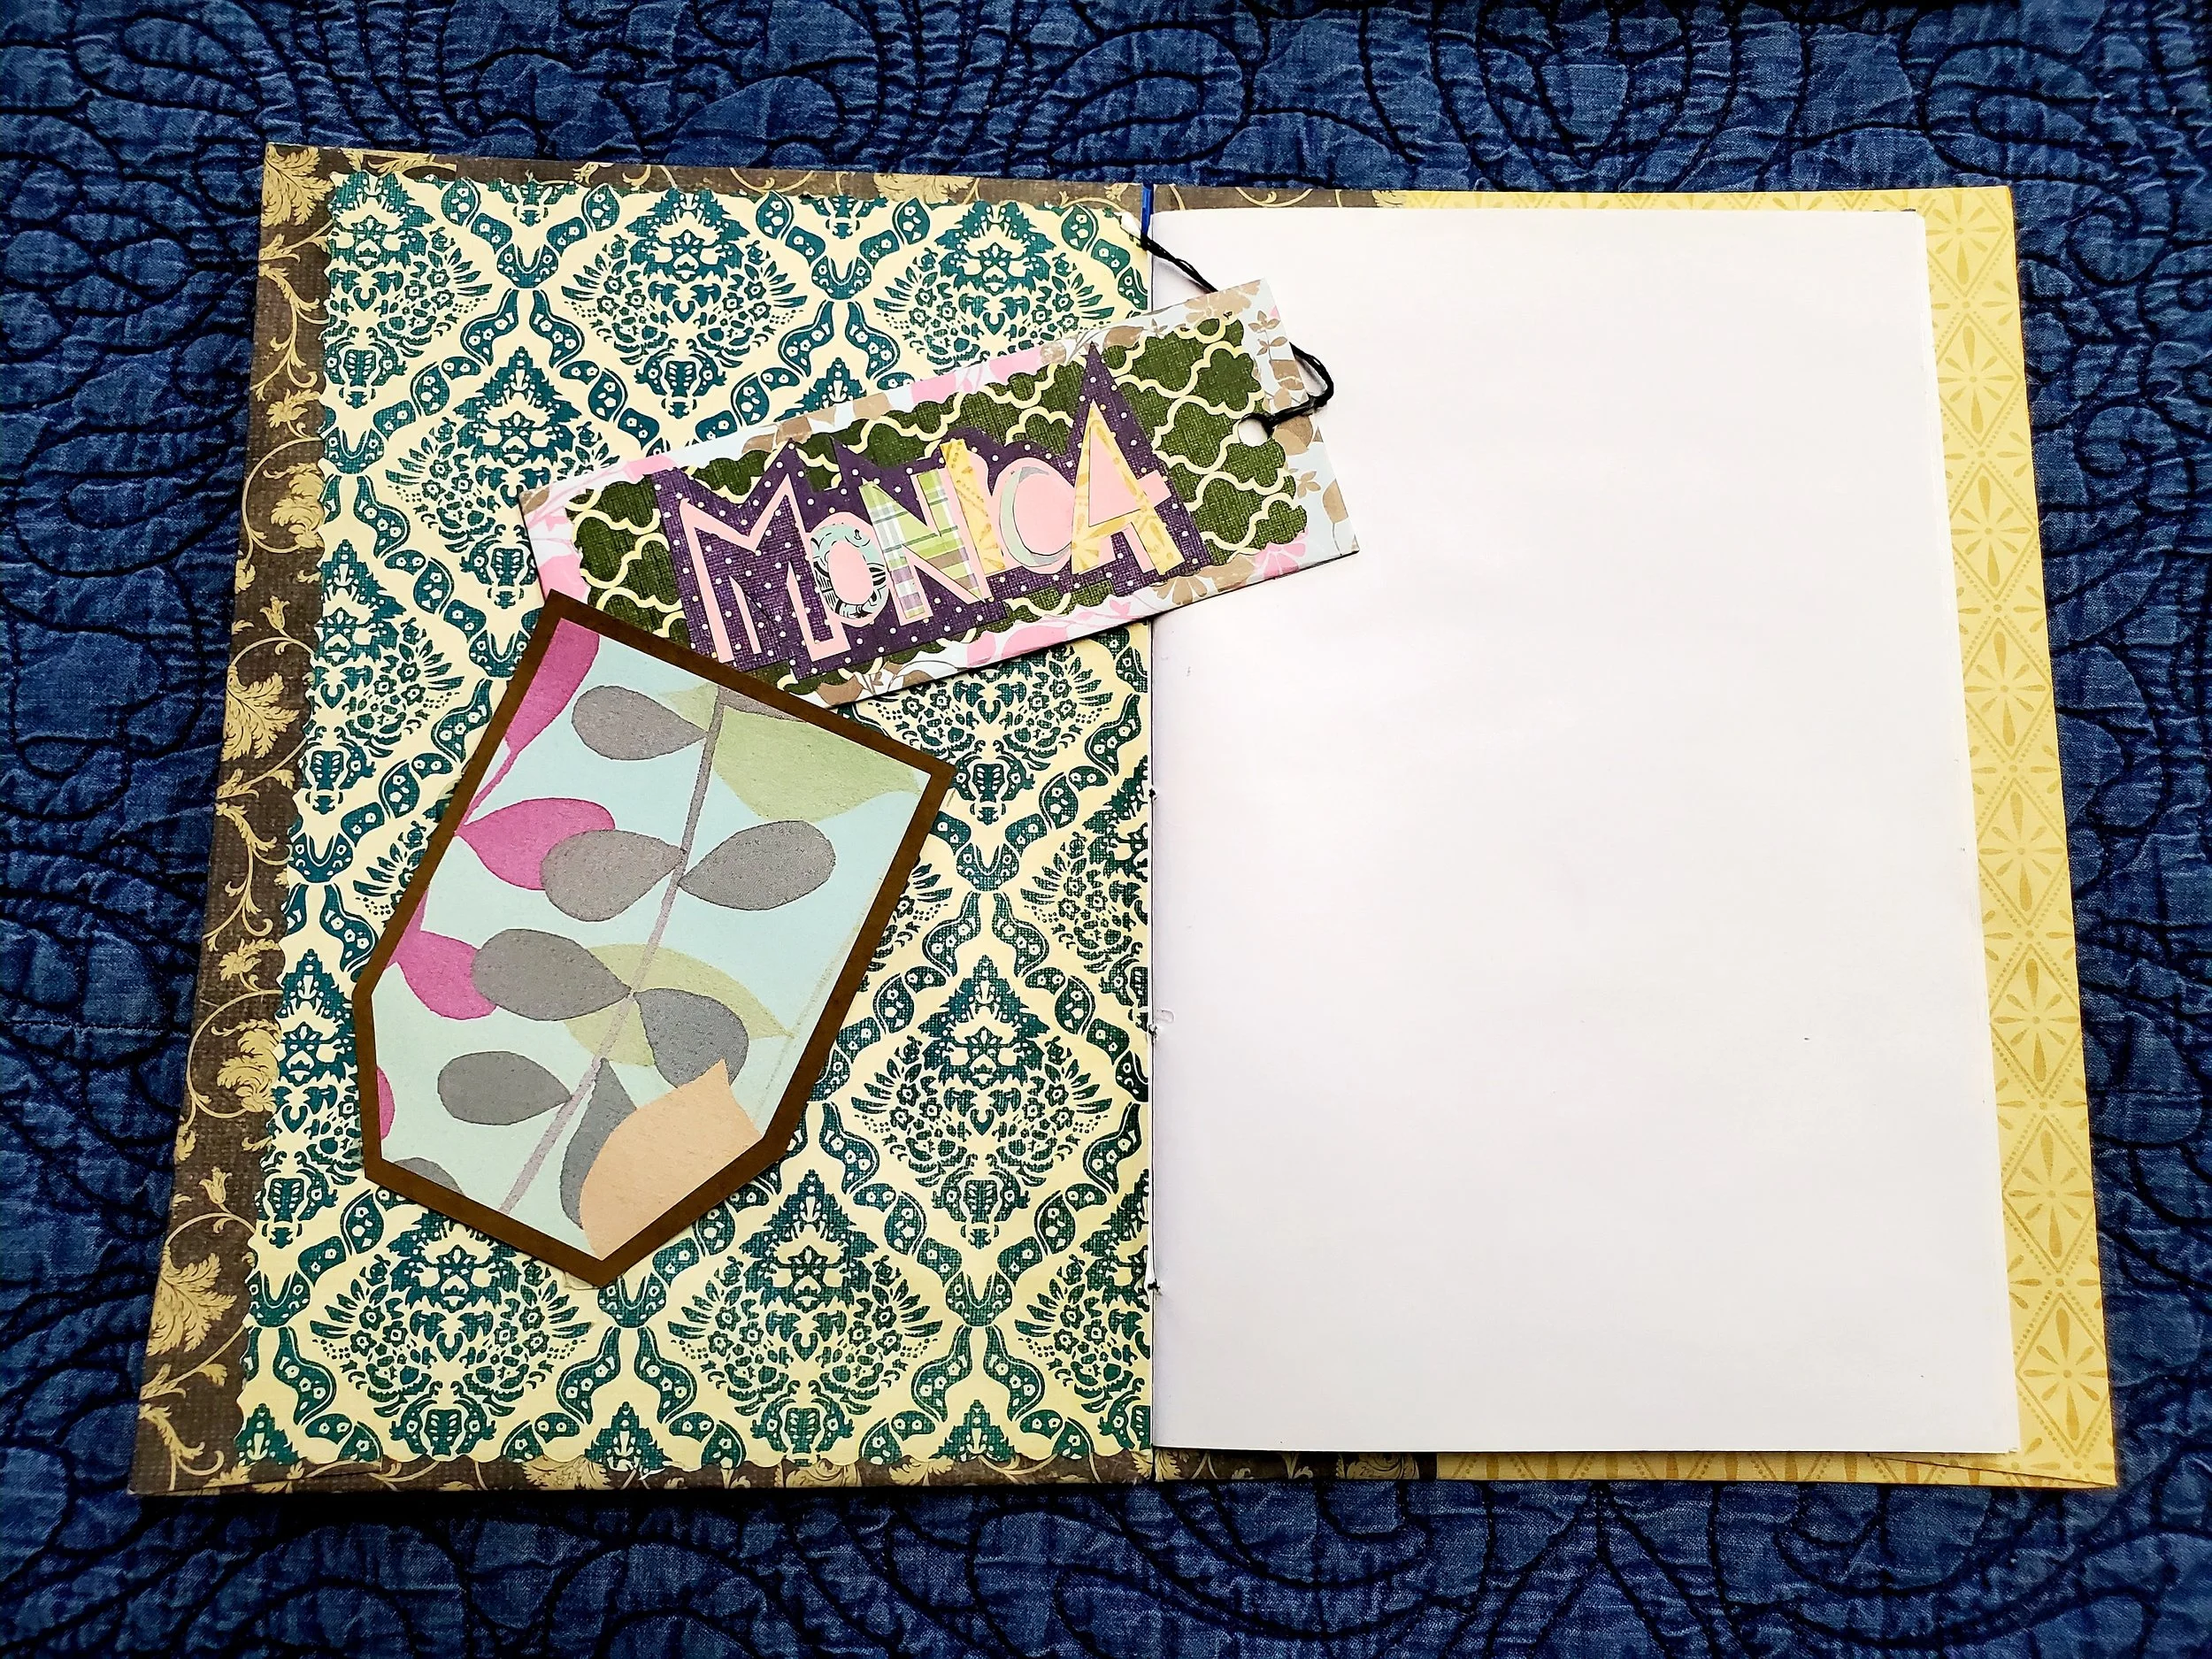
You can also add interactive elements to the inside covers.
Pockets and bookmarks are great additions.
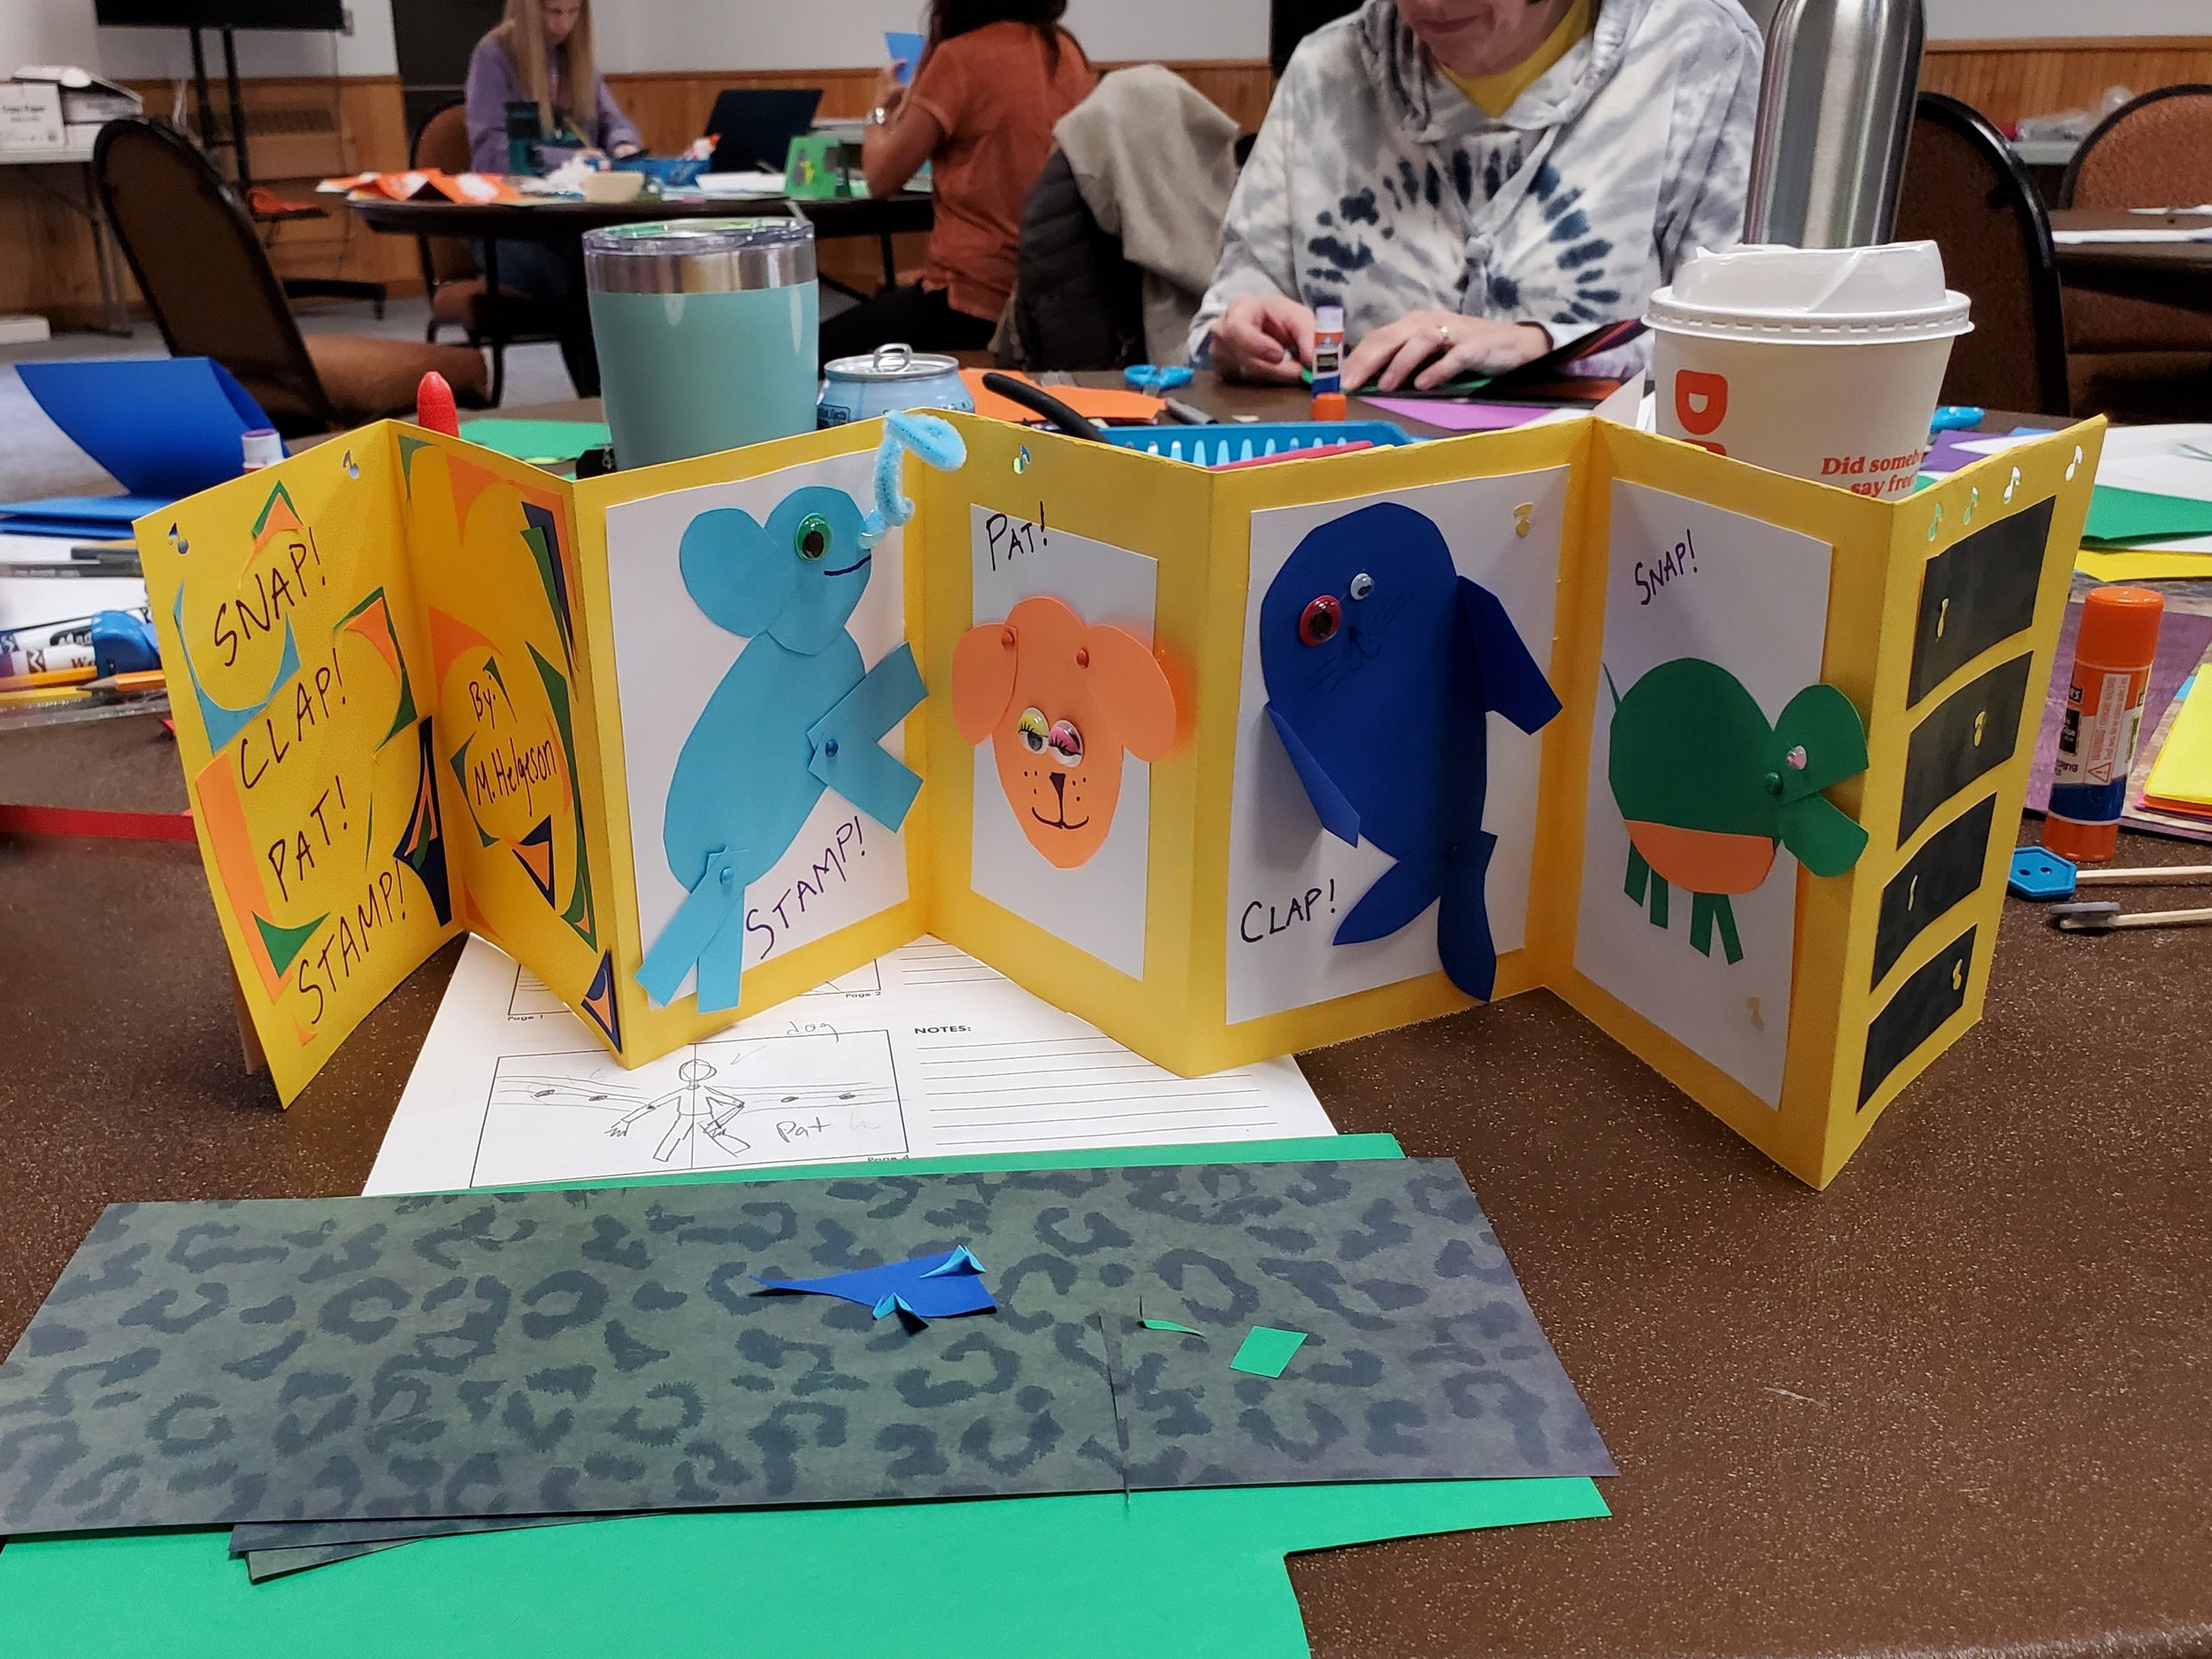
This book designed for music class celebrates sounds, shapes and animals.

This weather-inspired book includes an LED Circuit Card to illuminate the sun.

This book uses windows and inserts to compare and contrast modern and historical inventions.
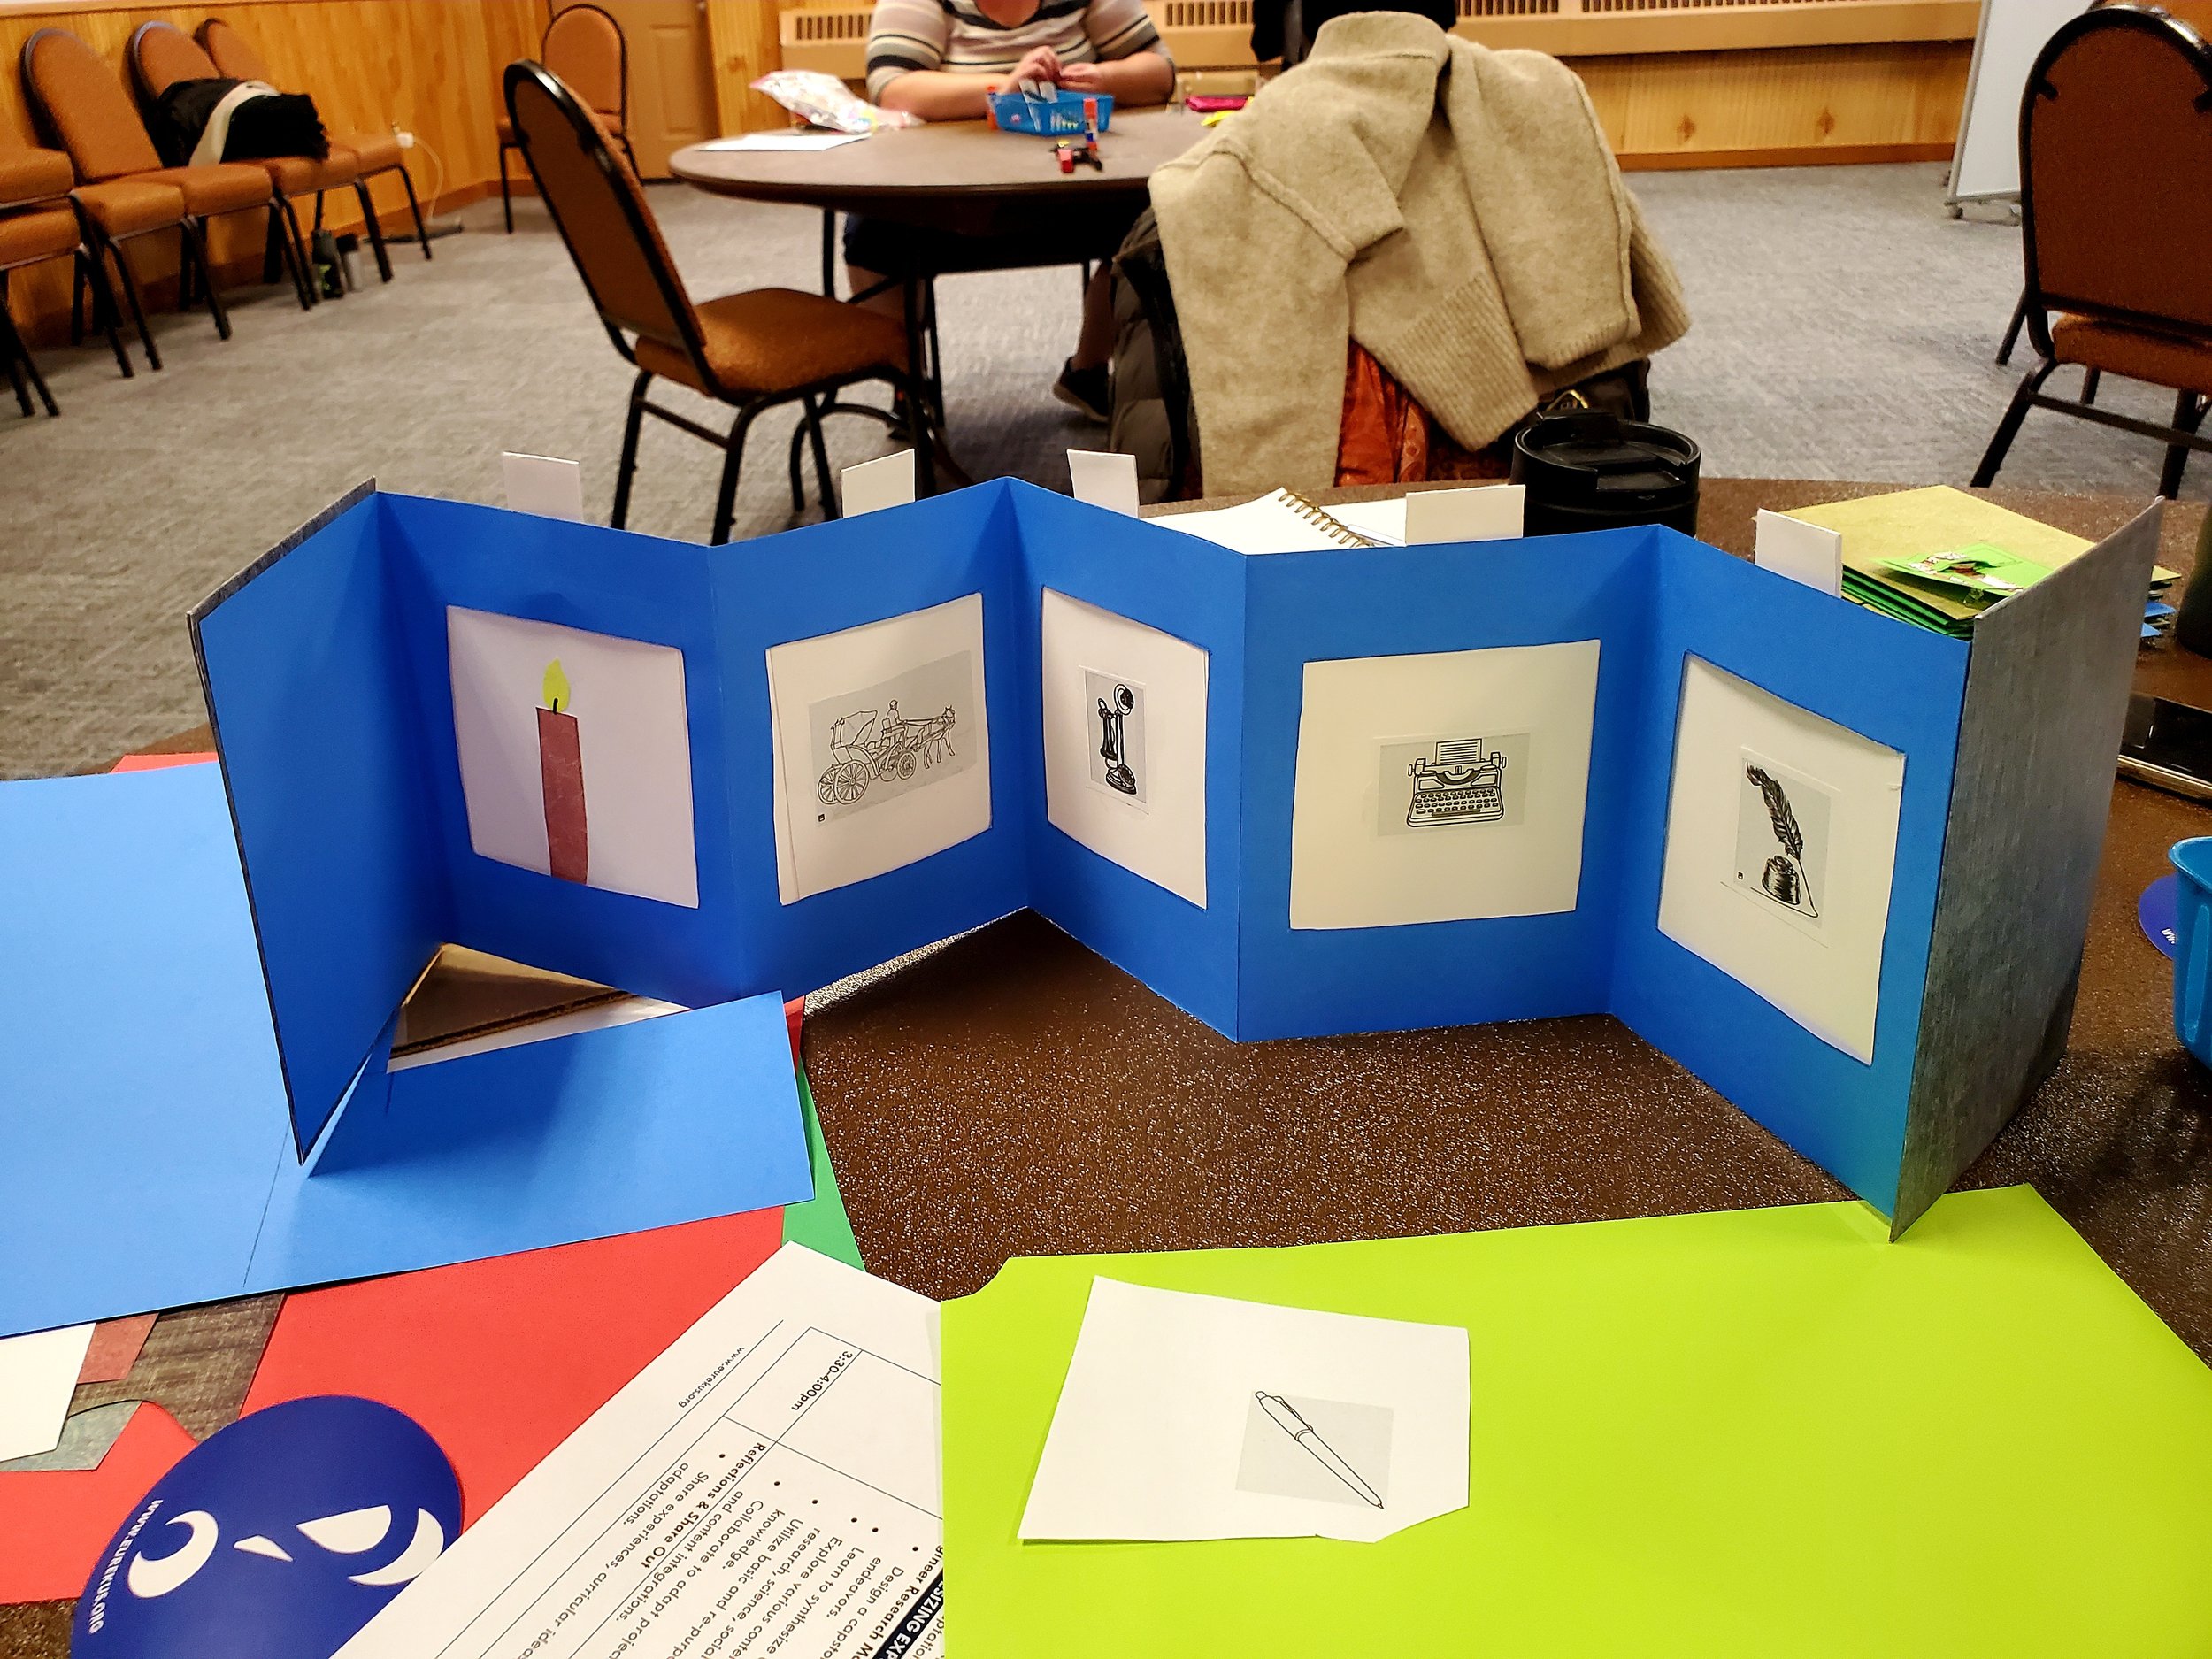
Windows allow for additional content and deeper investigations.
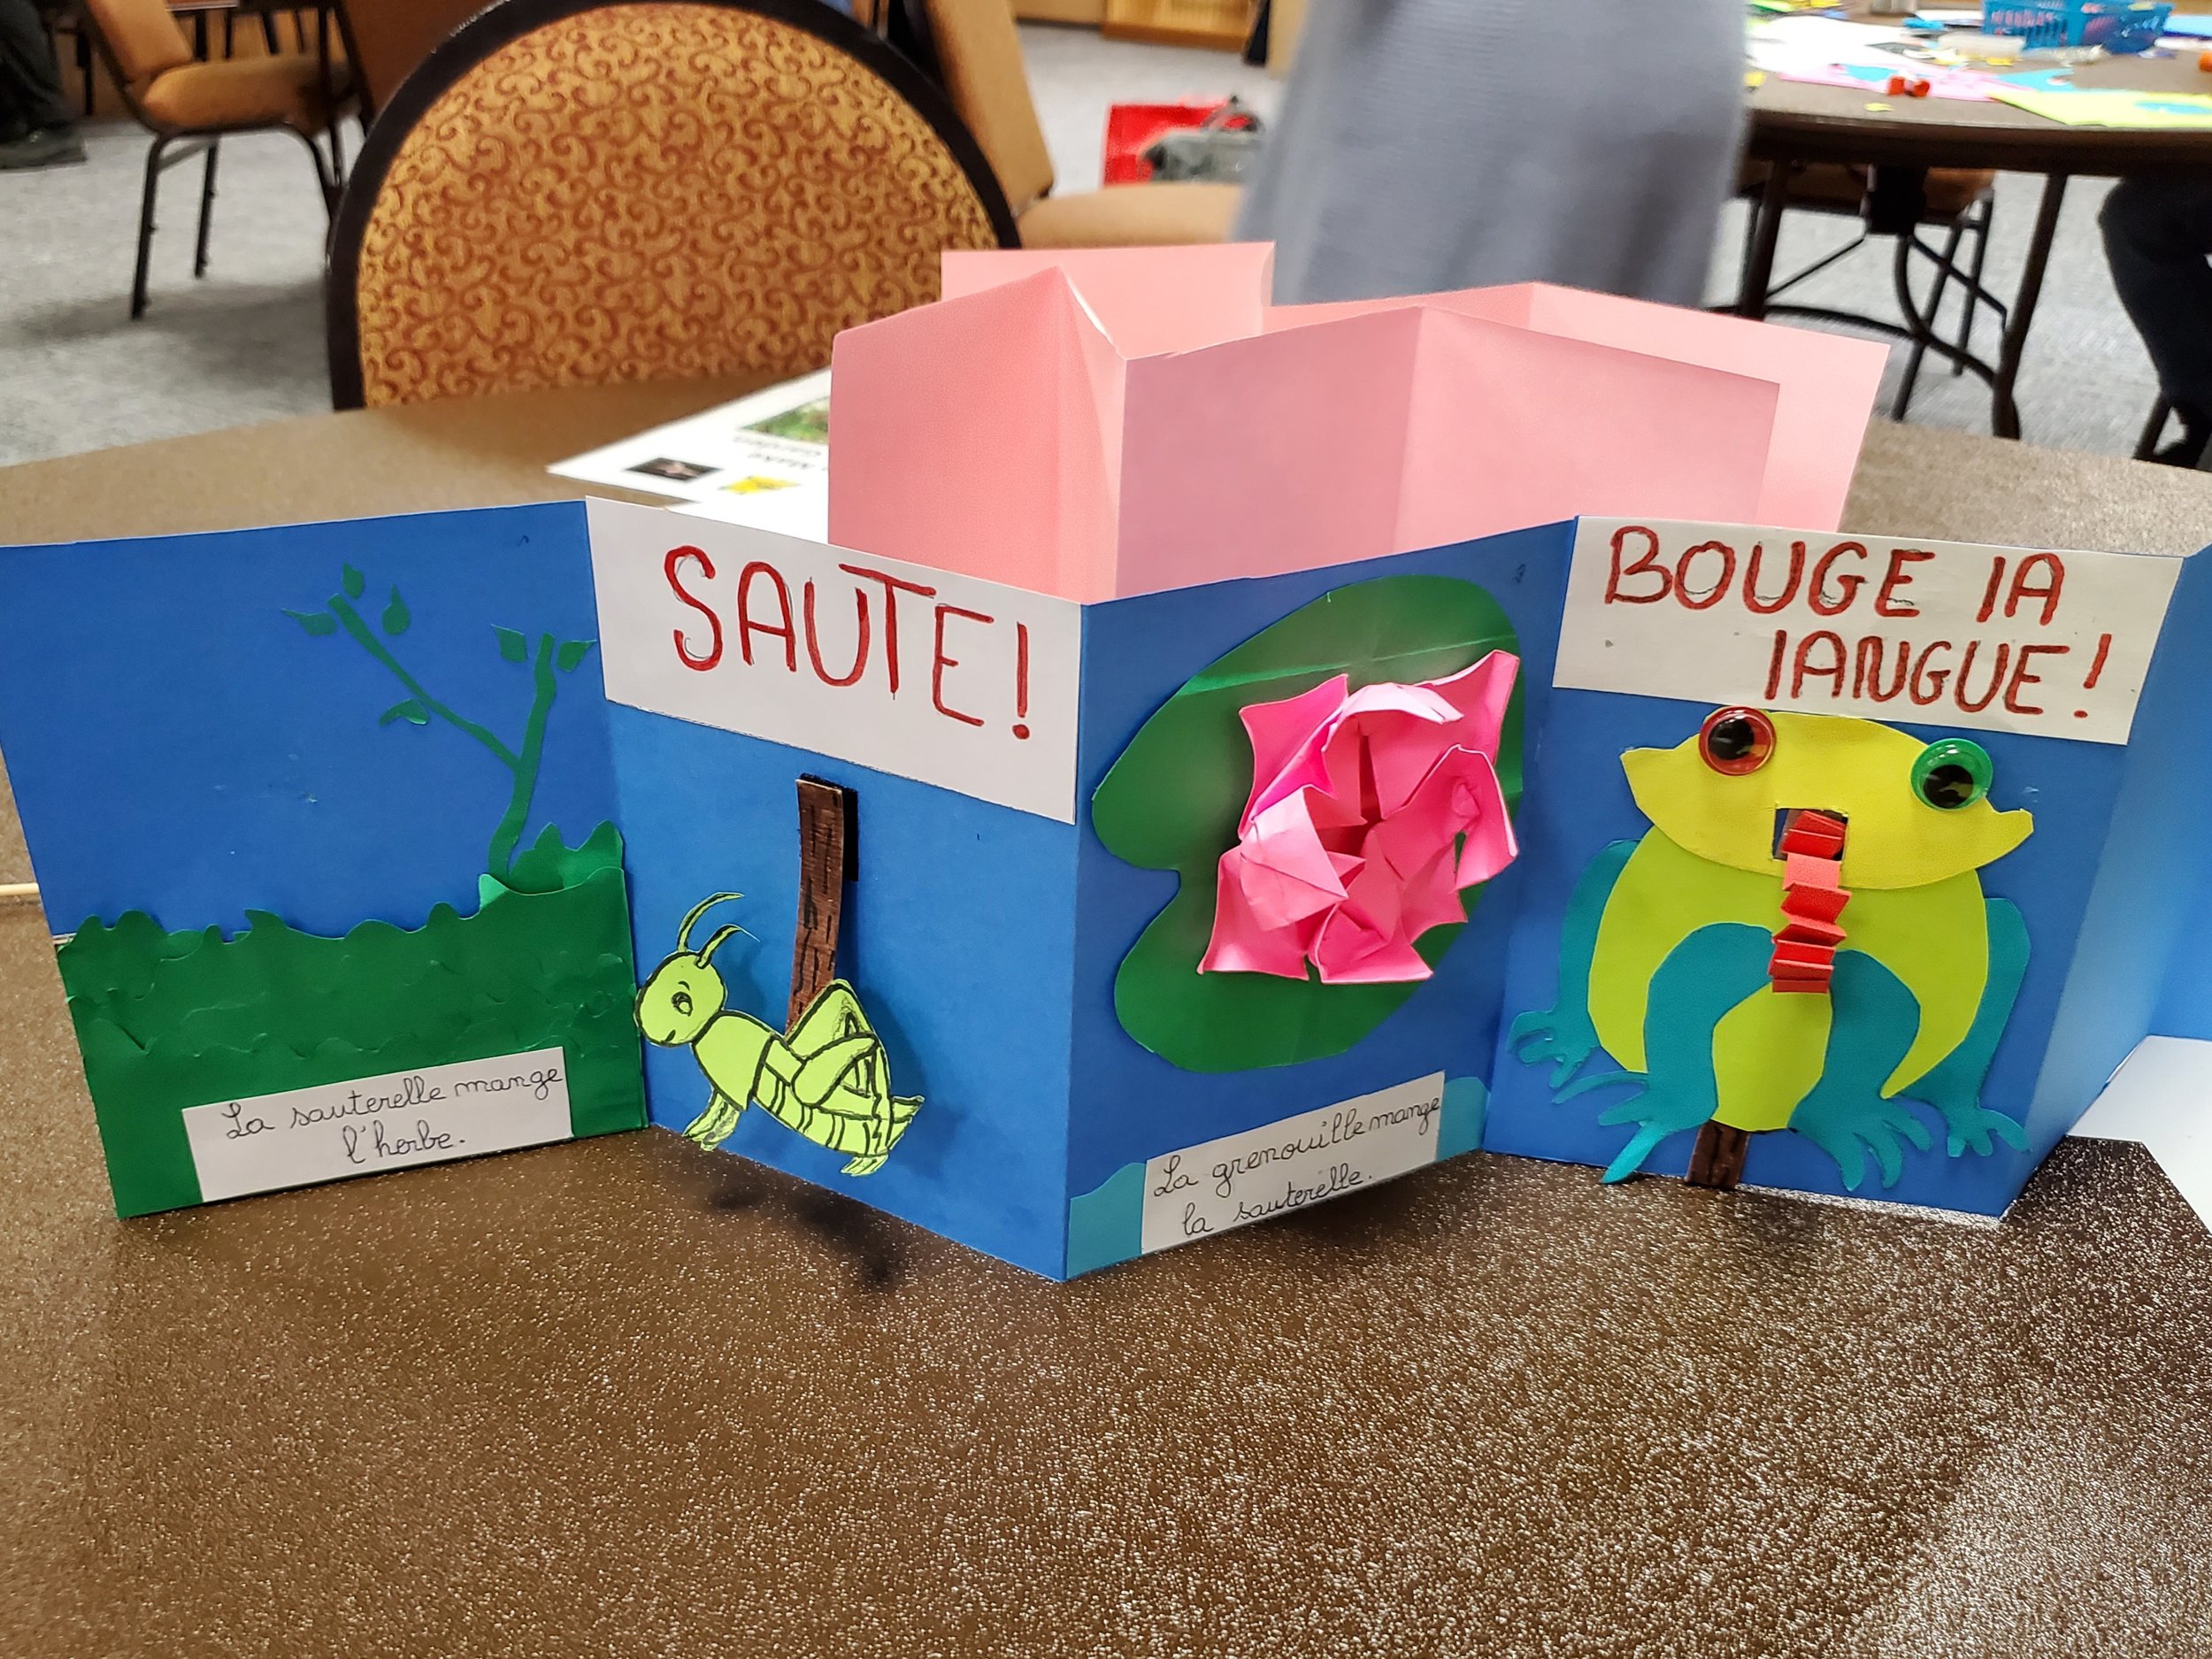
This book explores the food chain and activates language aquistion for a French-immersion school.
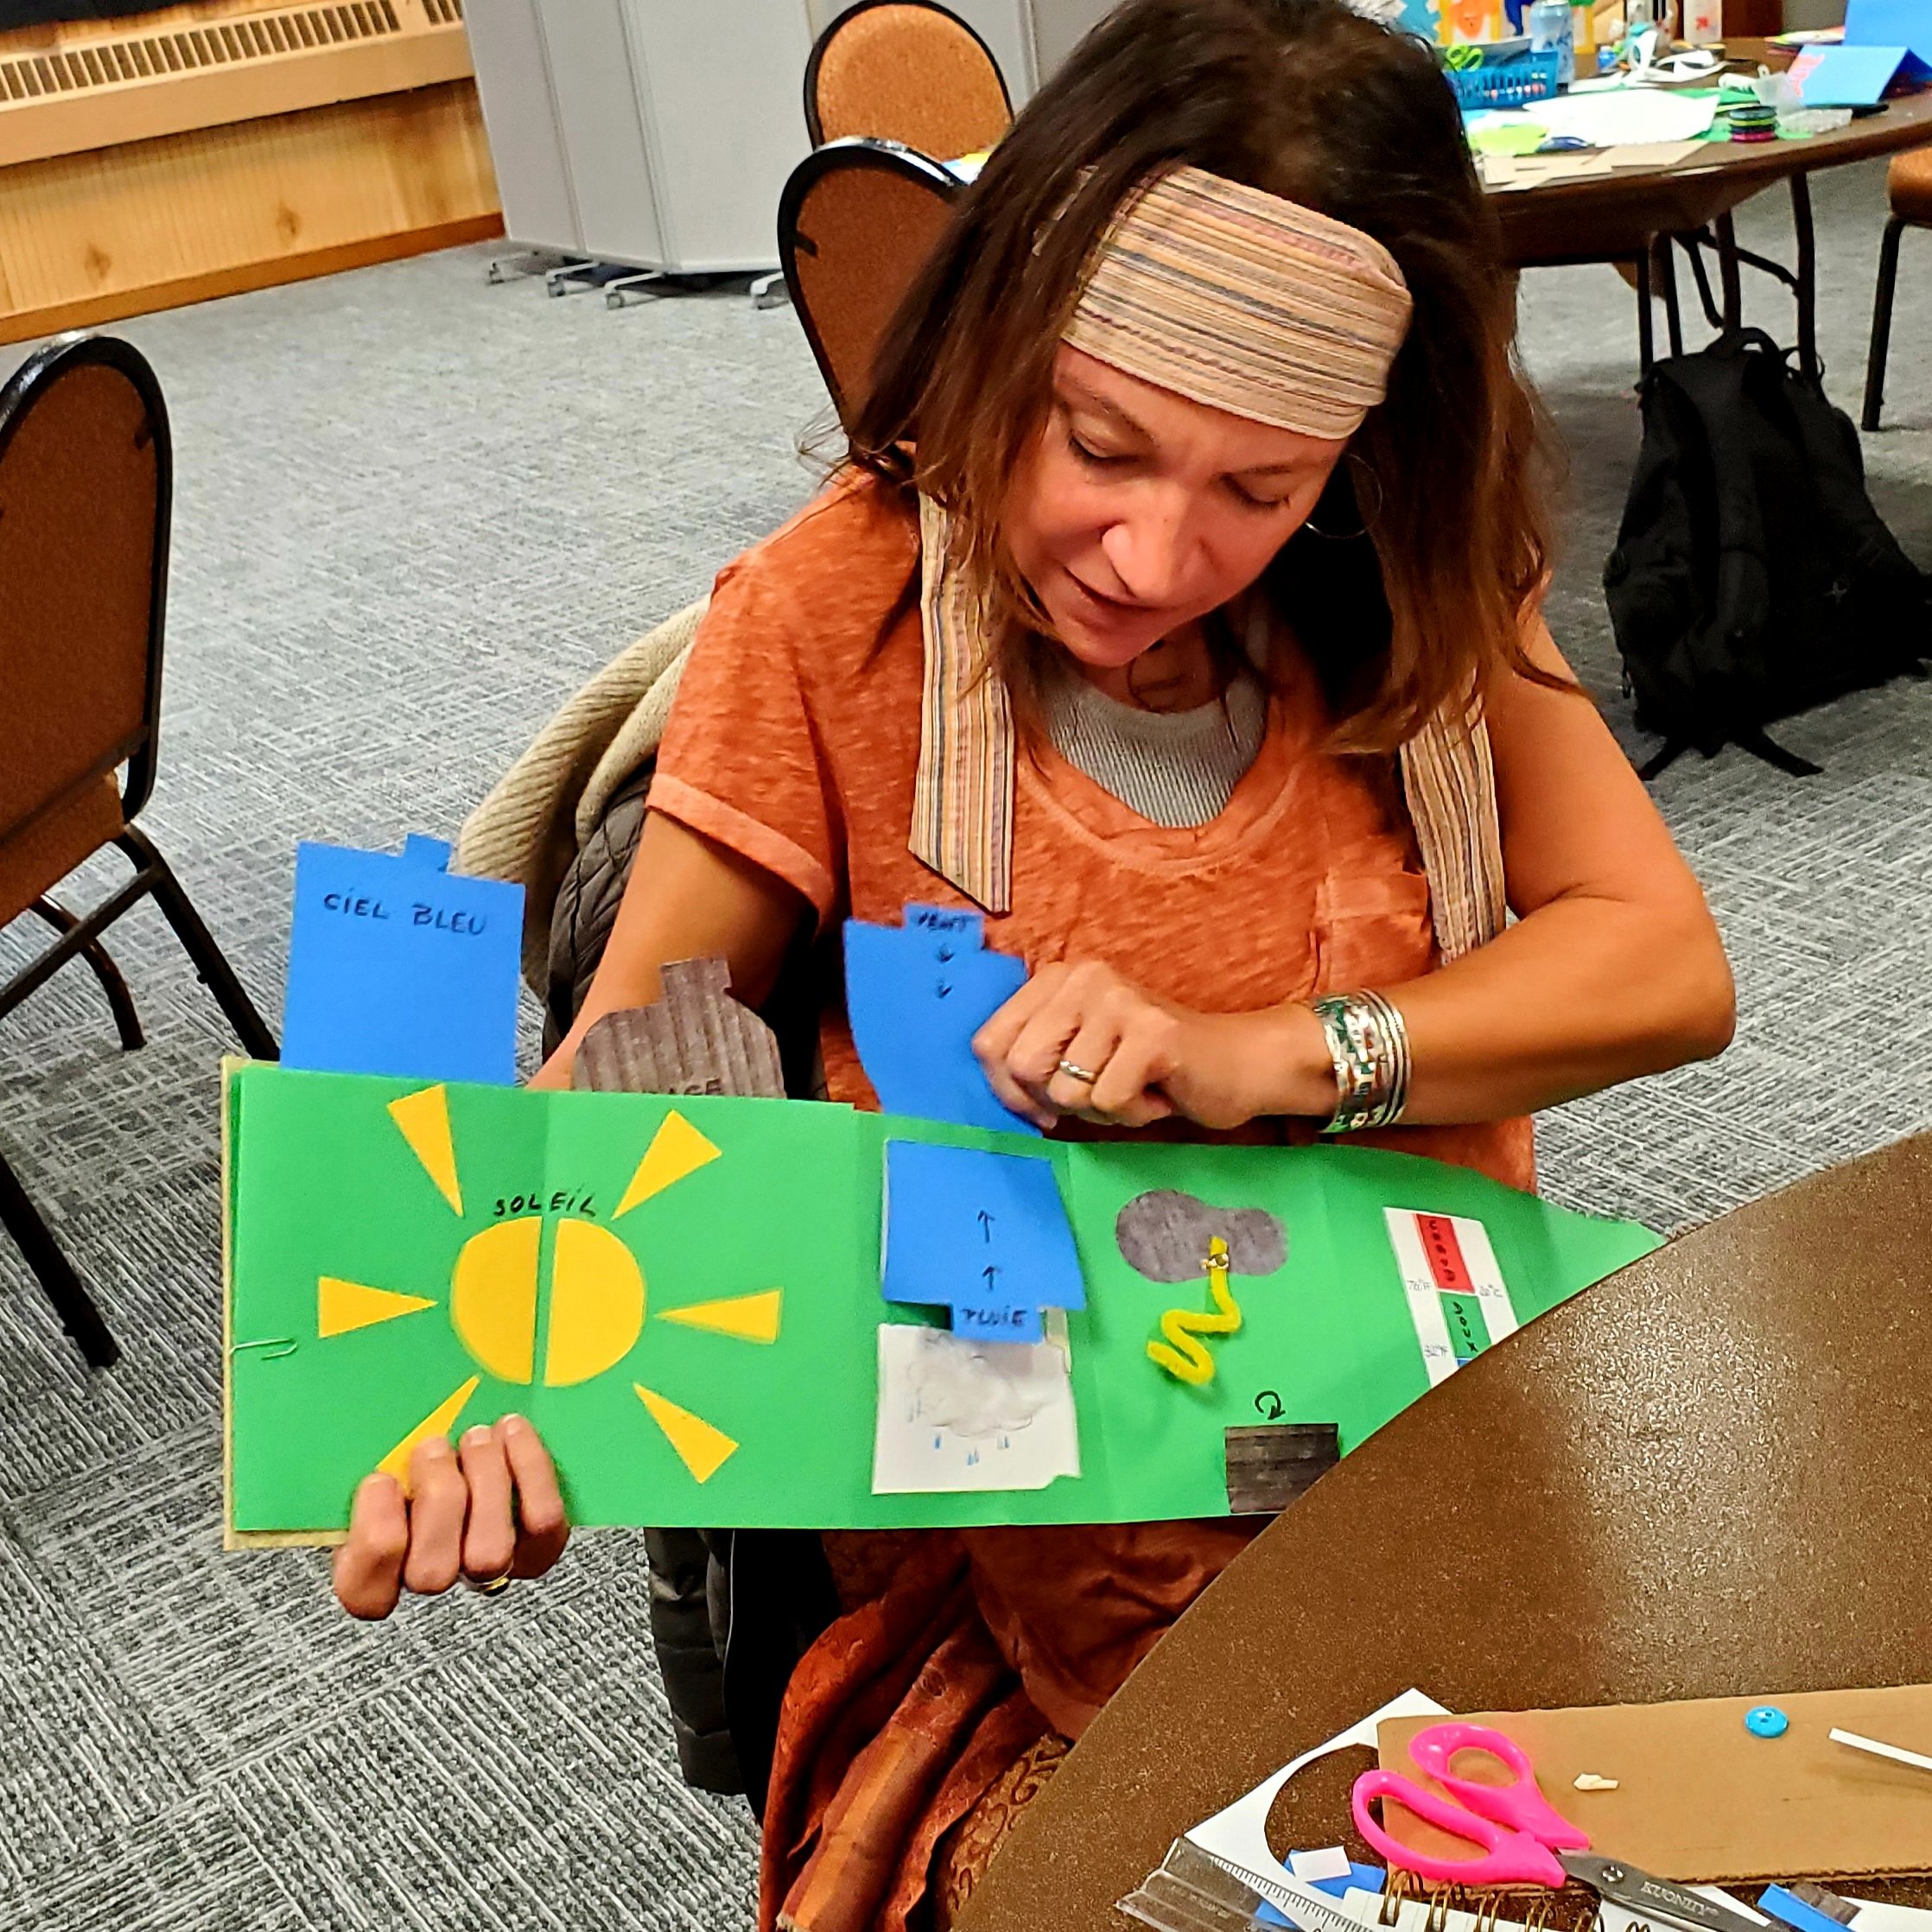
This book has many window and pop-up parts to activate weather investigations.
Video Tutorials - Accordion Books
Follow these tutorials to make an Accordion Book. These techniques are great for all ages, K-12. This is a robust activity to activate any topic or unit. You can also design 3D elements, windows, inserts and pop-ups for loads of interactive details.
1) Make Book Covers
2) Design Accordion Pages
3) Accordion Book Examples
Video Tutorials - Expandable Books
Follow these tutorials to make an Expandable Book. You will design “Add-On” pages which allows you to continue to add content to your creations over time. Expandable Books can amplify any content area and are great for 2nd-12th grade learners. They make fantastic planners, sketchbooks & notebooks to use throughout a unit or semester. Plus, you can add circuits, pop-ups and lots of interactive elements to enhance content and engineering challenges.
1) Make Book Covers
2) Design Add-On Pages
Video Tutorials - Sewn Books
Follow these tutorials to make a Sewn Book using traditional book-binding techniques. Sewn Books provide a deeper engineering challenge for 4th -12th grade makers. Sewn Books are tremendous to enhance any content area or investigation.
1) Make Covers & Pages
2) Design & Decorate
Video Tutorials - Windows & Inserts
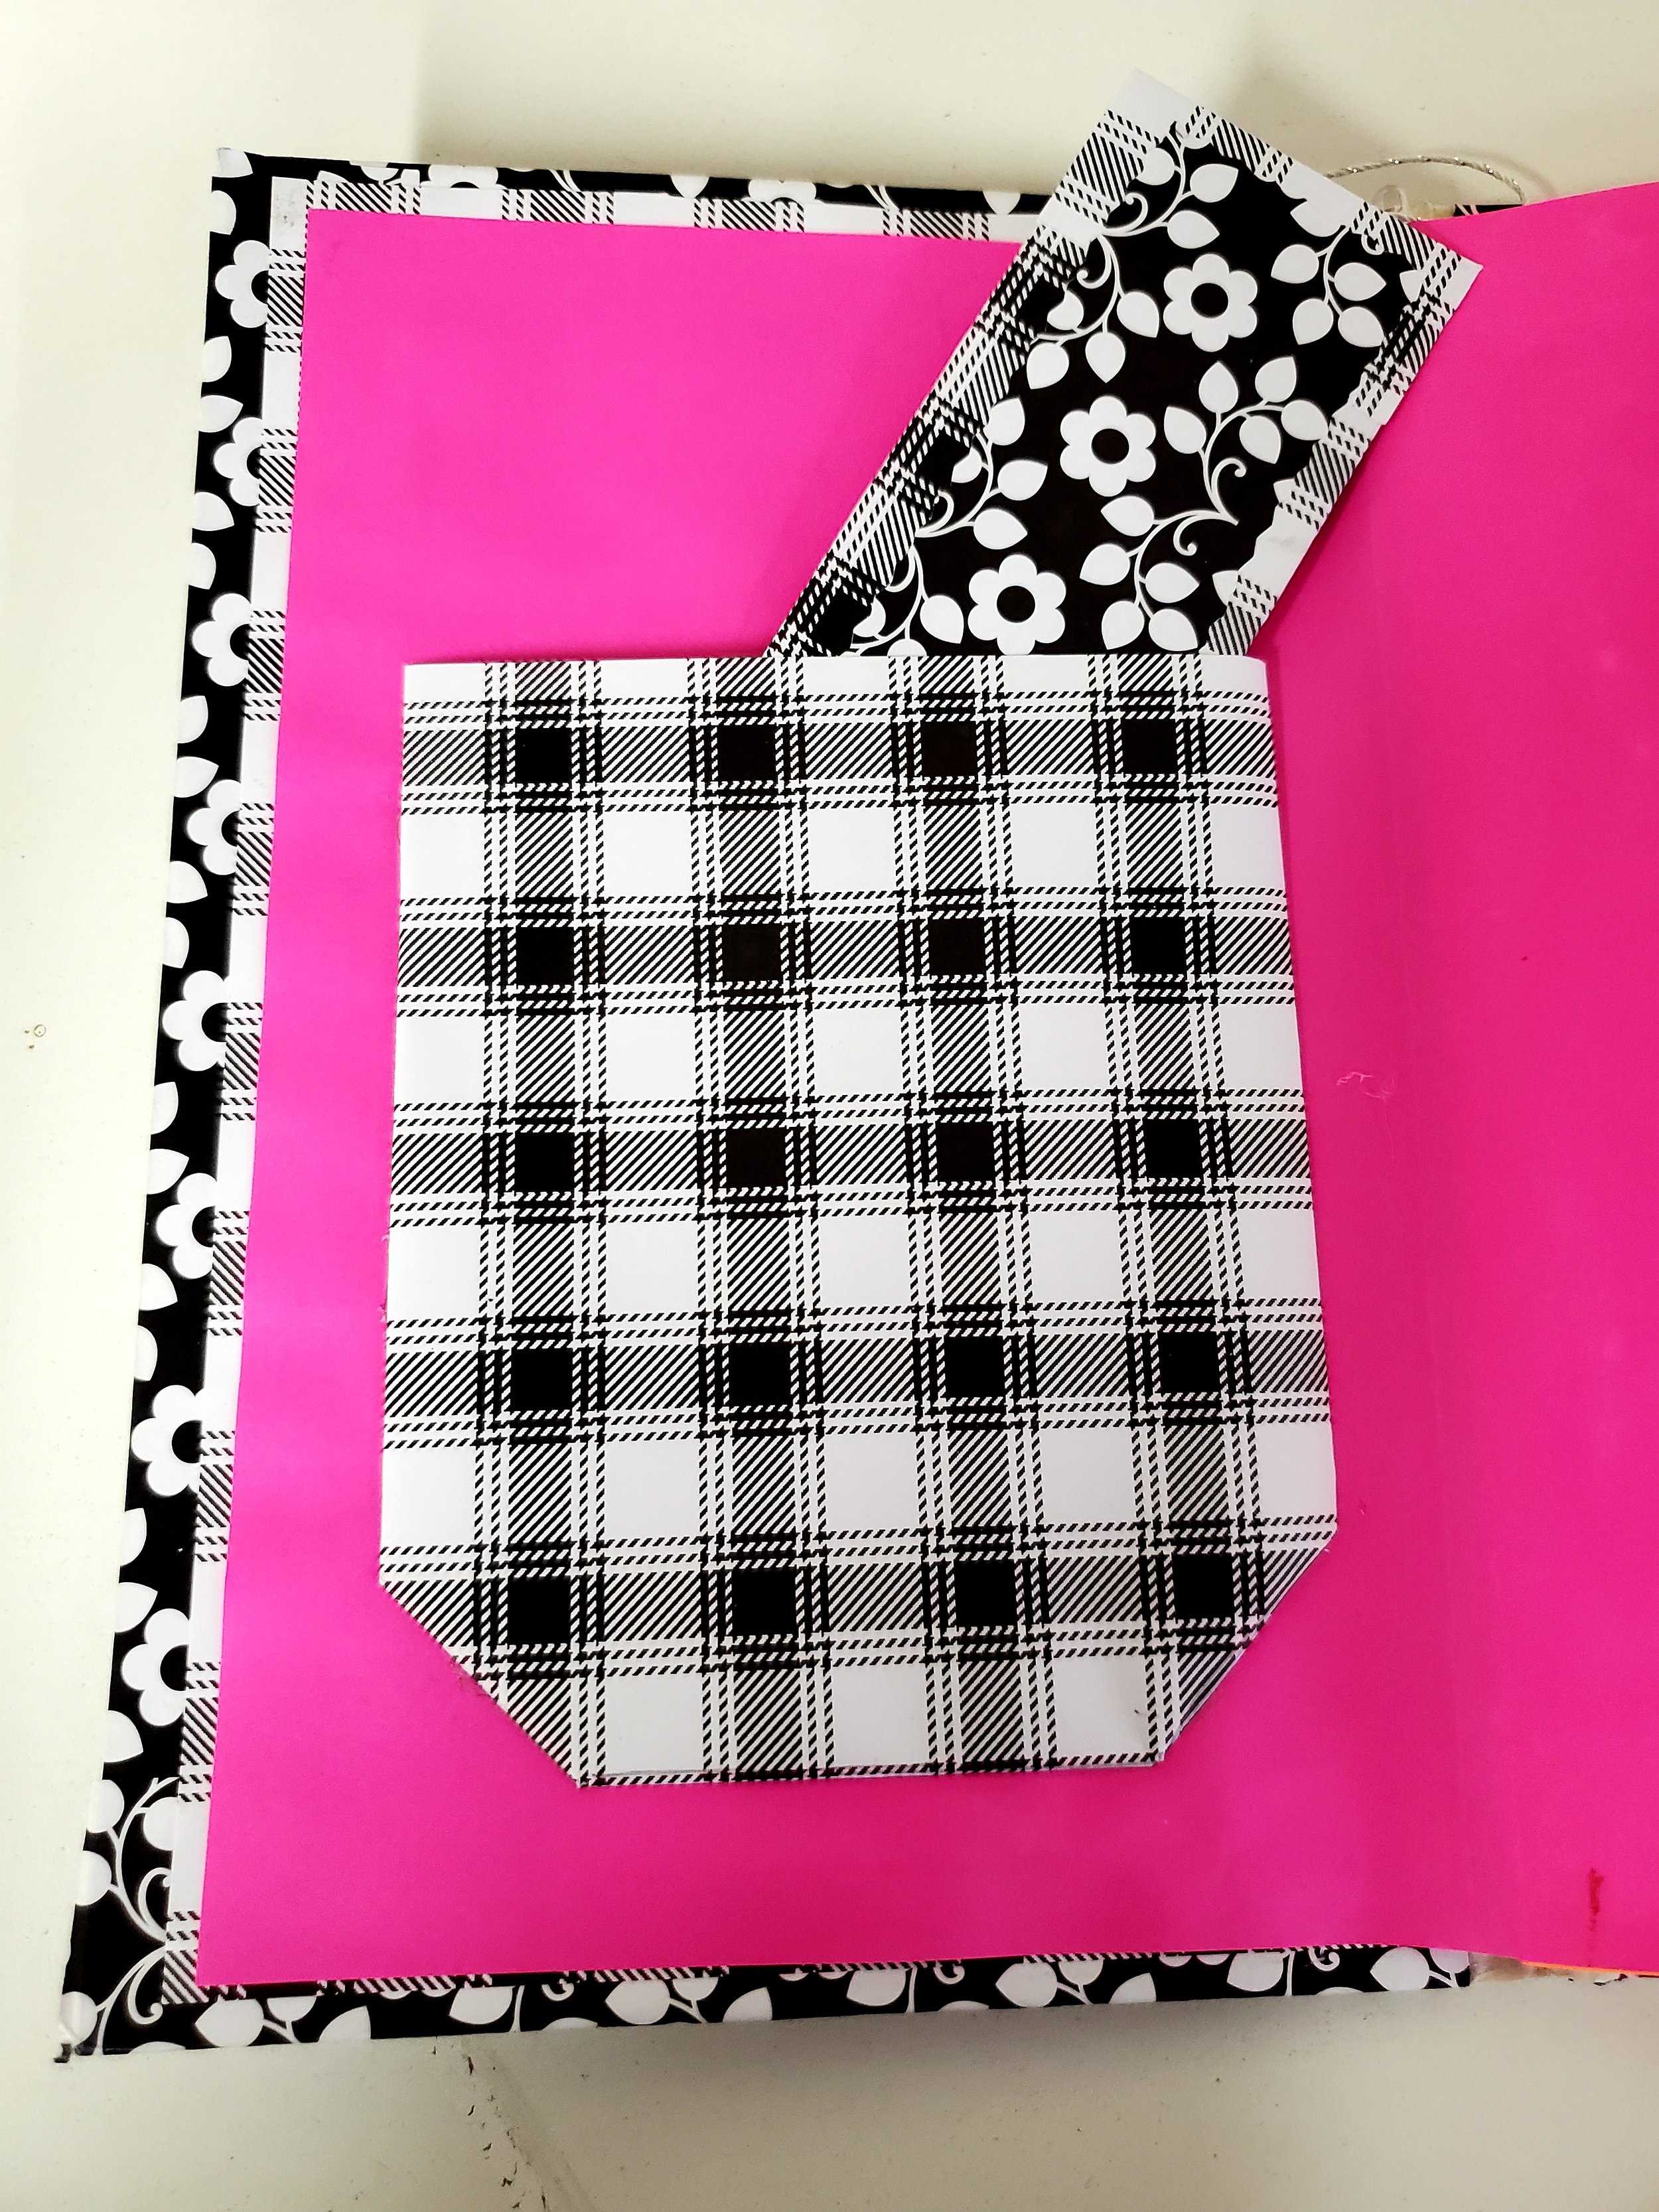
Follow these tutorials to add window pockets & inserts to your books. Download & print our templates above to create Square, Rectangle or Double Window designs. The templates were designed to fit into an Accordion Book, but can be used for other designs as well.
1) Square Windows & Inserts
2) Rectangle Windows & Inserts
3) Double Window With Inserts
4) Sample Pockets, Windows & Inserts
Tech Extension - Circuit Cards
Watch the following videos & slideshows to make a Circuit Card to add LED lights to your book designs. You can make cards with or without soldering.
Circuit Cards - Video Tutorials
Follow these tutorials to make an LED Circuit Card. Watch Video 1 to make your tape circuit. Then watch Videos 2 OR 3 depending on whether or not you are soldering.
1) Design Your Circuit
2) Simple Version: Make Without Solder
3) Complex Version: Make With Solder
Circuit Cards - Slideshow
Follow these tutorials to make an LED Circuit Card. The slideshow is great to project in class for step-by-step instructions.
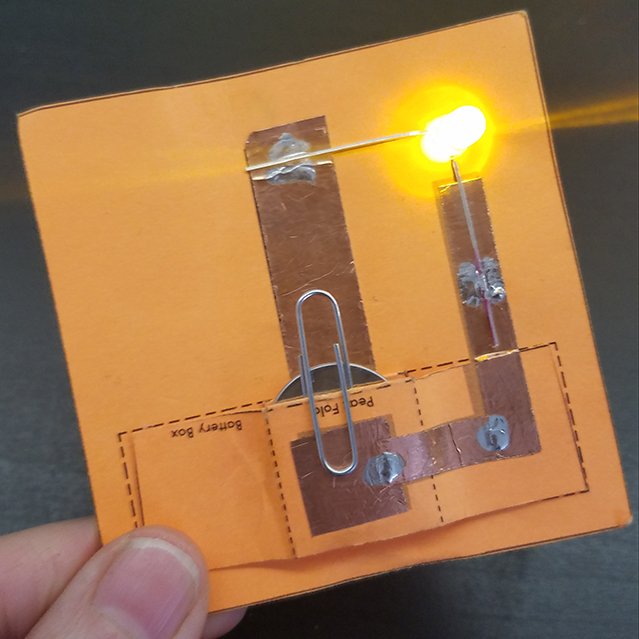
A Circuit Card is a great way to add technology to any project. You can make a small tape circuit & switch with an LED light and attach to any invention.
Download the Circuit Card template and print onto cardstock. Cut out the Circuit Card along the square line.
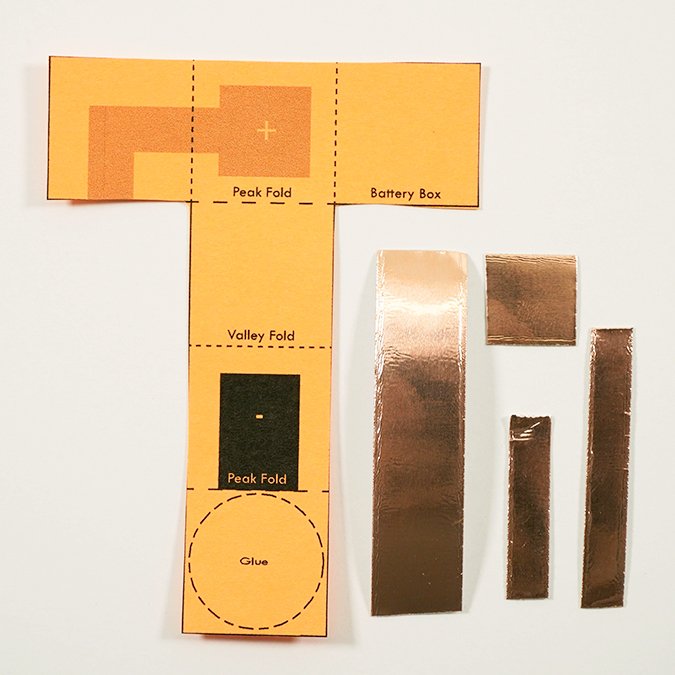
Cut out the T-shaped battery box. Pre-cut copper tape for younger makers: 1/2" x 2" copper strips, 1/2" x 1/2" copper squares, 1/4" x 1" copper strips, 1/4" x 1 1/2" copper strips.
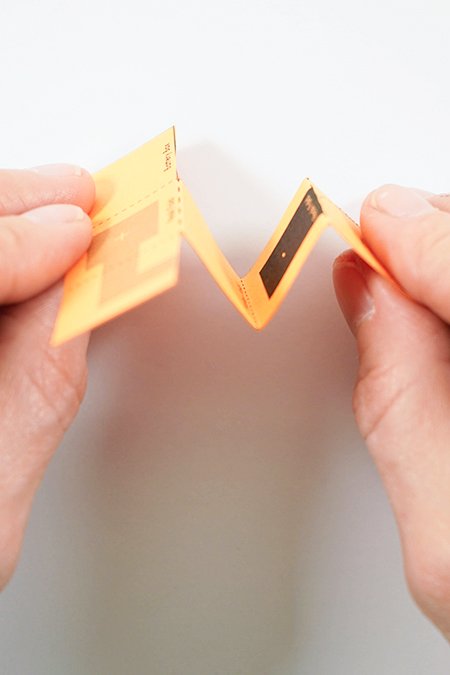
Fold the battery box template into peaks and valleys as shown on the diagrams. You will get an "M" shape.
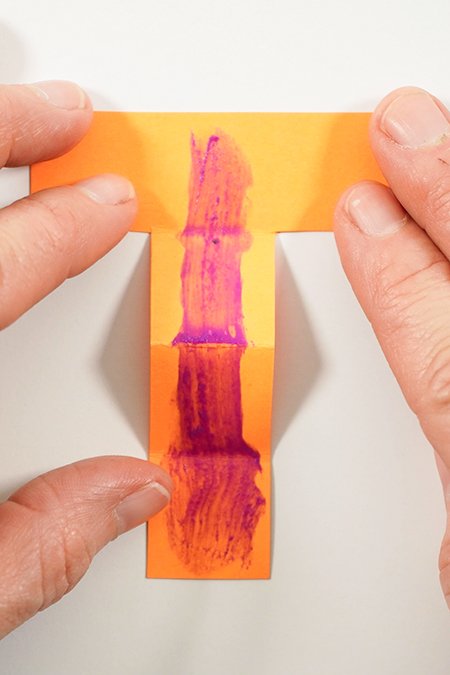
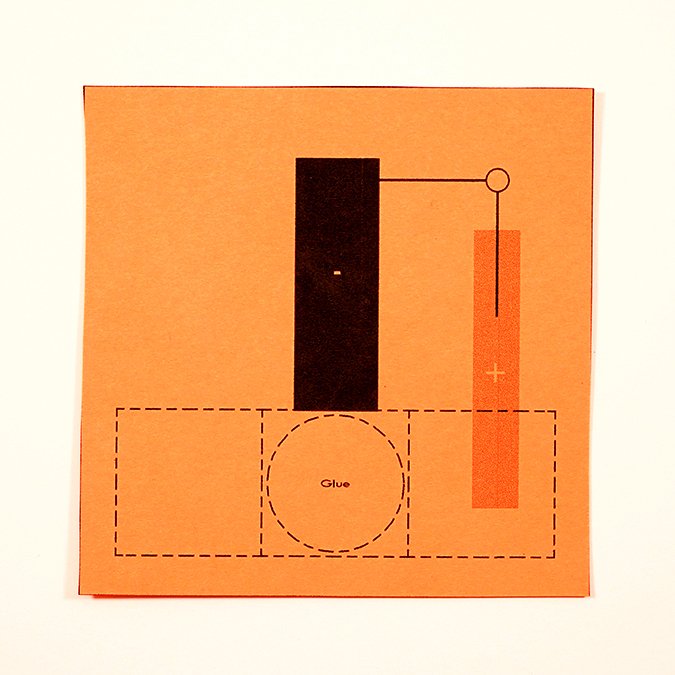
Flip the template over to the blank side. Place glue along the center.
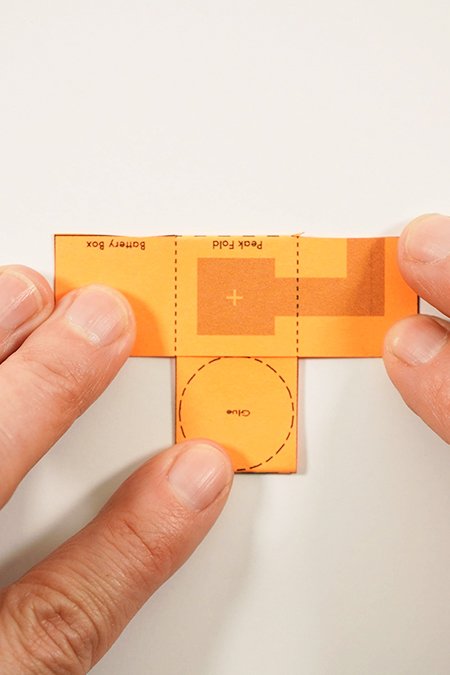
Fold over each end tab to make a smaller "T" shape. You should see the diagrams on all sides. Place glue on the circle.
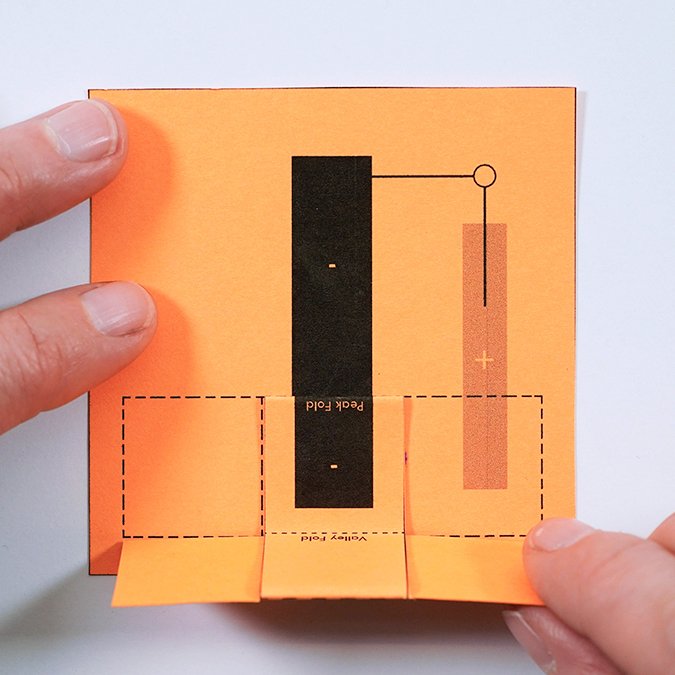
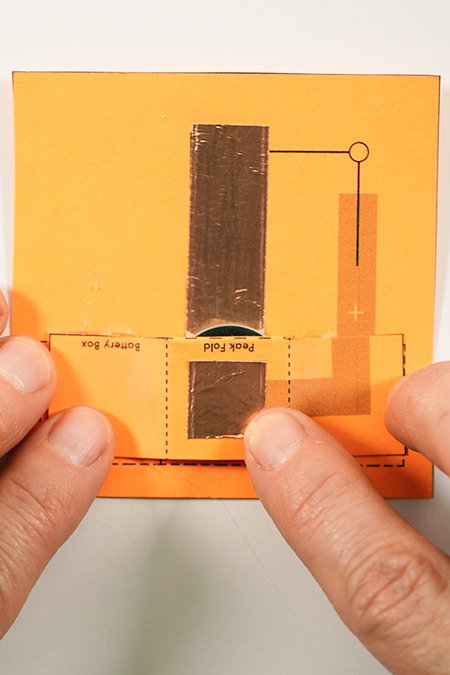
Stick it to the circle on your square template. The black (-) rectangle diagram should line up.
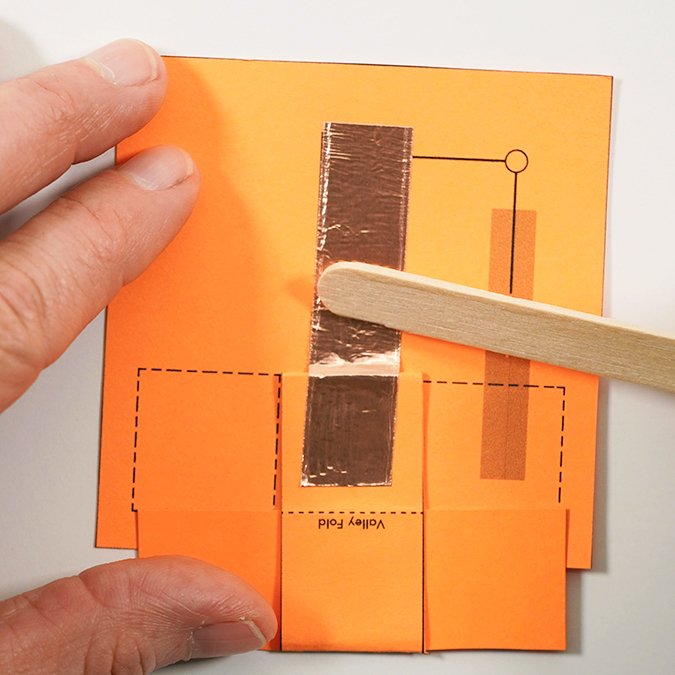
Place the 1/2" x 2" copper strip over the black diagram. Rub it with a popsicle stick to smooth & burnish. This is the (-) side of your circuit.
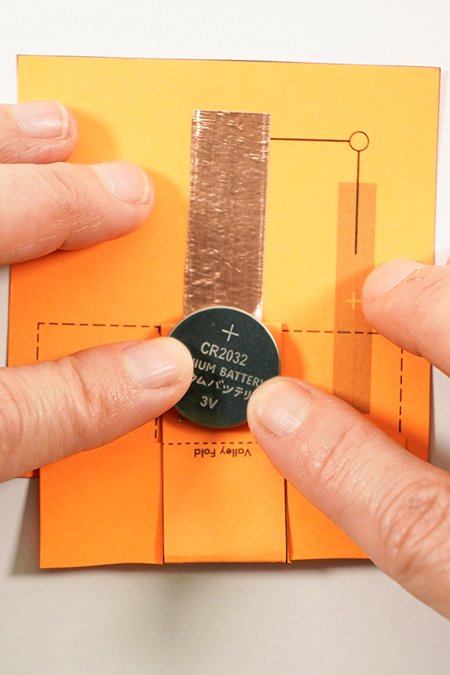
Place the (-) side of the battery on the copper, (+) side up.
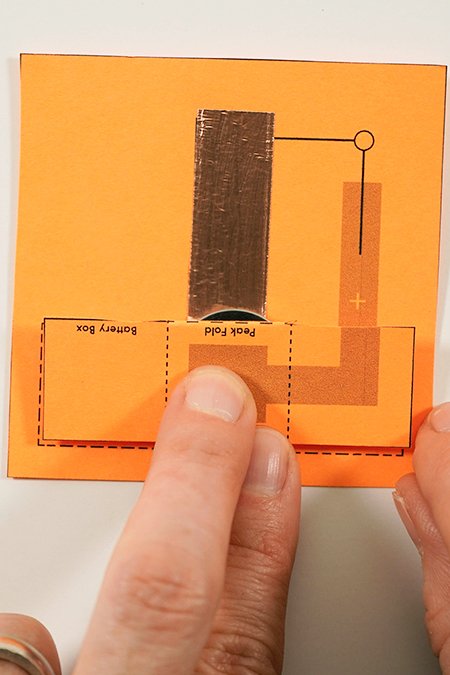
Fold the tab over to make a pocket
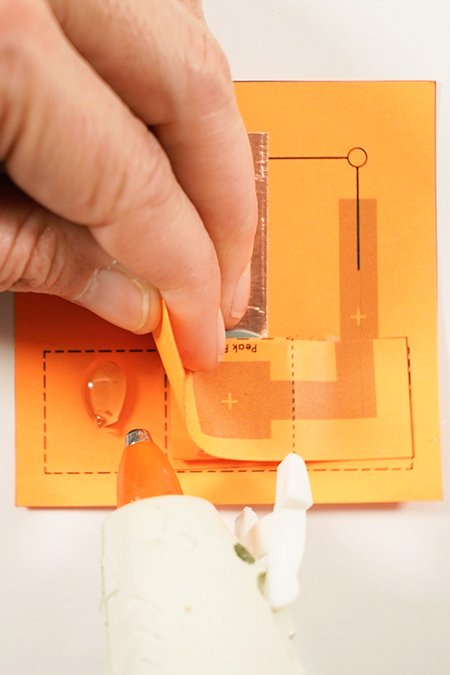
Hot glue both side tabs down. Make sure the battery is tight inside the pocket.
Stick your 1/2"x 1/2" copper square to the grey square on your battery box. This will be the (+) side of your circuit.
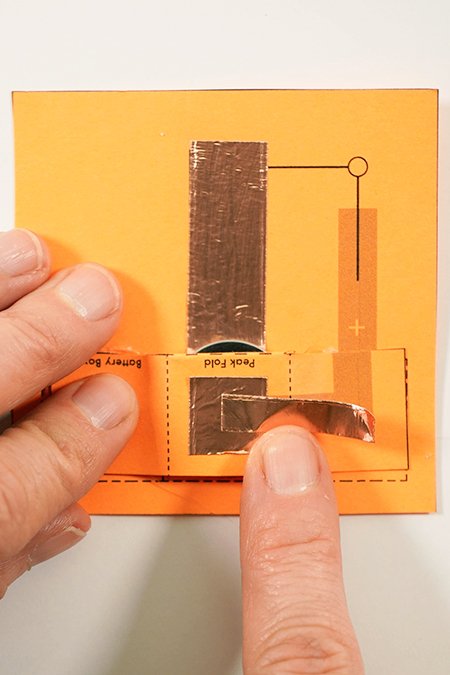
Add the 1/4" x 1" strip over the copper square and over the diagram to the right.
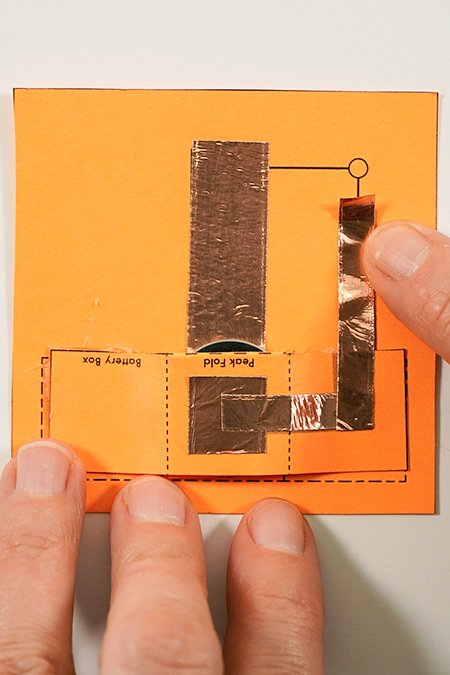
Add the final 1/4" x 1 1/2" strip of copper over the diagram. Make sure the copper overlaps at the corner. Burnish your copper to smooth it.
You can place your LED light on either side of your card depending on how it will be attached to your project. Placing it opposite the circuit is great if you're inserting it into your project.
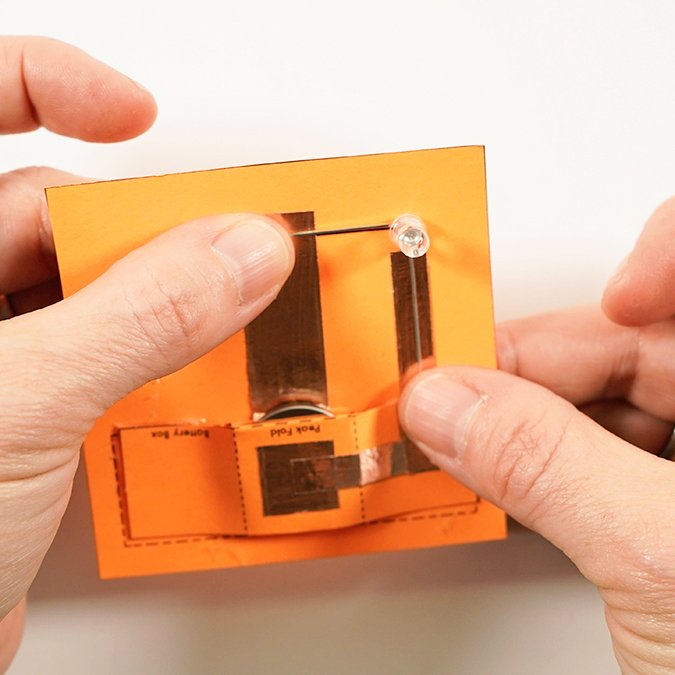
Placing it flat on the copper is great if you are gluing the card onto a flat surface.
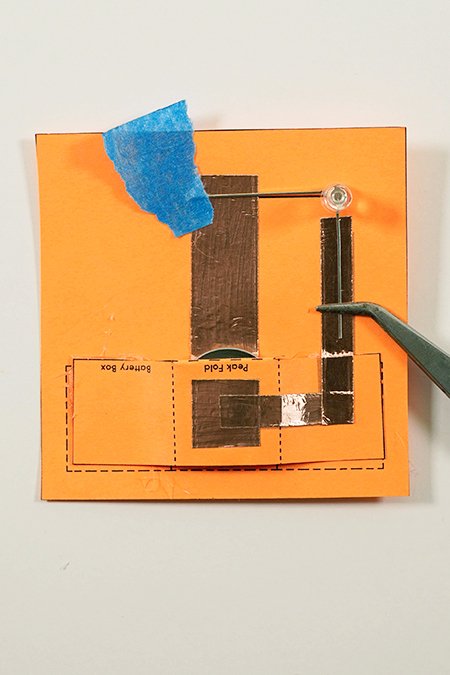
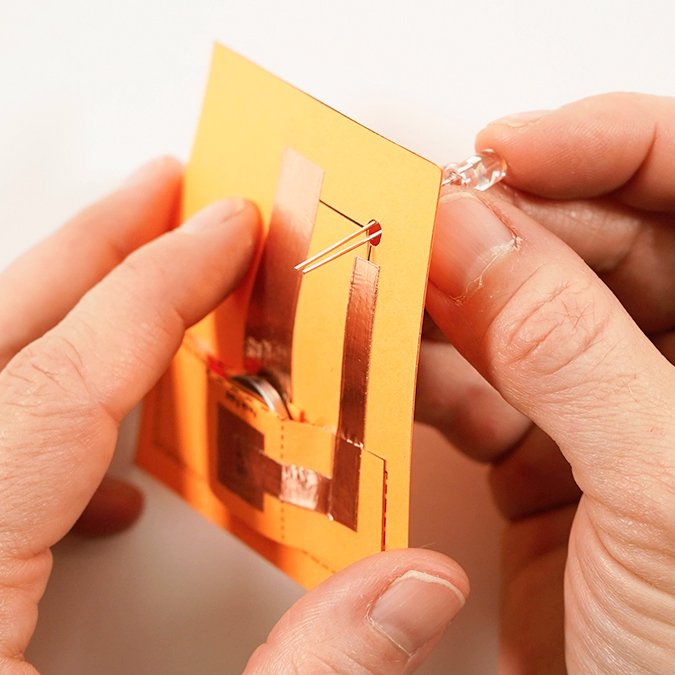
If you can not solder, hold the LED light in place with tape or tweezers. Place copper tape and scotch tape over your leads to secure.
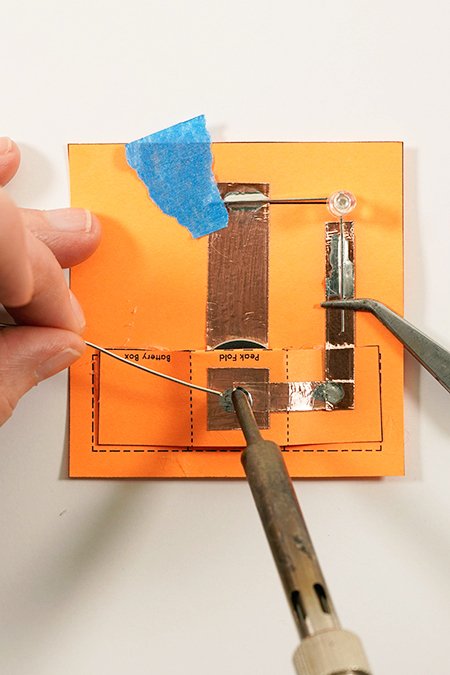
If you can solder, solder where the leads overlap the copper and where the copper overlaps along the circuit. Make sure the (+) and (-) are facing the right direction.
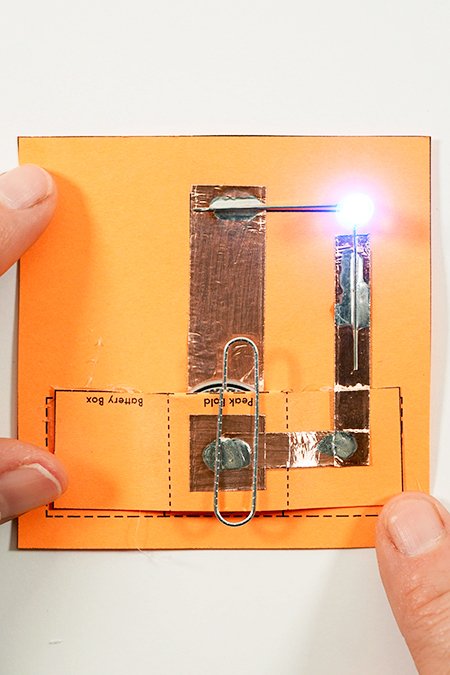
Insert a paperclip to the battery pocket so that one loop touches the battery and one loop touches the copper. This is your switch.
STEAM IN ACTION
Check Out These Awesome Examples Of Student & Teacher Creations
COPYRIGHT NOTICE:
This curriculum is developed and owned by Eurekus LLC and is intended for educational purposes only. No portion of the instructional webpage or associated materials can be copied, distributed or edited for commercial purposes without the express written consent from Eurekus LLC.
© EUREKUS LLC 2022