
LED CIRCUIT CARDS
Amplify Creativity With Technology
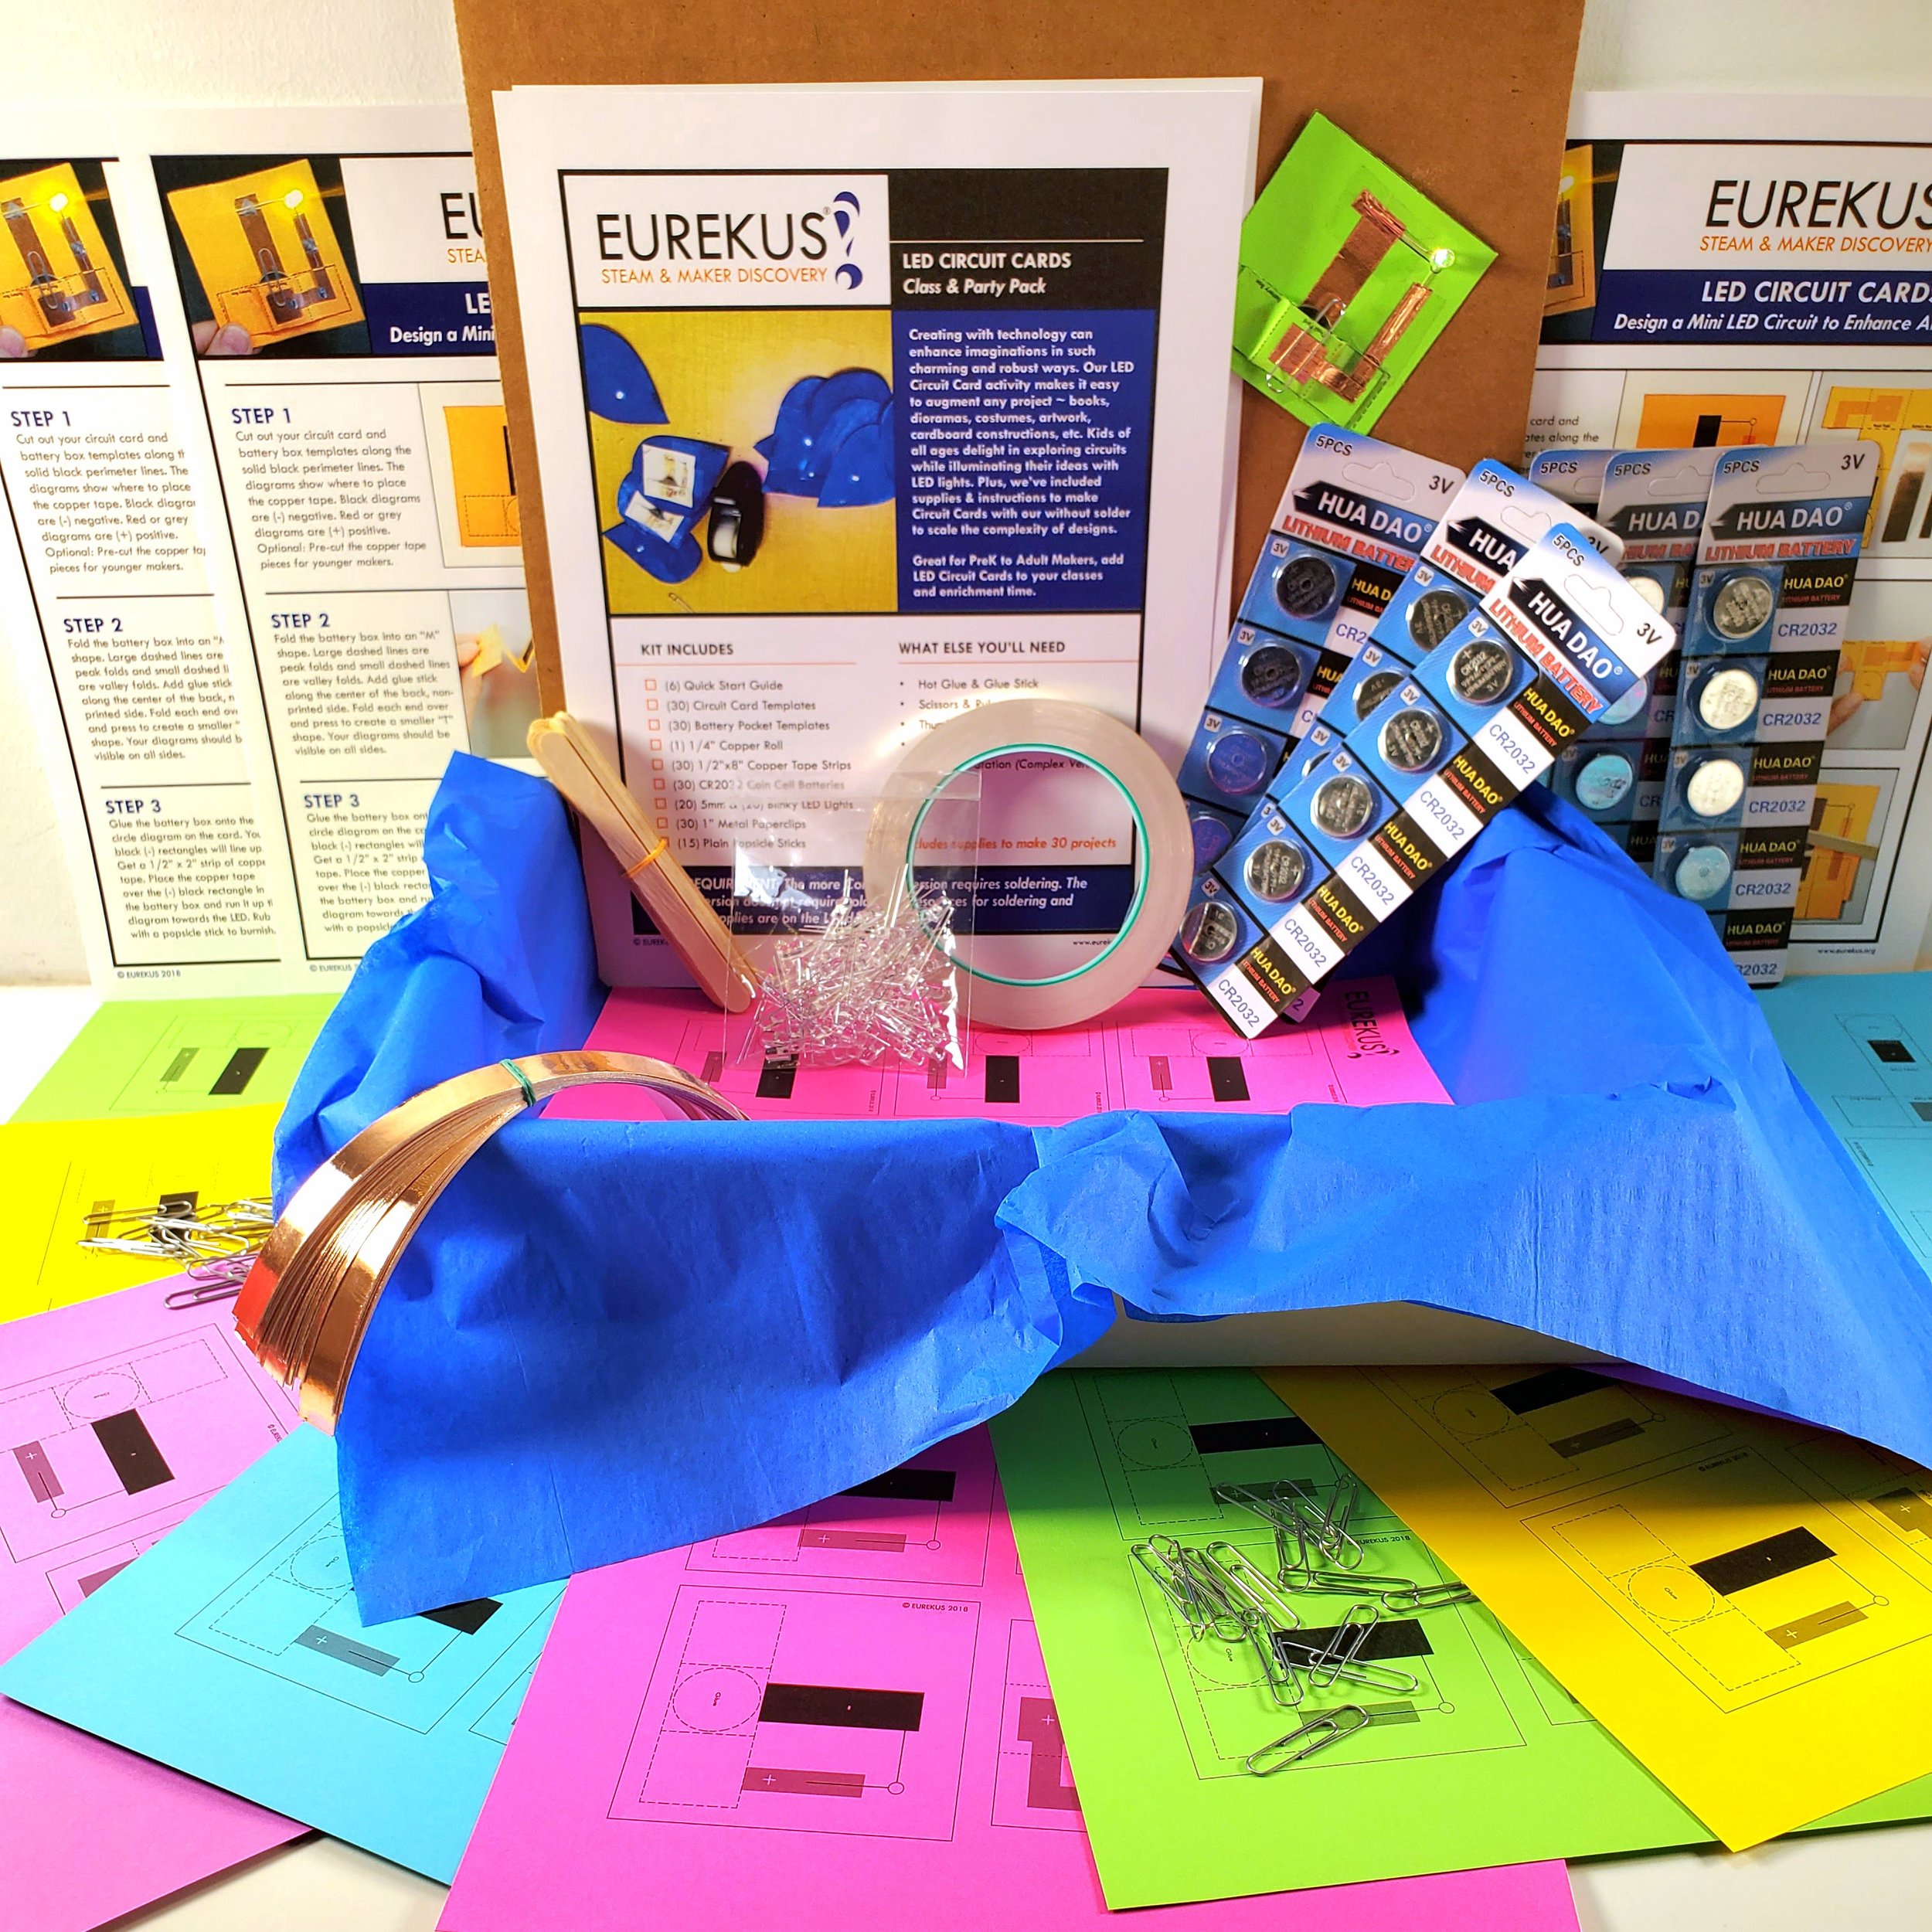
Creating with technology can enhance imaginations in charming and robust ways. Yet, it’s not always easy to add electronics investigations to class. That’s why we’ve designed a fantastic LED Circuit Card activity to augment any project ~ books, dioramas, costumes, artwork, cardboard constructions, etc. Kids of all ages delight in exploring circuits while illuminating their ideas with LED lights. Great for PreK to Adult Makers, add Circuit Cards to your classes and enrichment time.
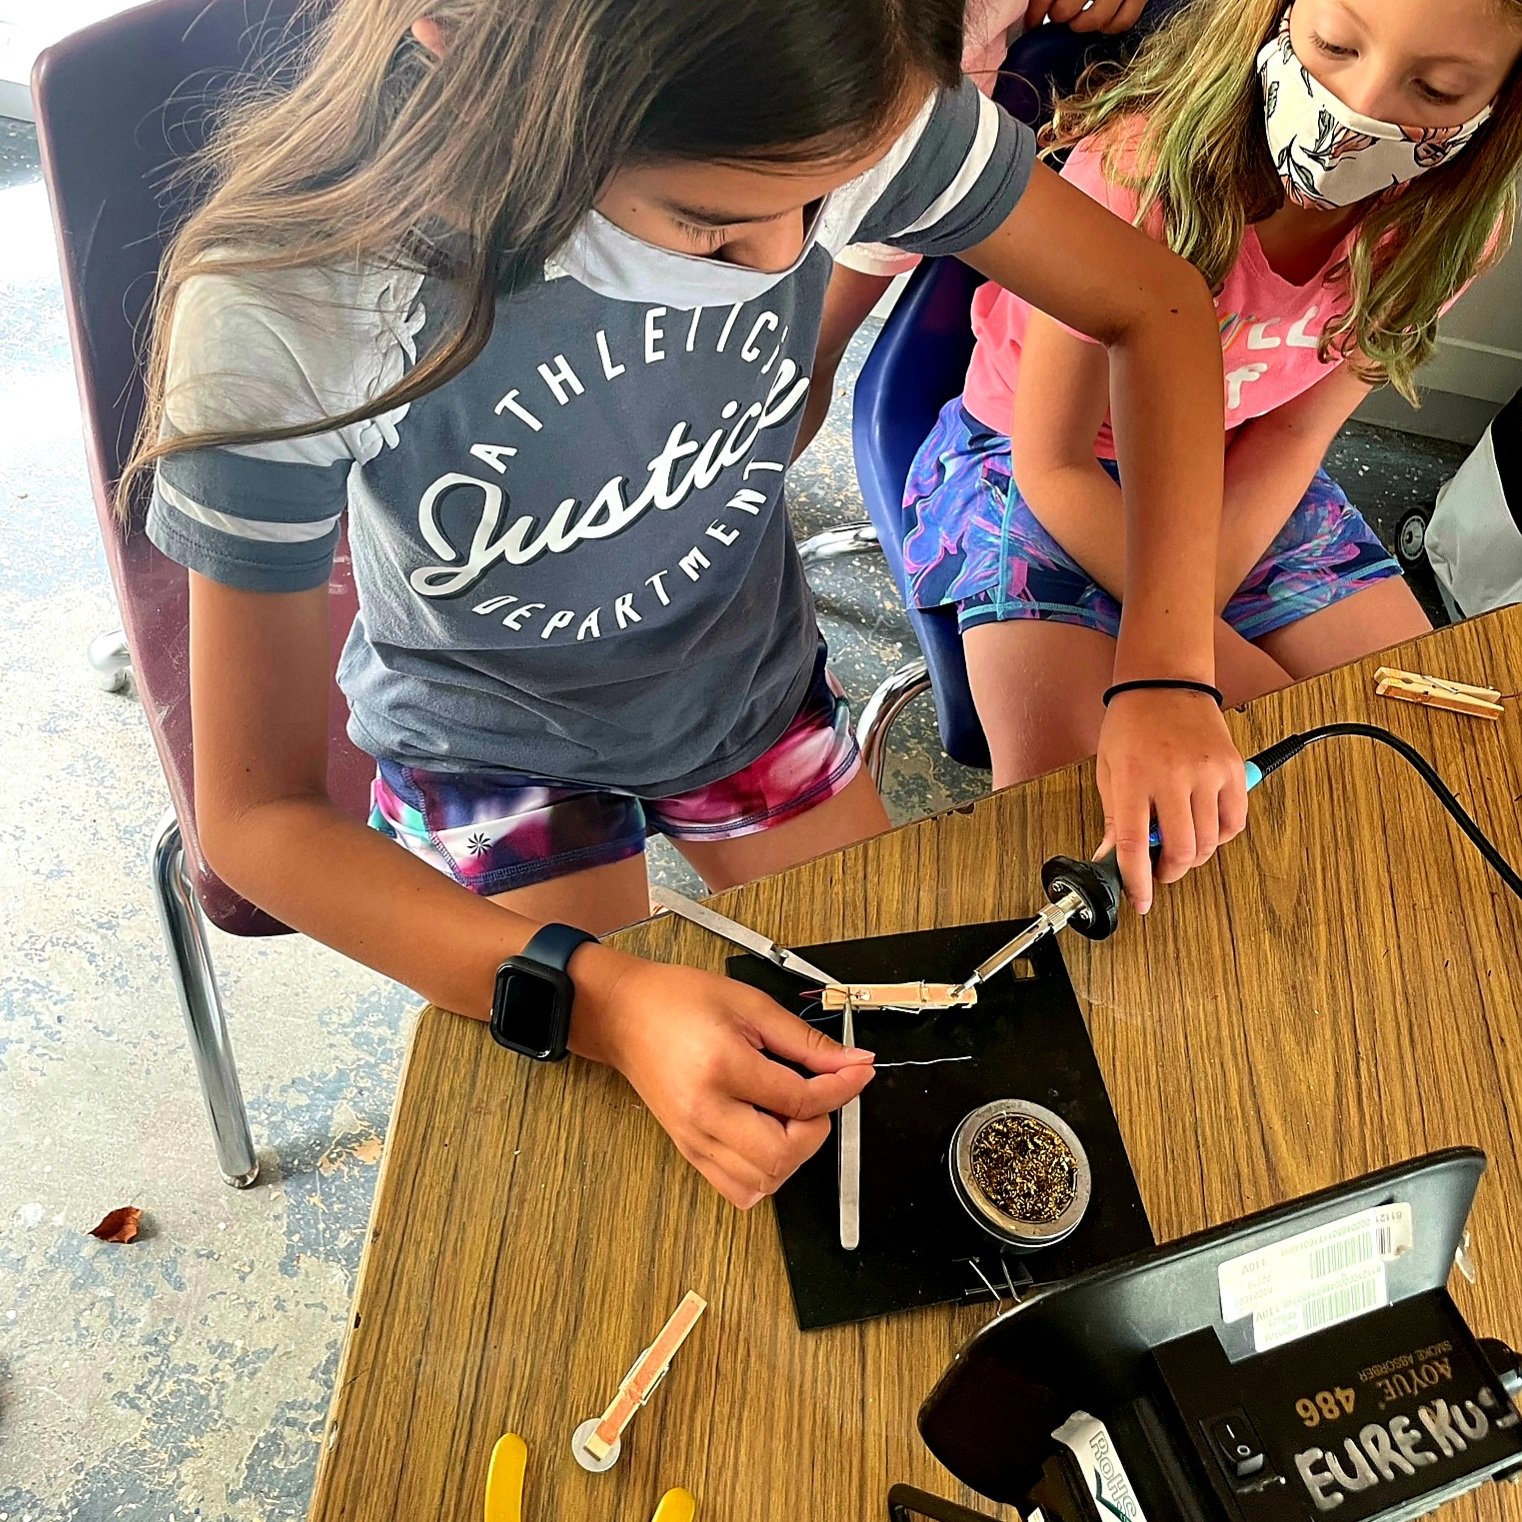
Can be made with or without soldering
-
PreK-12th Grade
Adult Learners
-
30-60 min. depending on version
-
Integrates with any topic or investigation
-
In-class, Hybrid or Online Learning
Implementation Steps


Overview
-
LED Circuit Cards are highly flexible to scale for different grades and content areas. We’ve included instructions and resources for making a simple Circuit Card that does not require soldering. There’s also tutorials for adding soldering to your creations for deeper engineering challenges.
-
Download planners, templates & handouts below. Print any needed resources.
-
Use the Supply Planner below to collect materials and tools for class. We’ve also included links to some of our vendors to order bulk supplies & technology.
You can also purchase handy student & teacher kits directly from us:
-
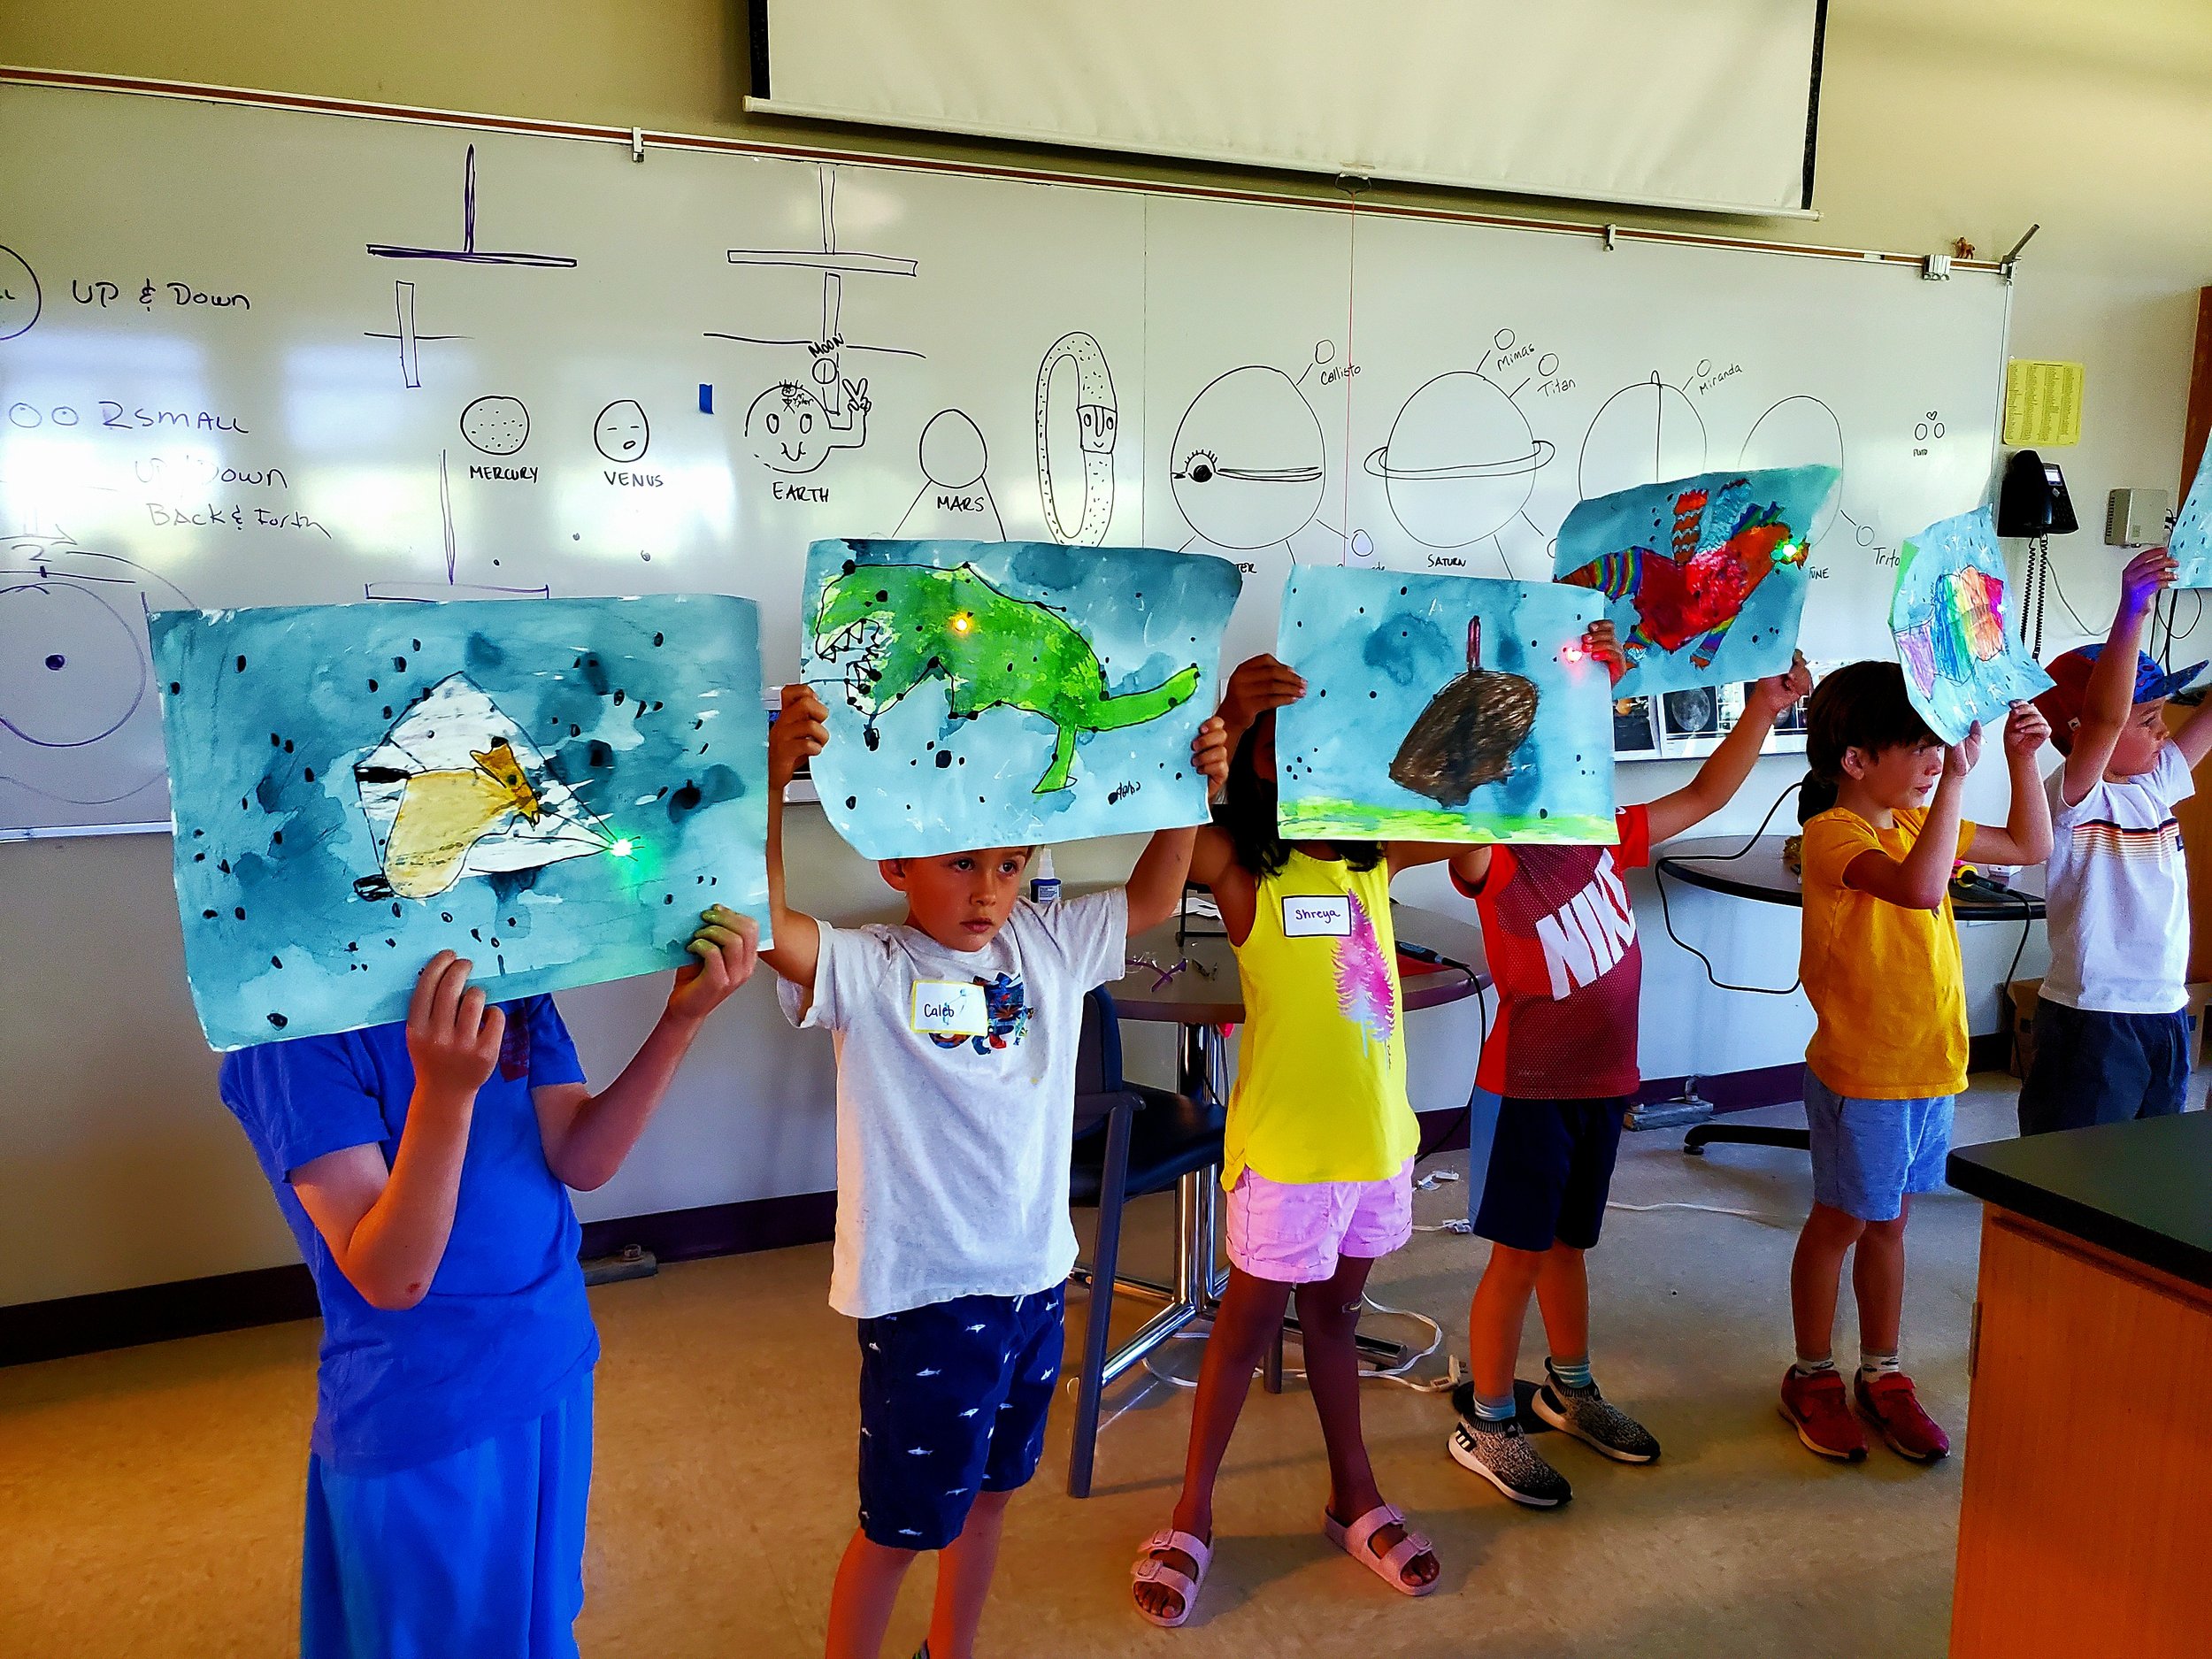
Explore our gallery of student work for inspiration. Be creative as you customize this program for your community. And, think of ways to integrate with your existing curriculum or units - creative writing, social studies, life science, etc.
-
Watch the tutorials and make several class samples. This allows you to learn the project, extend your ideas & trouble-shoot. We recommend chunking out the activity in phase like the videos.
-
Have a ball creating with your learners. You can show the video tutorials & slideshows in class to help guide you.
Need Help Planning? Enjoy Our Handy Student & Teacher Kits!


Planners, Templates & Handouts
Download Resources
-
Supply & Tool Planner (Collect your own or order from us)
-
-
Circuit Cards can easily scale for PreK-12th grade and integrate with any content area. Thus, they are a great project to enhance any investigation and can align with many Standards across grade levels. They also meet NGSS Standards for Engineering & Design.
-
Eurekus programs are easy to tailor to meet different learning goals. Here are some ideas of what educators have done to adapt the program and make it their own.
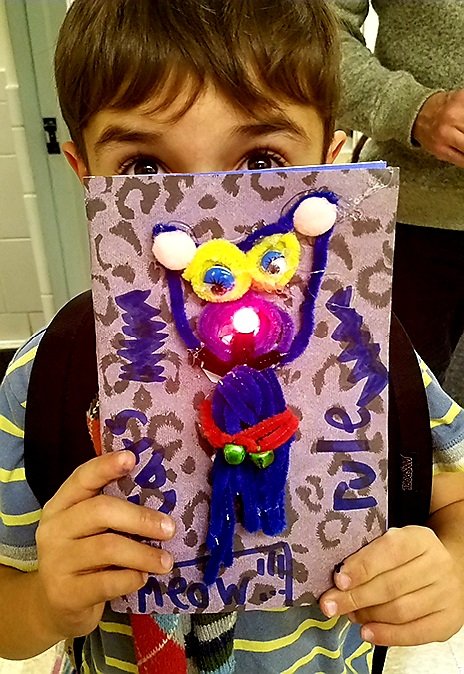
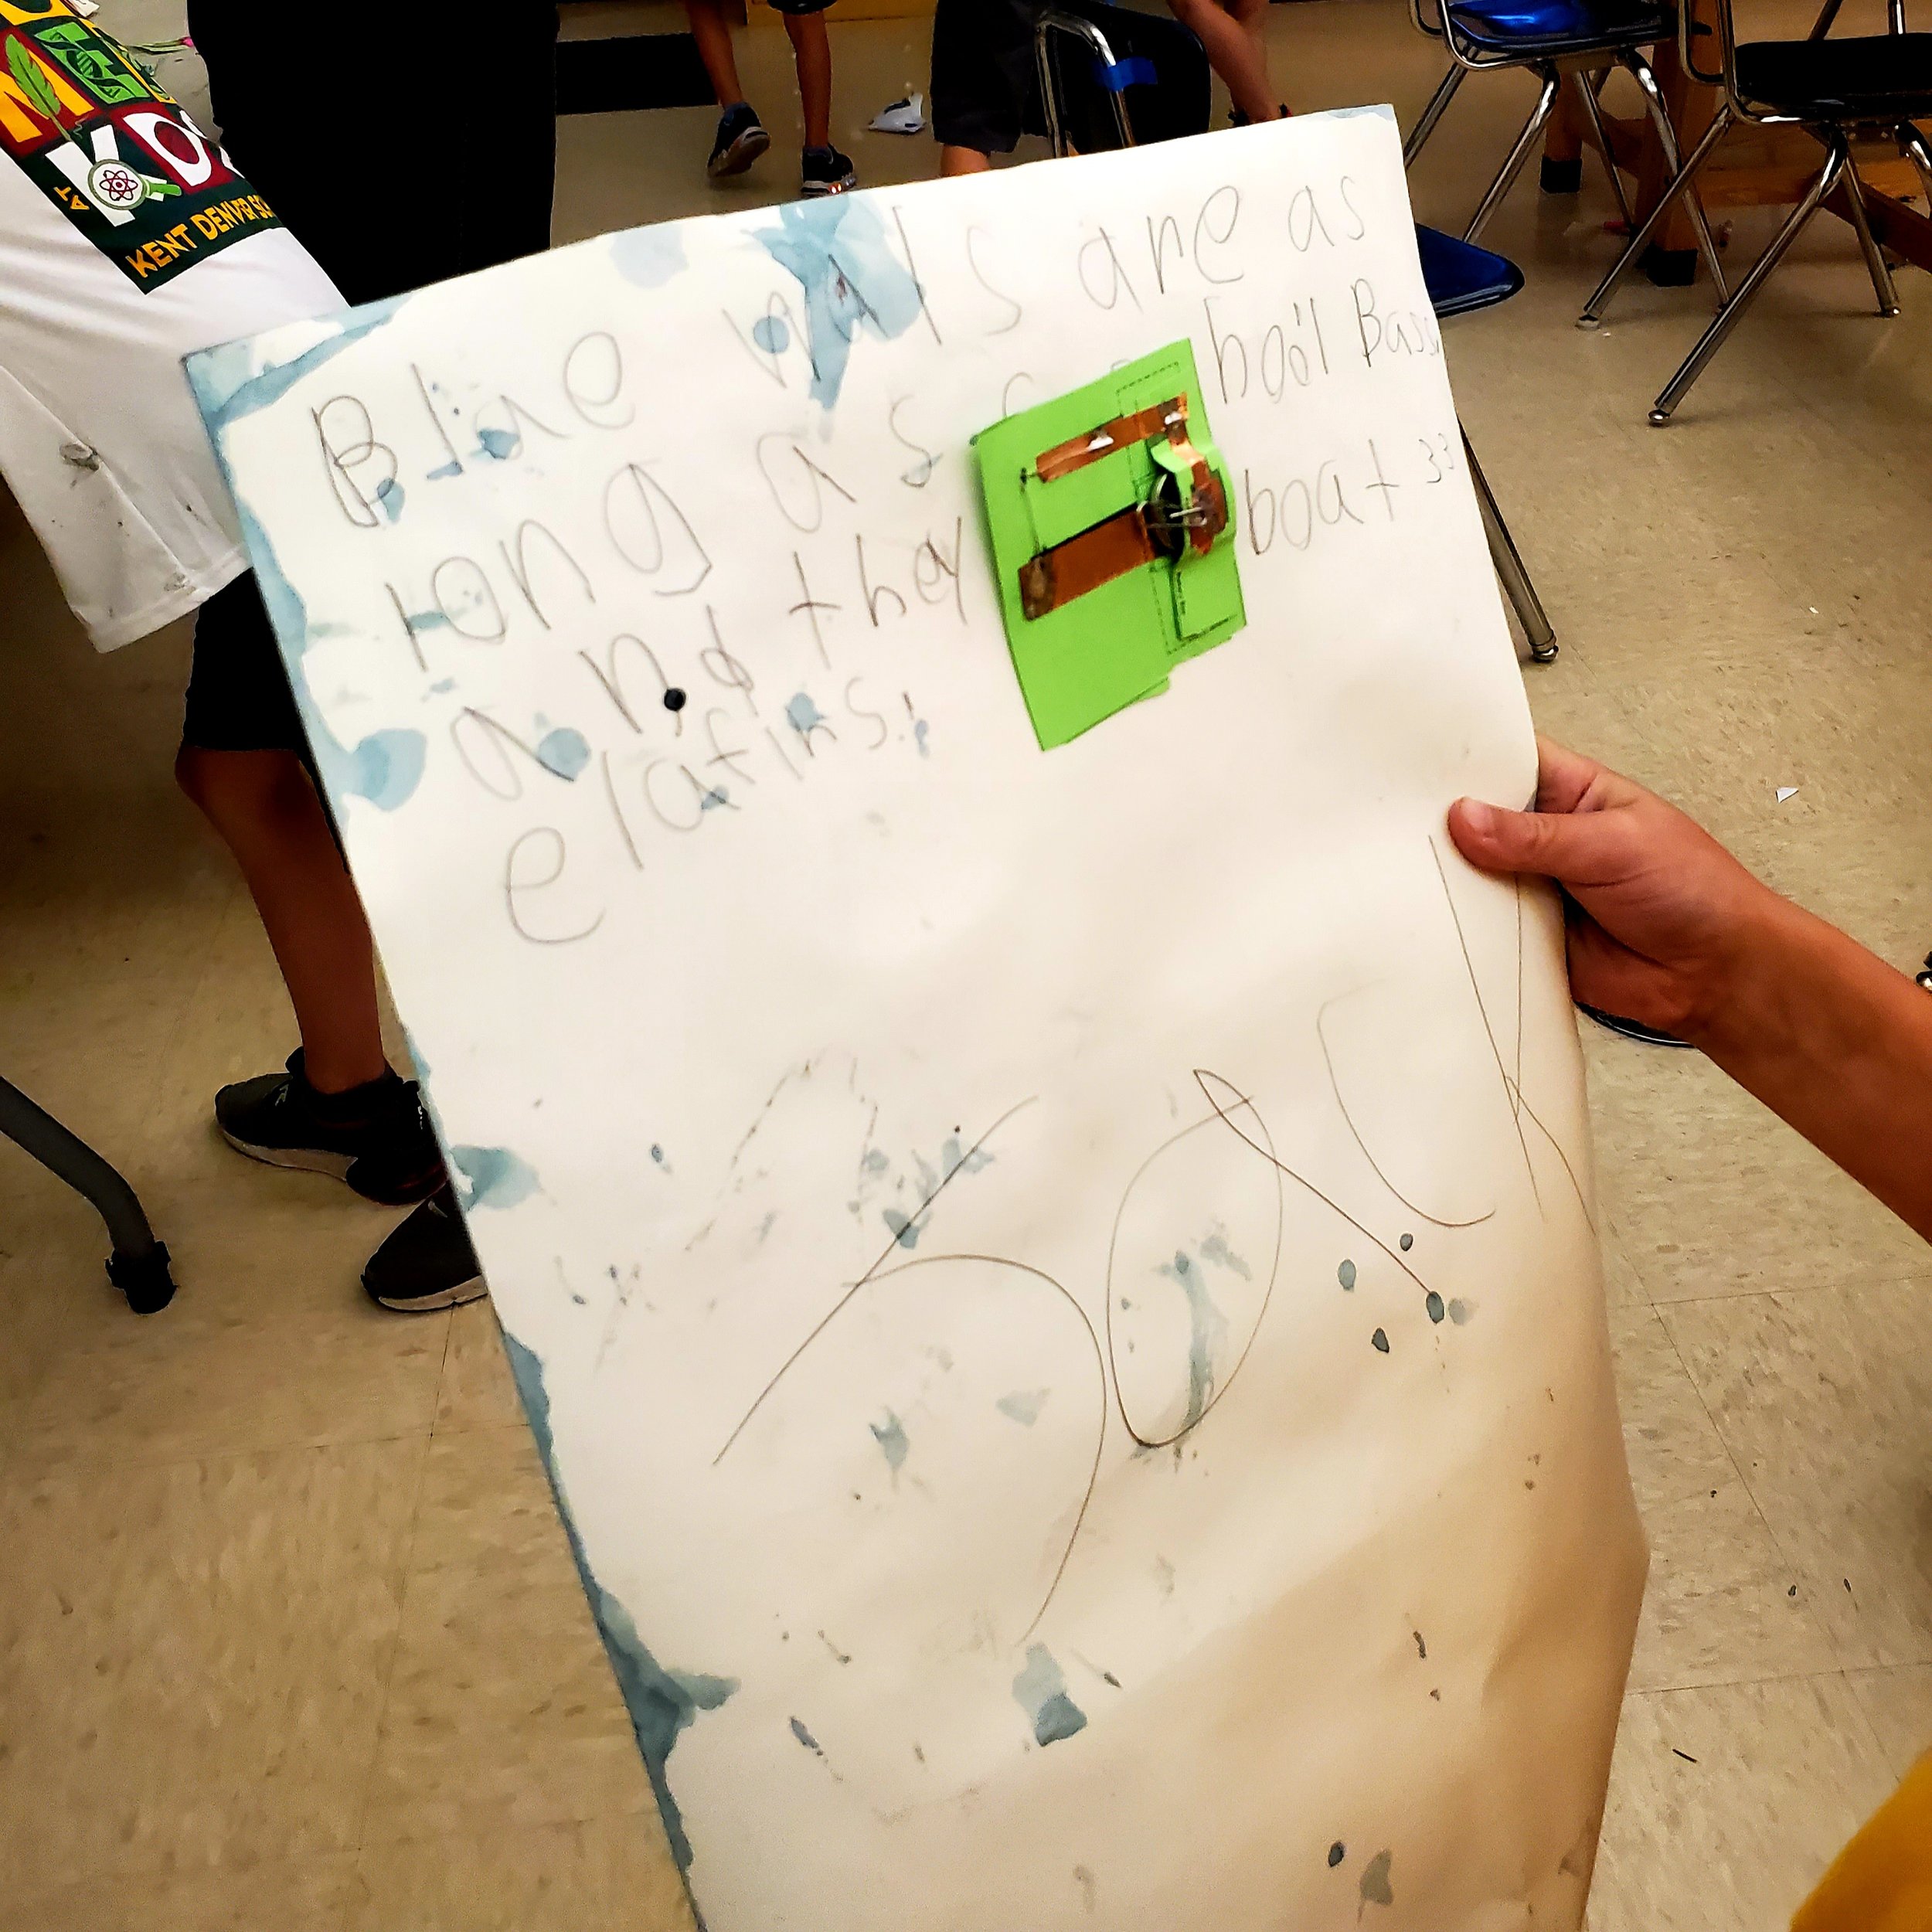
Add Circuit Cards to book-making activities.
Augment dioramas with Circuit Cards.
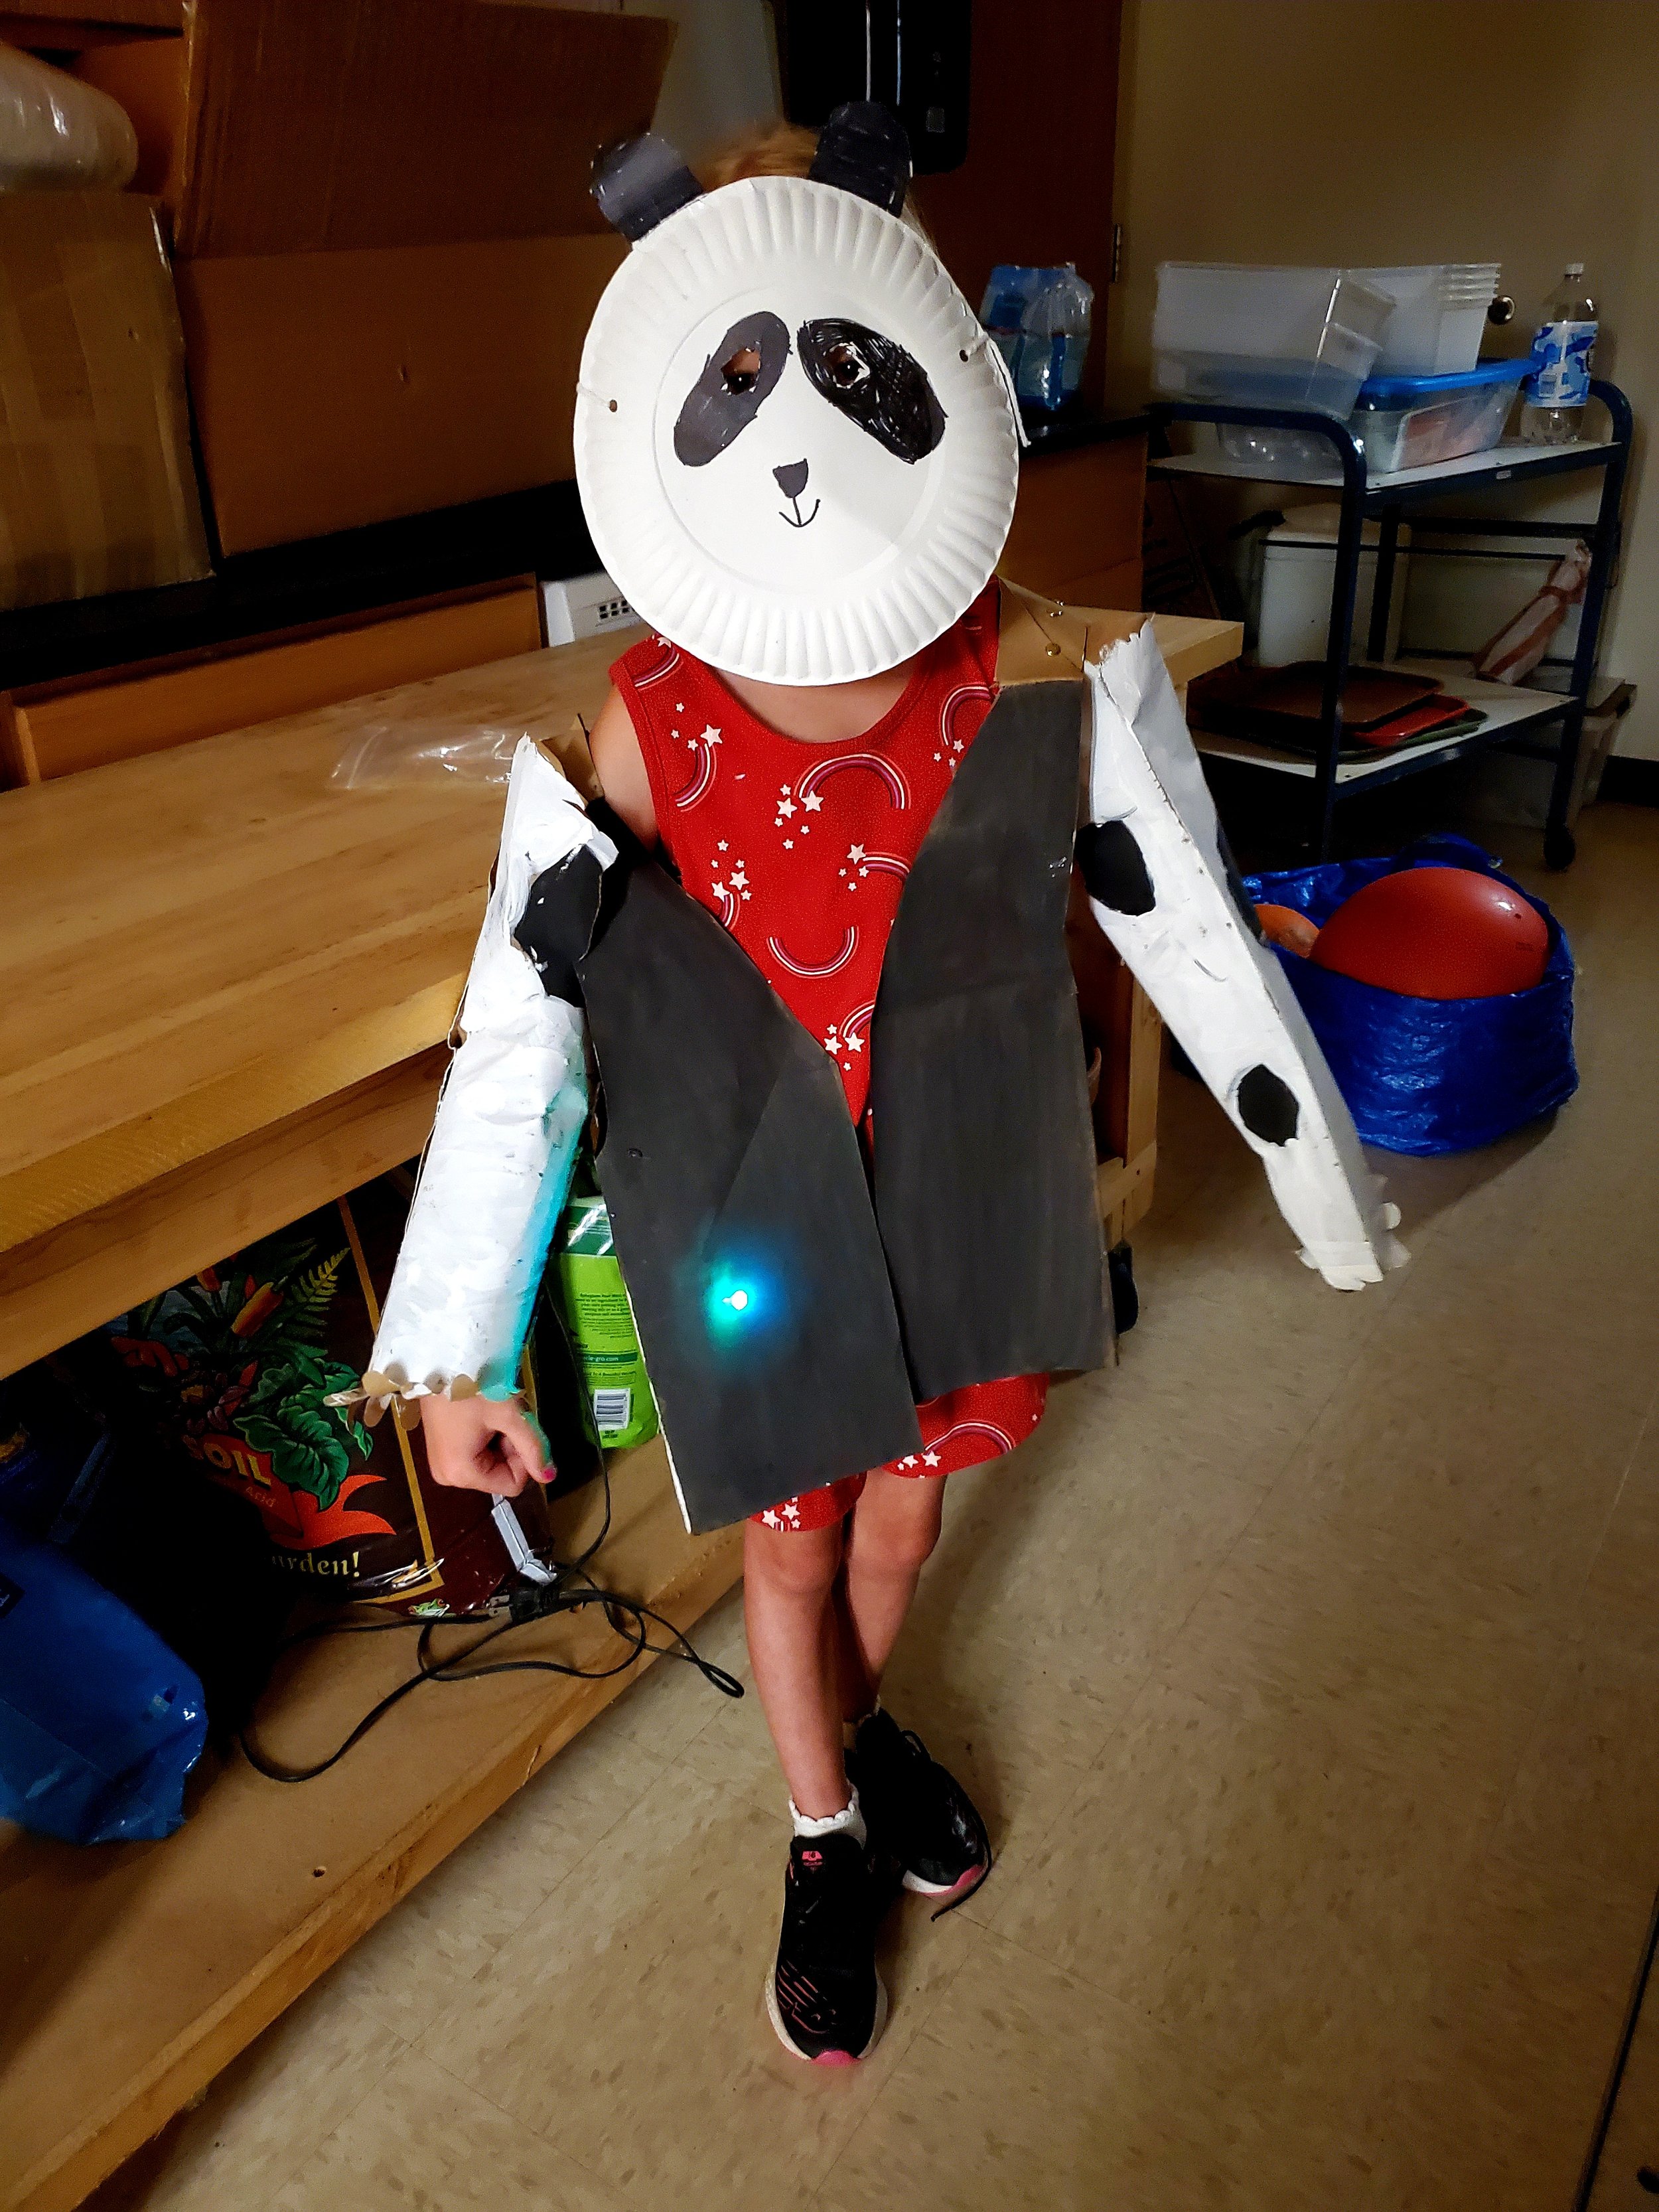
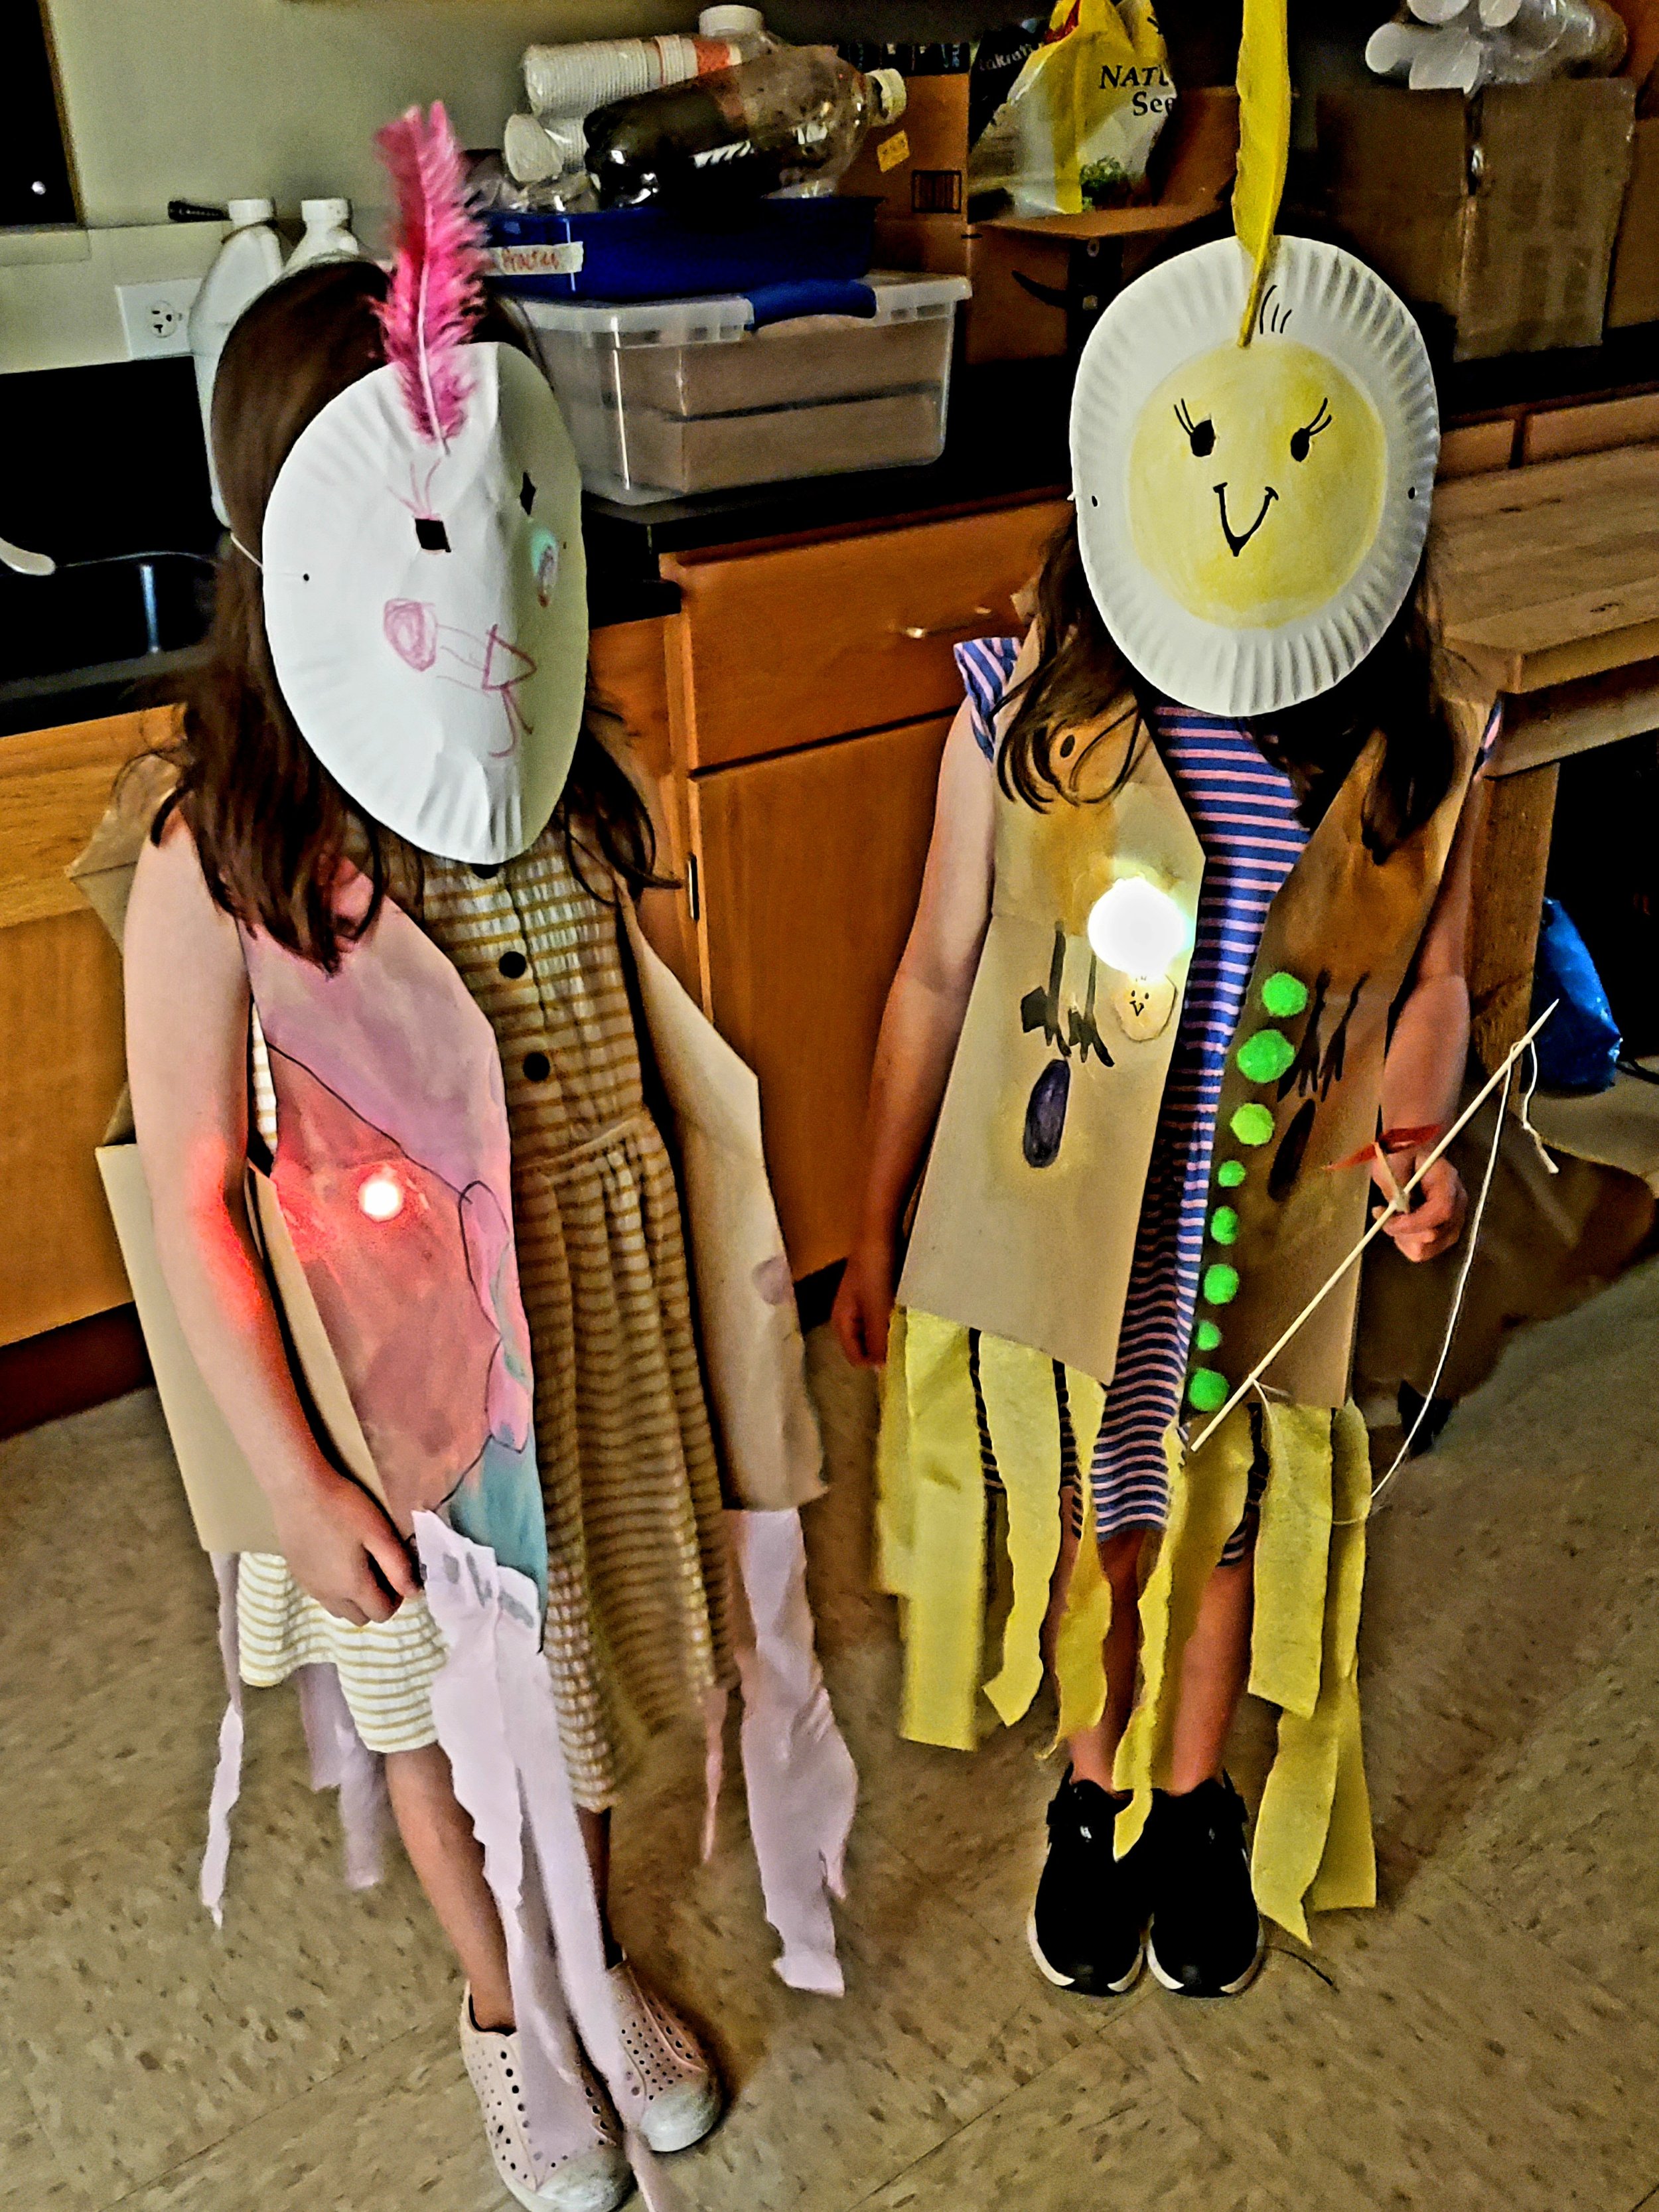
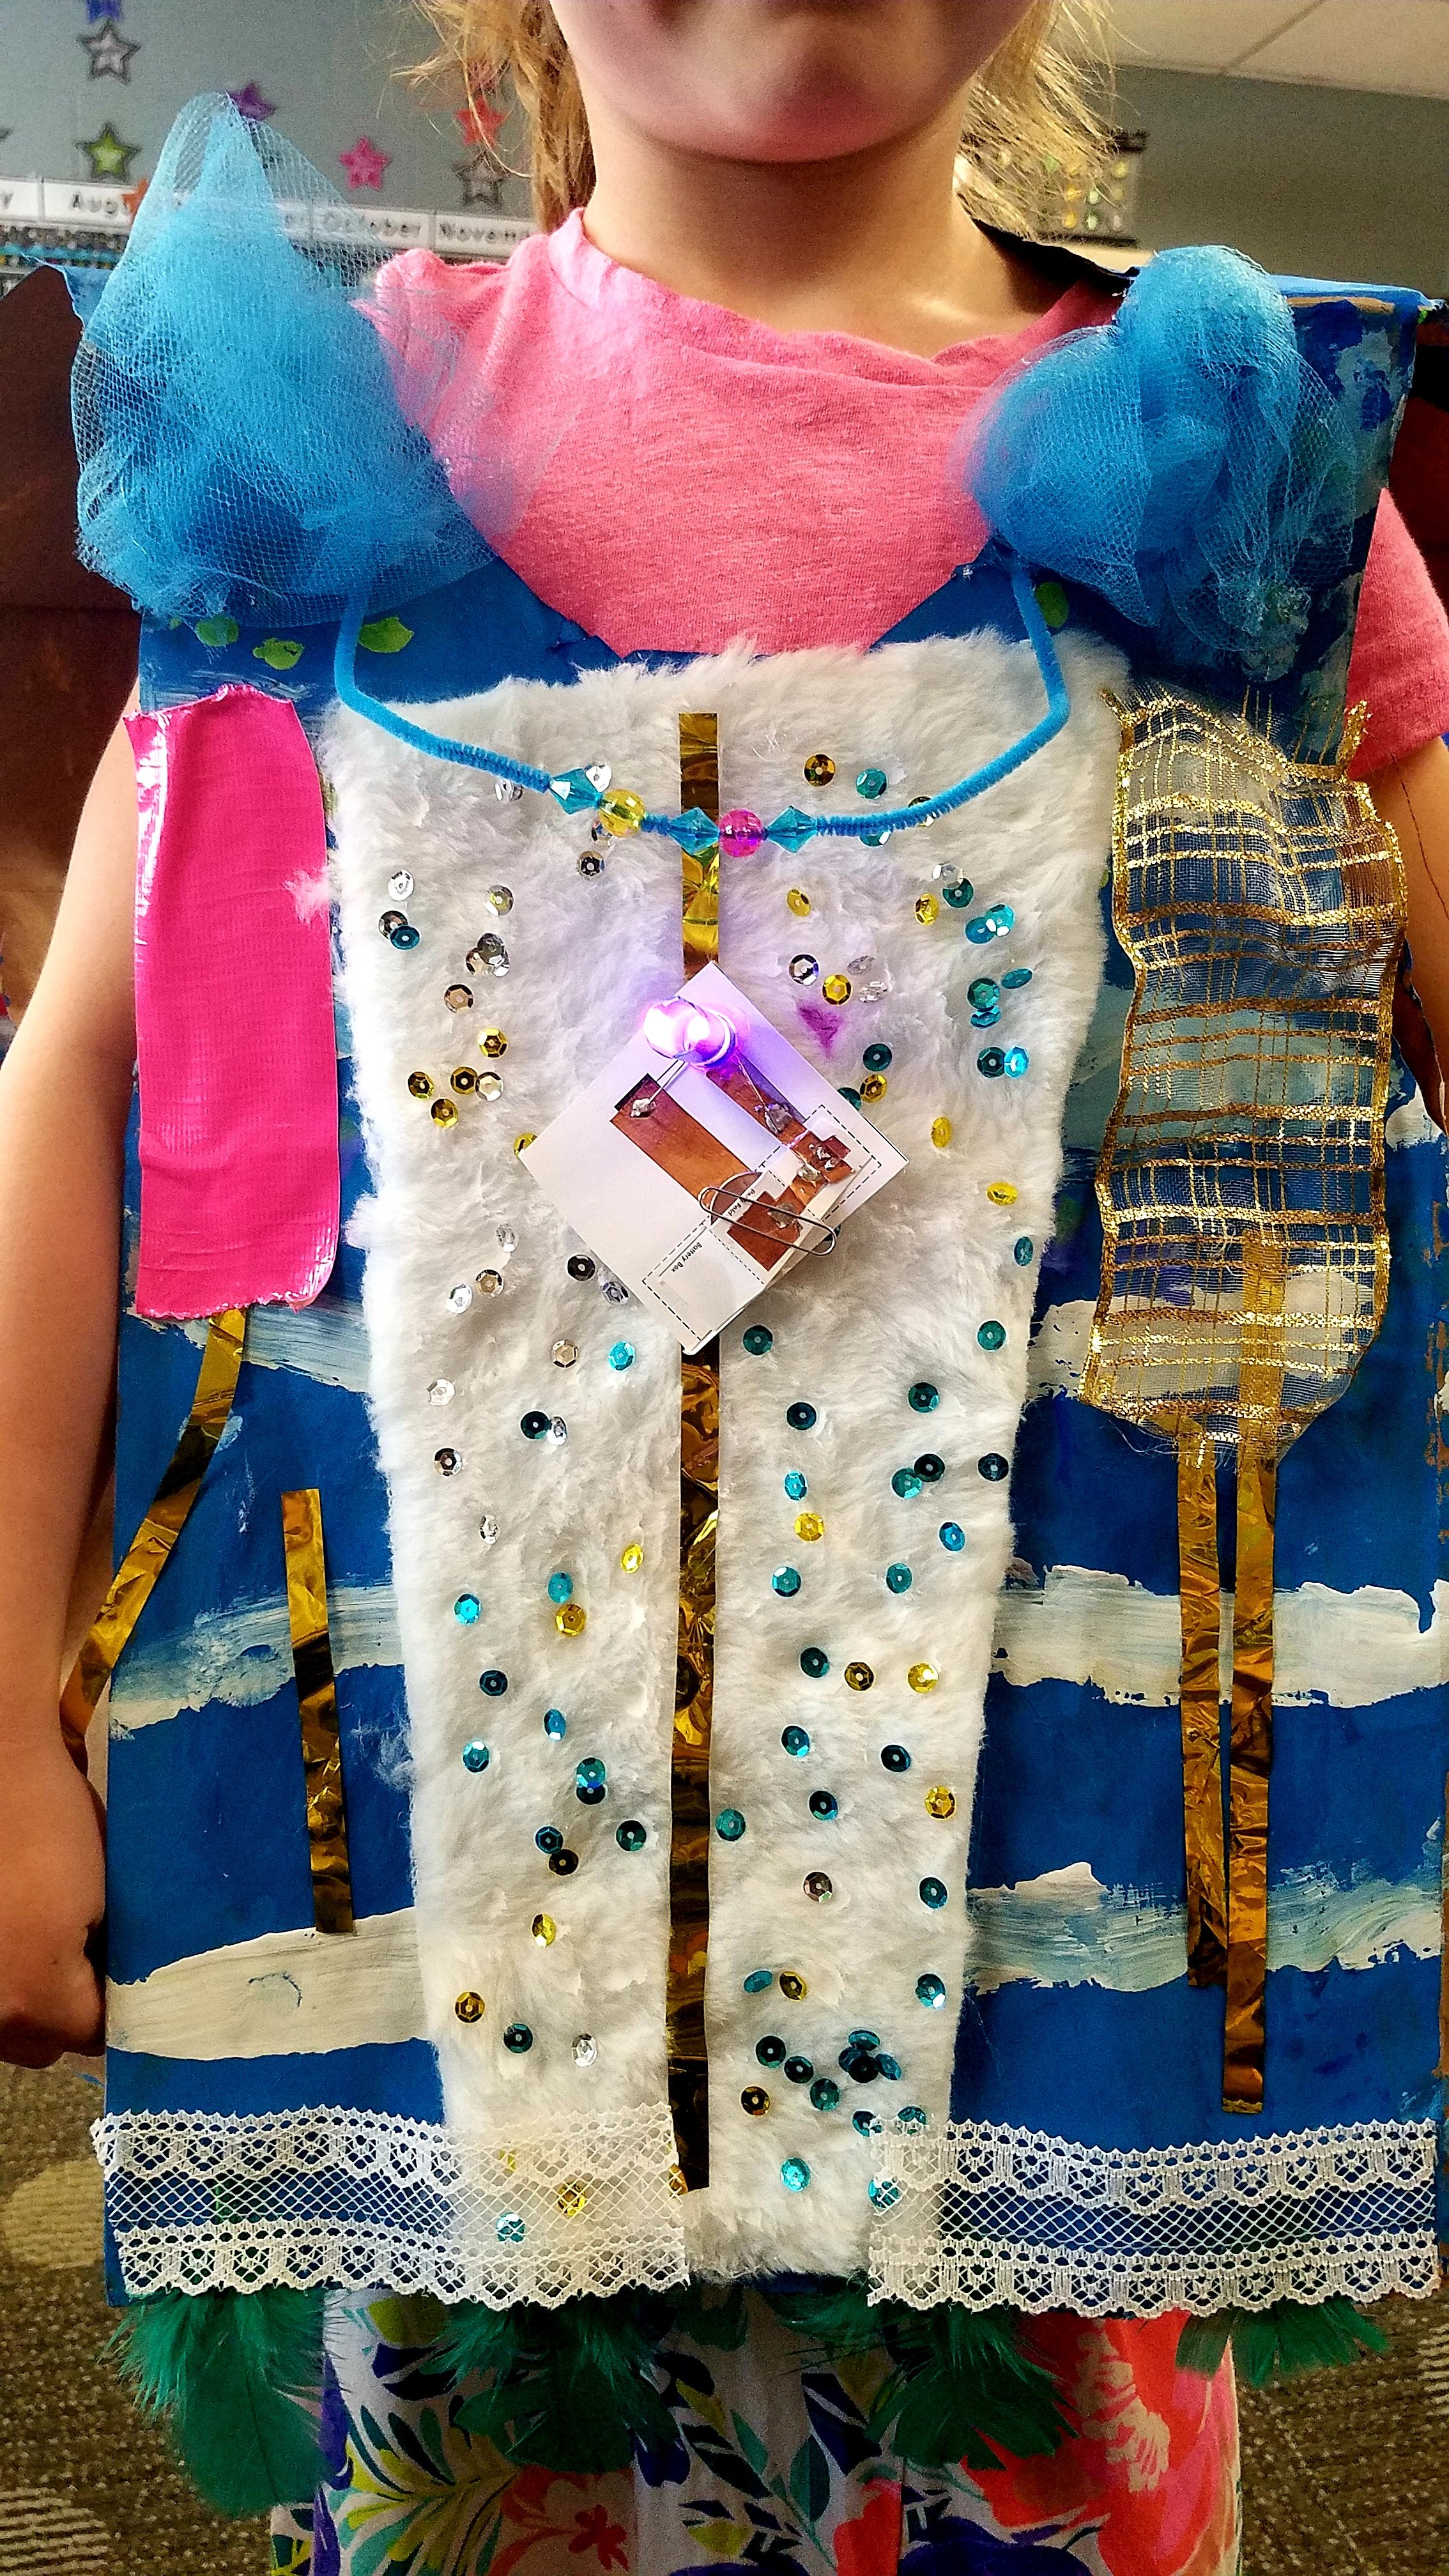
Create home-made costumes and props with Circuit Cards.
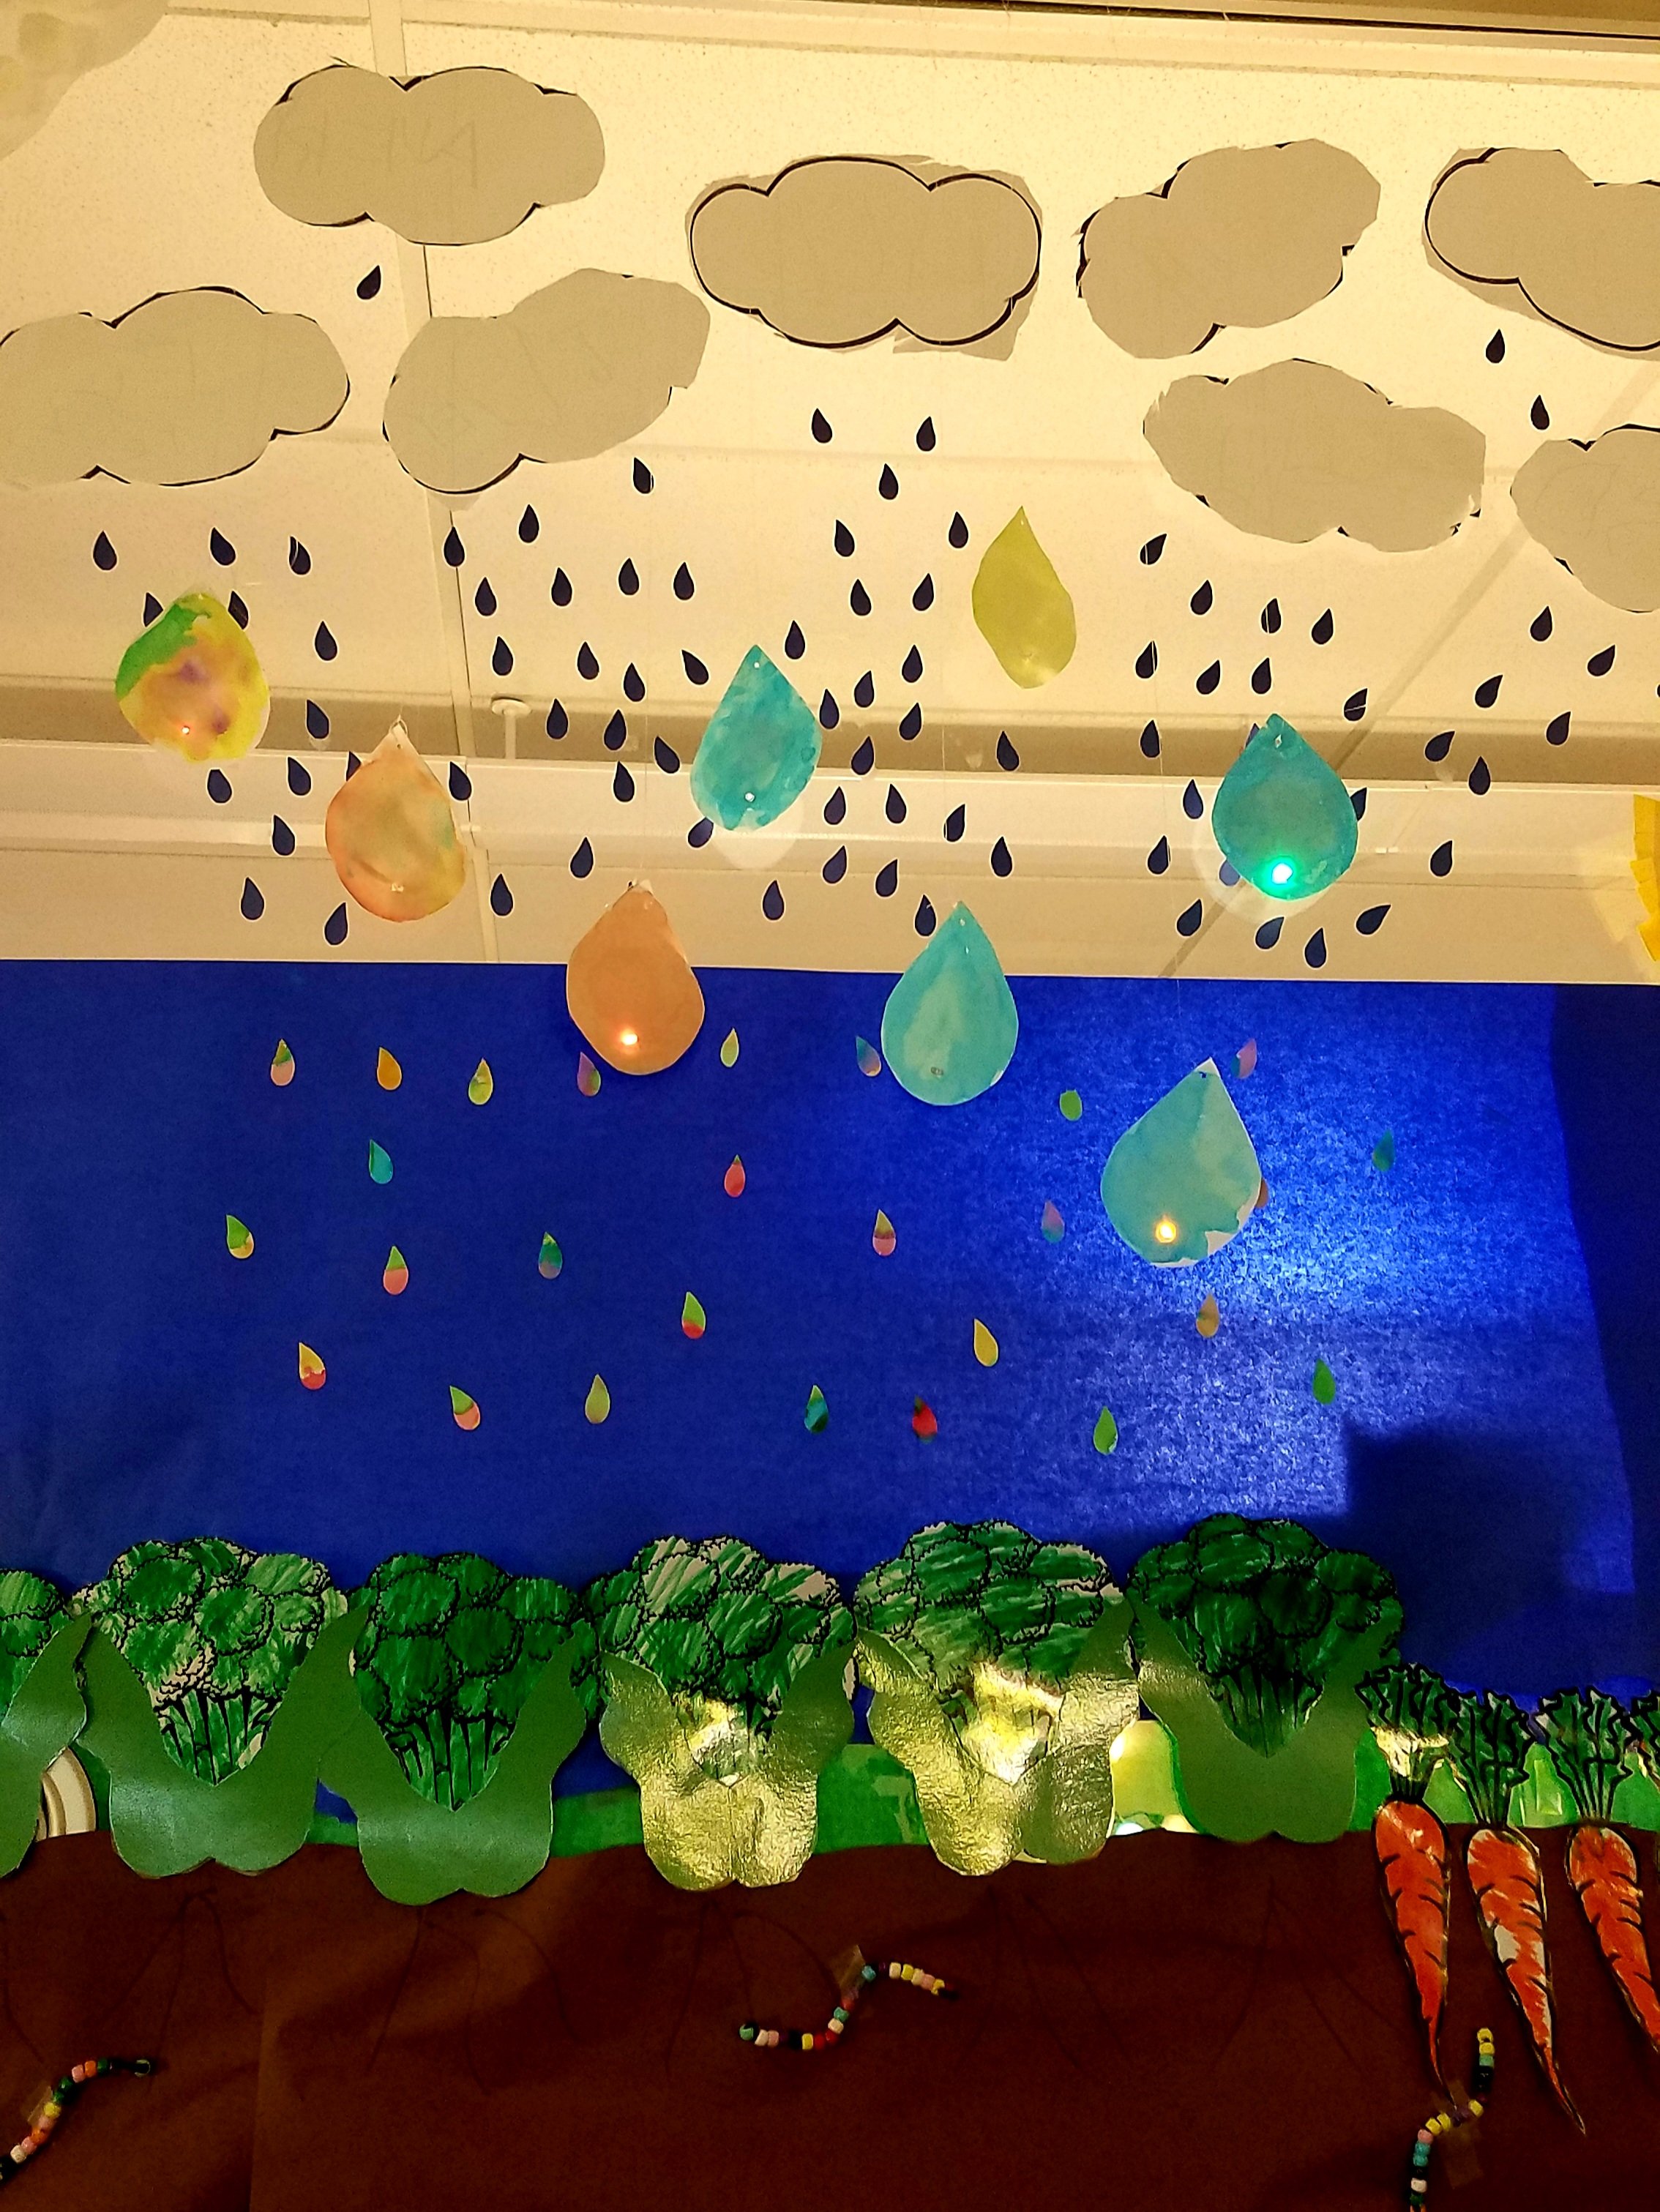
Add Circuit Cards to raindrop artwork to investigate the water cycle.
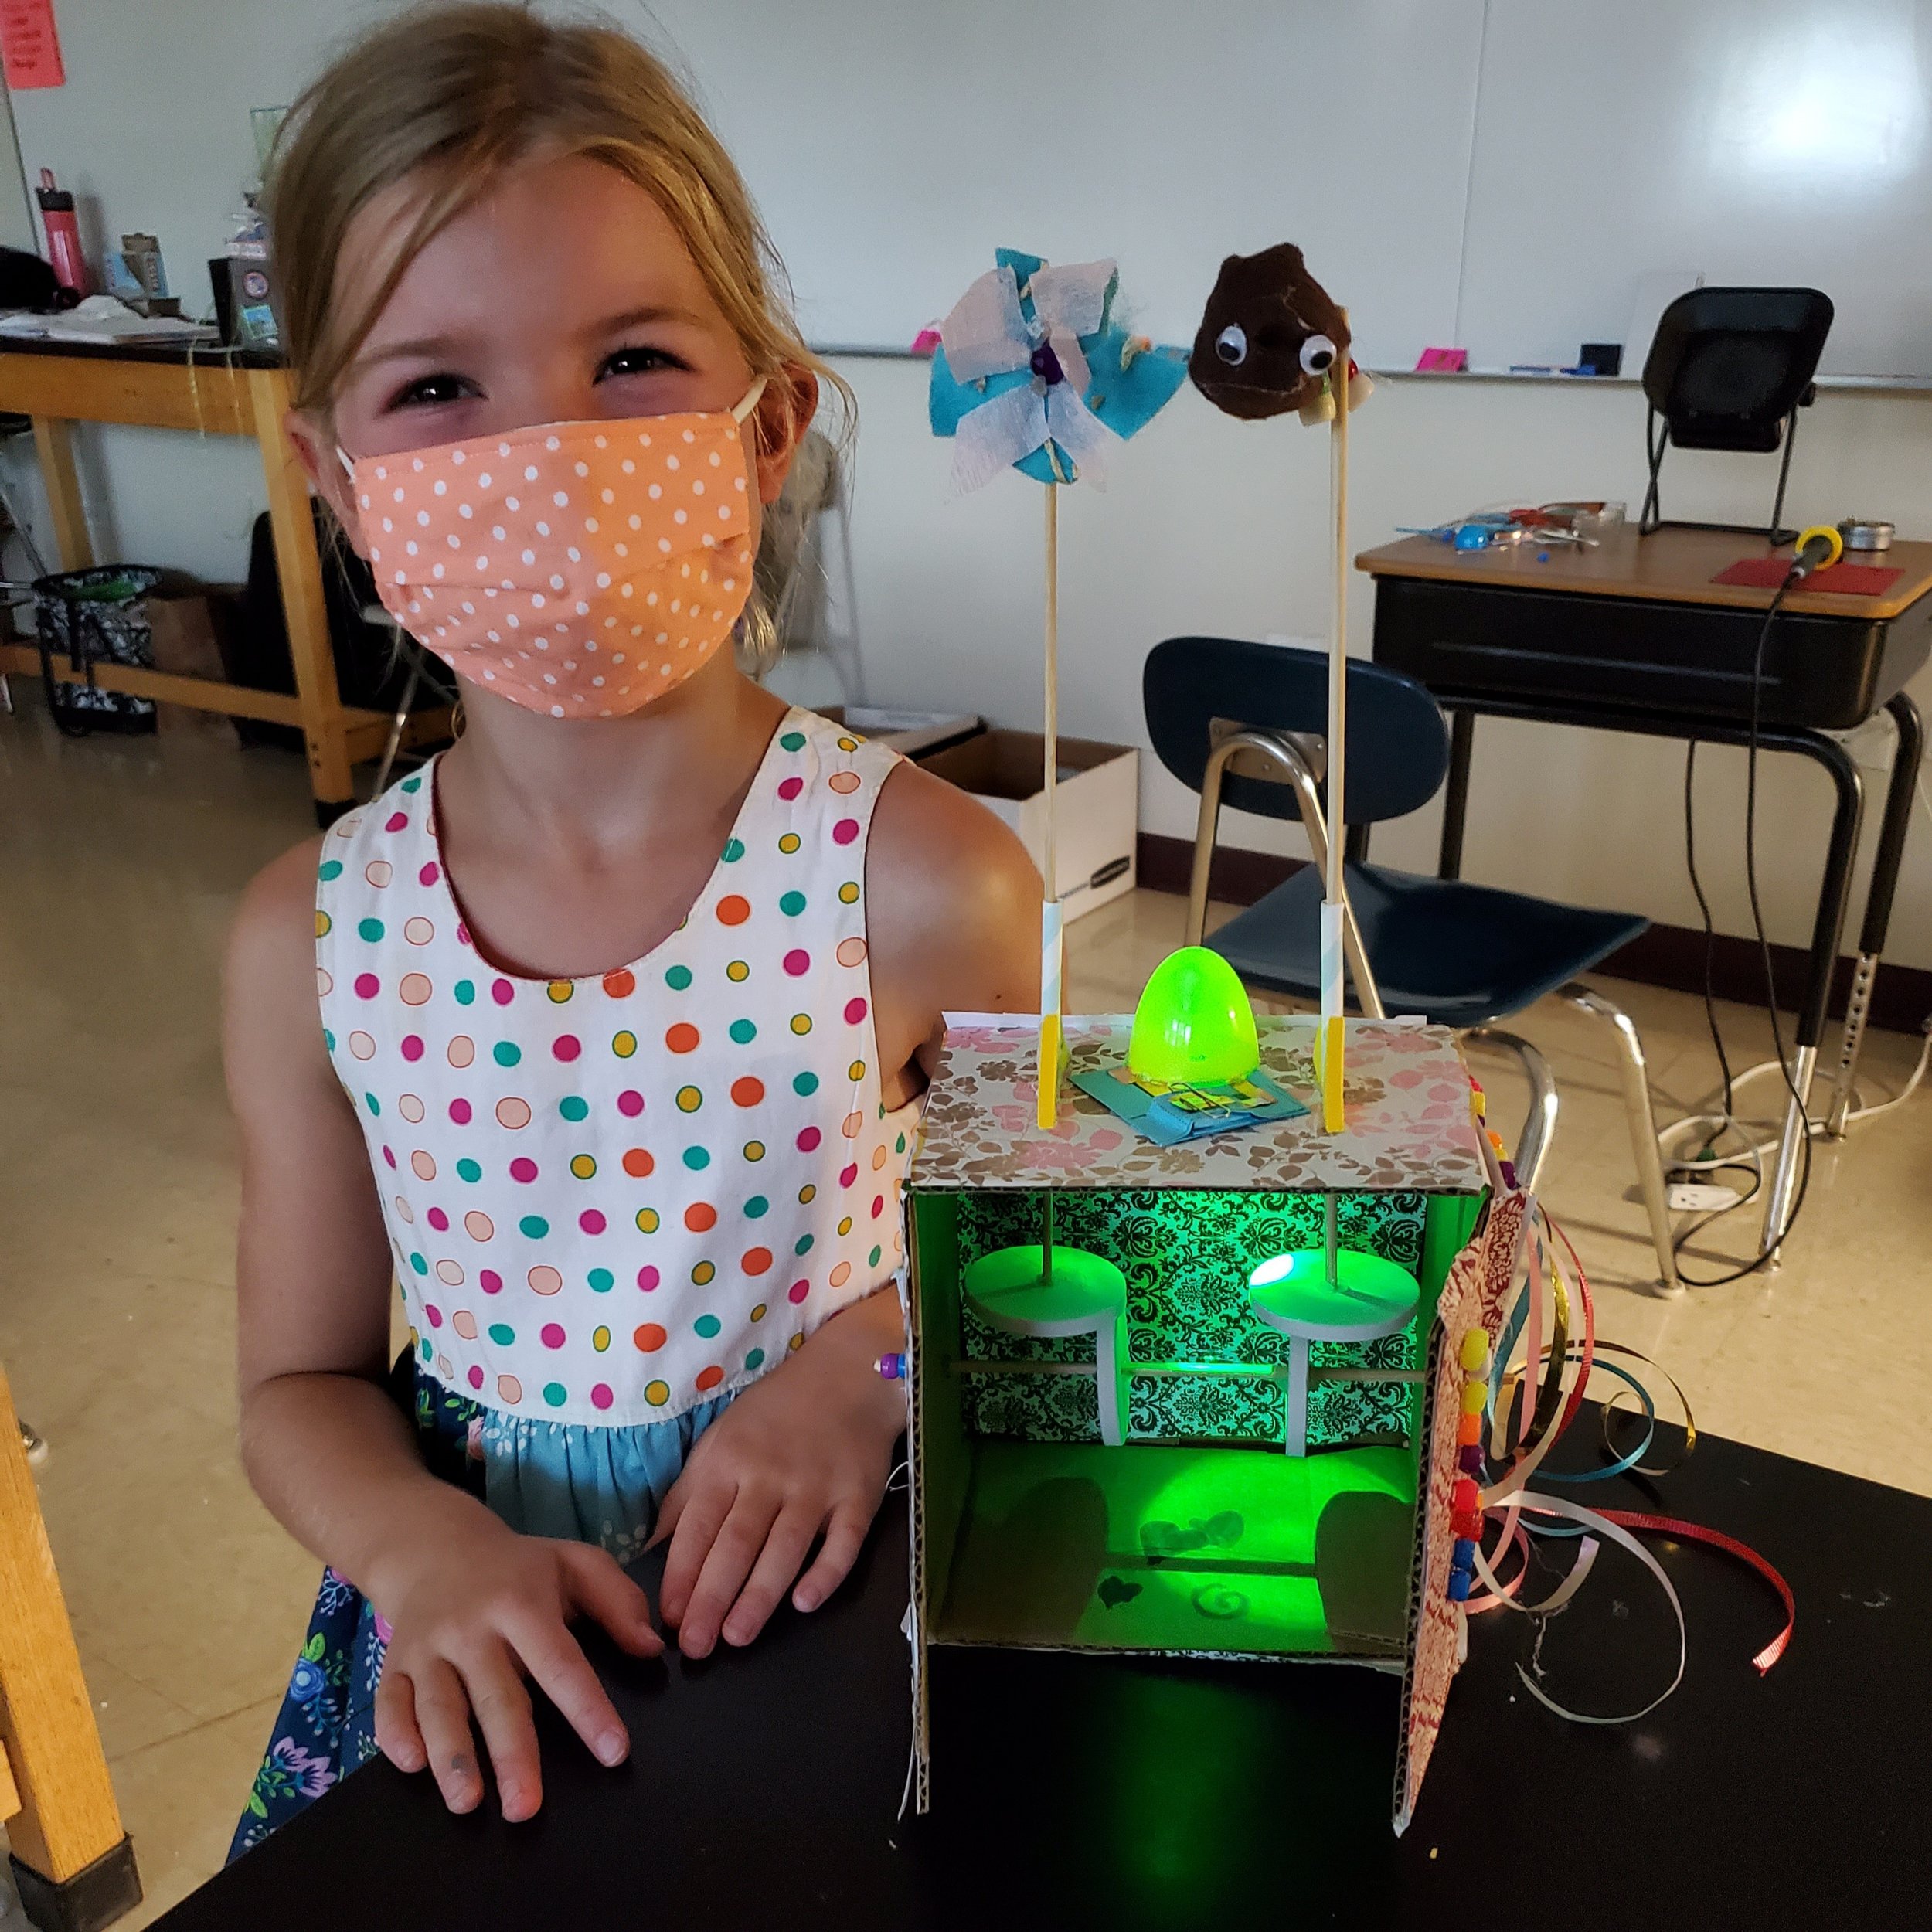
Add Circuit Cards to our Automata Theater Box activity.
Create glow-in-the-dark sculpture.
Design jellyfish mobiles that light-up.
Add Circuit Cards to Easter Eggs to augment projects about the life cycle of a chick.
Add Circuit Cards to weather-themed projects to light-up the sun.
Light-up the stars with Circuit Cards & constellations investigations.
Video Tutorials
Follow these tutorials to make an LED Circuit Card. Watch Video 1 to make your tape circuit. Then watch Videos 2 OR 3 depending on whether or not you are soldering.
1) Design Your Circuit
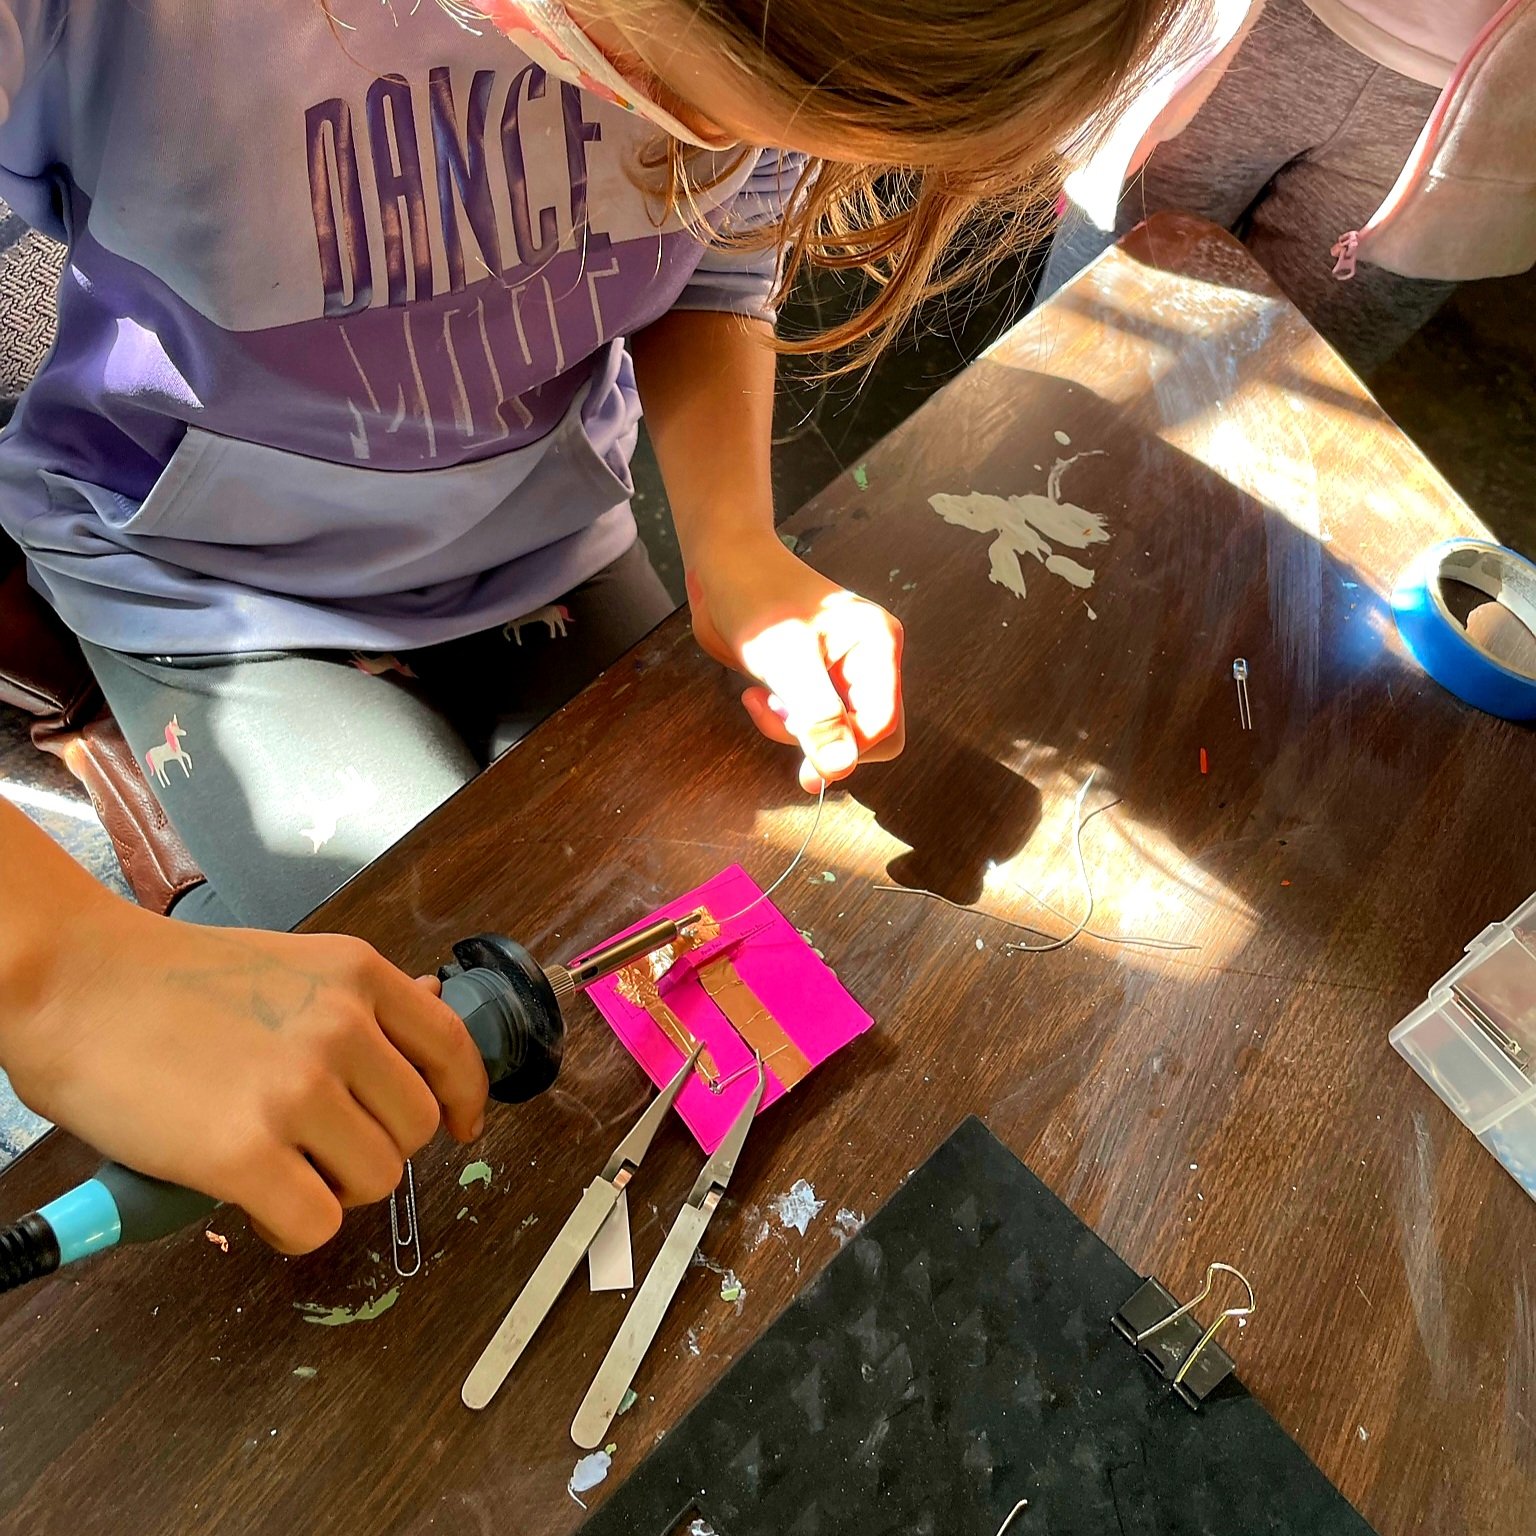
2) Make A Simple Card (No Soldering)
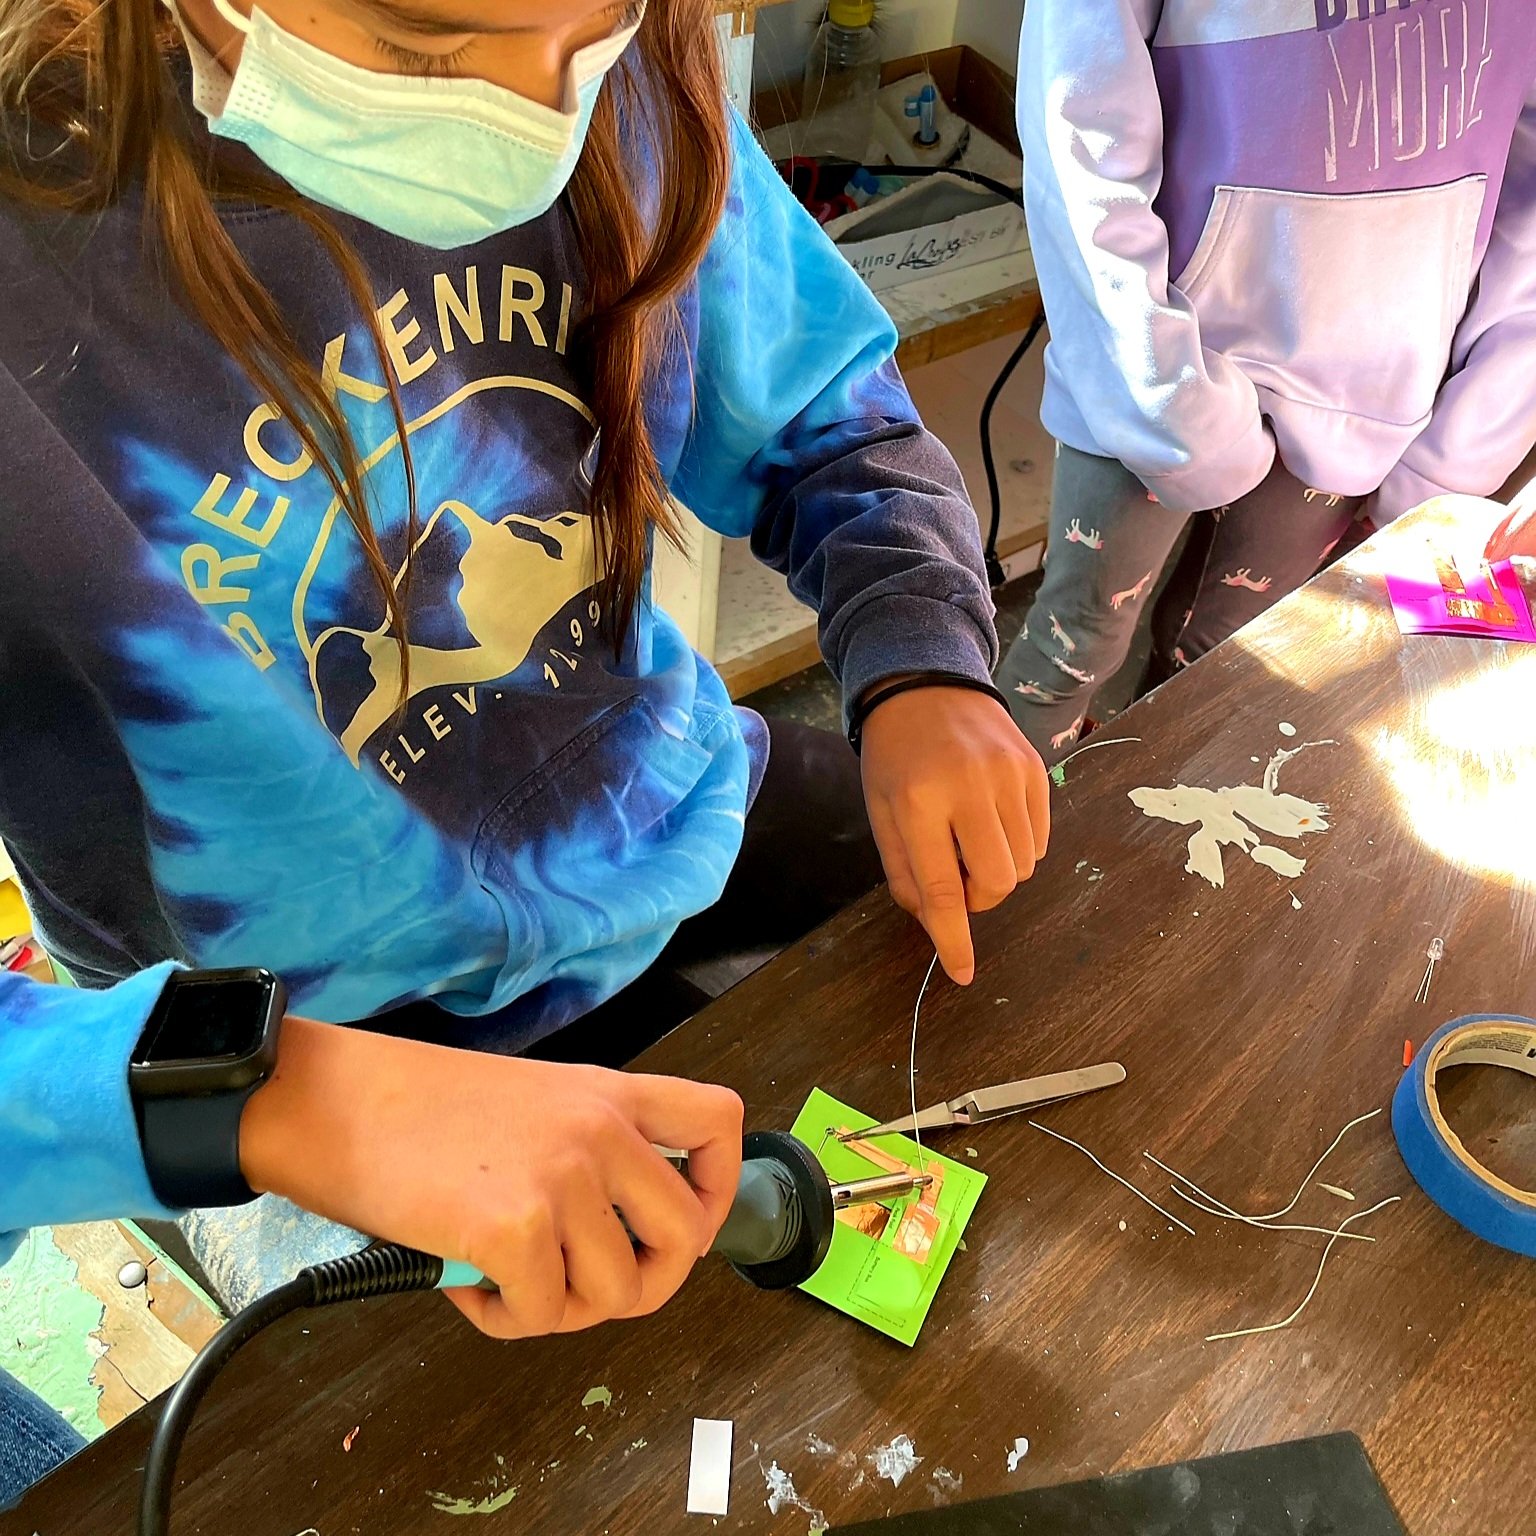
3) Make A More Complex Card (With Soldering)
Slideshow Instructions
Watch the following slideshows to make a Circuit Card to add LED lights to any activity or project. You can make cards with or without soldering.
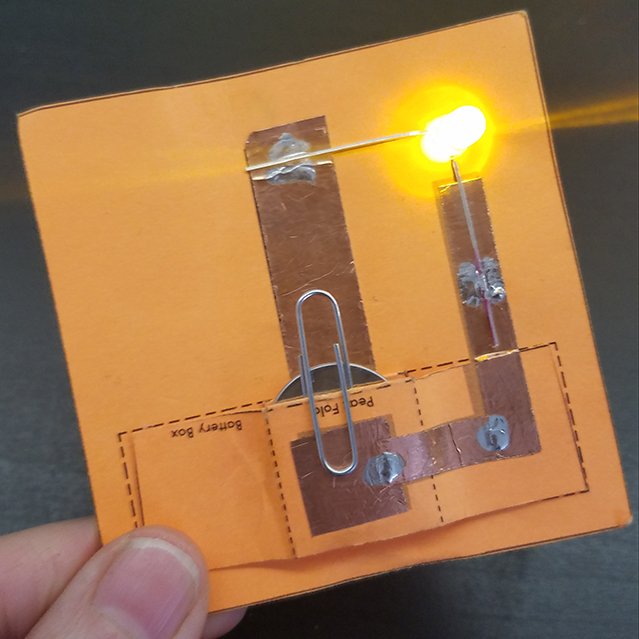
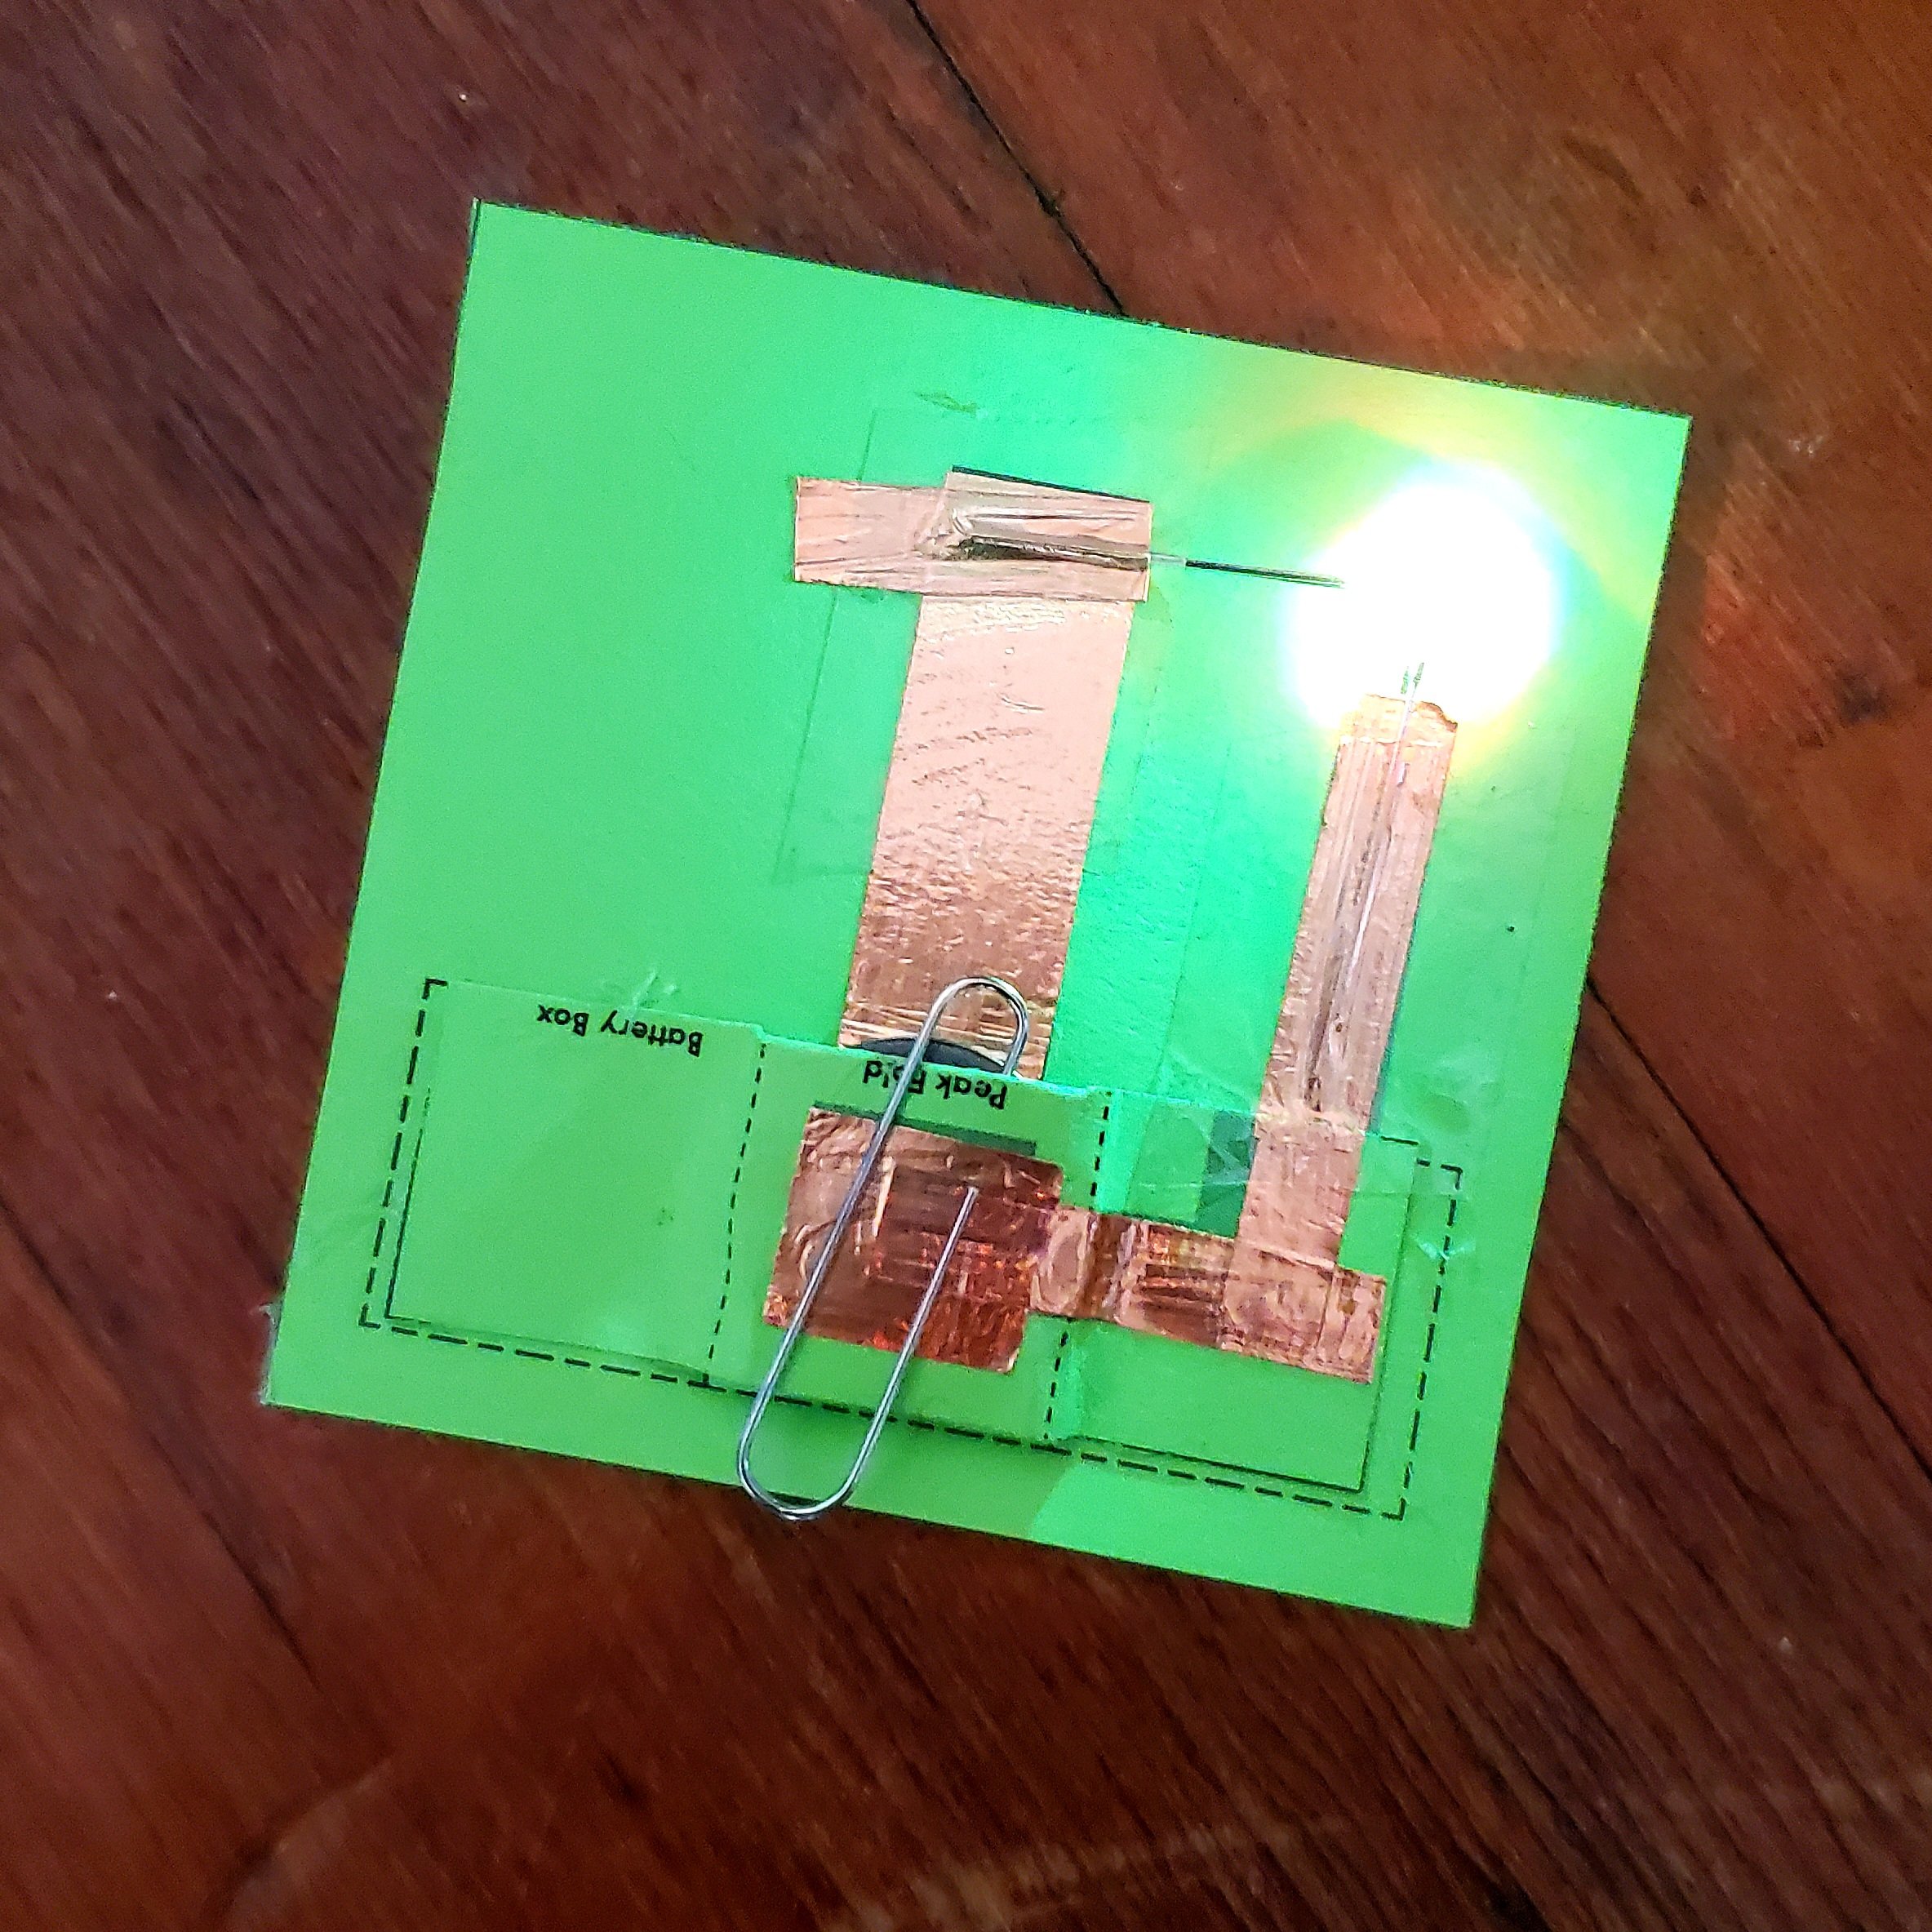
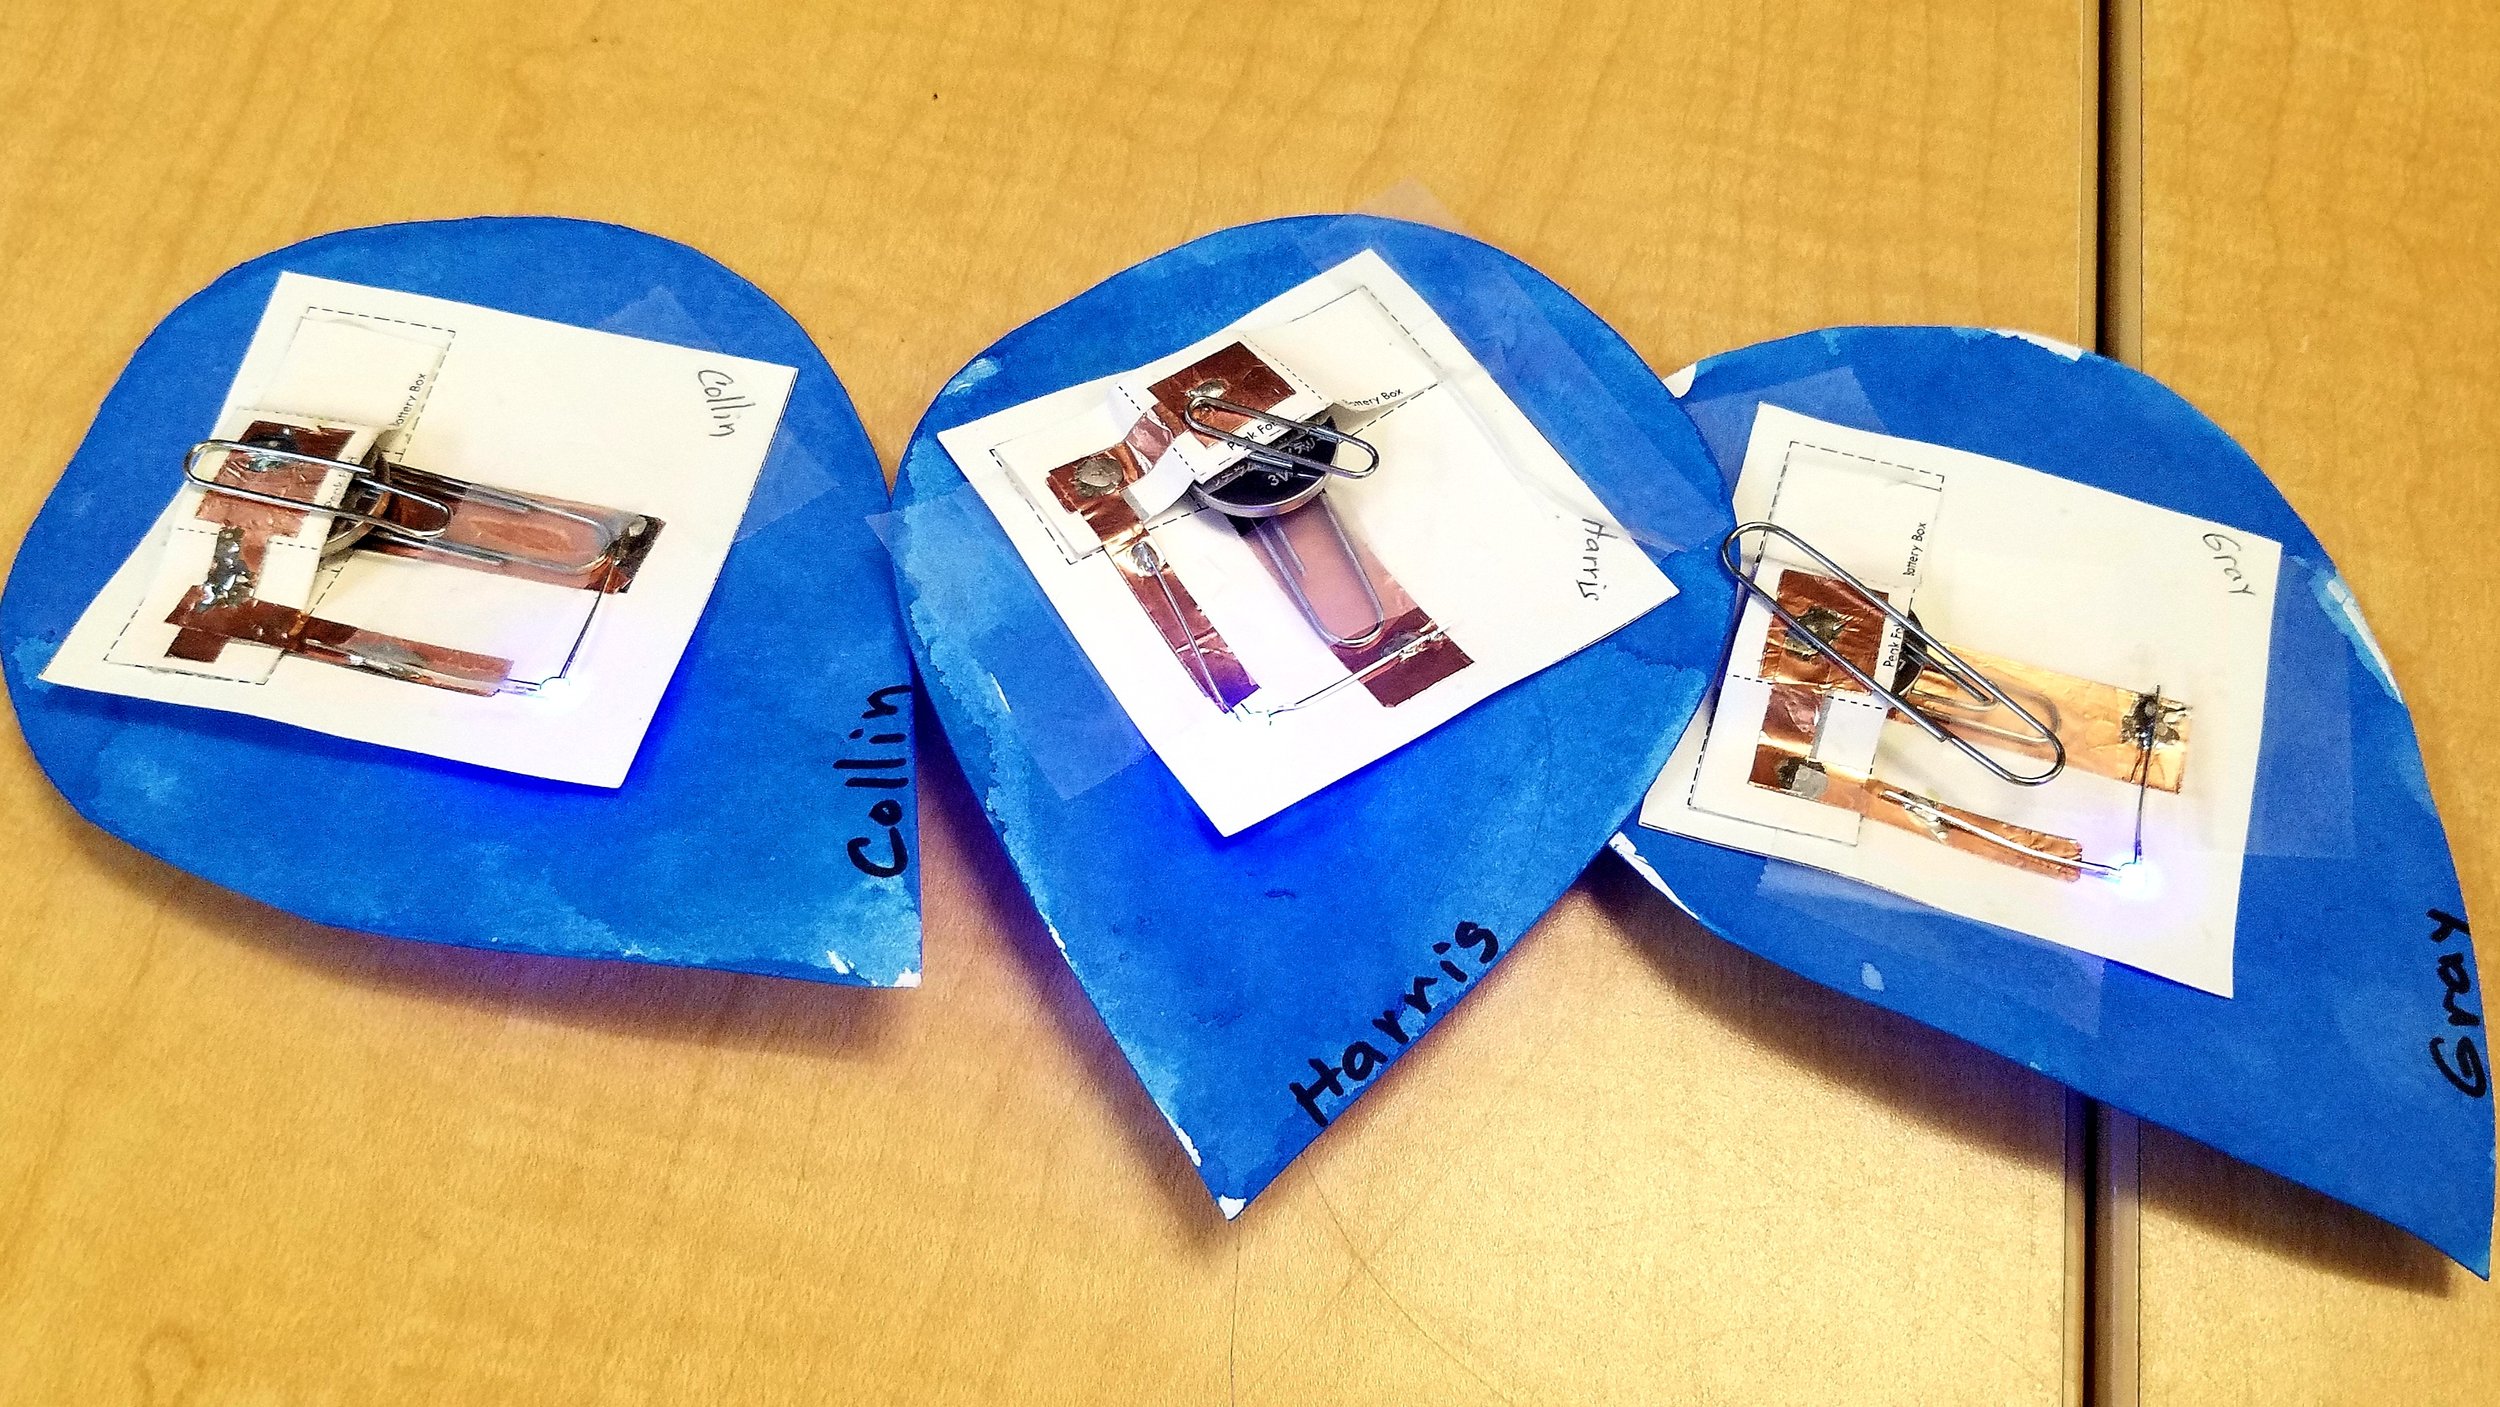
A Circuit Card is a great way to add technology to any project. You can make a small tape circuit & switch with an LED light and attach to any invention.
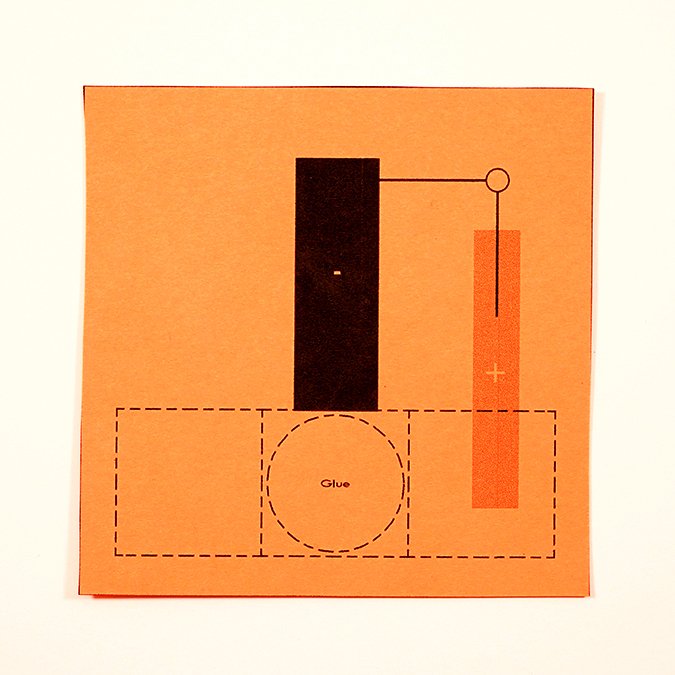
Download the Circuit Card template and print onto cardstock. Cut out the Circuit Card along the square line.
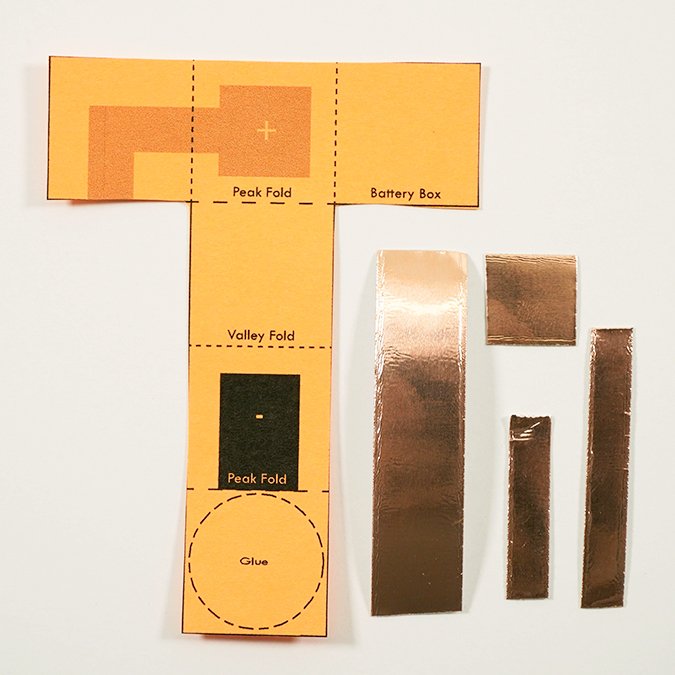
Cut out the T-shaped battery box. Pre-cut copper tape for younger makers: 1/2" x 2" copper strips, 1/2" x 1/2" copper squares, 1/4" x 1" copper strips, 1/4" x 1 1/2" copper strips.
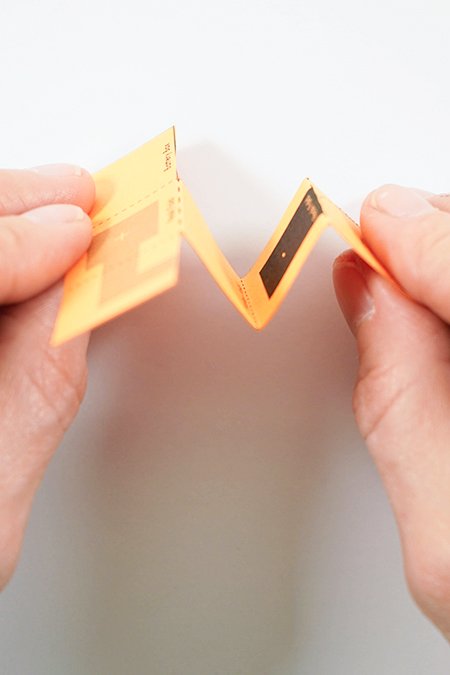
Fold the battery box template into peaks and valleys as shown on the diagrams. You will get an "M" shape.
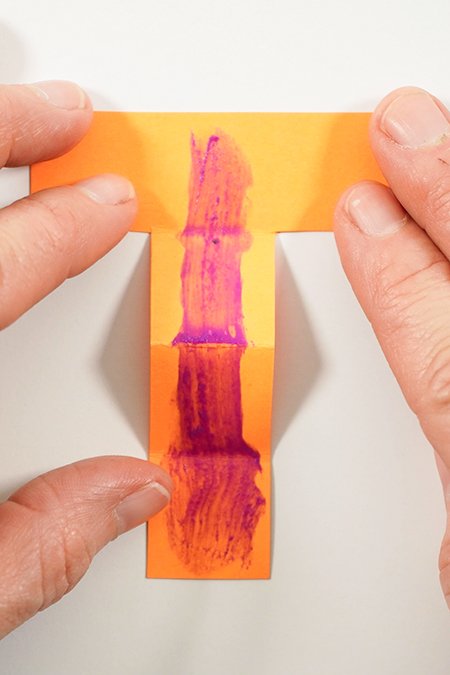
Flip the template over to the blank side. Place glue along the center.
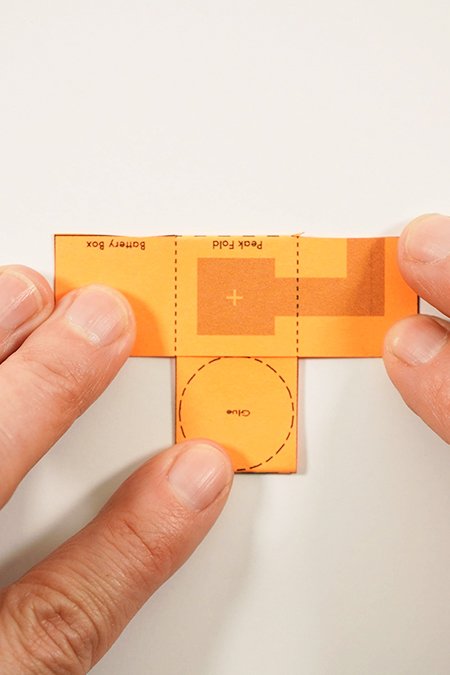
Fold over each end tab to make a smaller "T" shape. You should see the diagrams on all sides. Place glue on the circle.
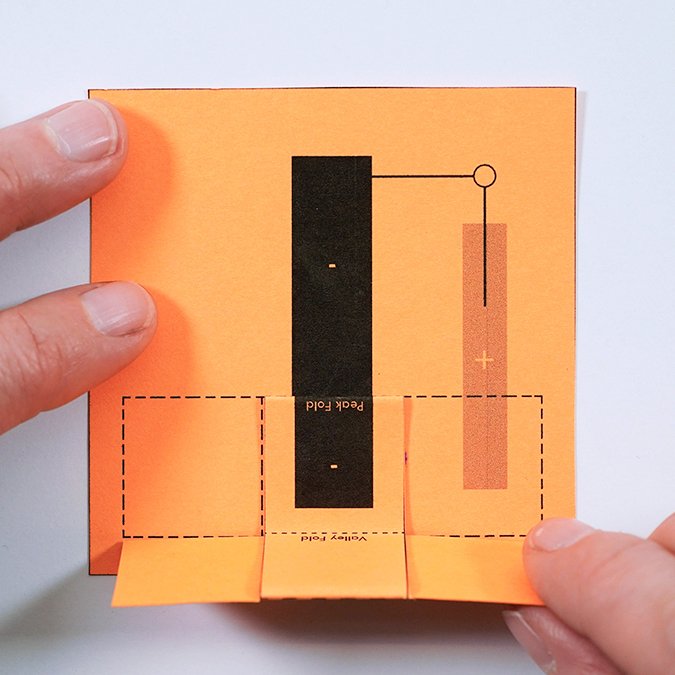
Stick it to the circle on your square template. The black (-) rectangle diagram should line up.
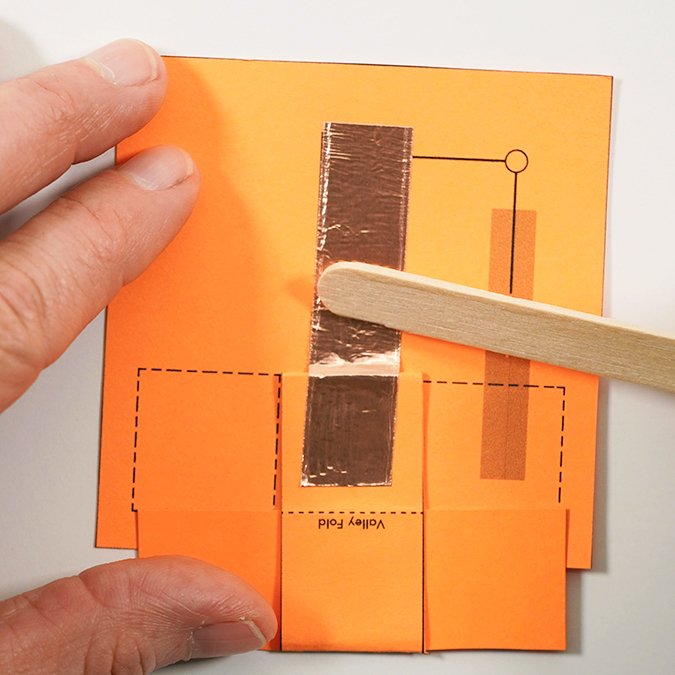
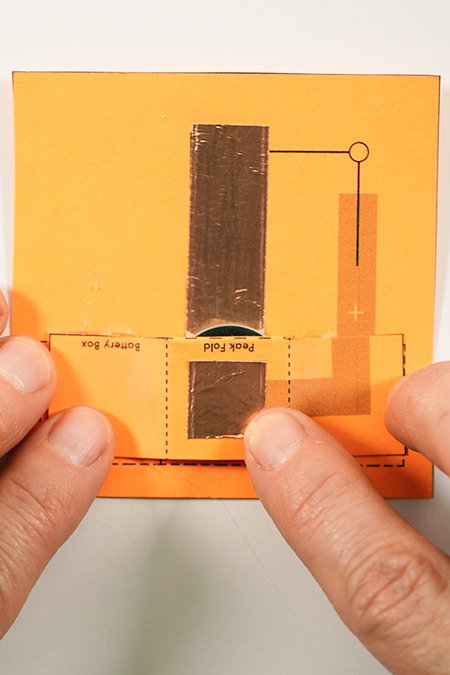
Place the 1/2" x 2" copper strip over the black diagram. Rub it with a popsicle stick to smooth & burnish. This is the (-) side of your circuit.
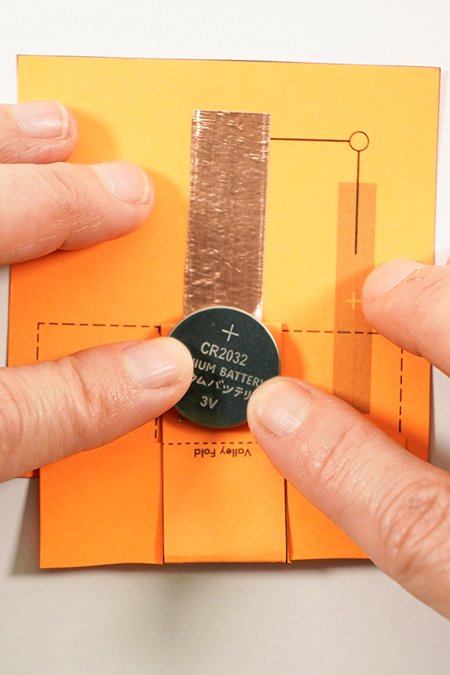
Place the (-) side of the battery on the copper, (+) side up.
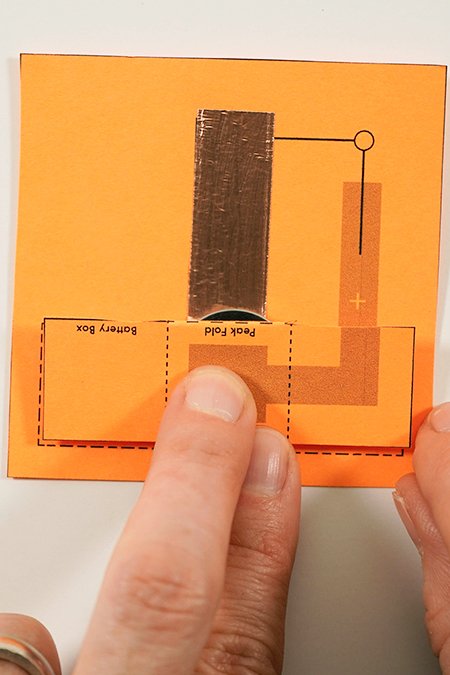
Fold the tab over to make a pocket
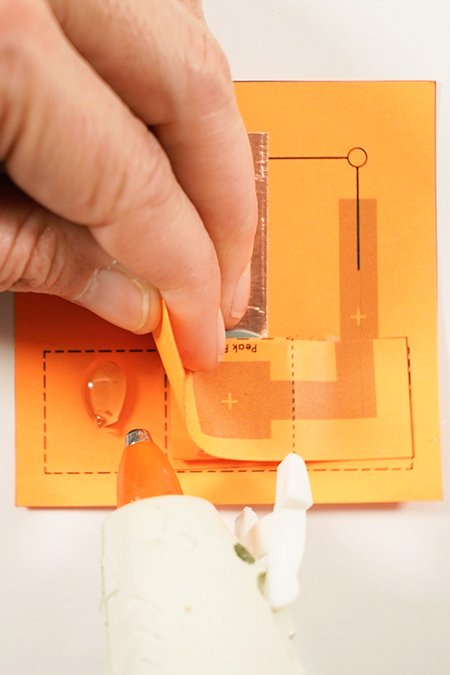
Hot glue both side tabs down. Make sure the battery is tight inside the pocket.
Stick your 1/2"x 1/2" copper square to the grey square on your battery box. This will be the (+) side of your circuit.
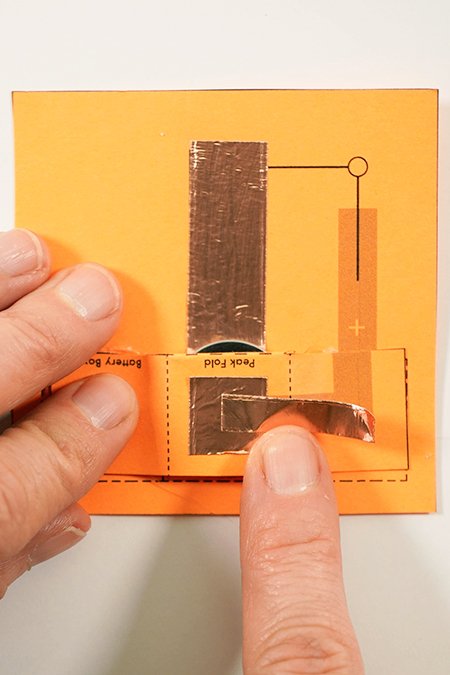
Add the 1/4" x 1" strip over the copper square and over the diagram to the right.
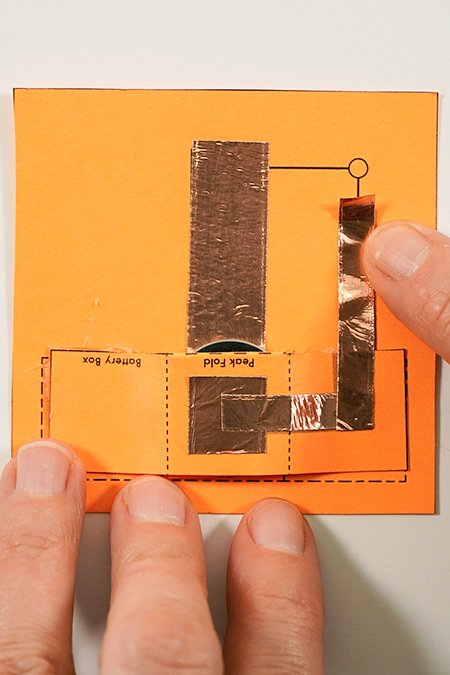
Add the final 1/4" x 1 1/2" strip of copper over the diagram. Make sure the copper overlaps at the corner. Burnish your copper to smooth it.
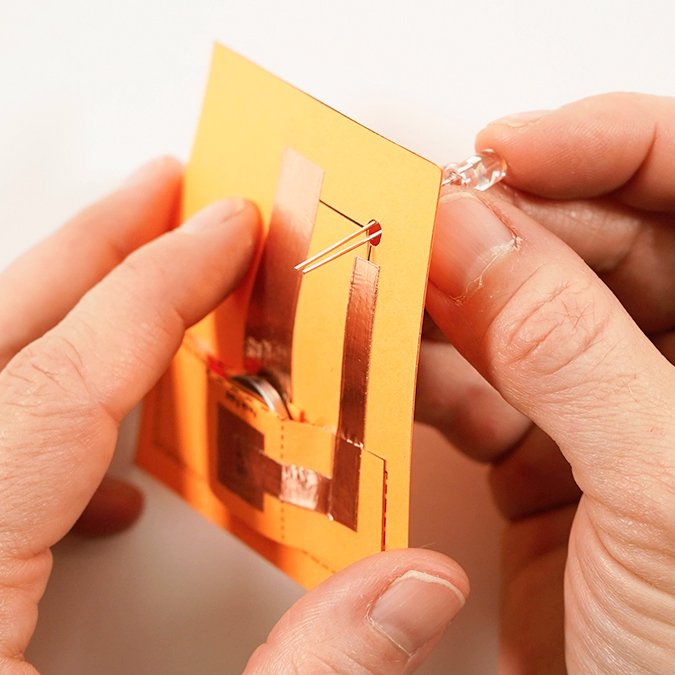
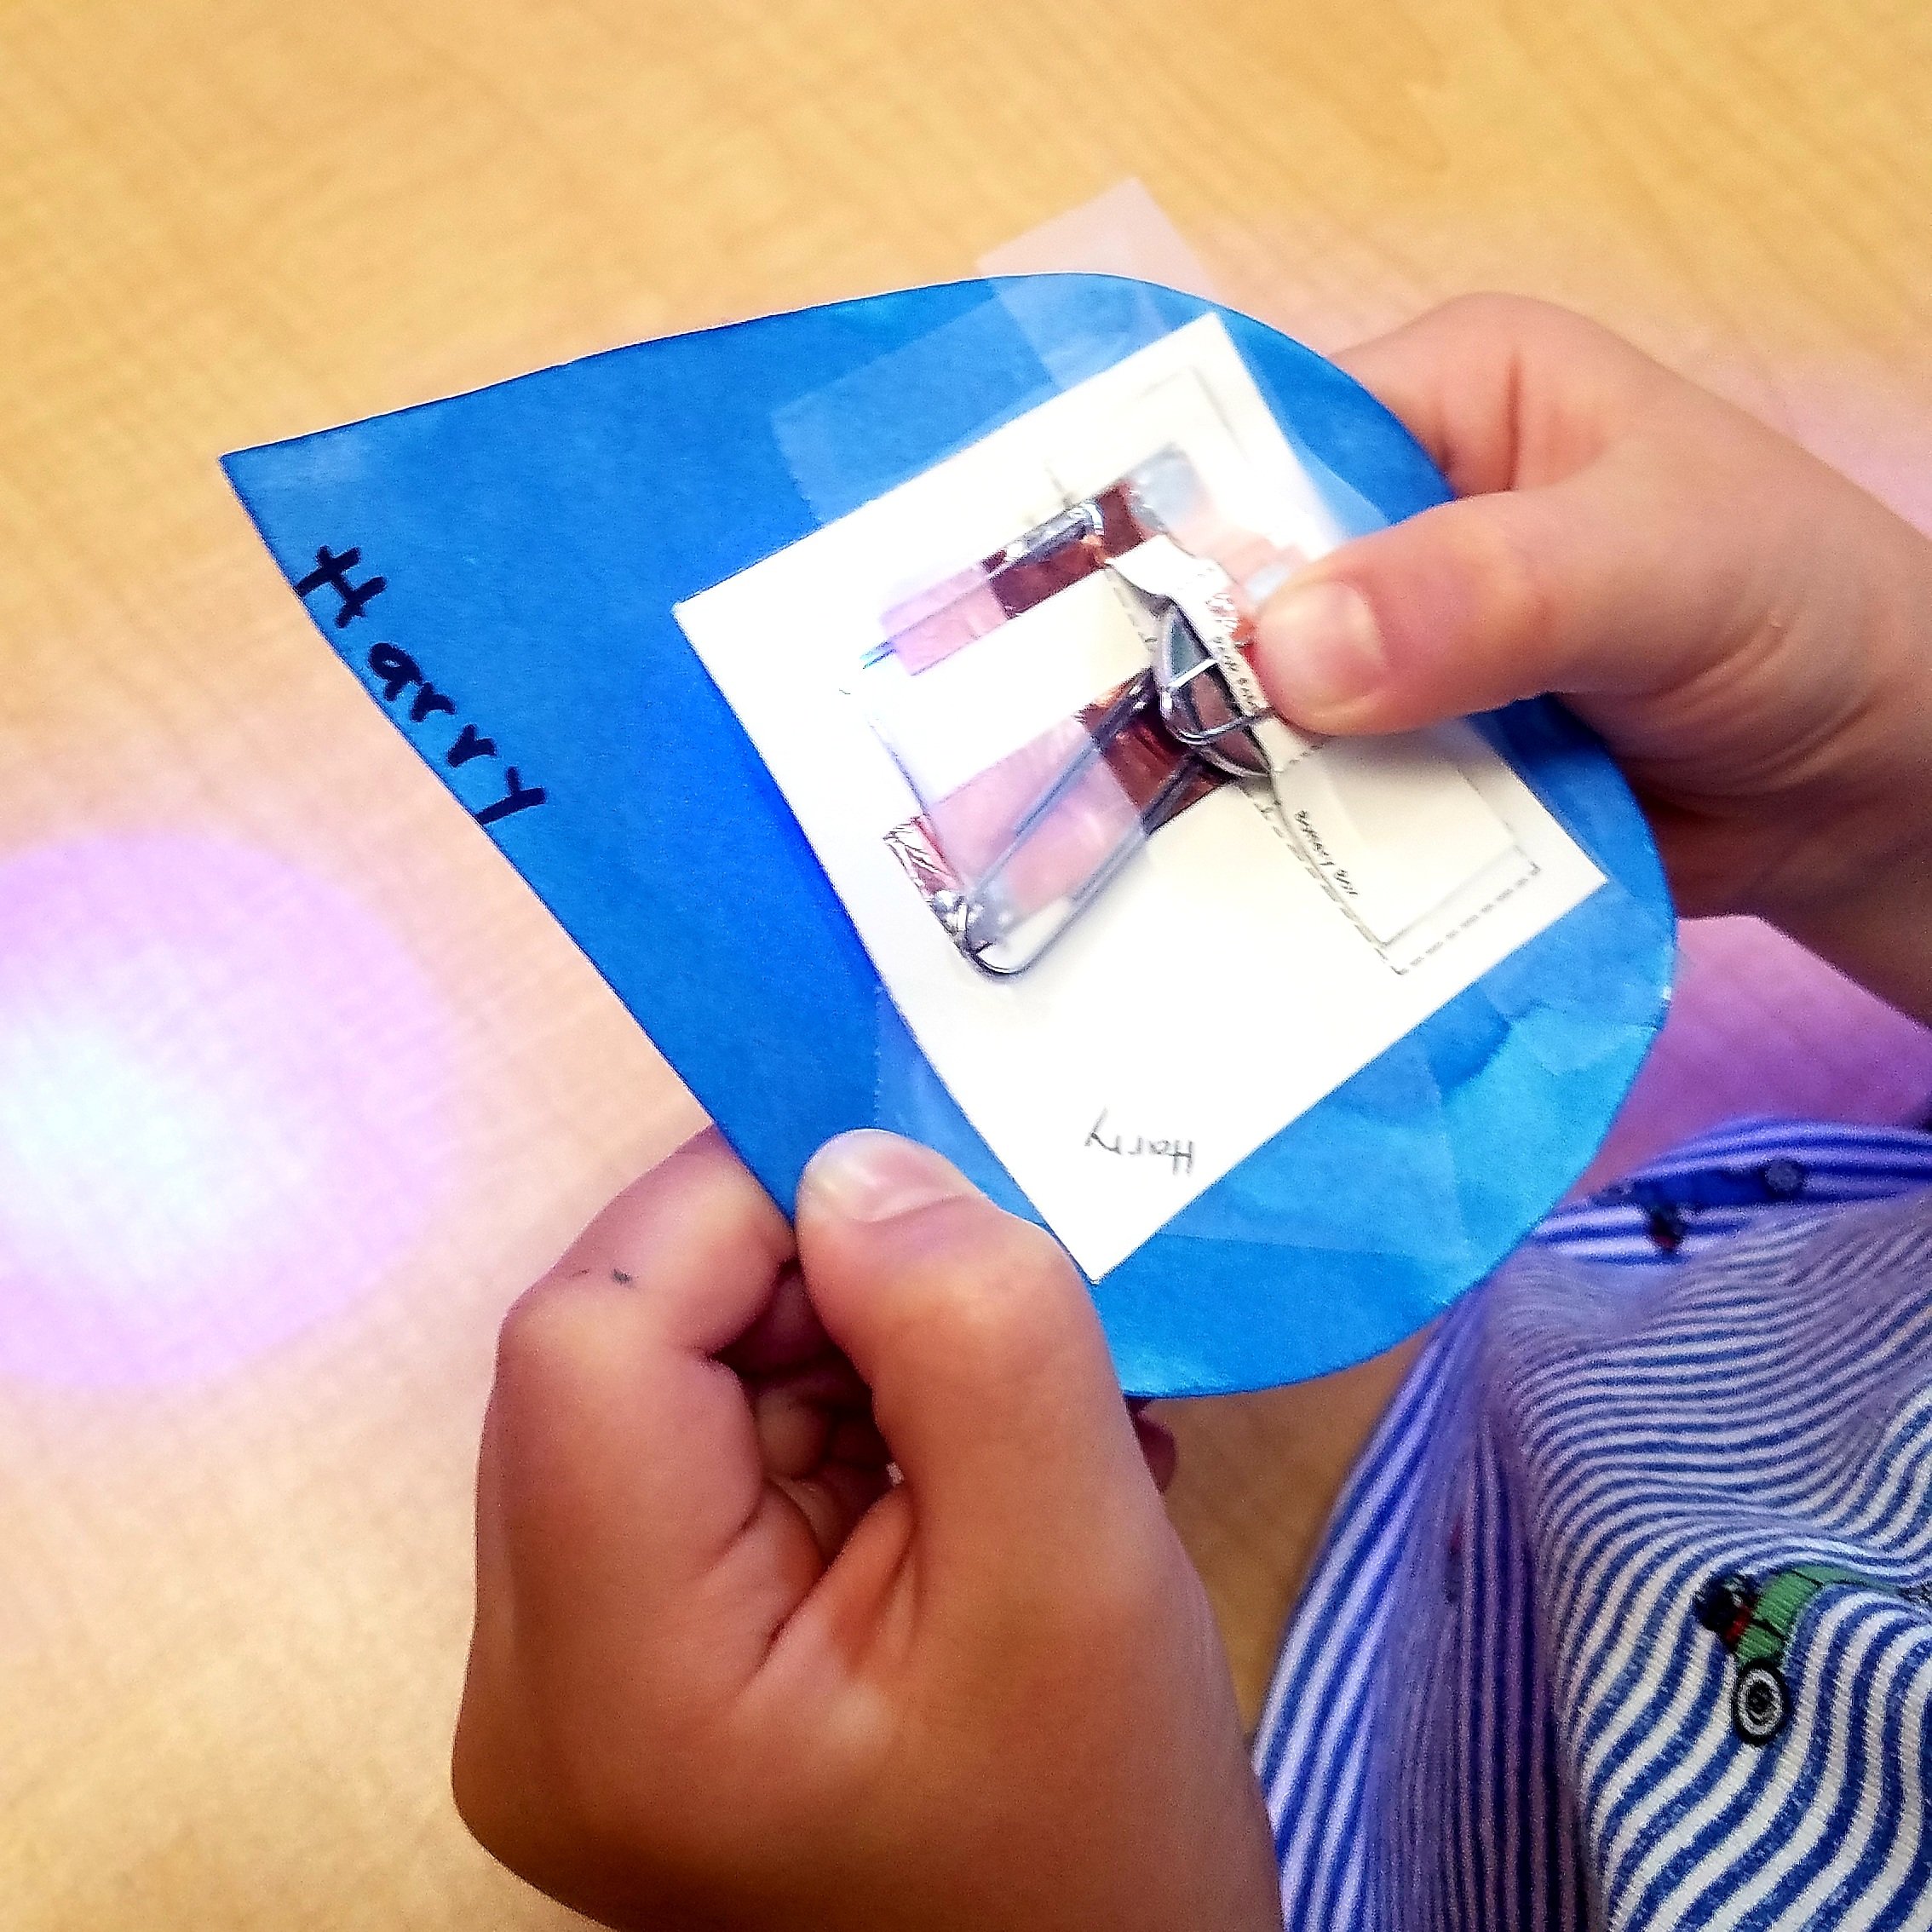
You can place your LED light on either side of your card depending on how it will be attached to your project. Placing it opposite the circuit is great if you're inserting it into your project.
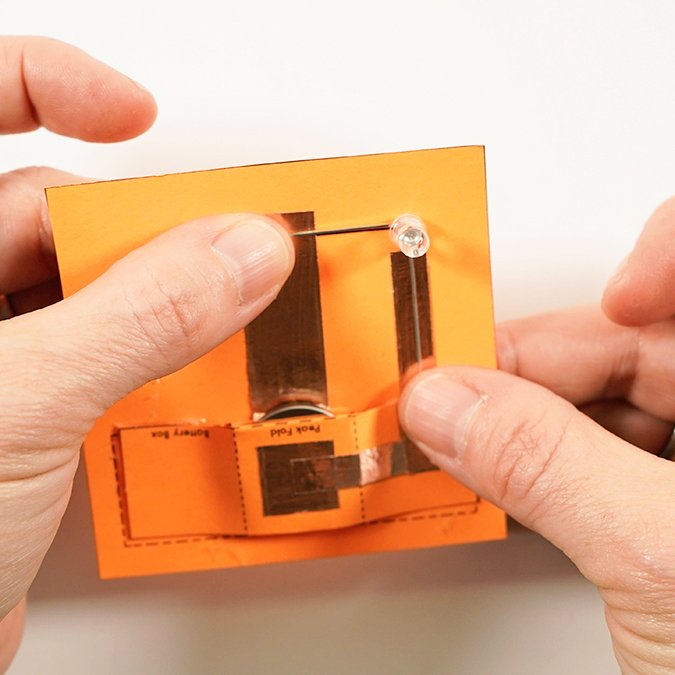
Placing it flat on the copper is great if you are gluing the card onto a flat surface.
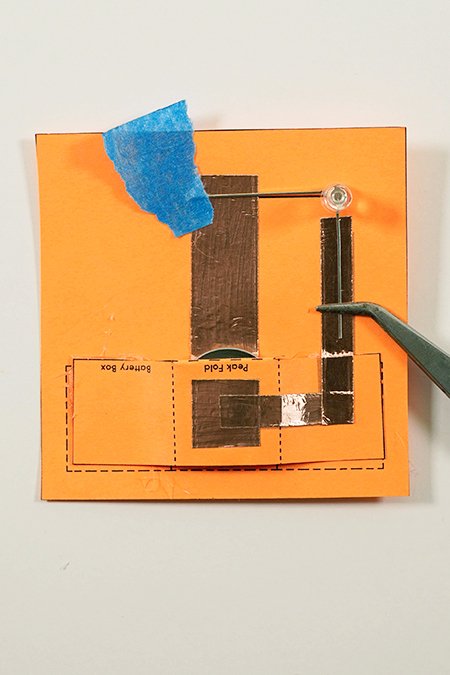
If you can not solder, hold the LED light in place with tape or tweezers. Place copper tape and scotch tape over your leads to secure.
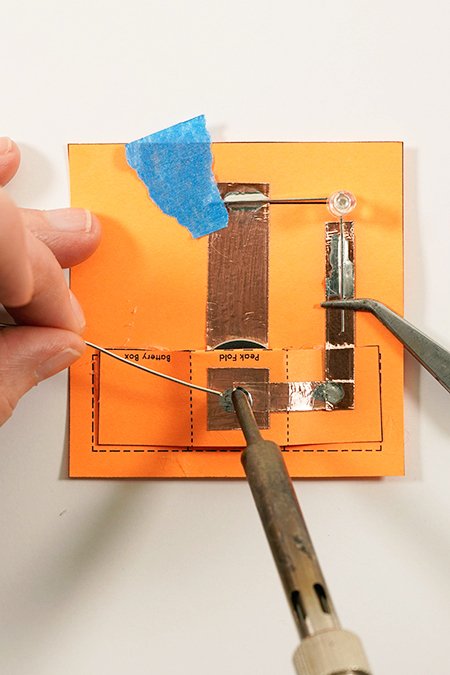
If you can solder, solder where the leads overlap the copper and where the copper overlaps along the circuit. Make sure the (+) and (-) are facing the right direction.
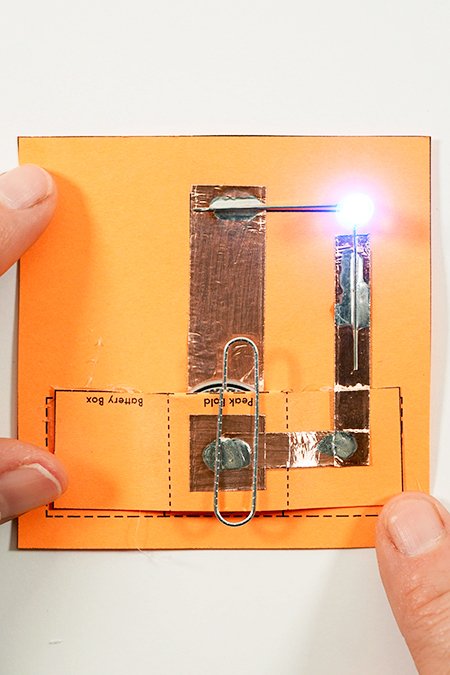
Insert a paperclip to the battery pocket so that one loop touches the battery and one loop touches the copper. This is your switch.
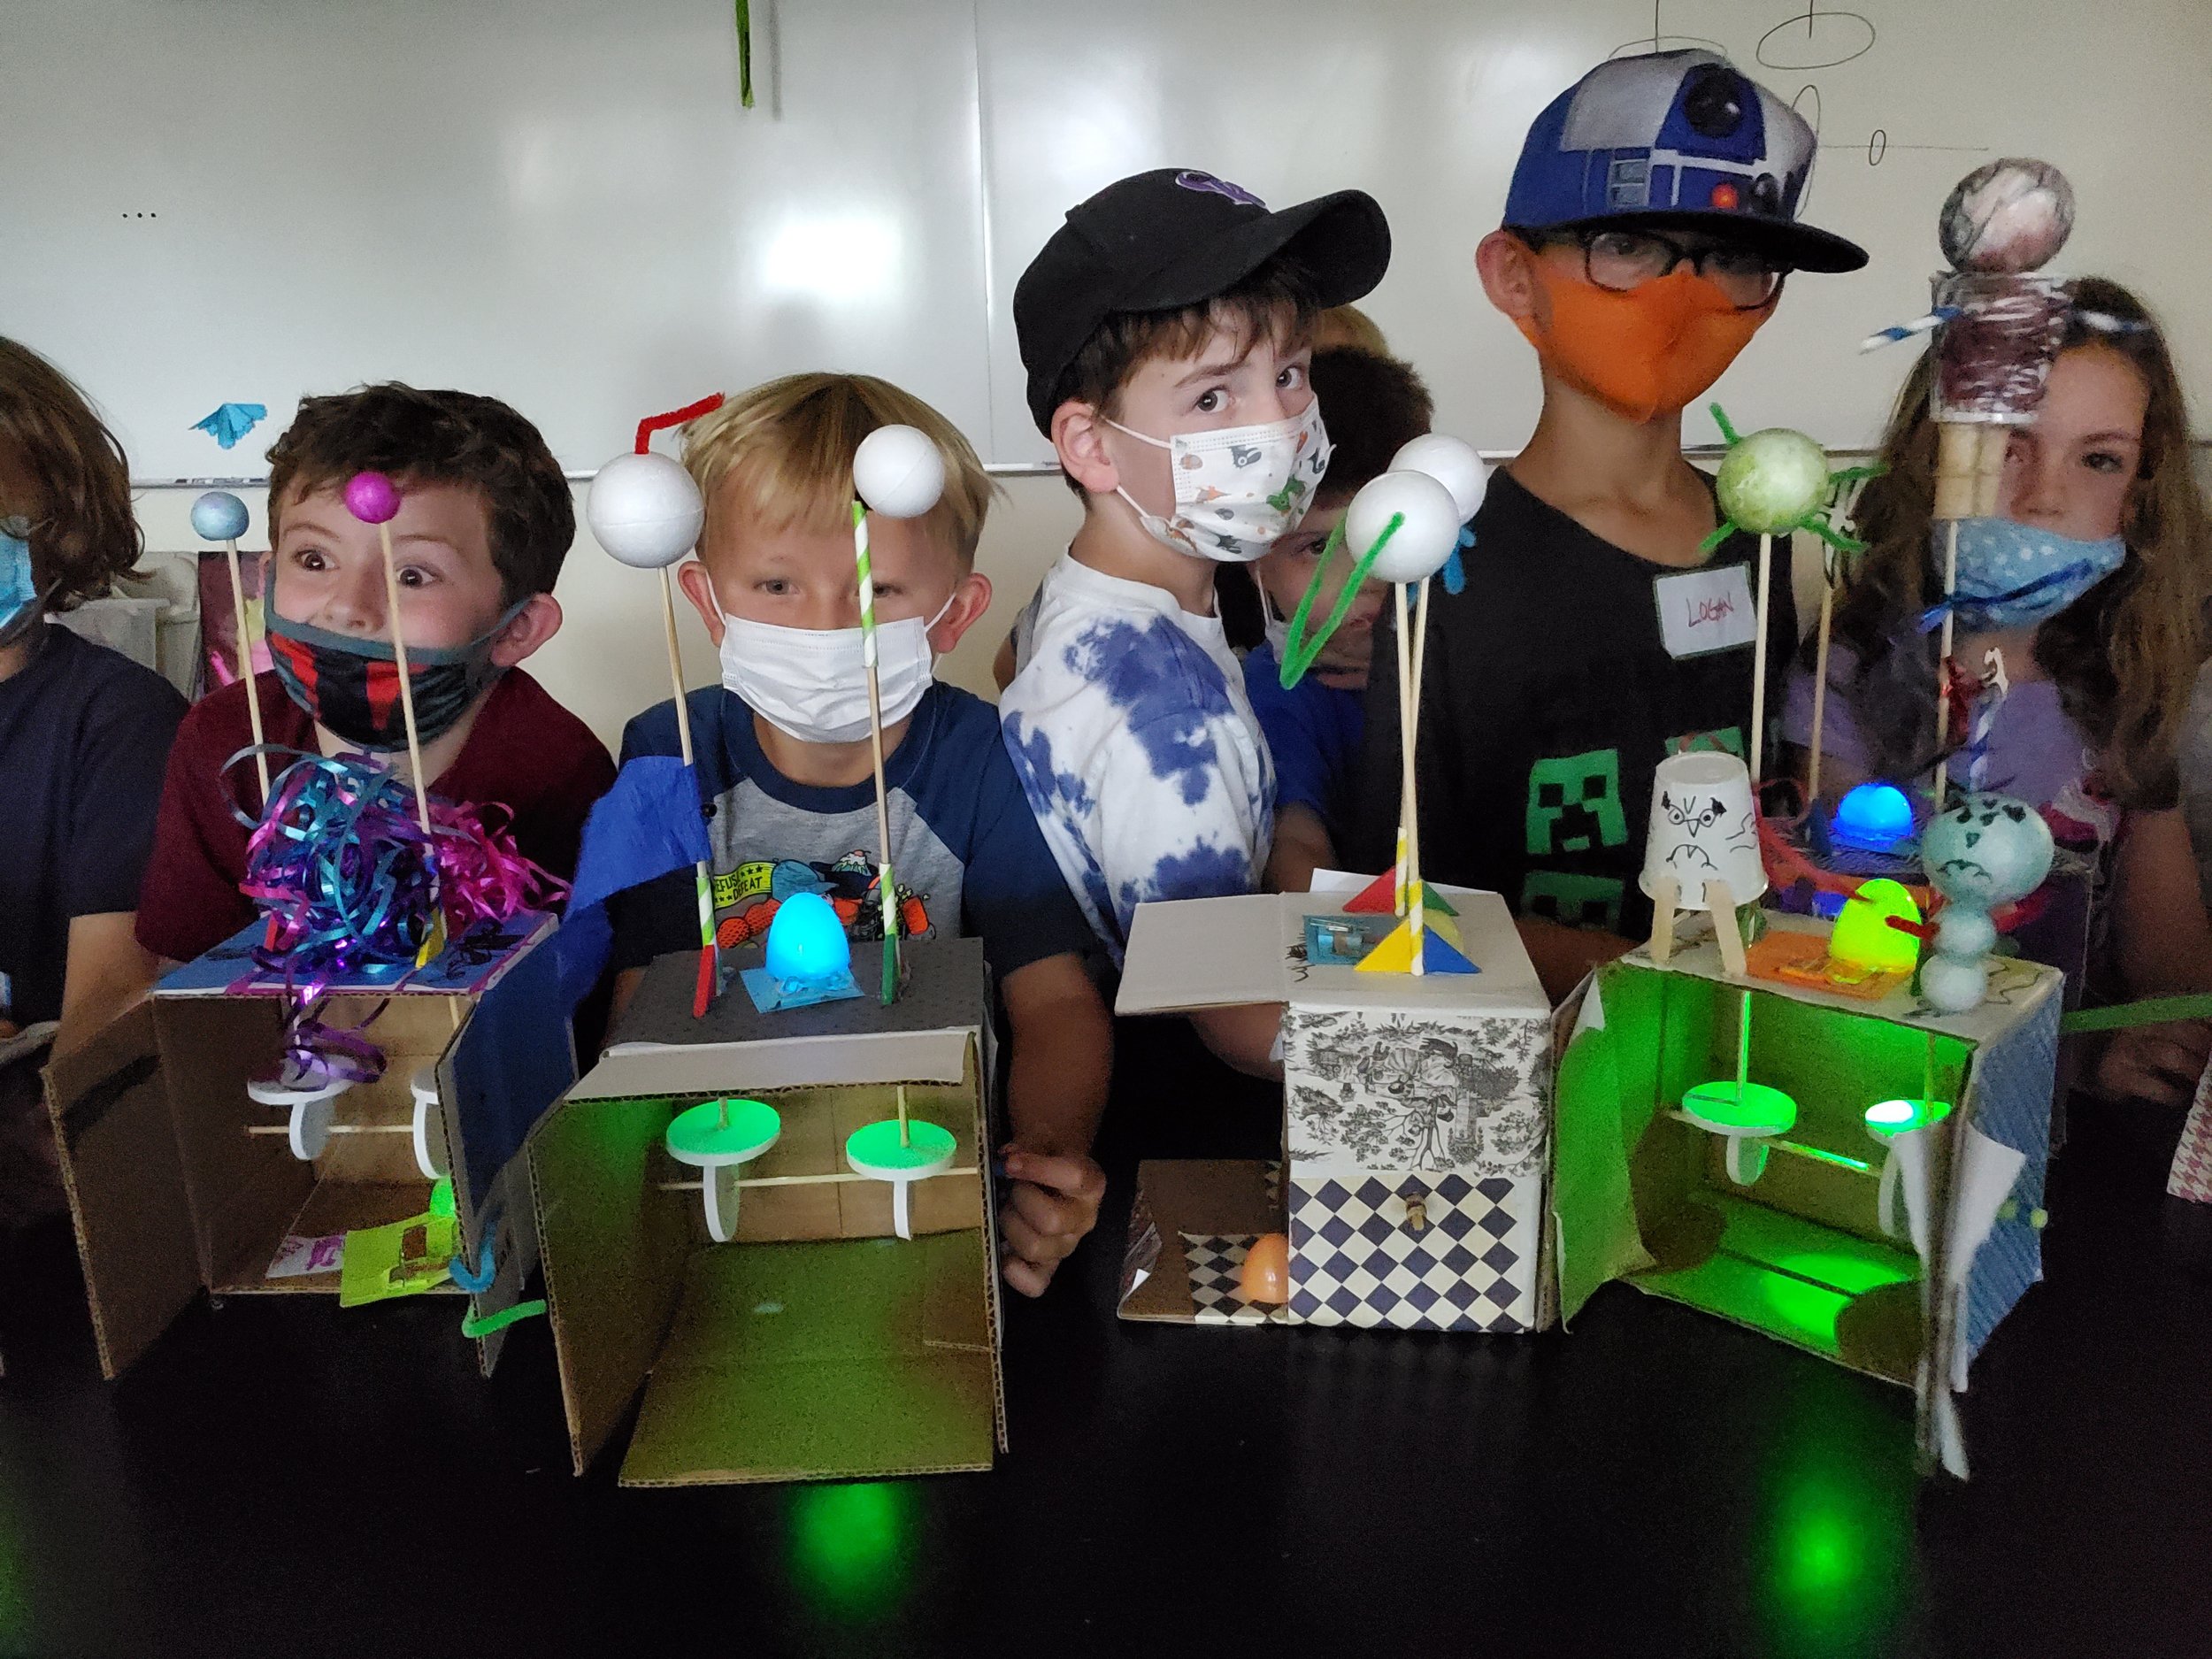
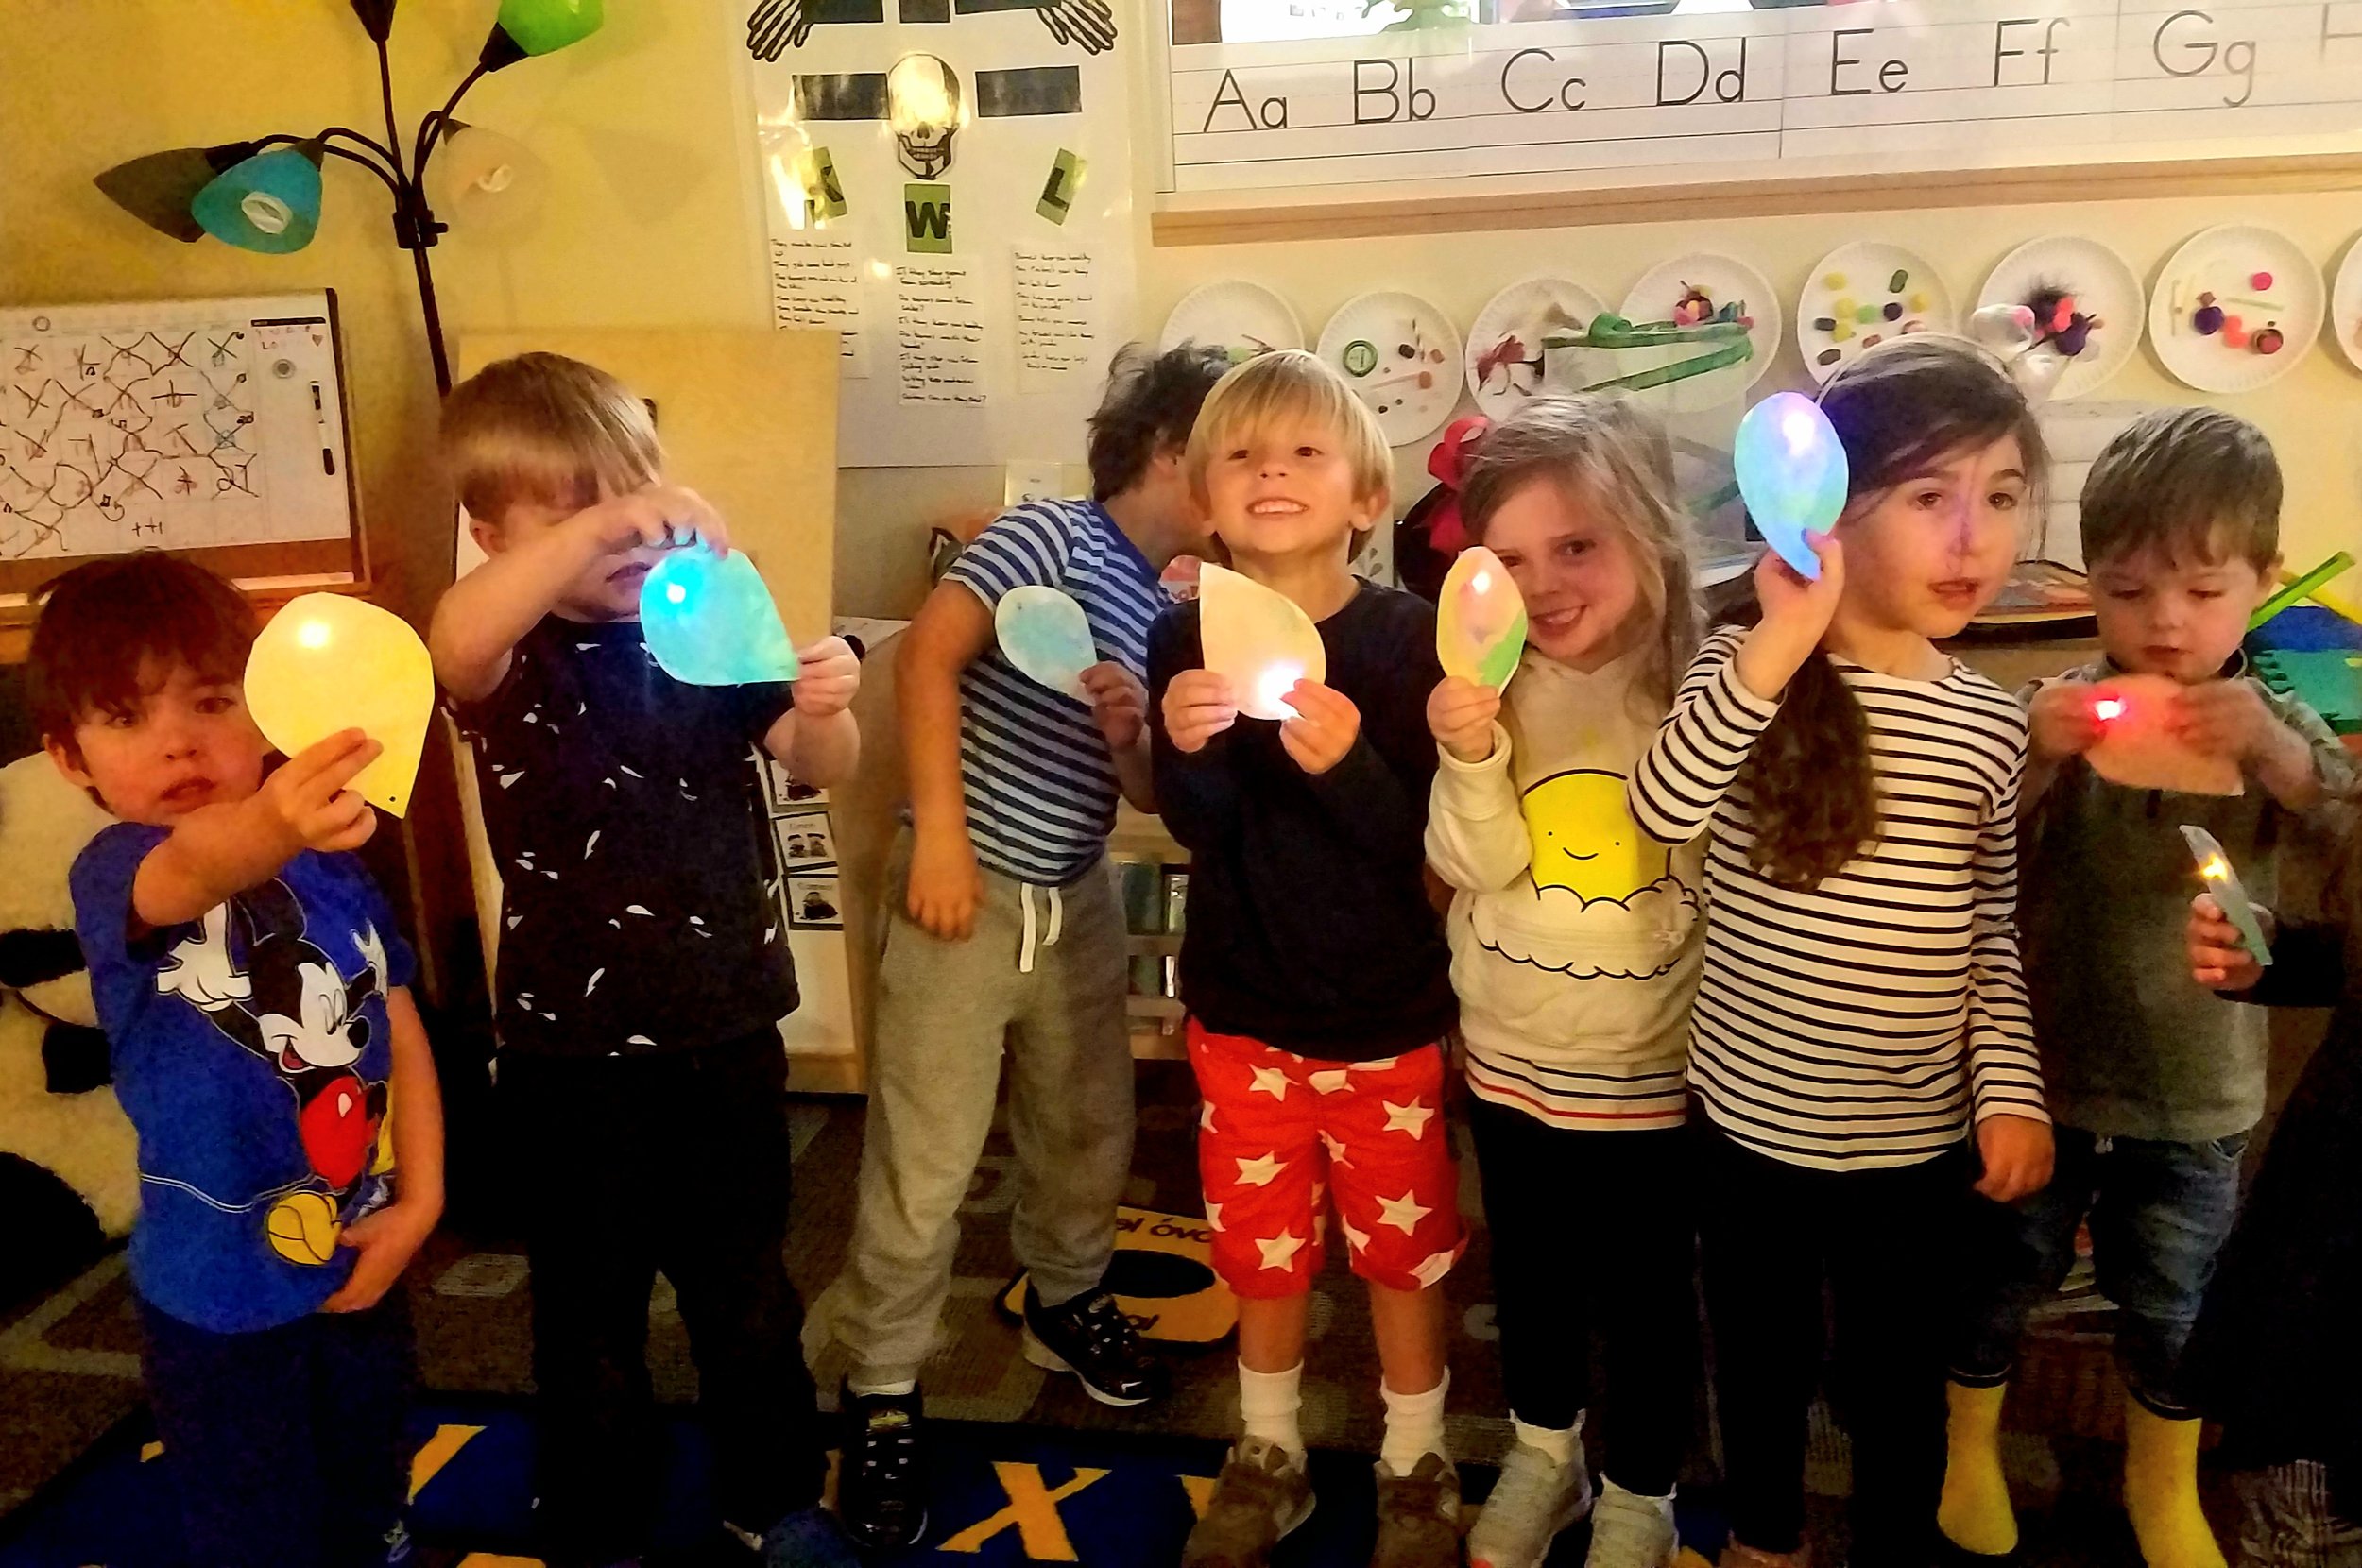
STEAM IN ACTION
Check Out These Awesome Examples Of Student Creations Using Circuit Cards
COPYRIGHT NOTICE:
This curriculum is developed and owned by Eurekus LLC and is intended for educational purposes only. No portion of the instructional webpage or associated materials can be copied, distributed or edited for commercial purposes without the express written consent from Eurekus LLC.
© EUREKUS LLC 2022