
LED HOLIDAY CARDS - PROJECT PAGE


Celebrate With Technology
Get Started
-
You can make a Basic Version that does not need solder. Or, you can make a Complex Version with solder for more advanced engineering challenges. We’ve included instructions for both below.
-
Your kit includes all the templates, supplies & technology you need. You will also want scissors, thumb tack and hot glue.
If you’re making a Basic Version you’ll need scotch tape. If you’re making a Complex Version, you’ll need a soldering iron. You’ll also want some a blue tape or masking tape.
-
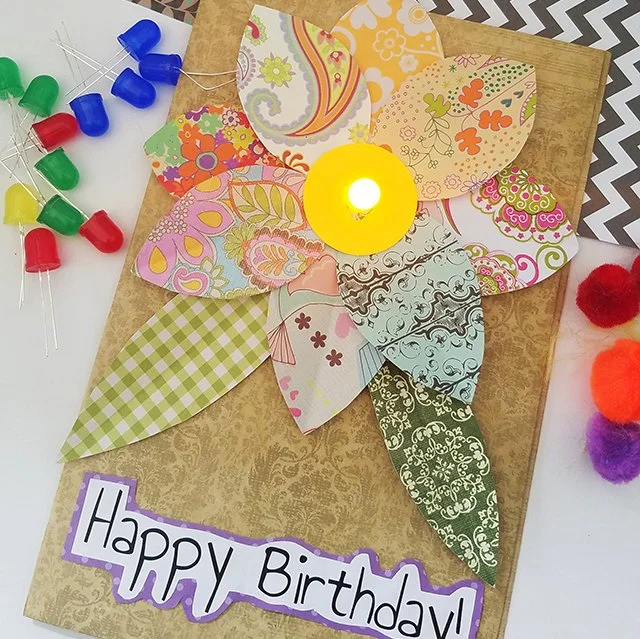
Check out our gallery of project examples for inspiration. This project is fun for all ages!
-
Watch the video tutorials & slideshows below which have step-by-step instructions. You can also check-out your printed Quick Start Guide.
-
Eurekus projects spark personal creativity and originality. Think of awesome ways you can customize your designs.
Video Tutorials
Basic Version - Make Without Solder
Learn to create a Basic Card without using solder. Explore cool techniques for creating copper tape circuits and switches.
Complex Version - Make With Solder
Learn to solder and create a more Complex Card. We’ve also included instructions for decorating your card with scrapbook paper.
Slideshow Instructions - Basic Version
Slideshow 1: Create A Circuit Without Solder
Make a basic tape circuit and corner squeeze switch.
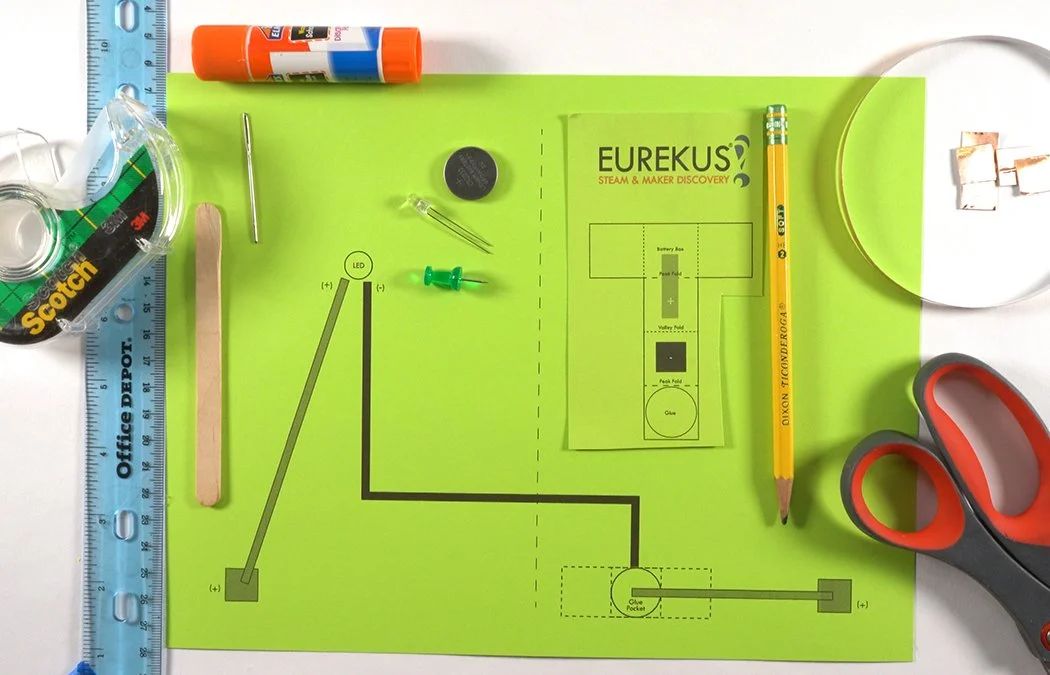
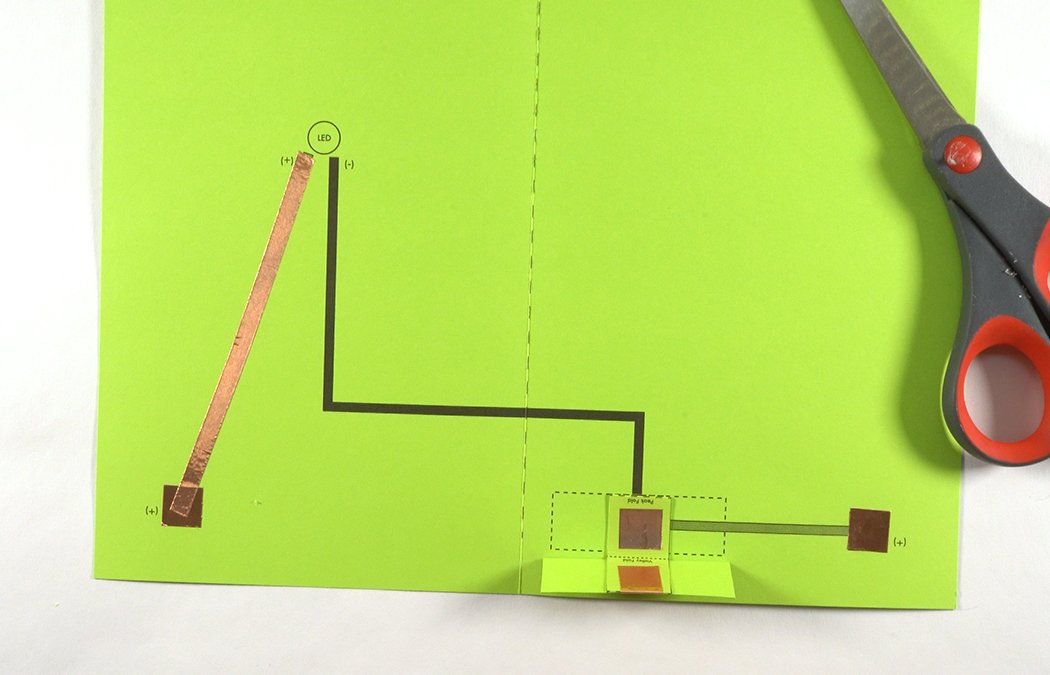
Collect your supplies & templates.
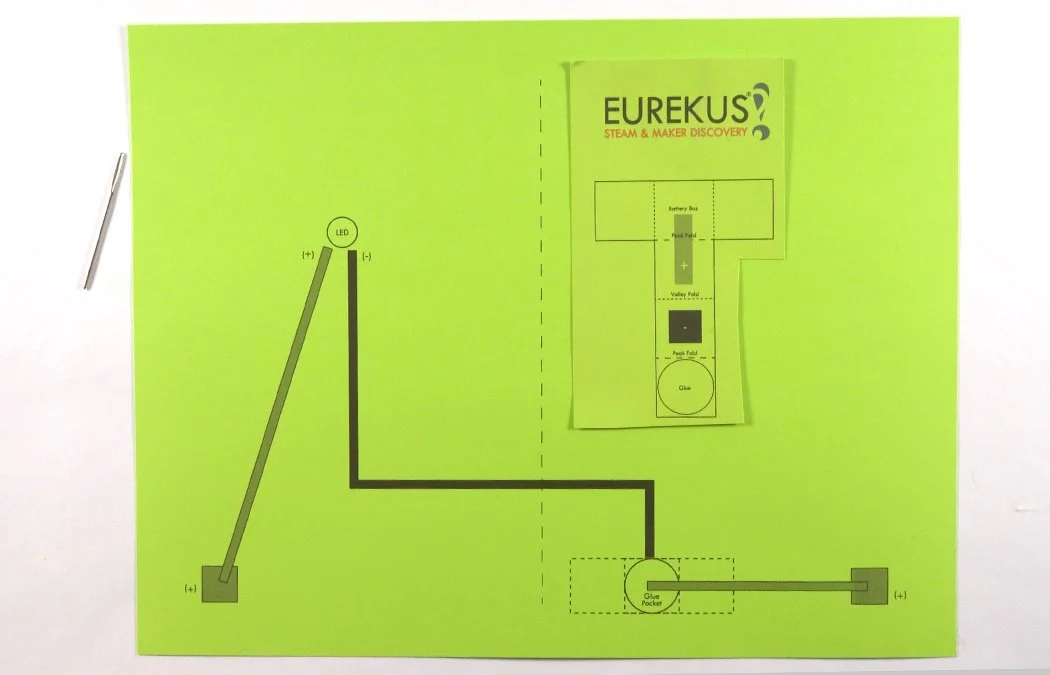
Both your card template and battery box should be printed onto cardstock.
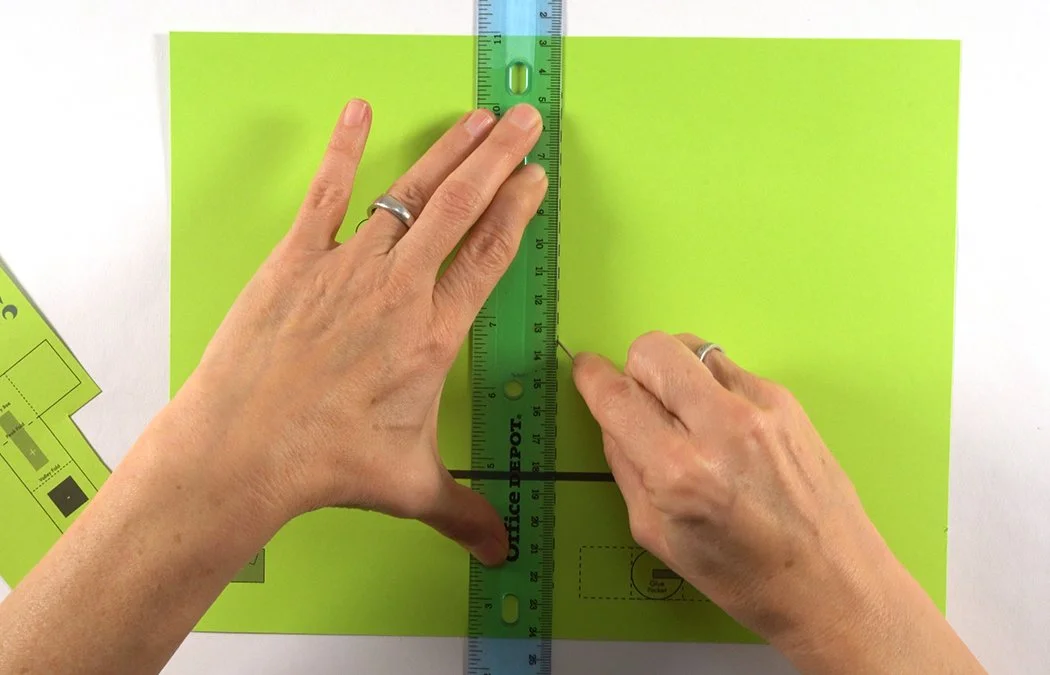
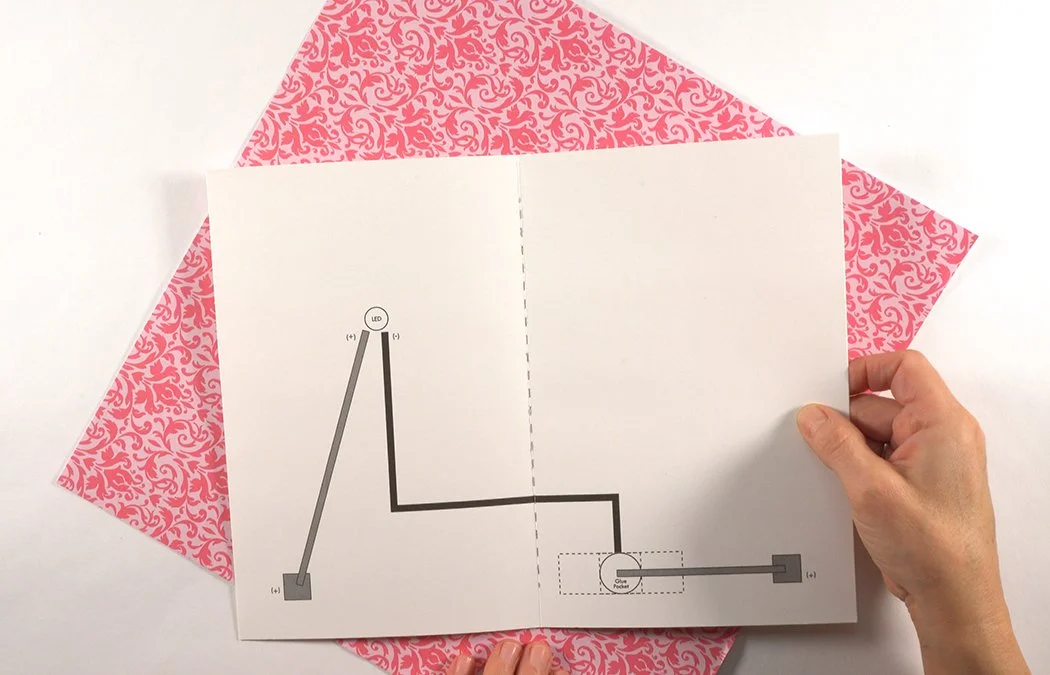
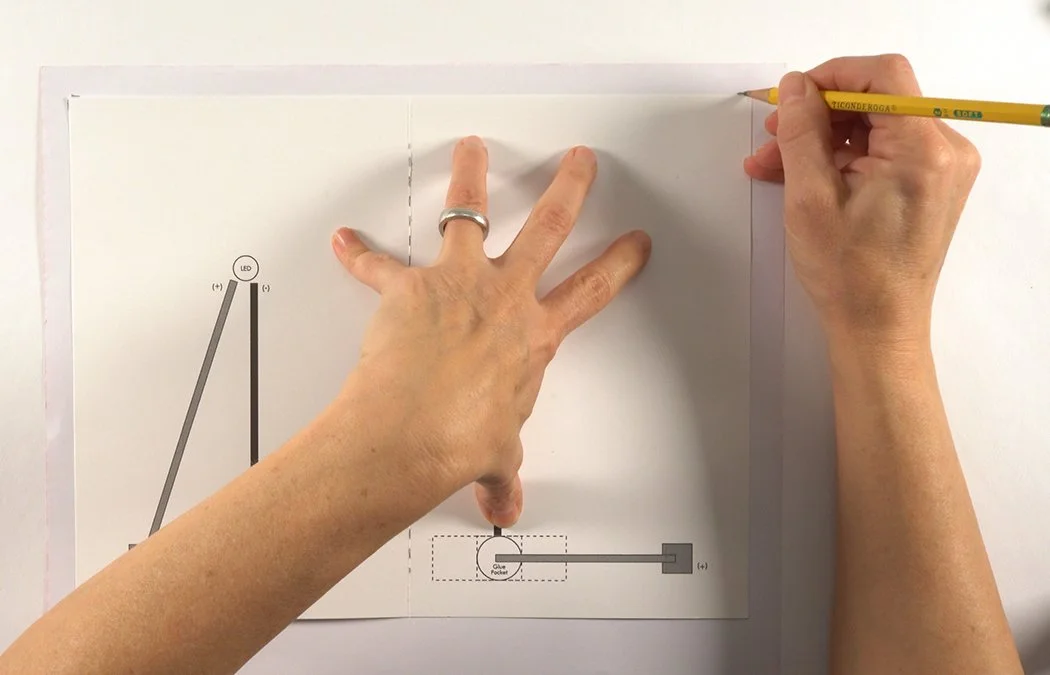
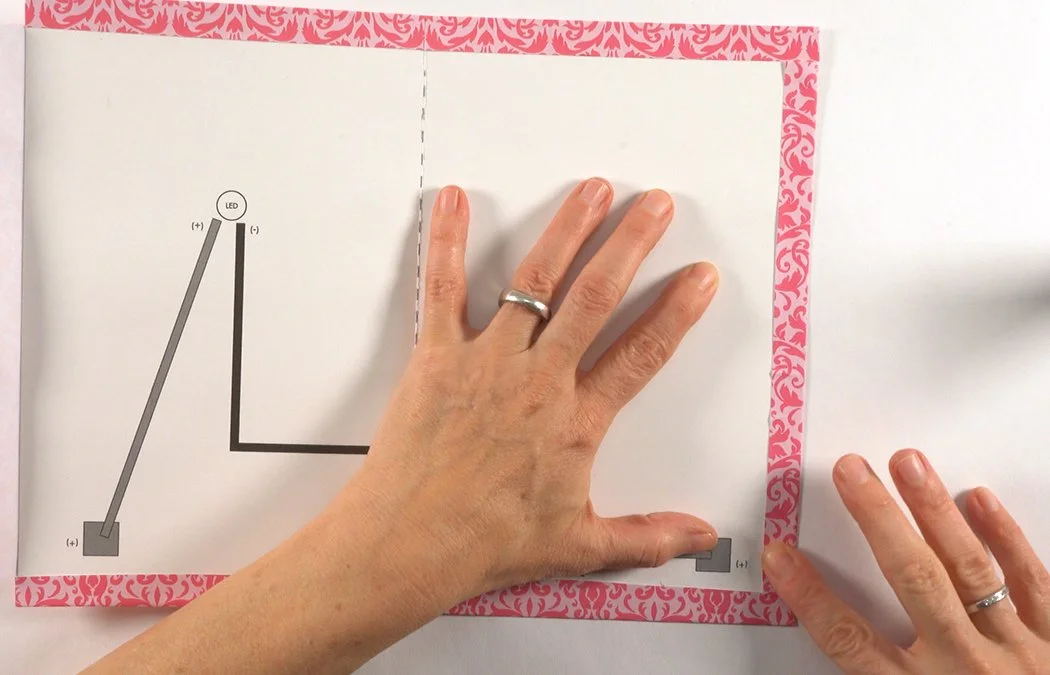
You can score the center line of the card with a ruler and embroidery needle to make a crispy fold. Line-up the ruler with the dashed line and run your needle down to indent the paper.
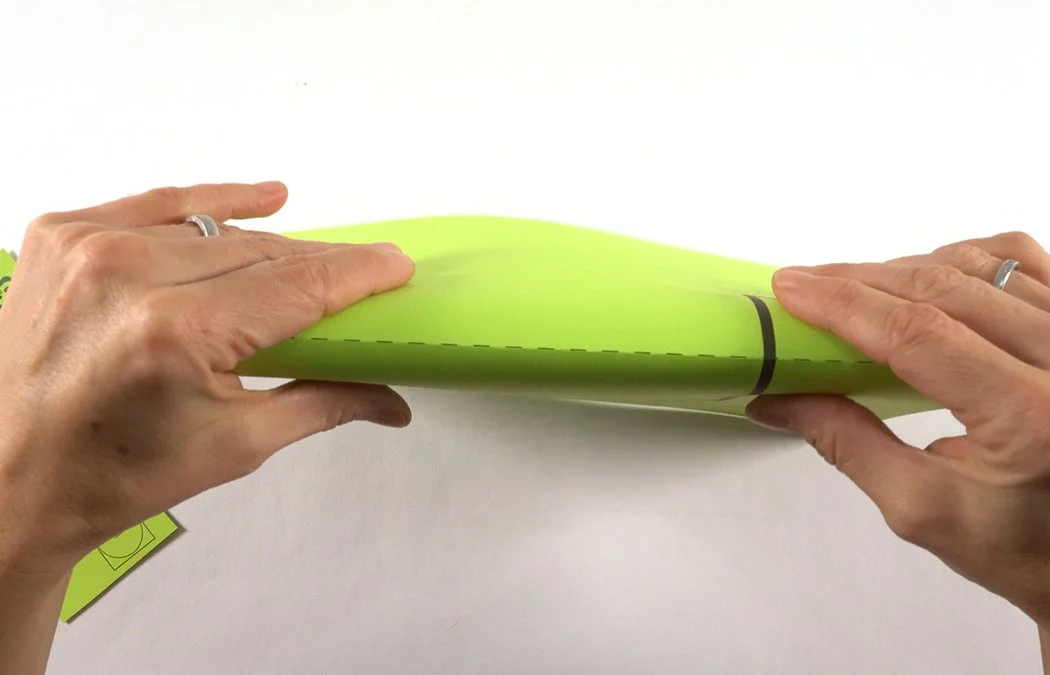
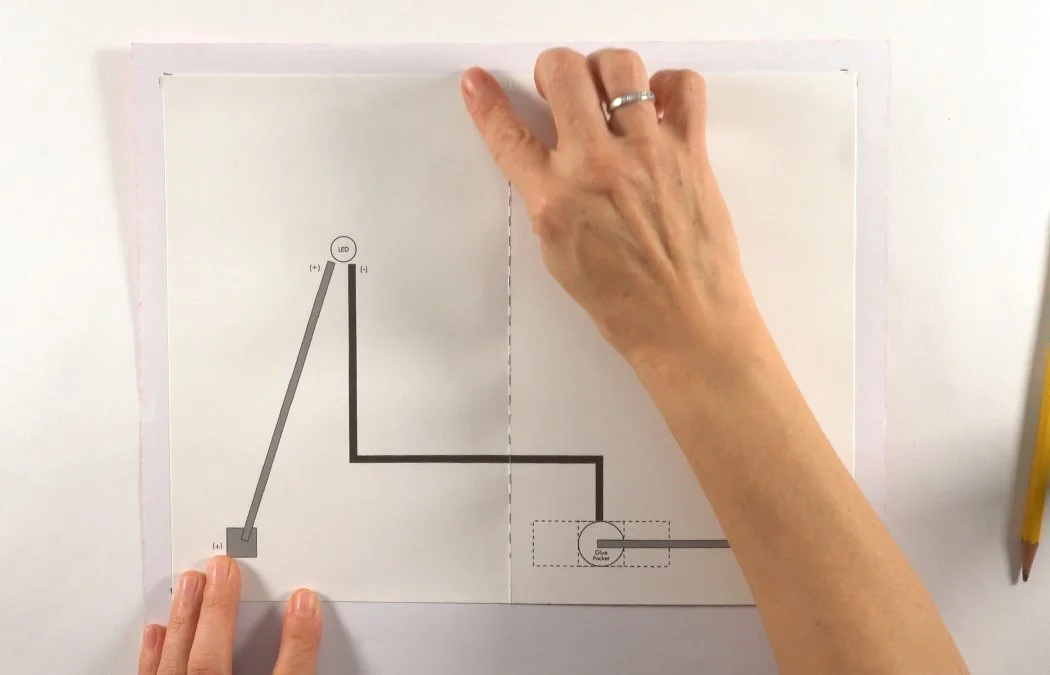
Fold the line one direction.
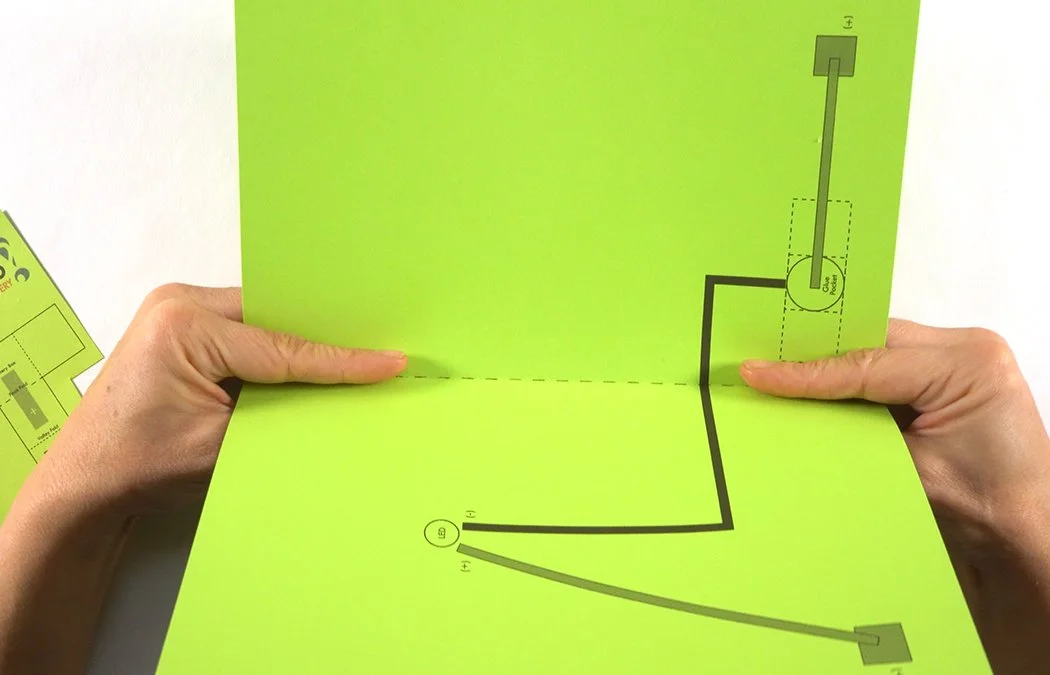
Then fold it back the other direction with the diagrams inside.
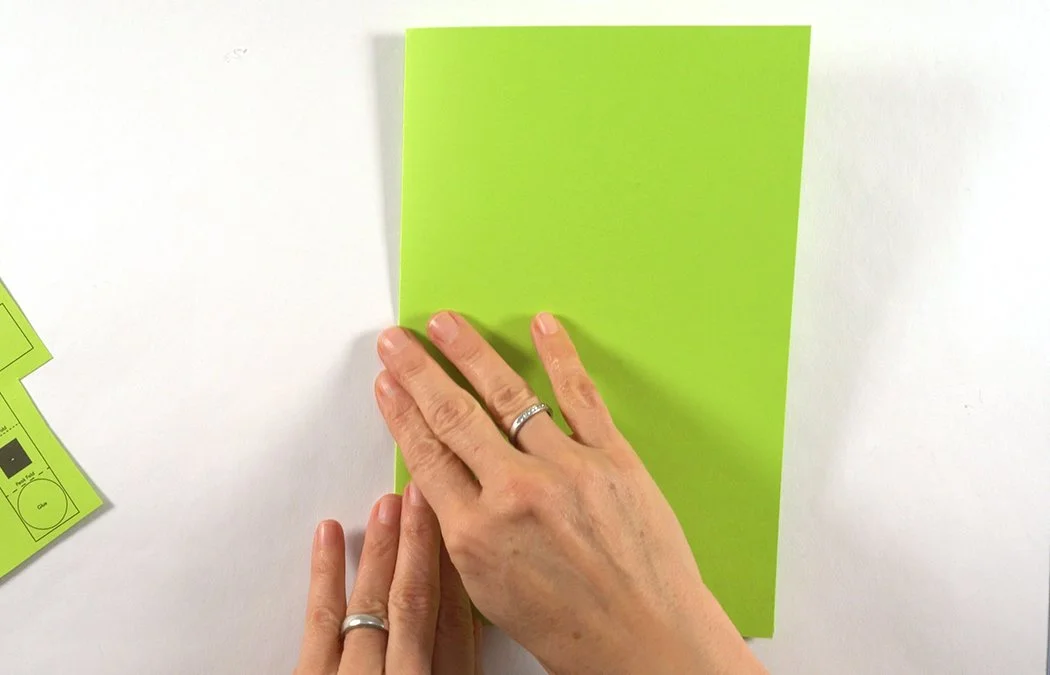
Smooth your fold. You can decorate your card with scrapbook paper, see the instructions for the Complex Version for details.
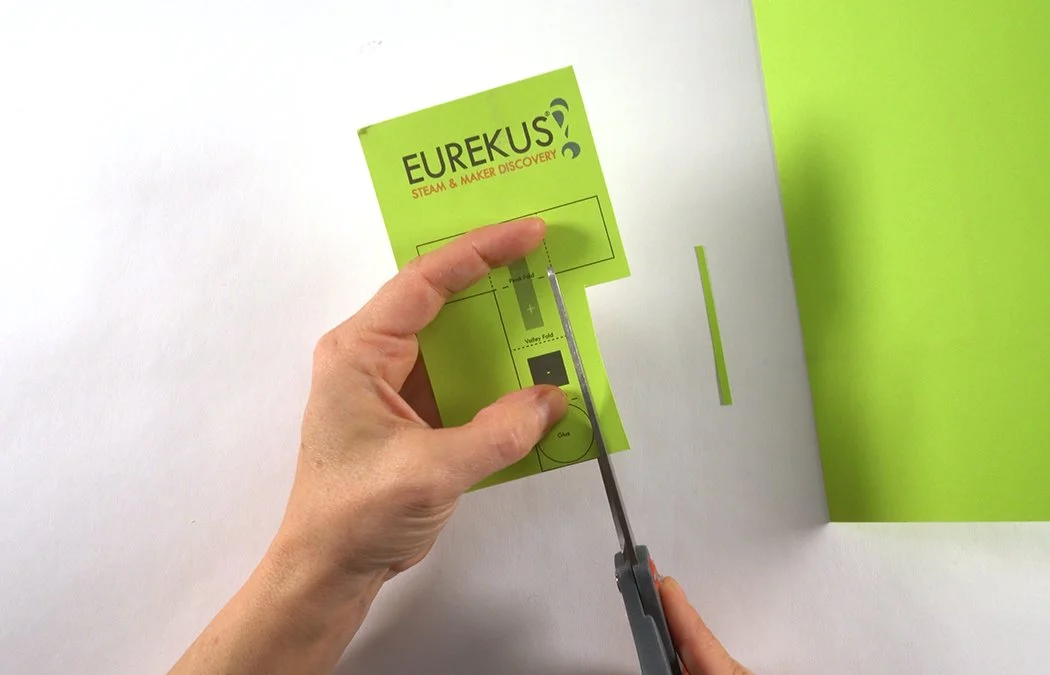
Cut out the T shaped battery box on the solid black perimeter lines.

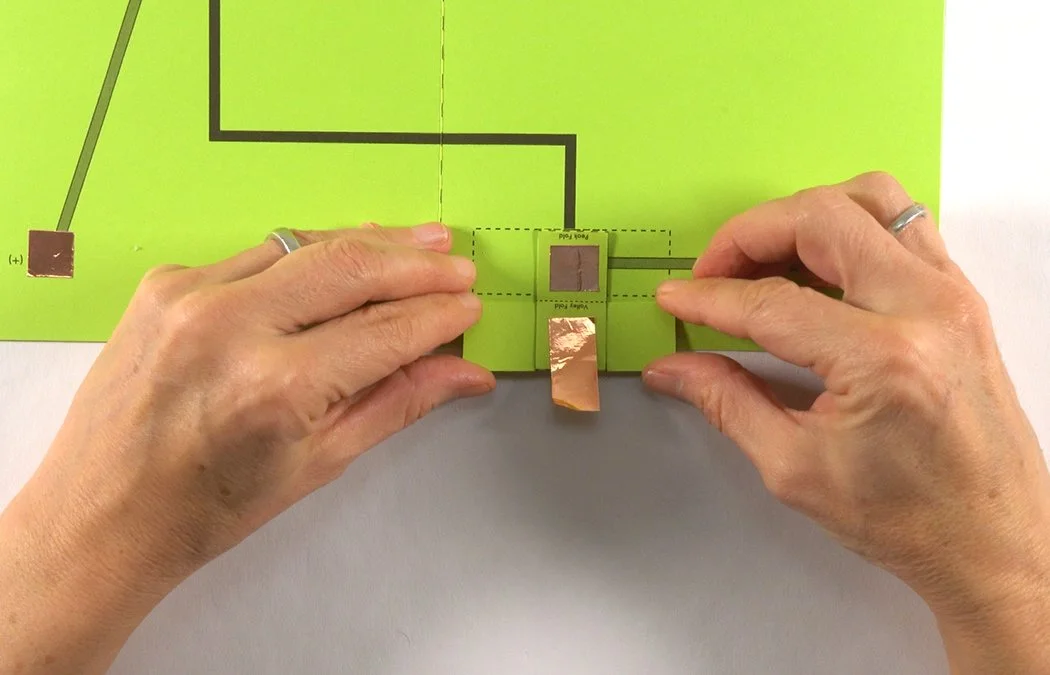
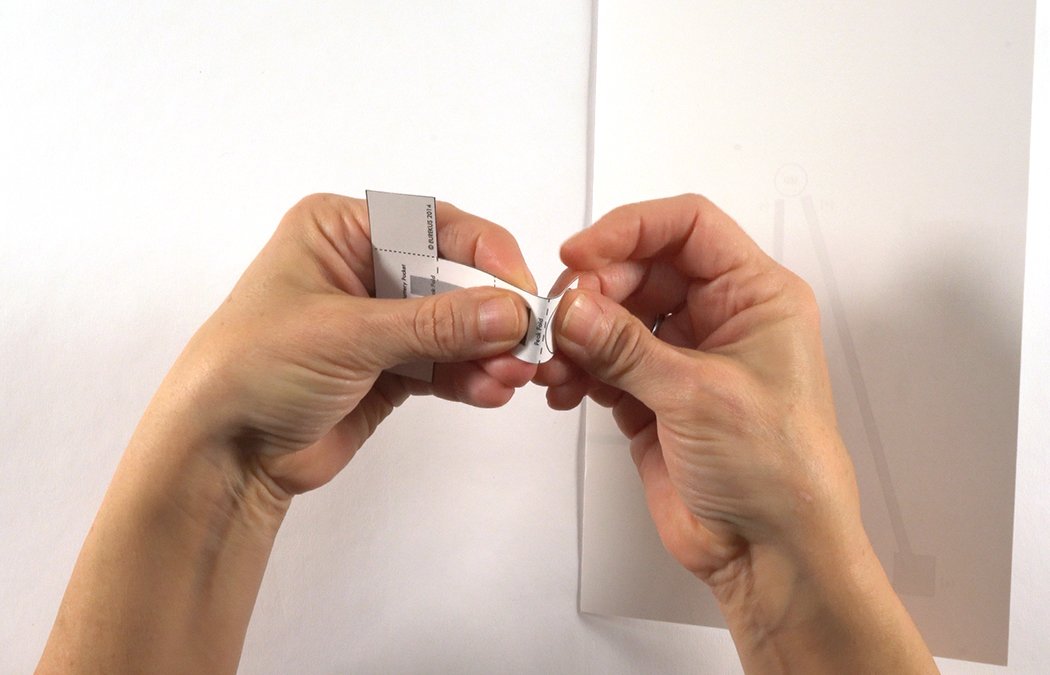
Fold the end into a peak on the solid dashed line.
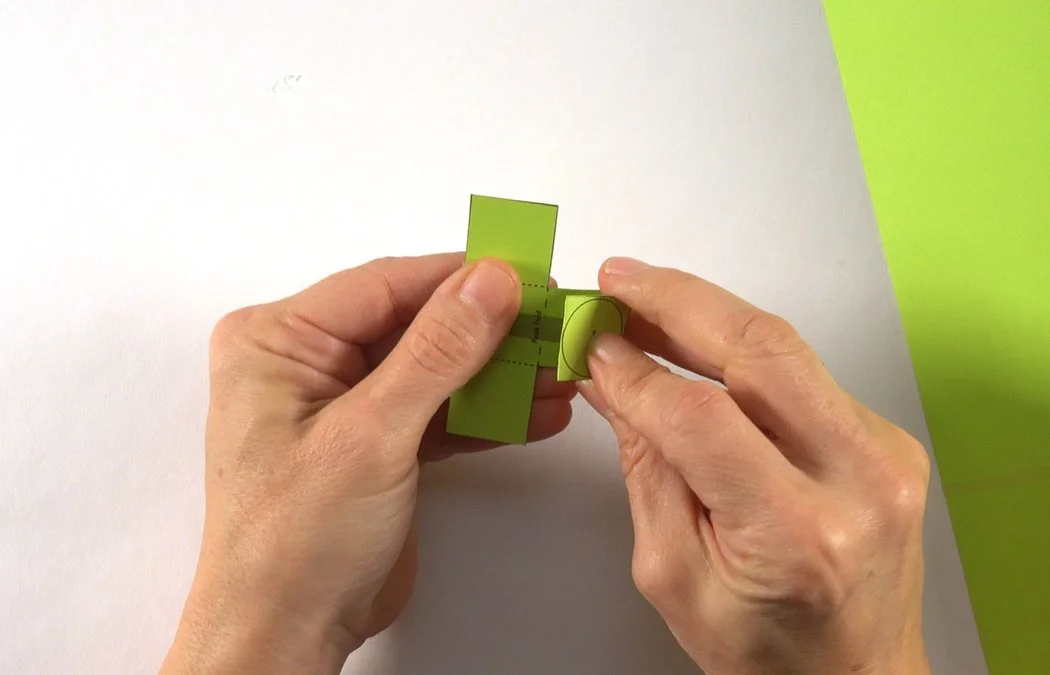
Fold the center dashed line into a valley shape.
Fold the dashed line at the T-tab into a peak fold.
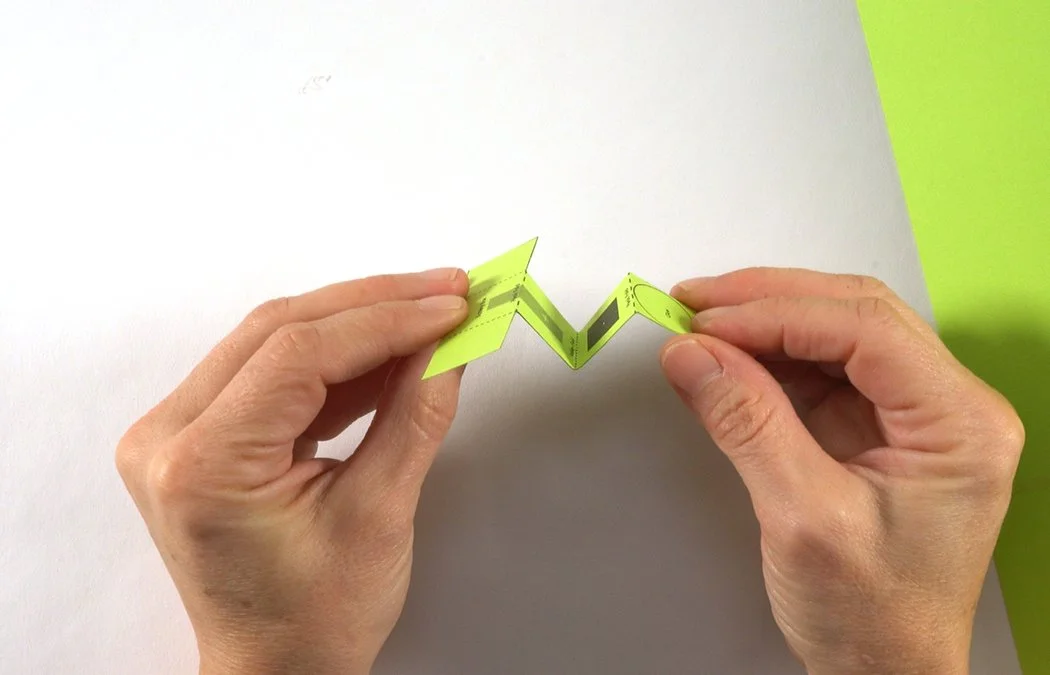
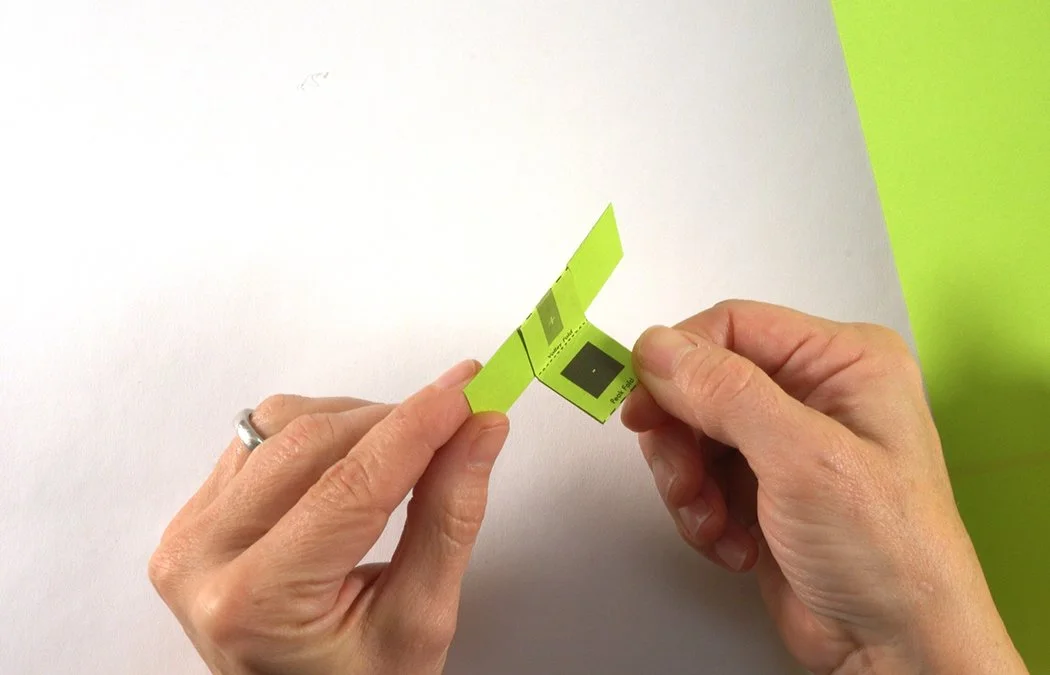
You've made and accordion fold with an M shape.
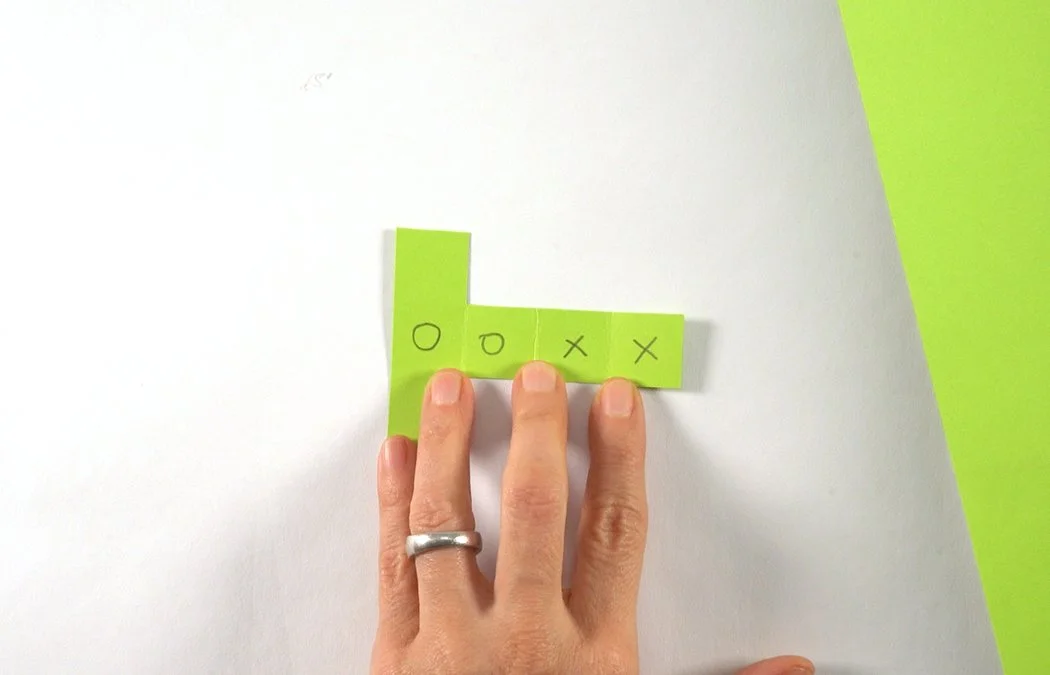
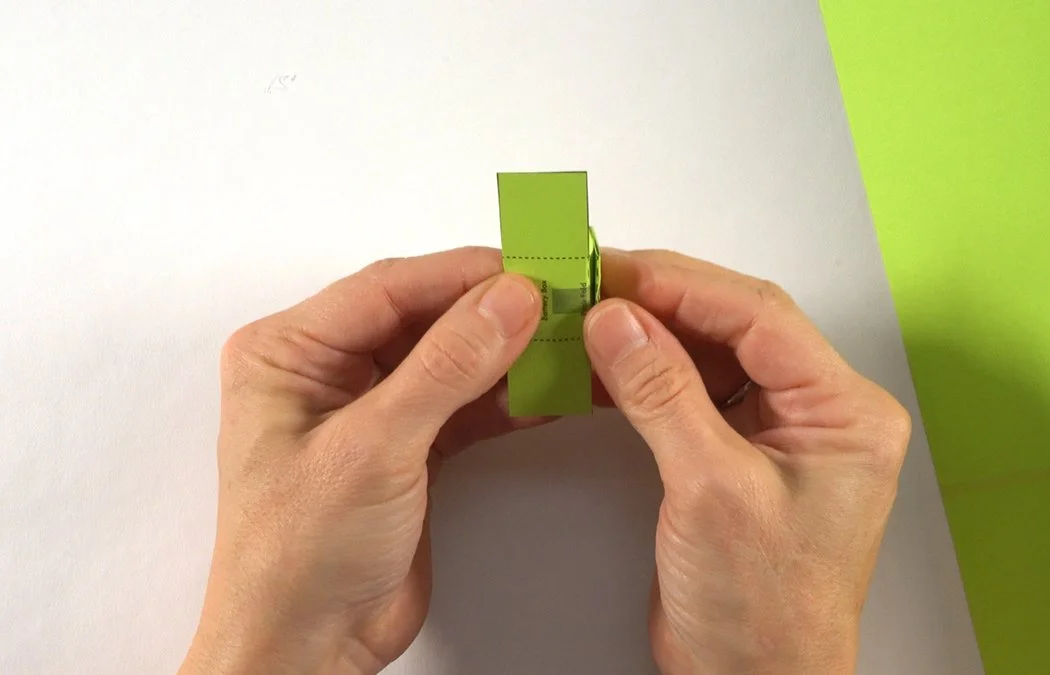
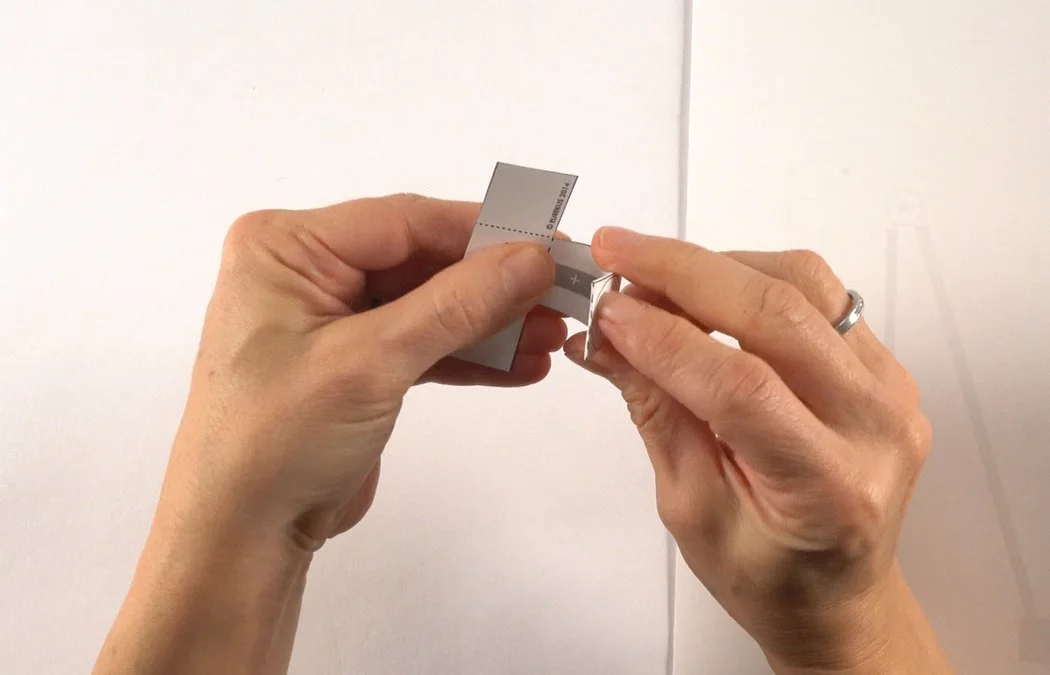
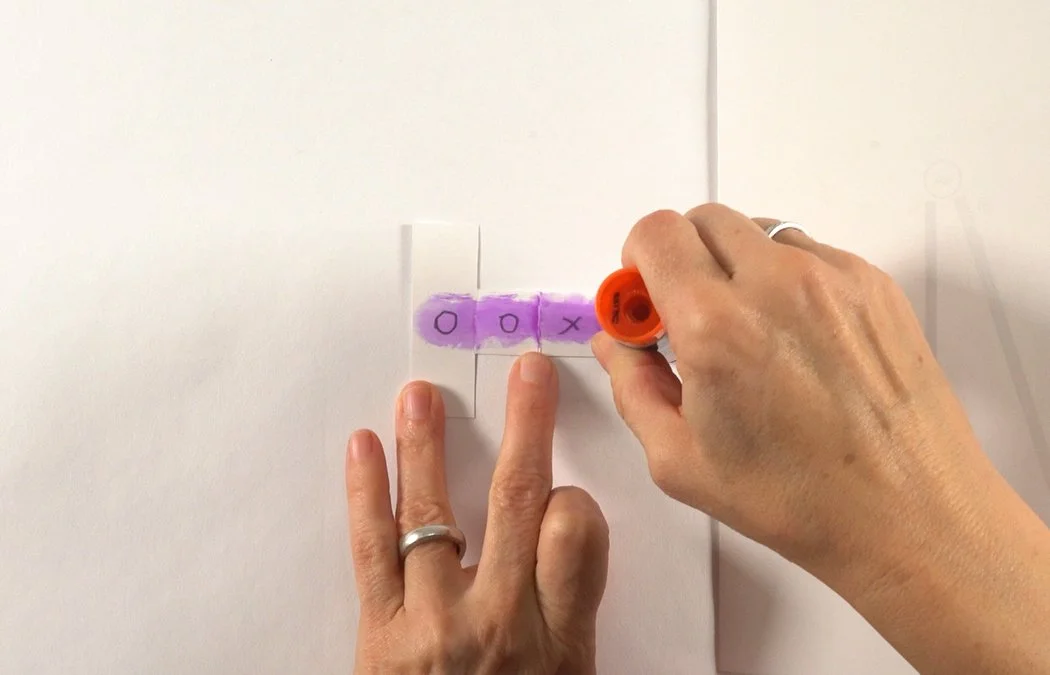
Flip your battery box over to see the blank side. Mark X's & O's as shown.
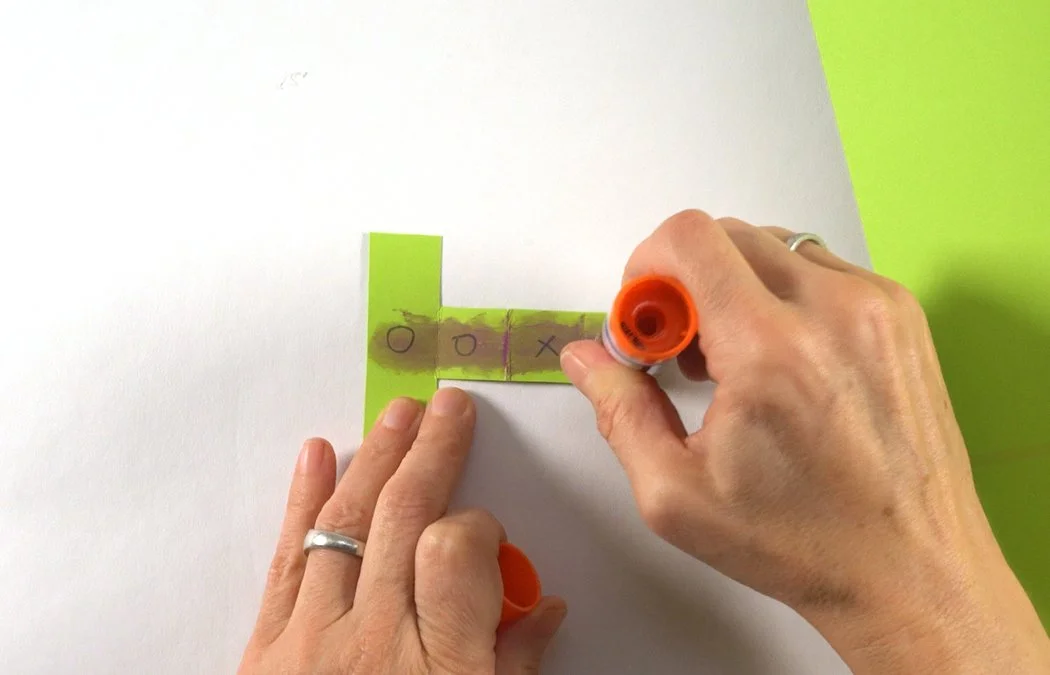
Place stick glue down the center of the T.
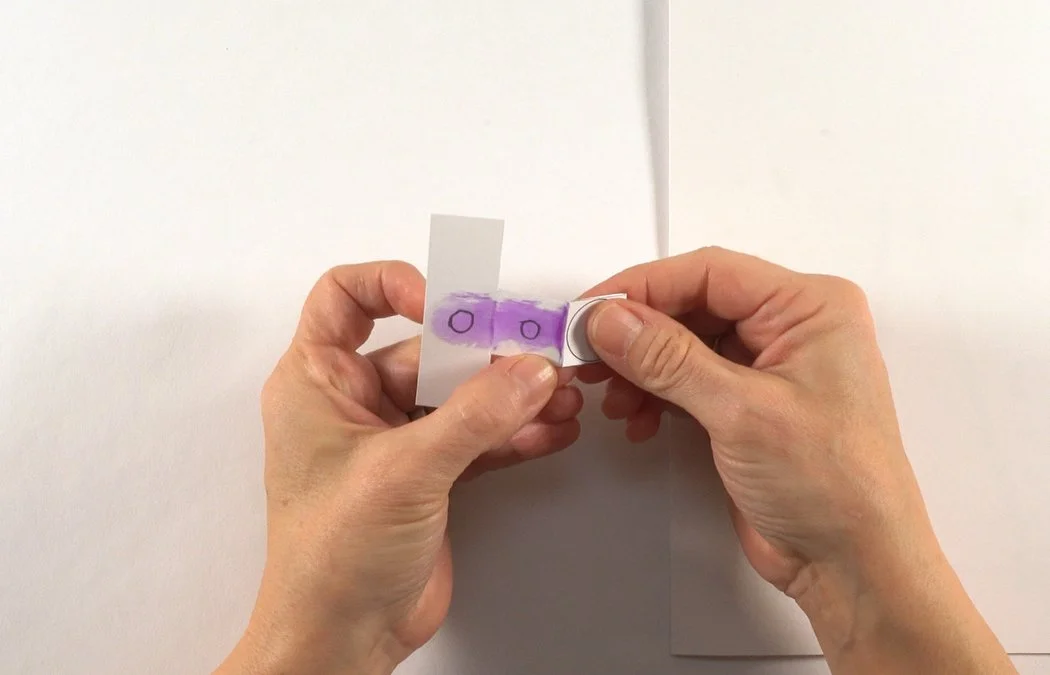
Fold the end over to glue one X panel to the other X panel.
Fold the T-tab over to glue one O panel to the other O panel.
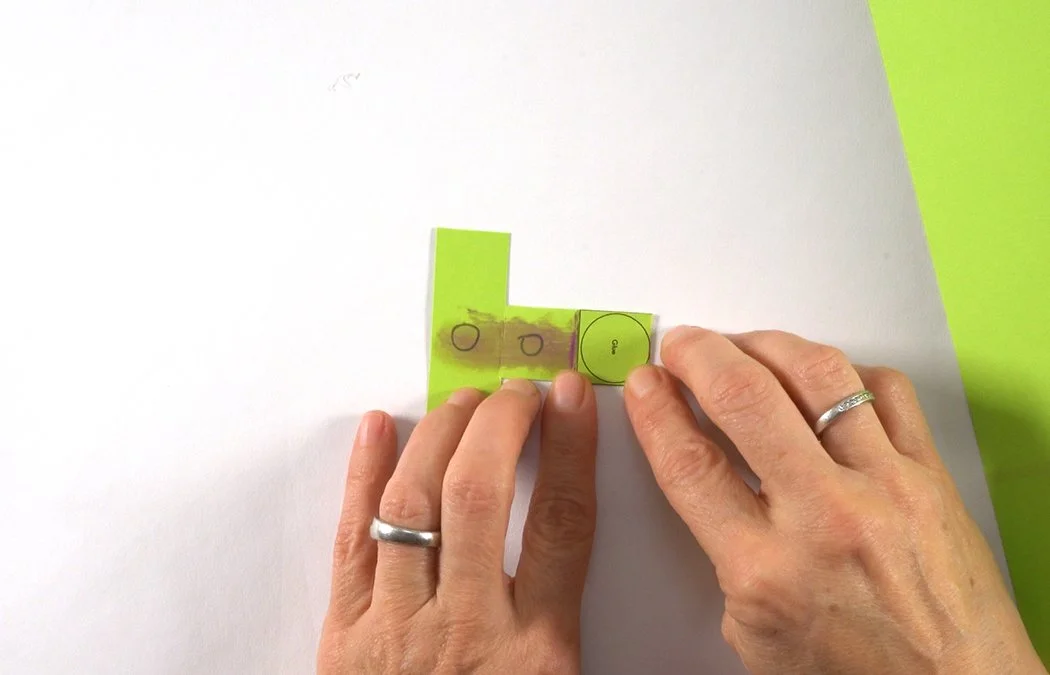
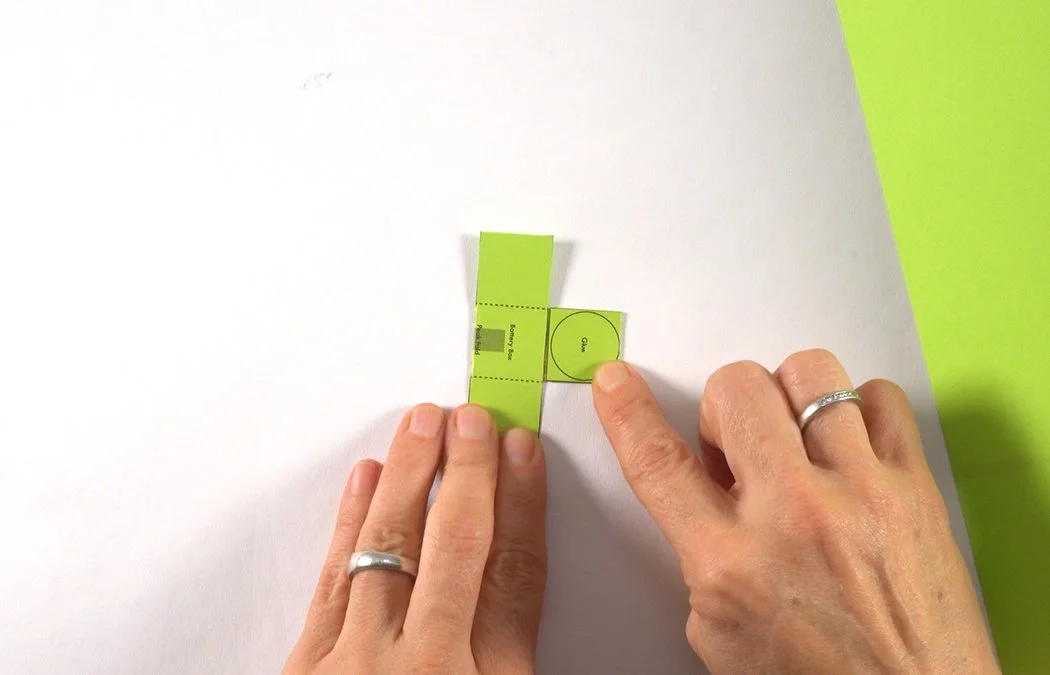
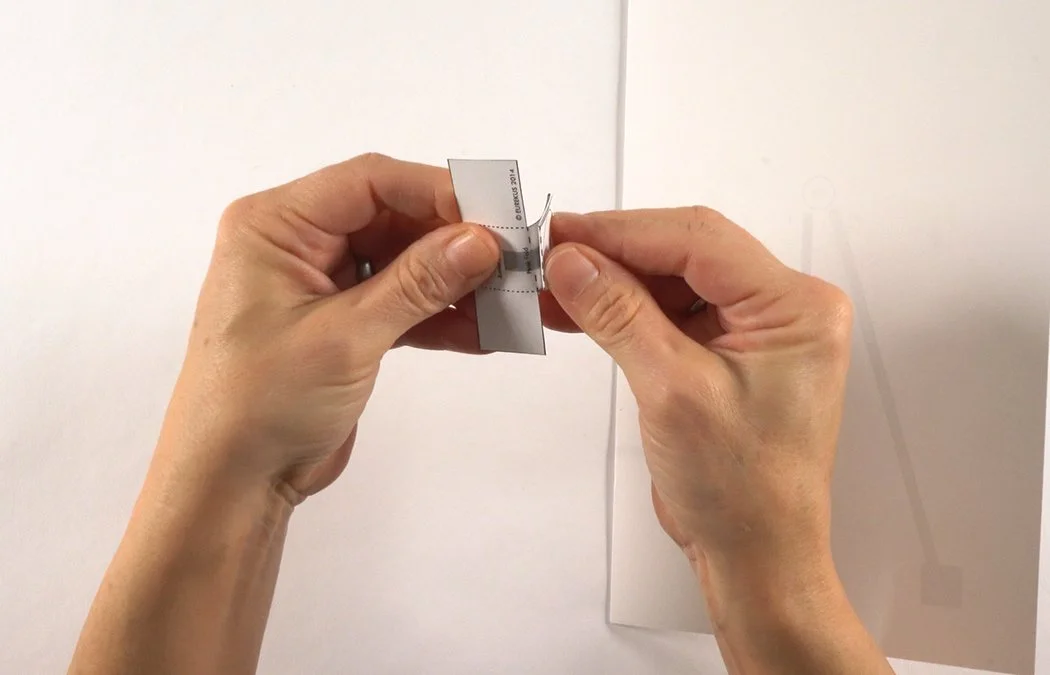
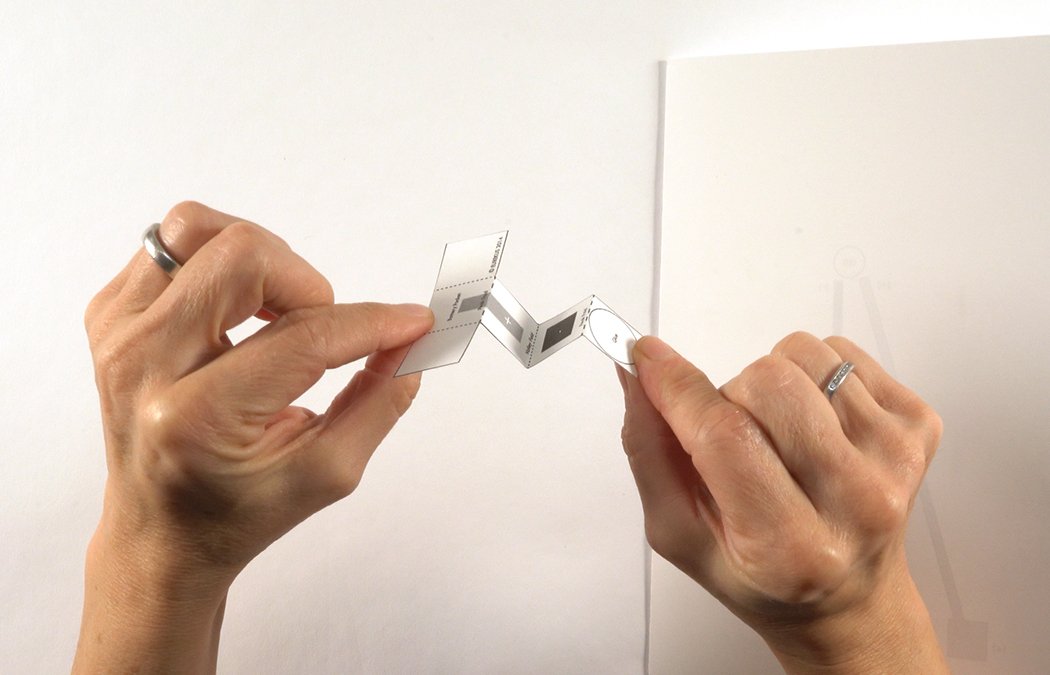
You will make a smaller T shape. Make sure you can see the diagrams on both sides.
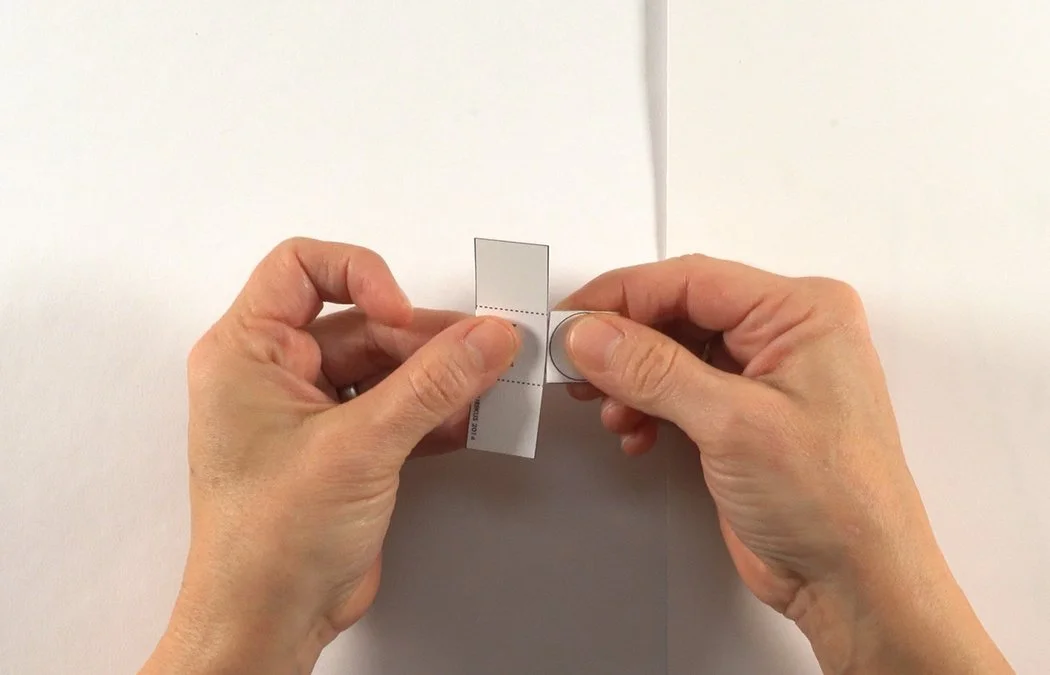
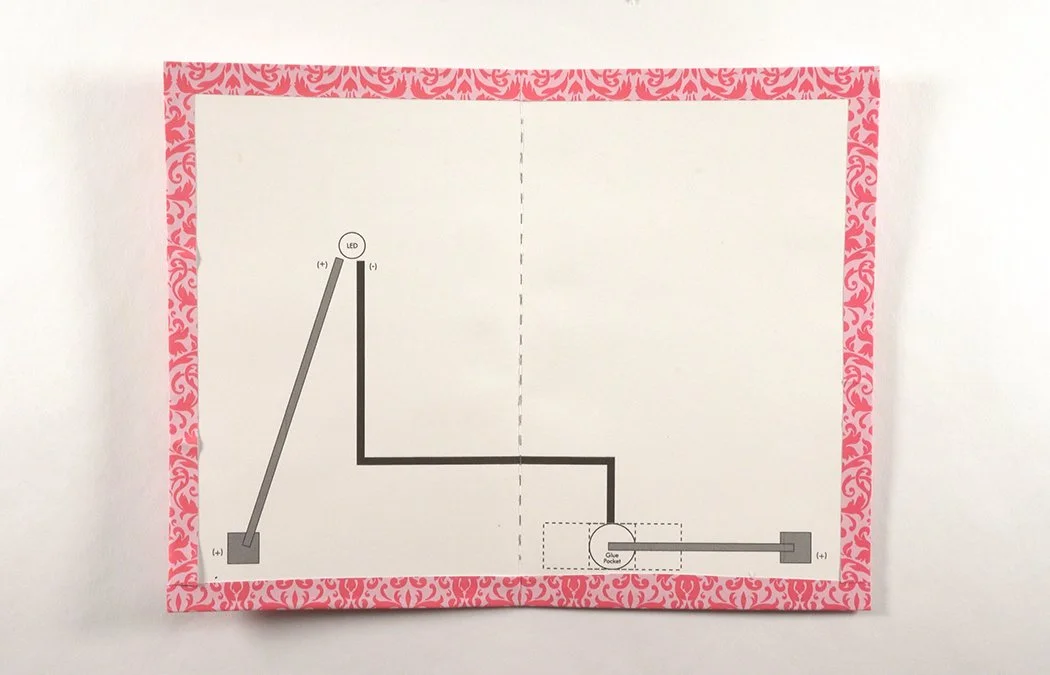
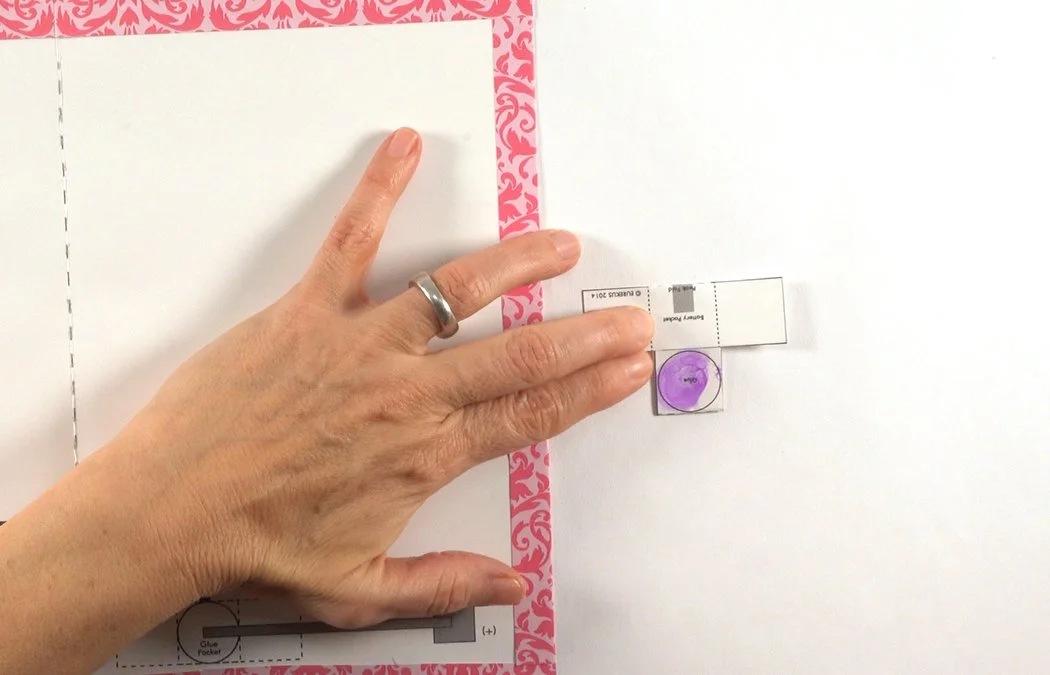
Place stick glue on the circle that says "Glue".

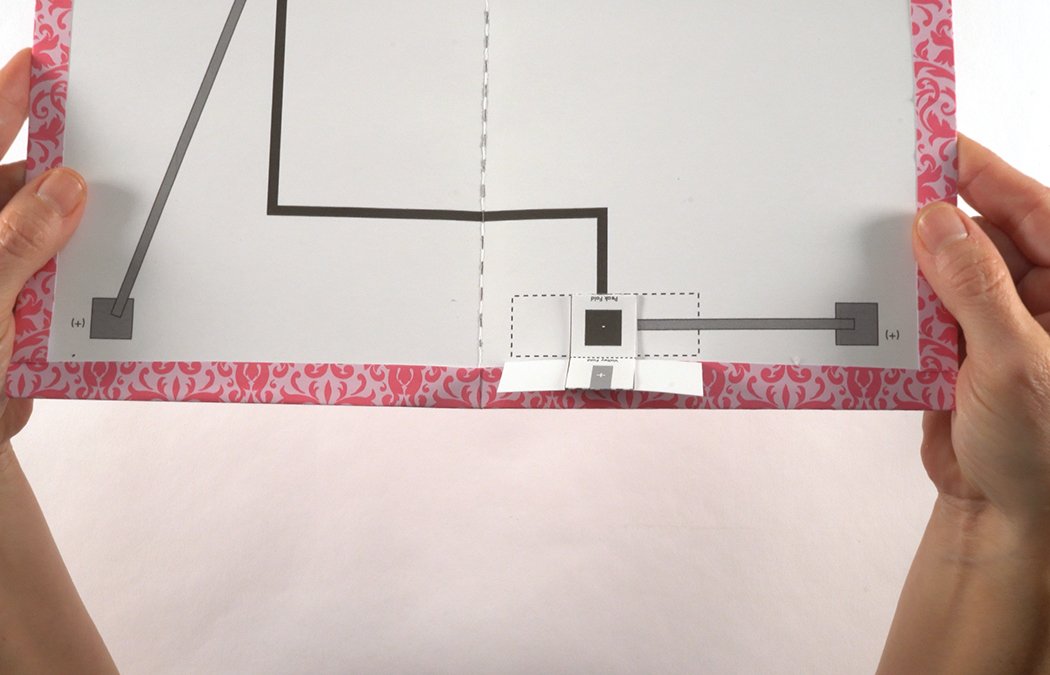
Attach the battery box to the circle on the template. The fold should face down.
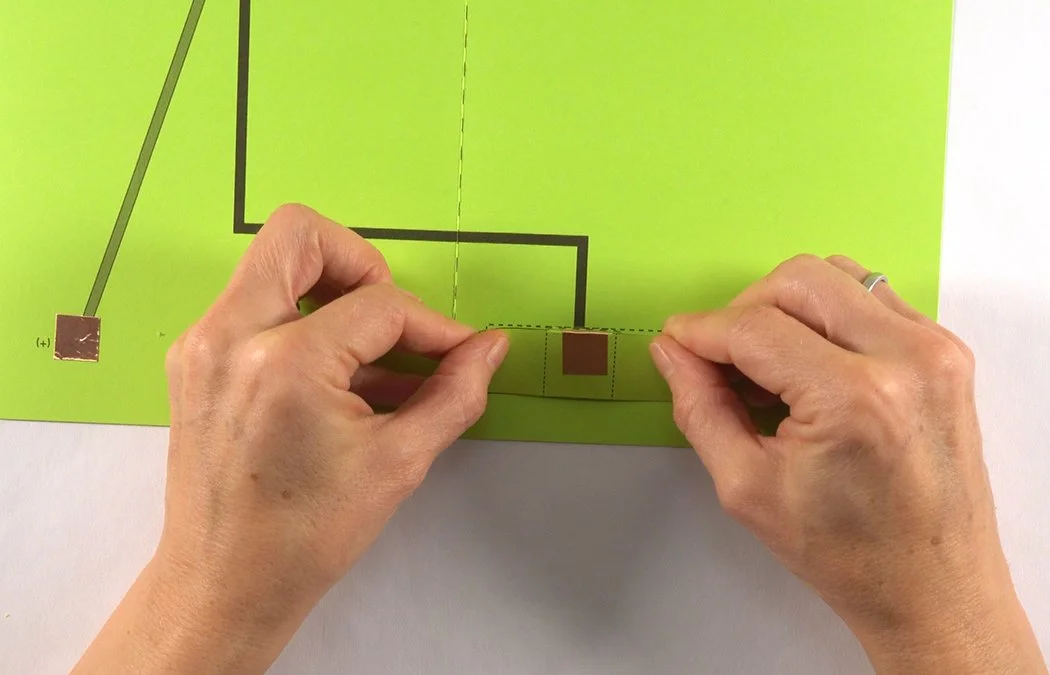
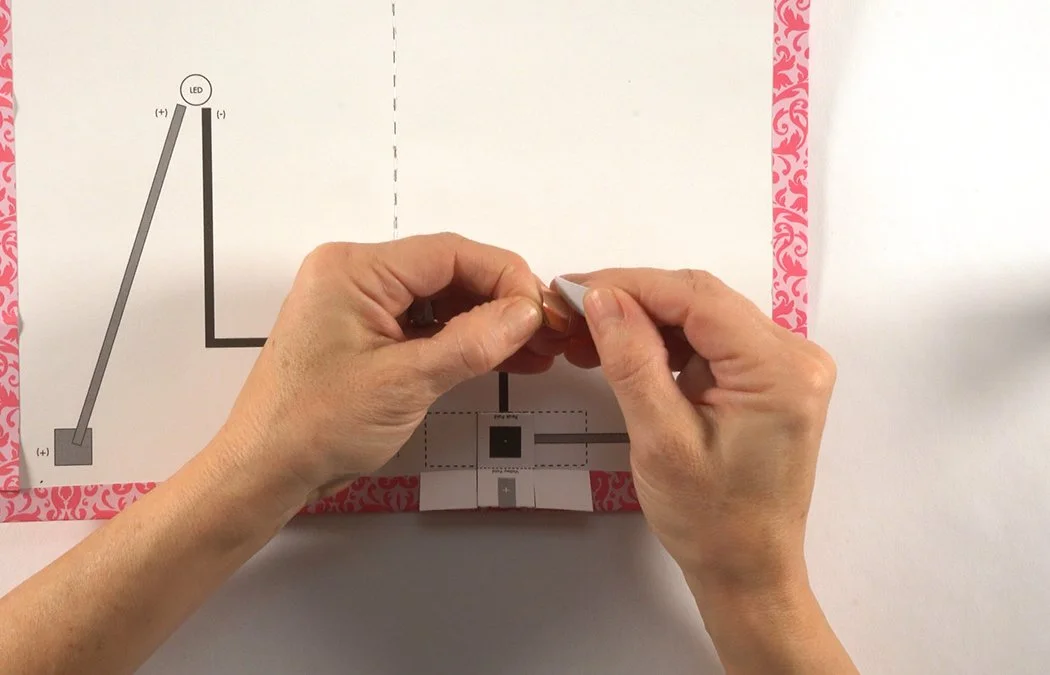
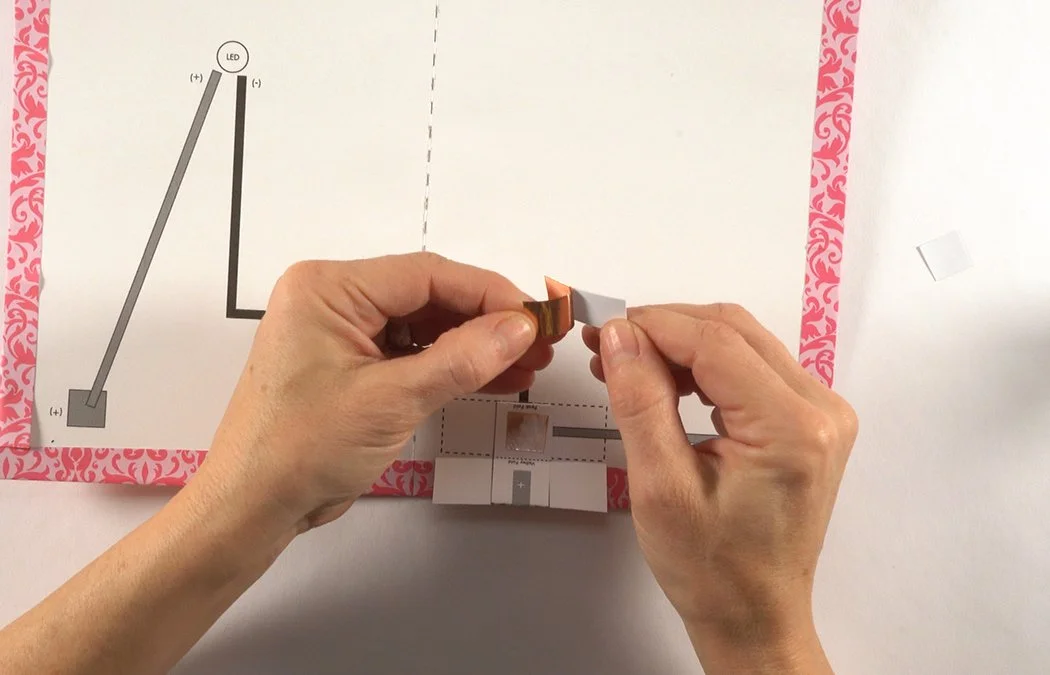
Cut (3) 1/2" x 1/2" copper tape squares. Remove the backing of one.
Stick it to the black (-) square inside your battery box. The black diagrams are the (-) side of your circuit.
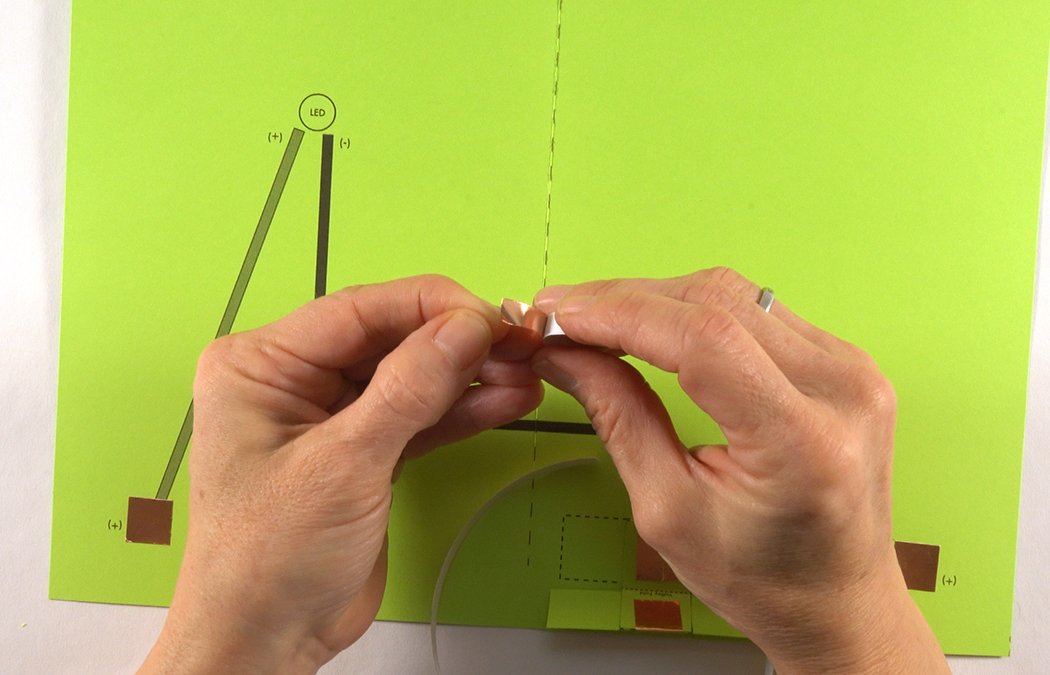
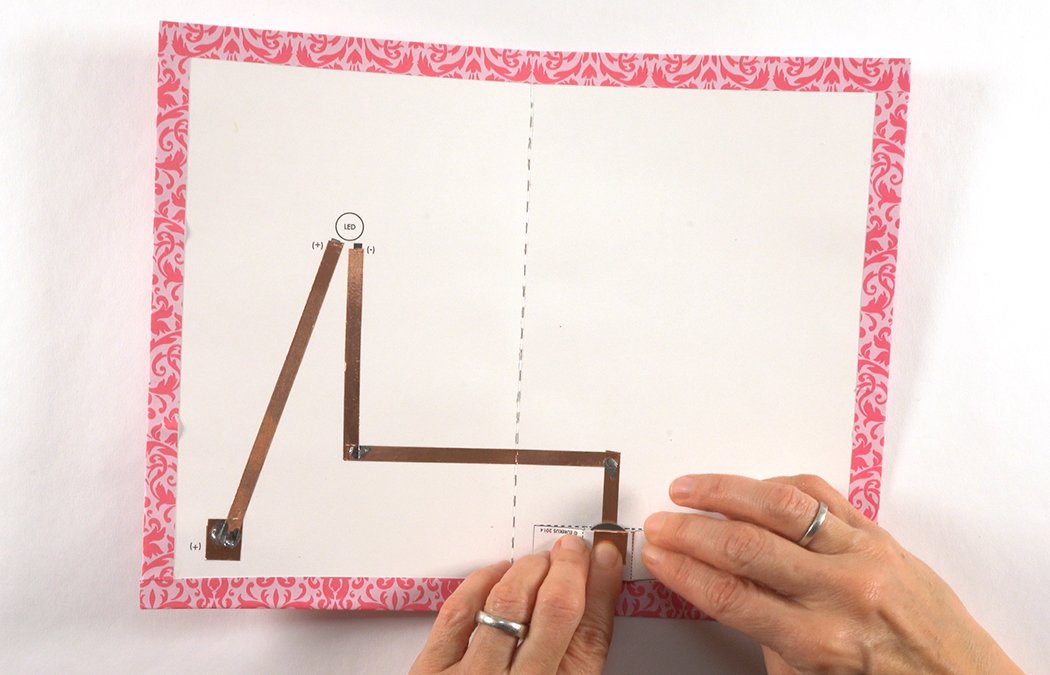
Place another 1/2" x 1/2" copper tape square on the right corner square diagram.
Place another 1/2" x 1/2" copper tape square on the left corner square diagram.
The corner squares are both (+) and make a squeeze switch. When you press them together, your light will turn on!
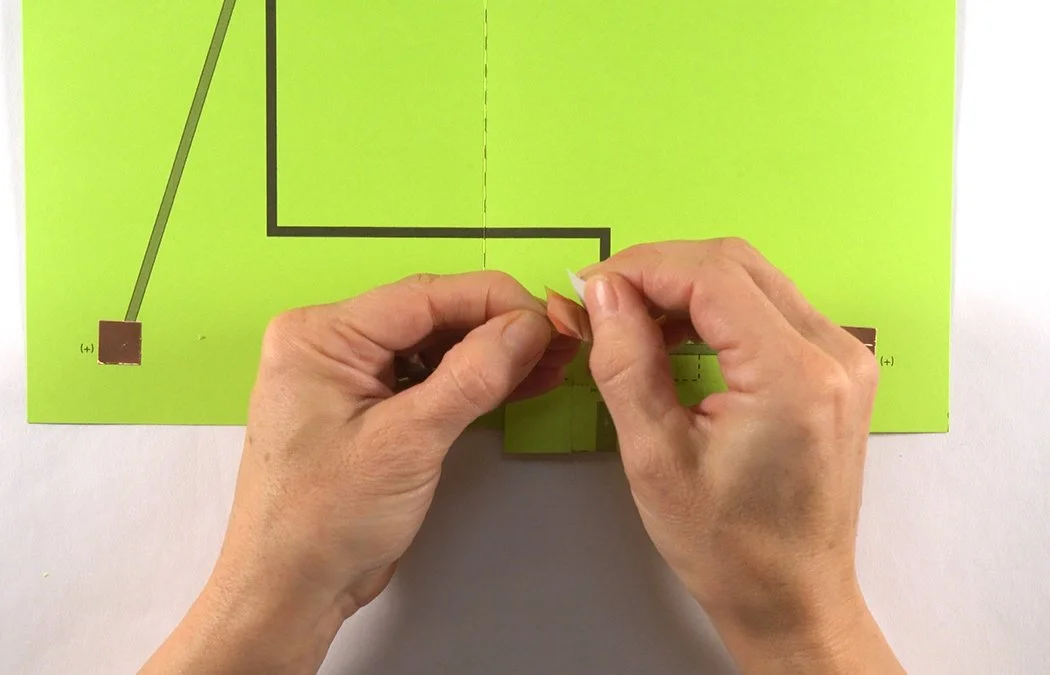
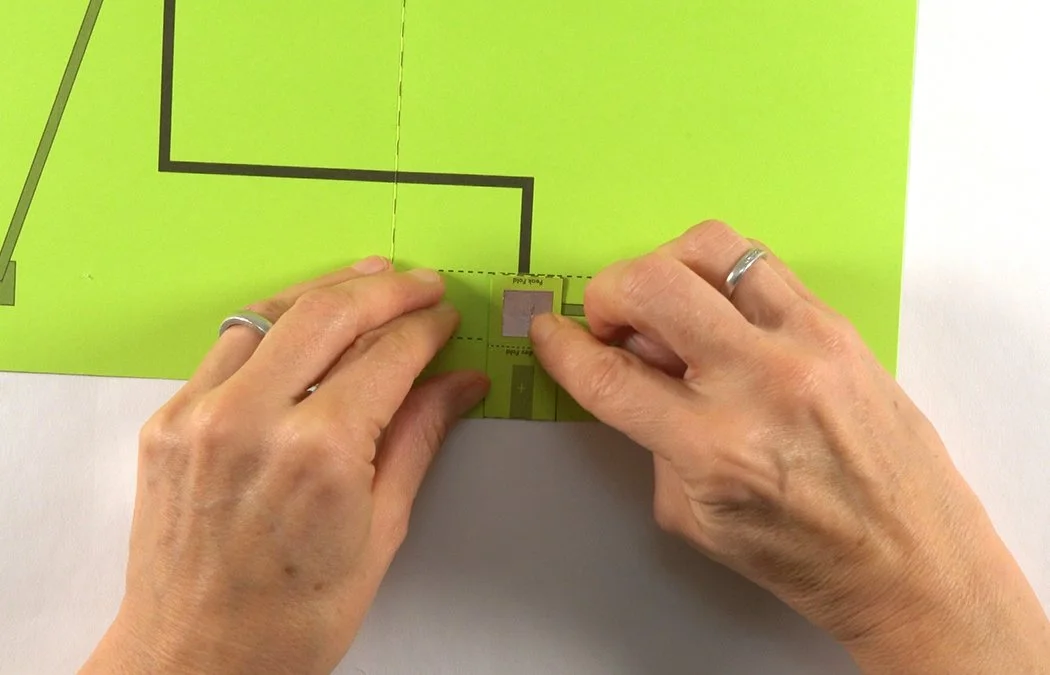
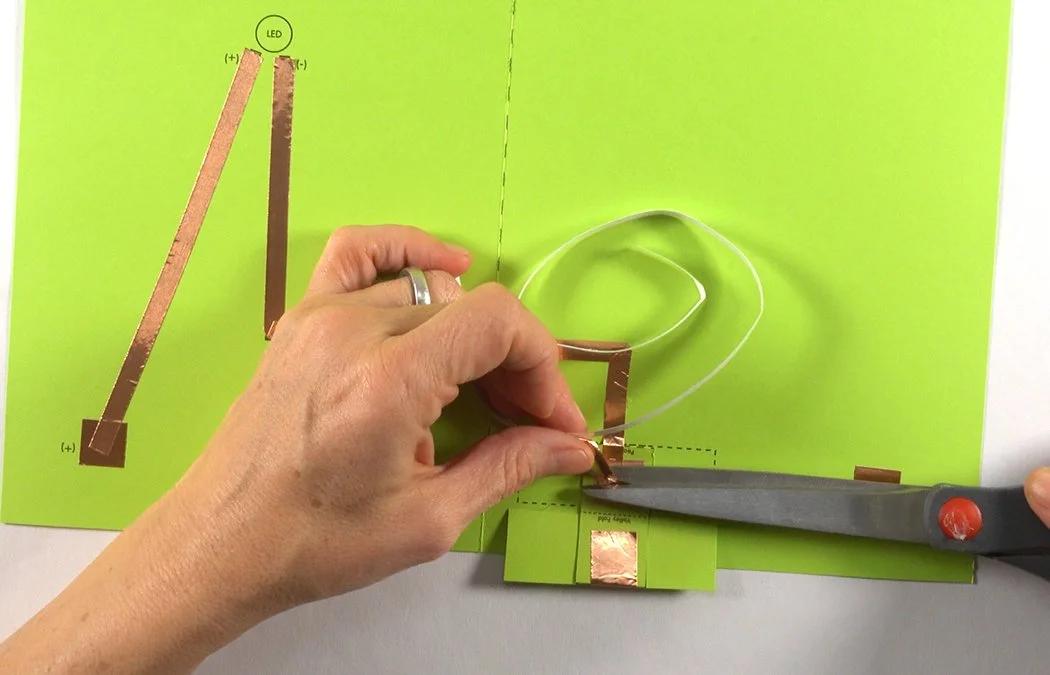
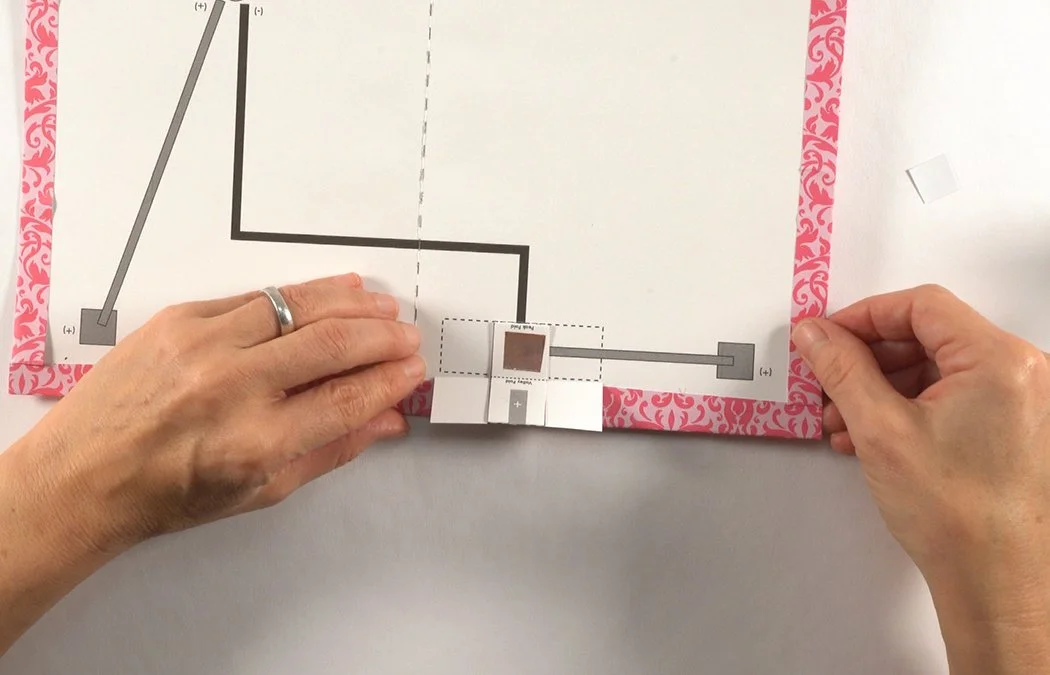
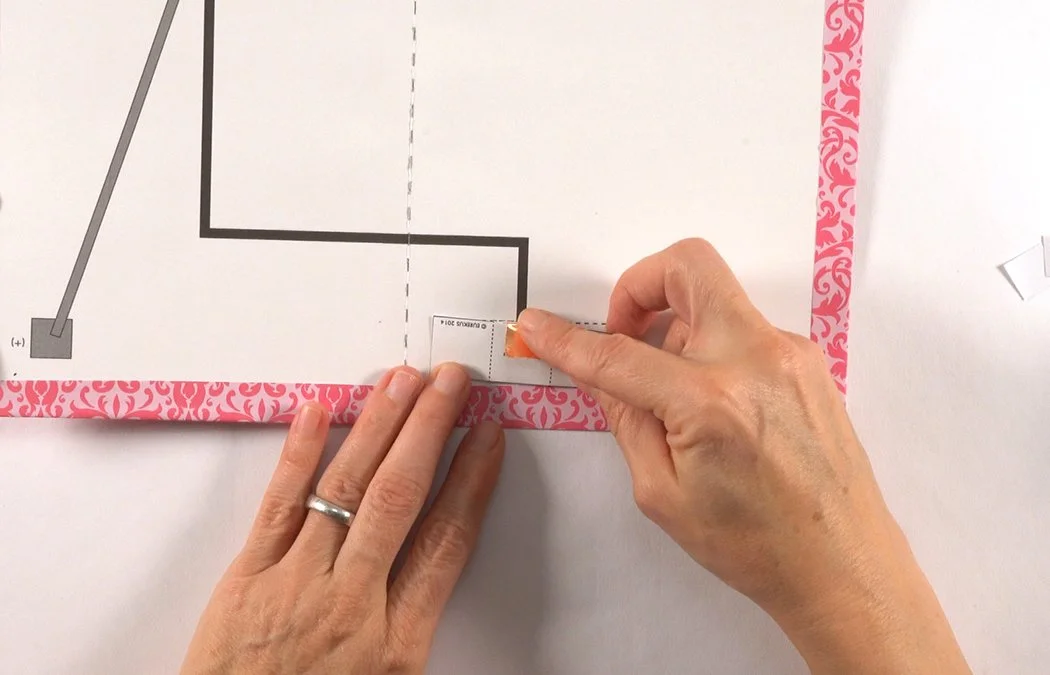
Cut a 1/2" x 1 1/4" copper tape rectangle. Remove the white backing.
Stick the copper directly over the grey (+) rectangle inside the battery box. Do not get either copper piece close to your dashed fold line.
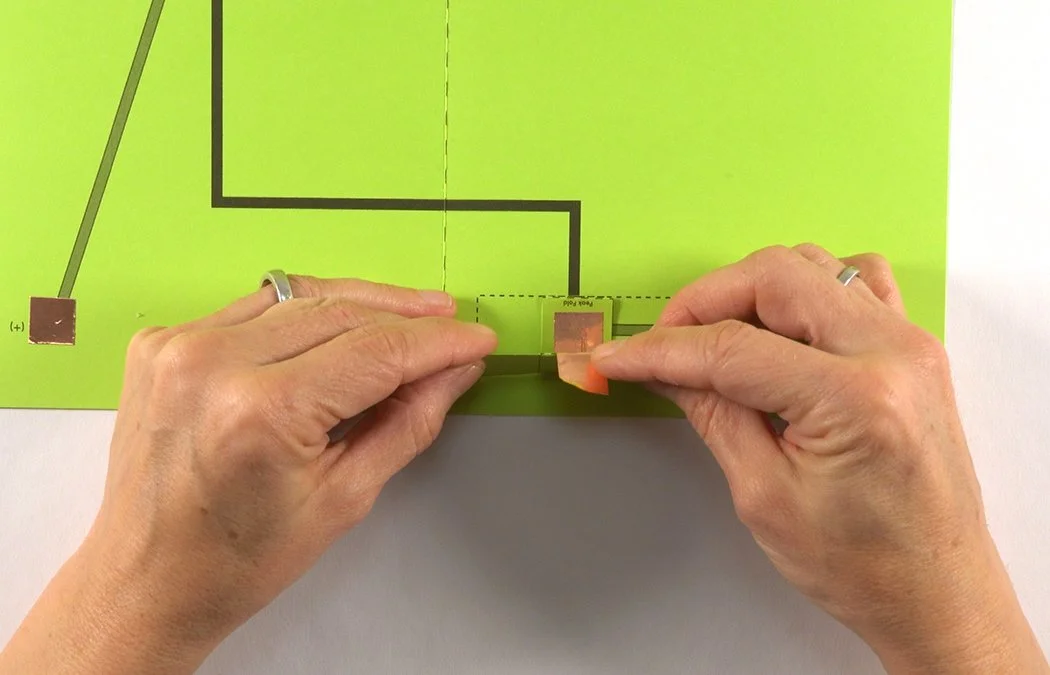
Wrap the copper rectangle over the edge of the battery box.
Stick it to the outside of the battery box.
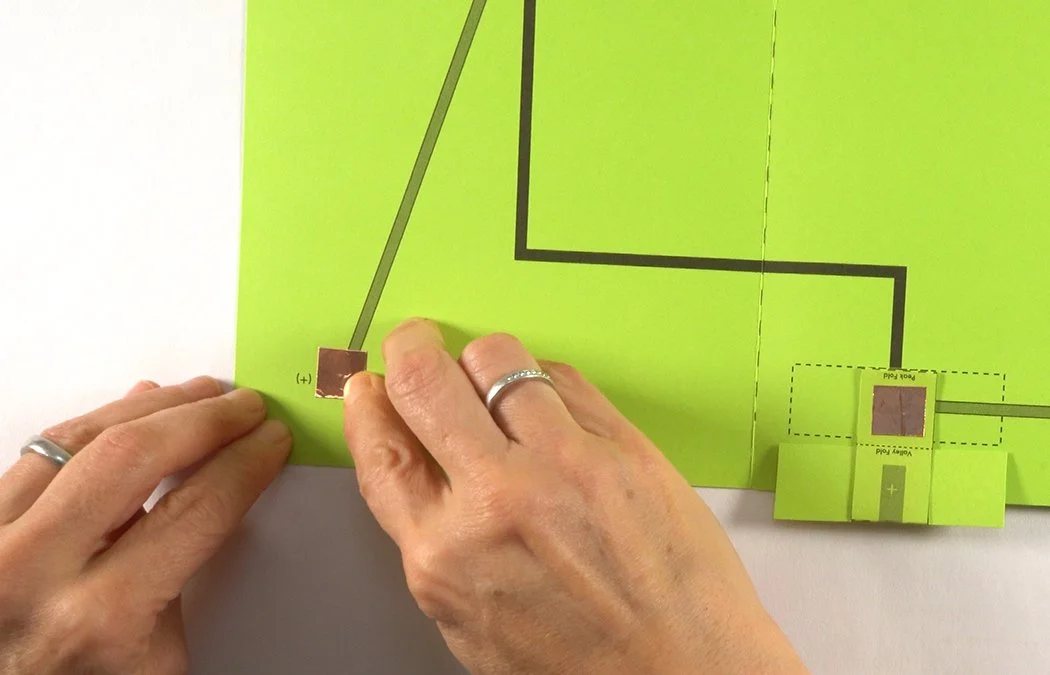
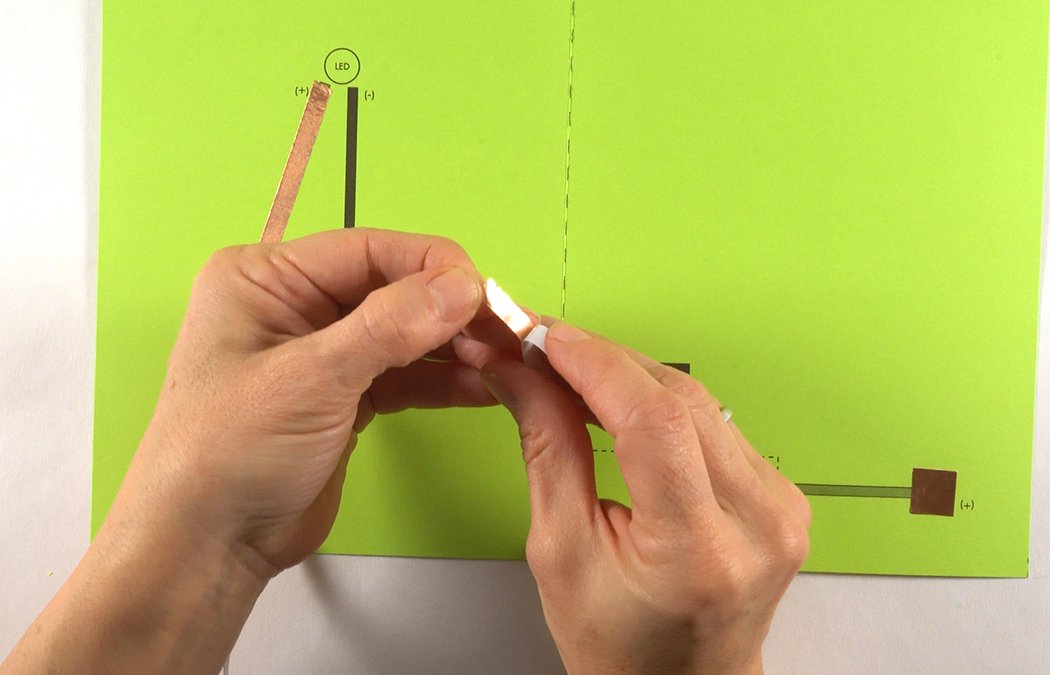
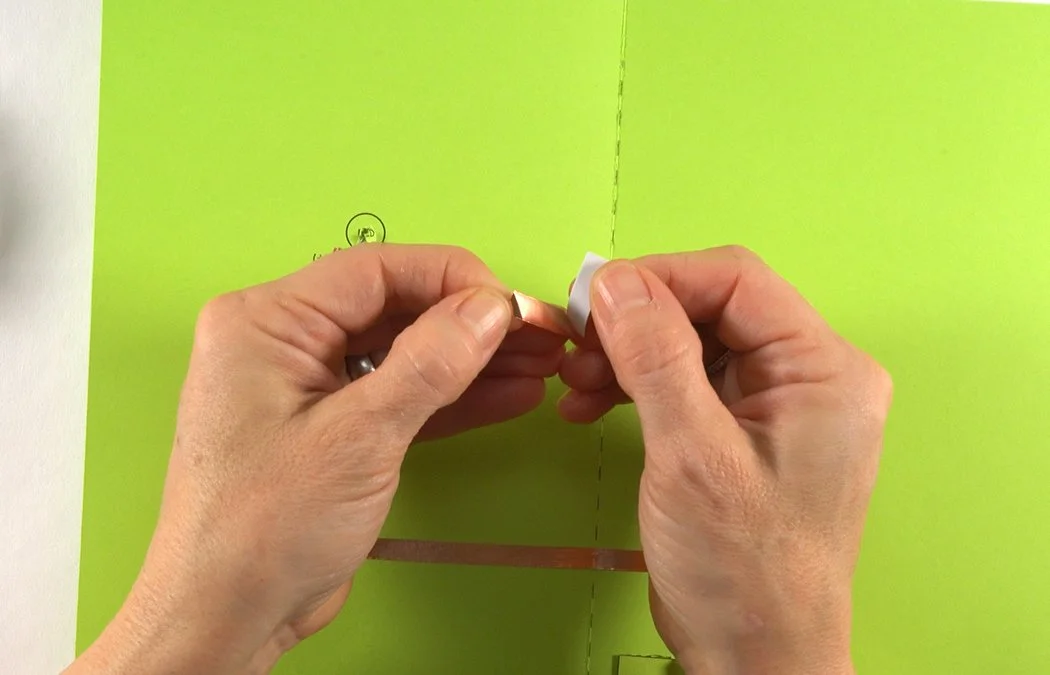
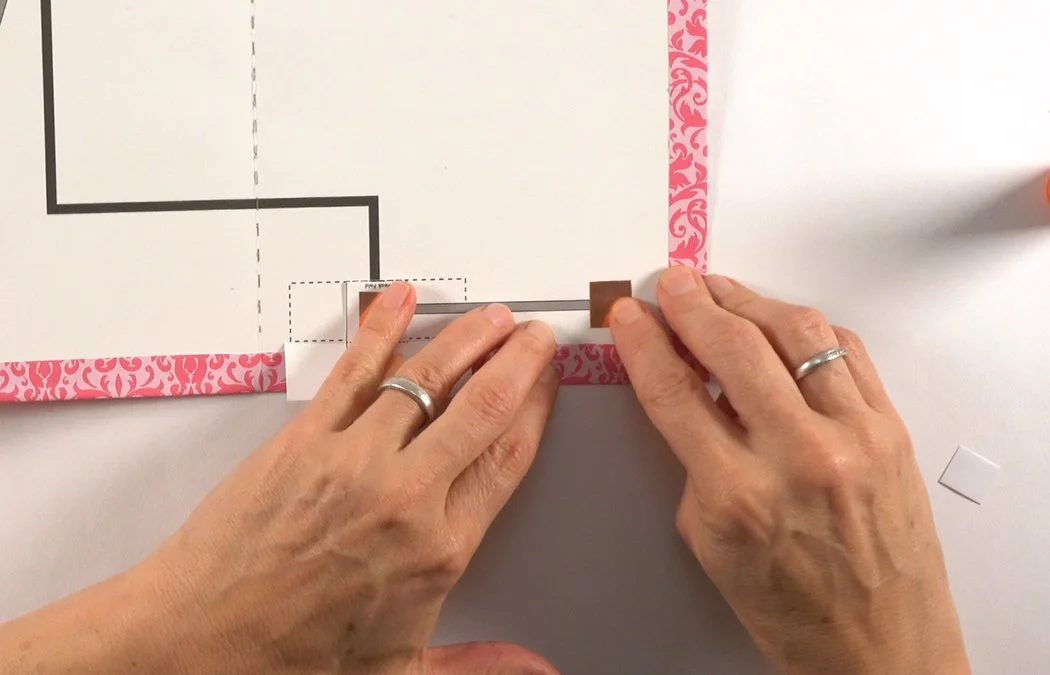
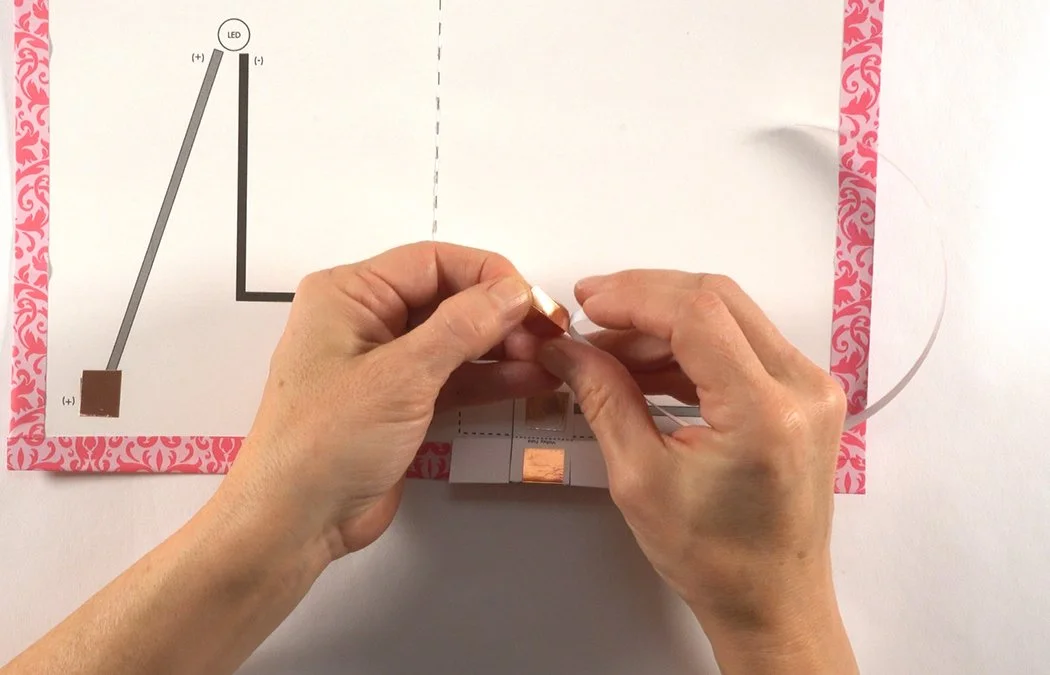
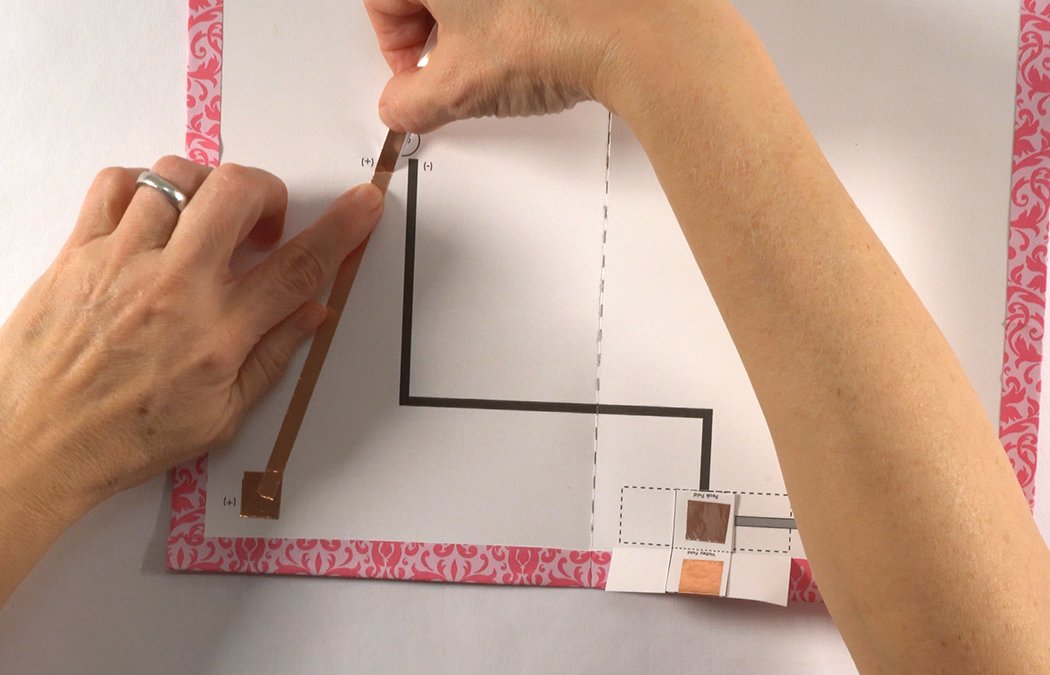
Get a strip of the thinner 1/4" copper tape. Remove a bit of backing.
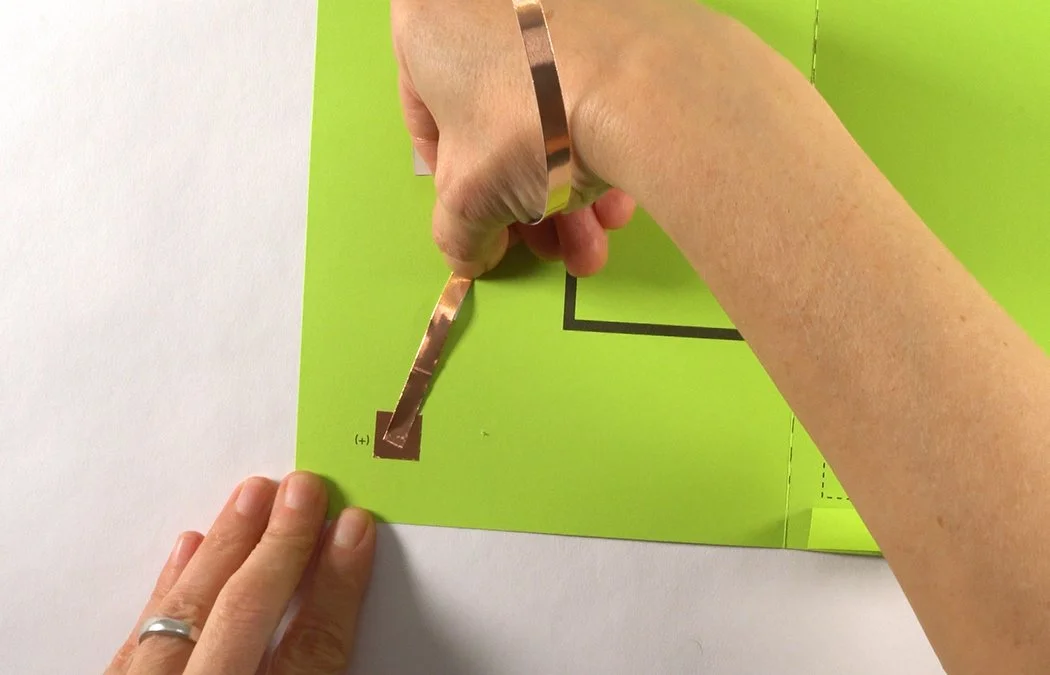
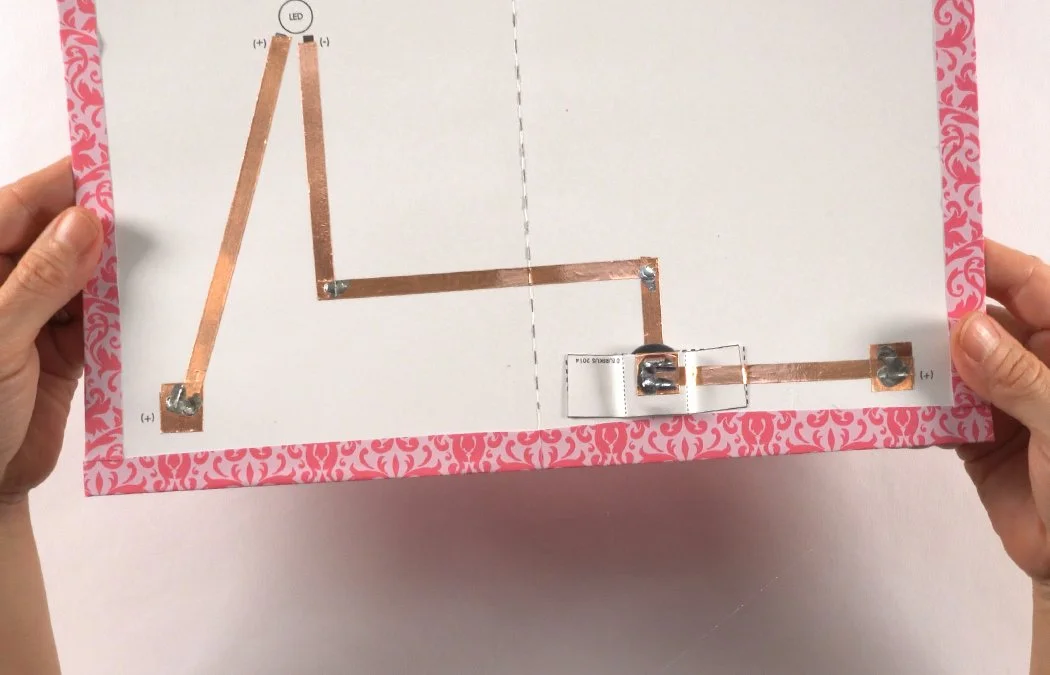
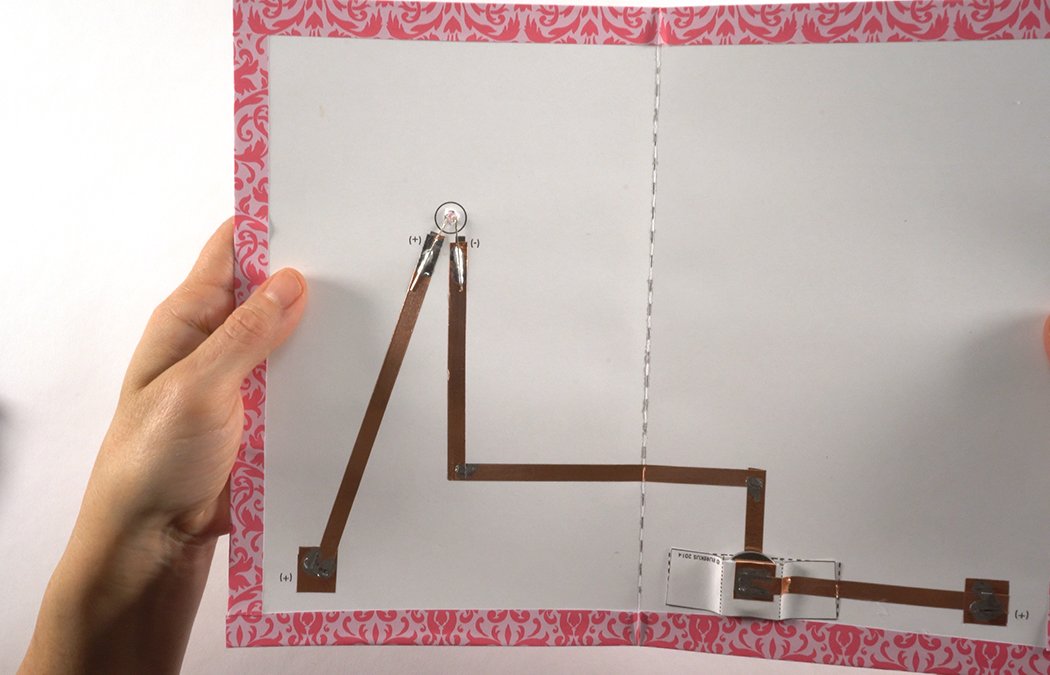
Place the copper directly over the square copper pad on the left corner of the card.
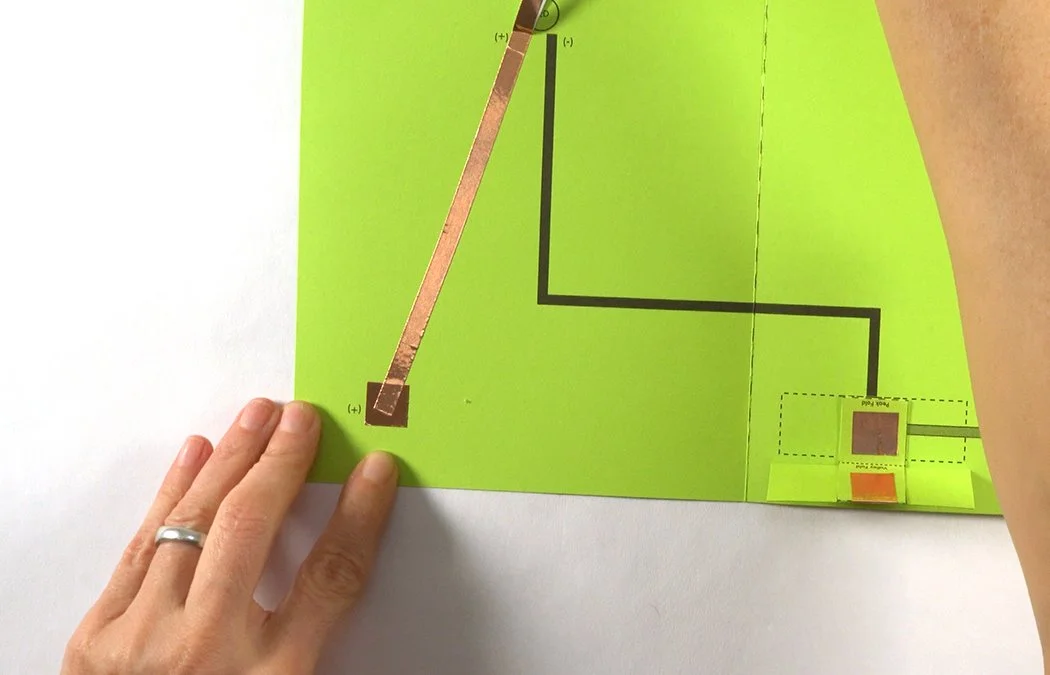
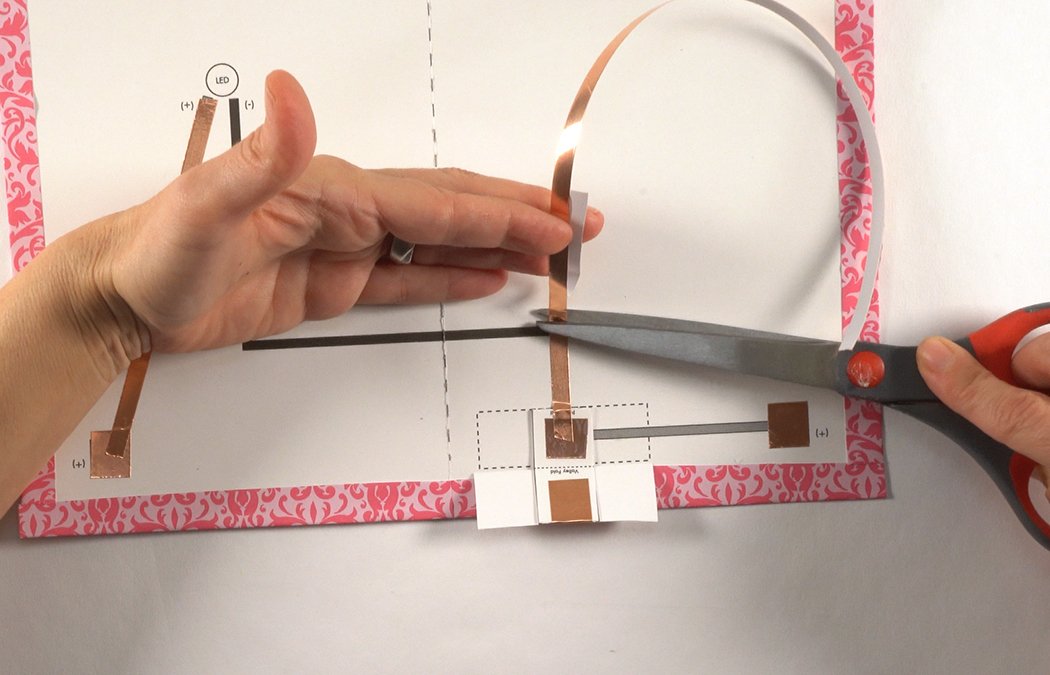
Remove a bit of backing at a time and place the copper over the grey (+) line.
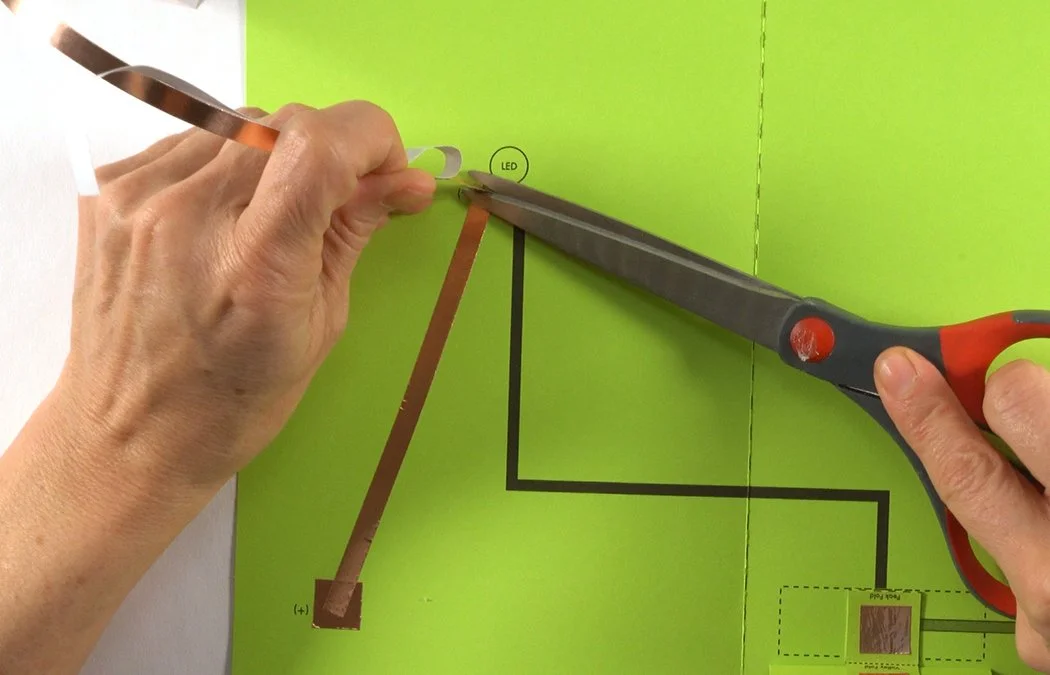
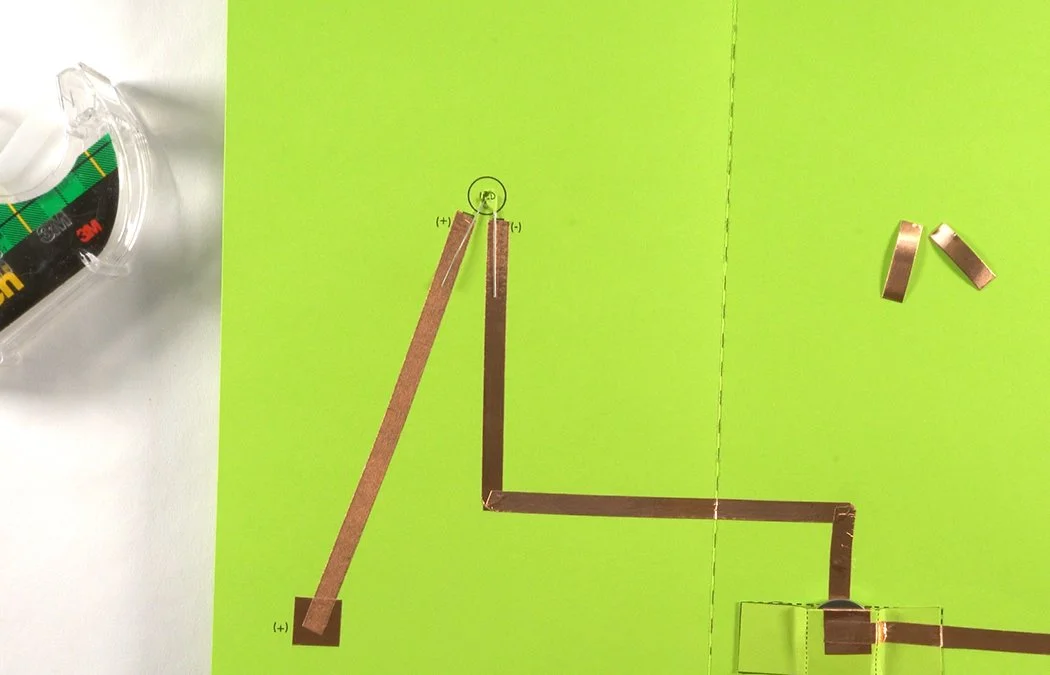
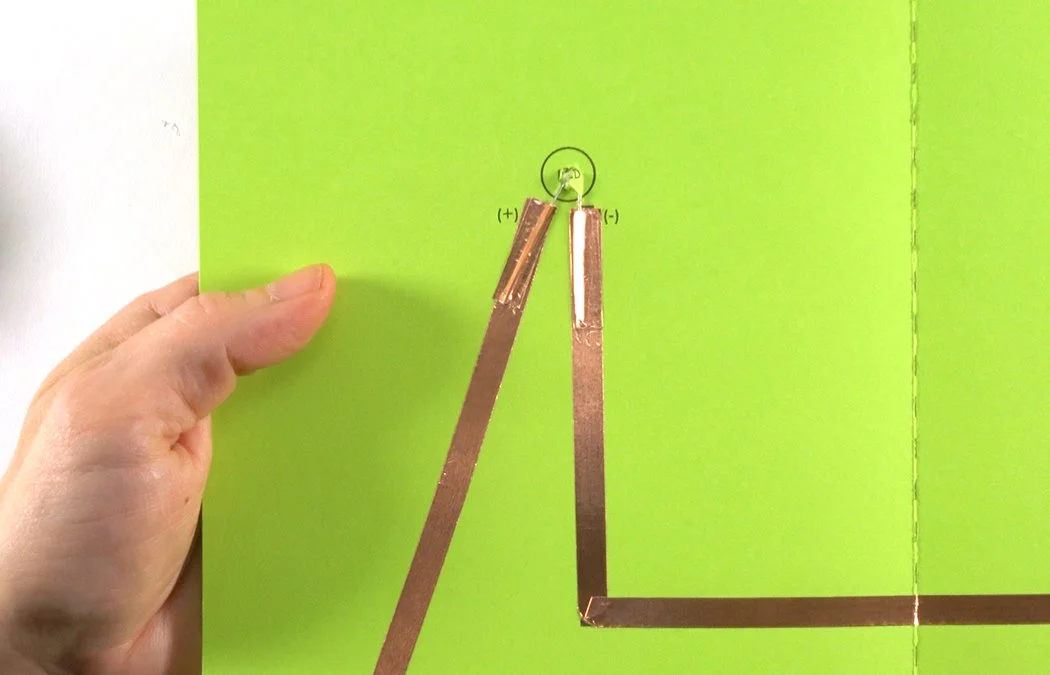
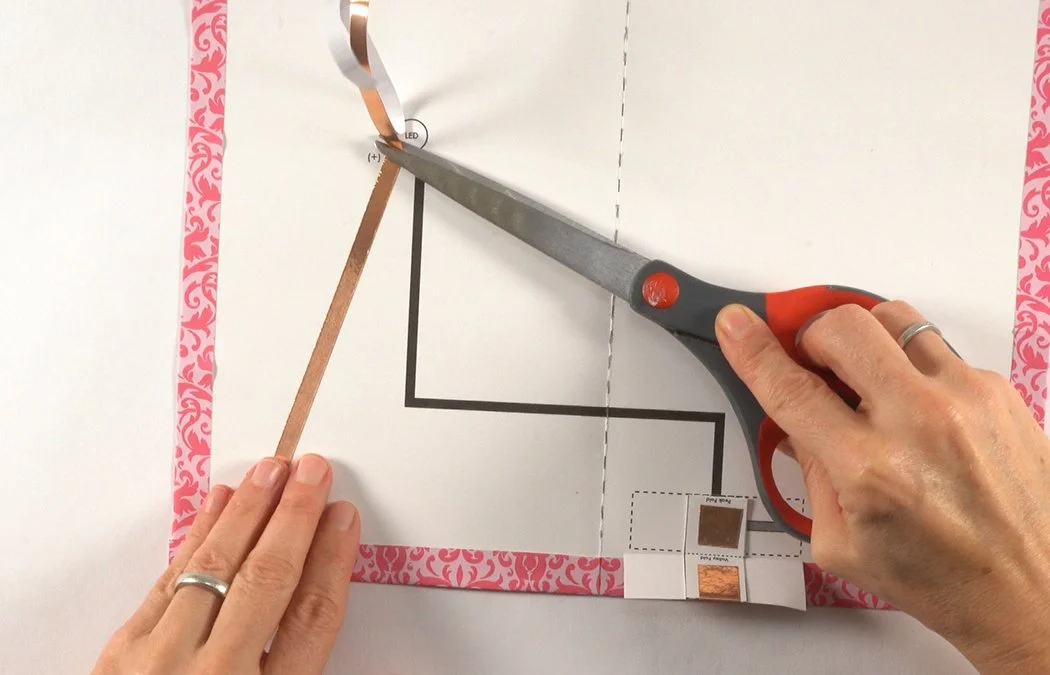
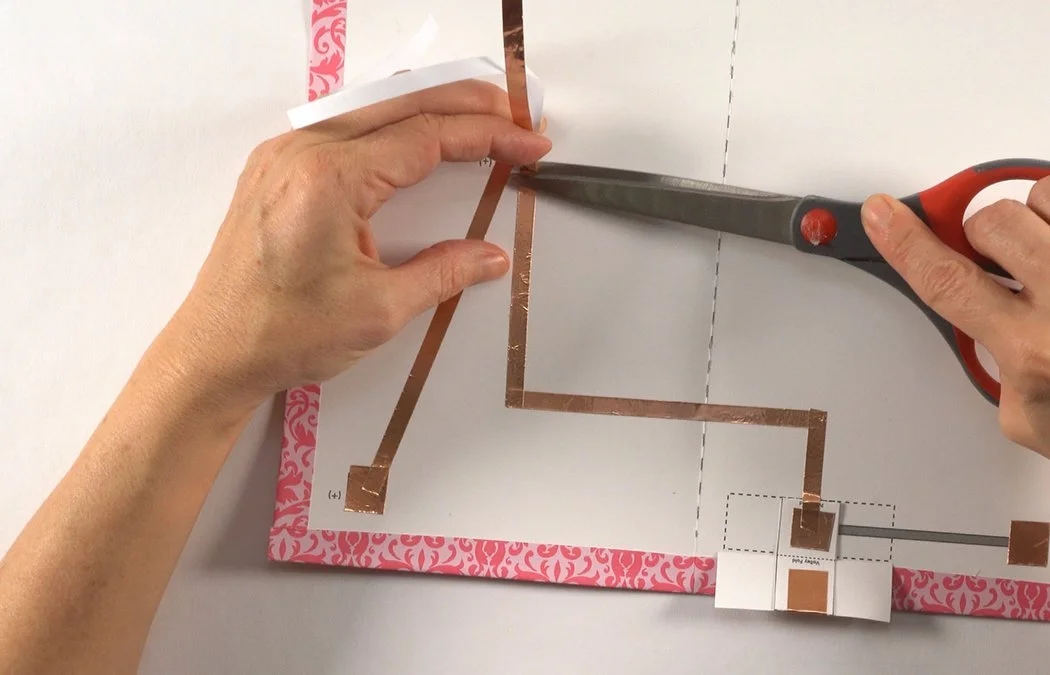
Cut the copper at the end of the diagram. Do NOT place it in the circle for the LED light.
Double check the copper is not in the LED circle. Make sure your copper overlaps at the corner.
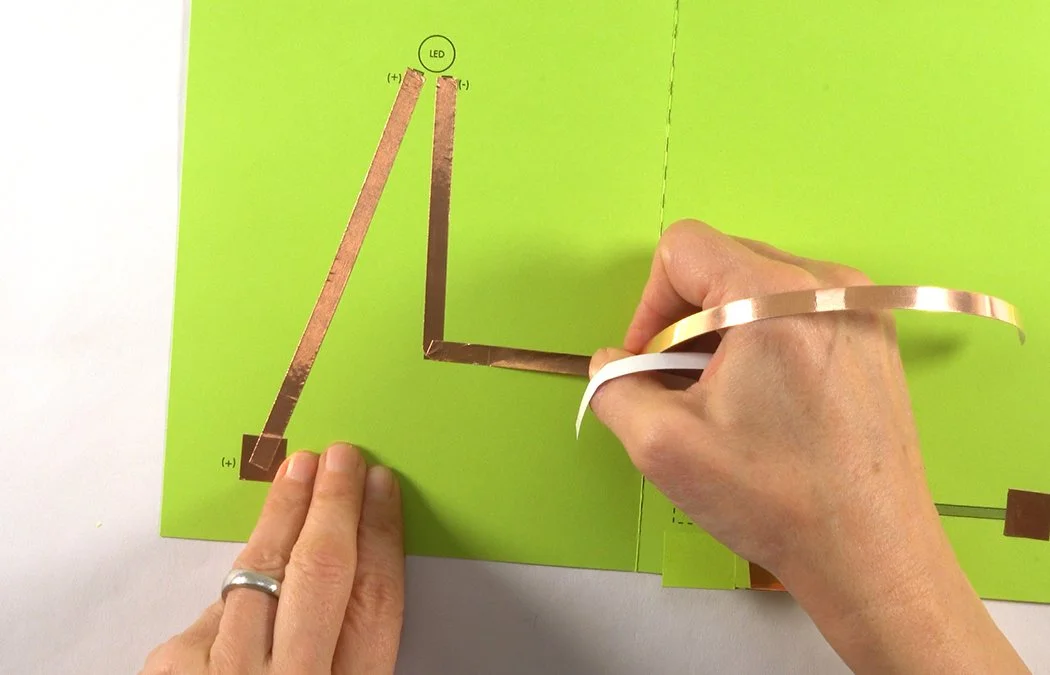
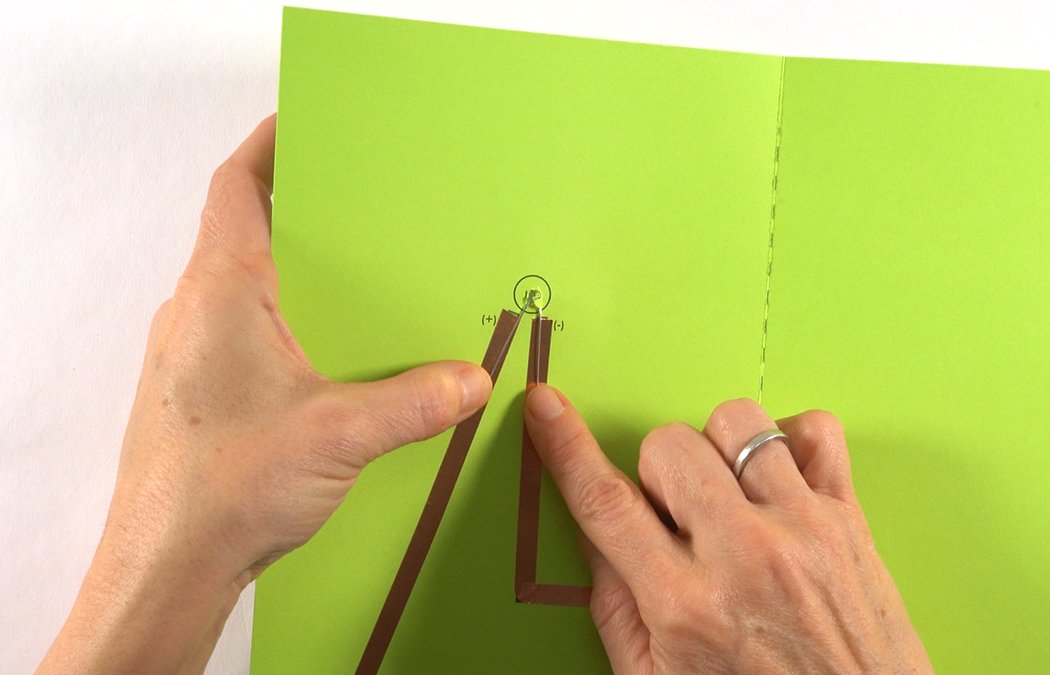
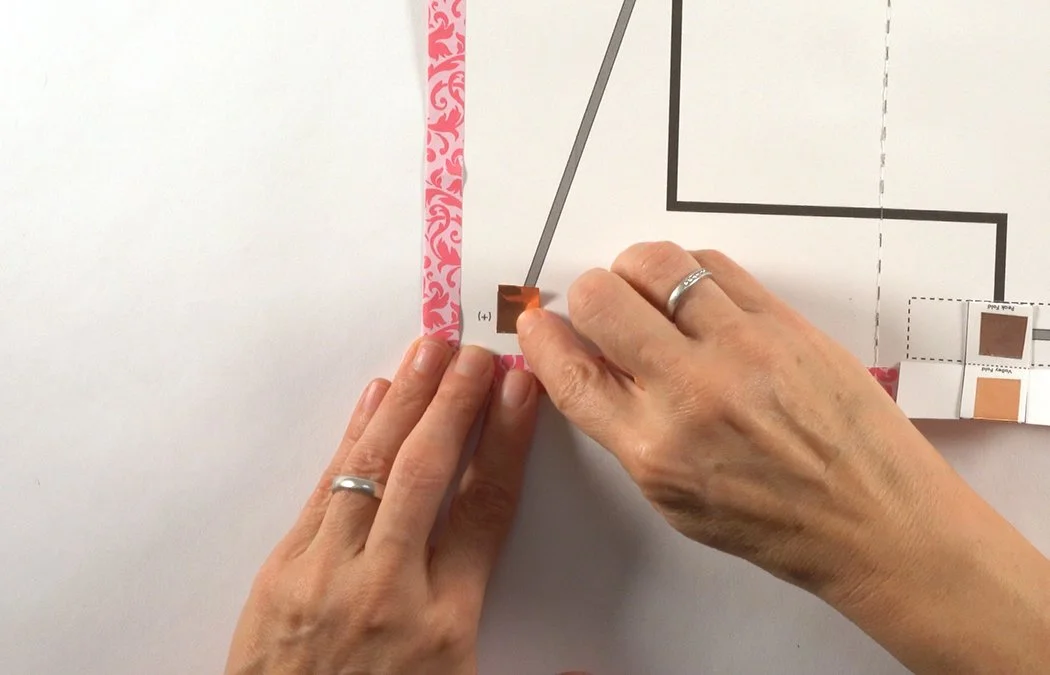
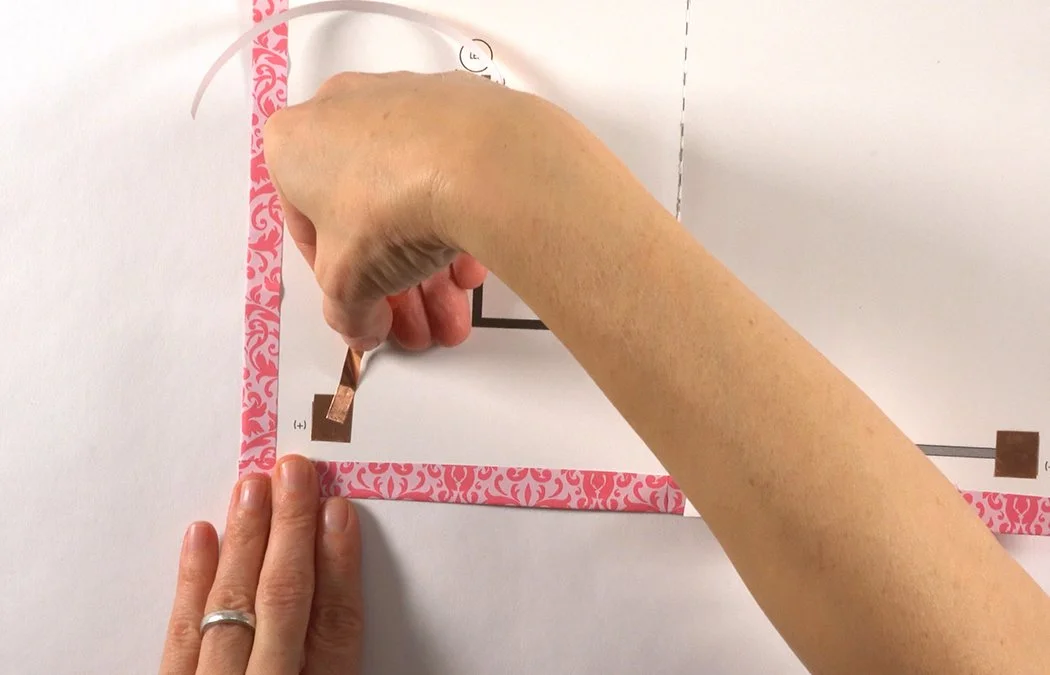
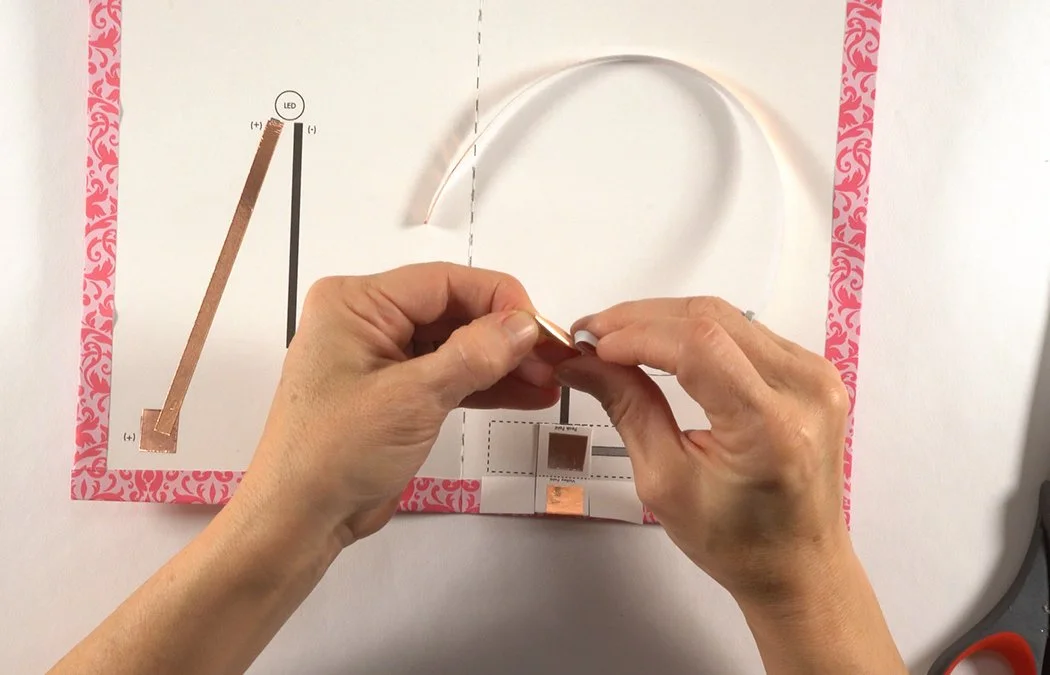
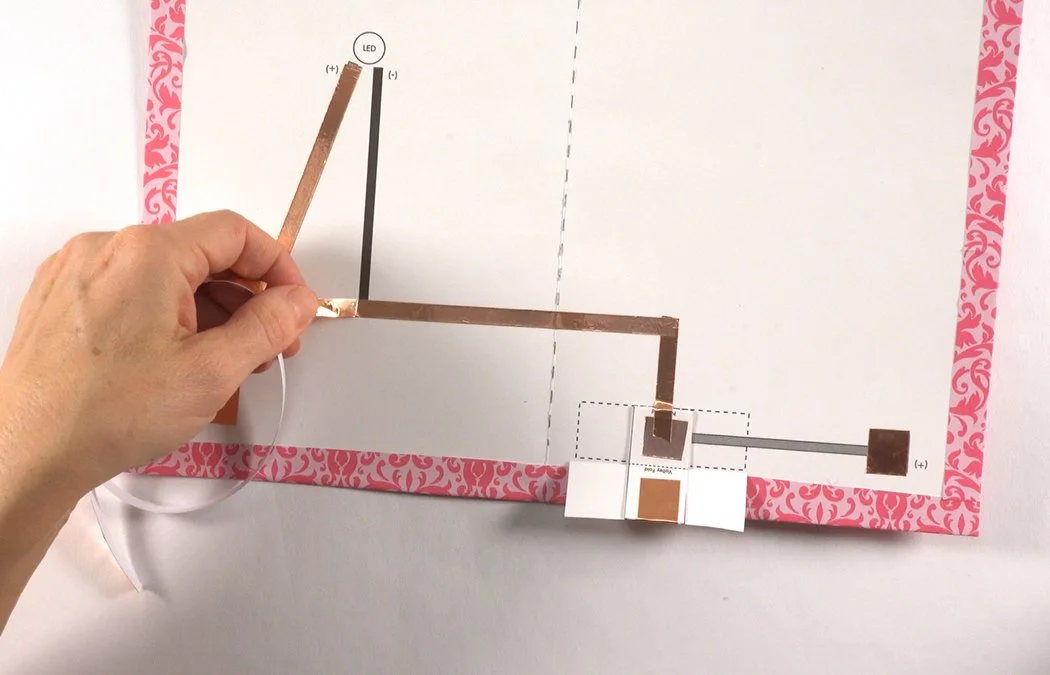
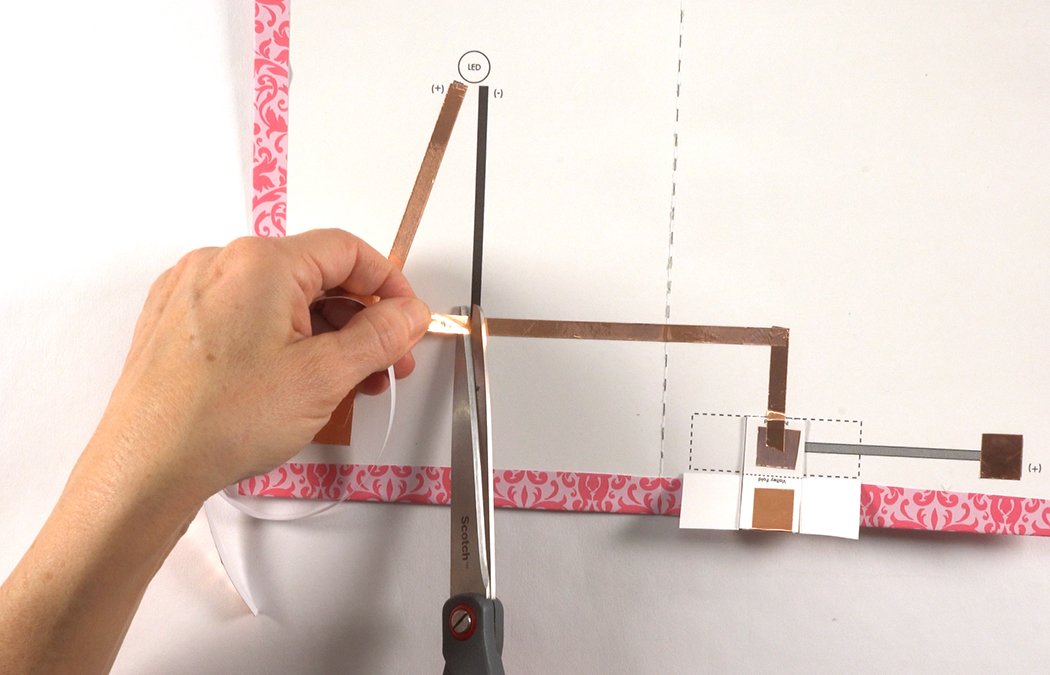
Get another strip of 1/4" copper tape. Remove a bit of backing.
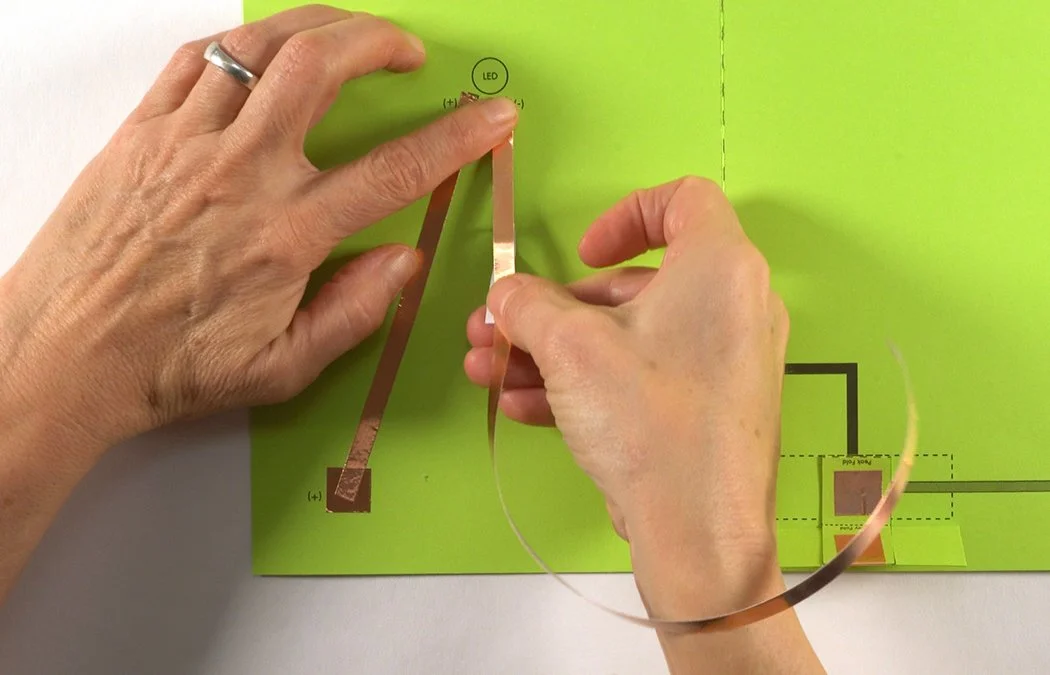
Starting under the LED circle, stick the copper to the black (-) diagram. Do not place copper inside the LED circle.
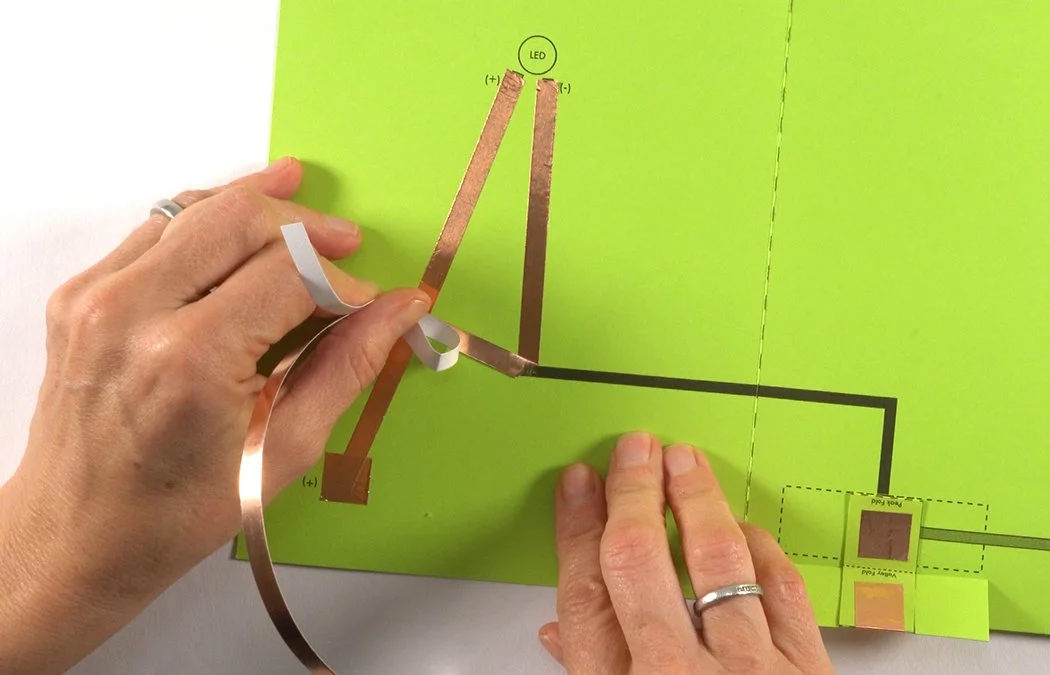
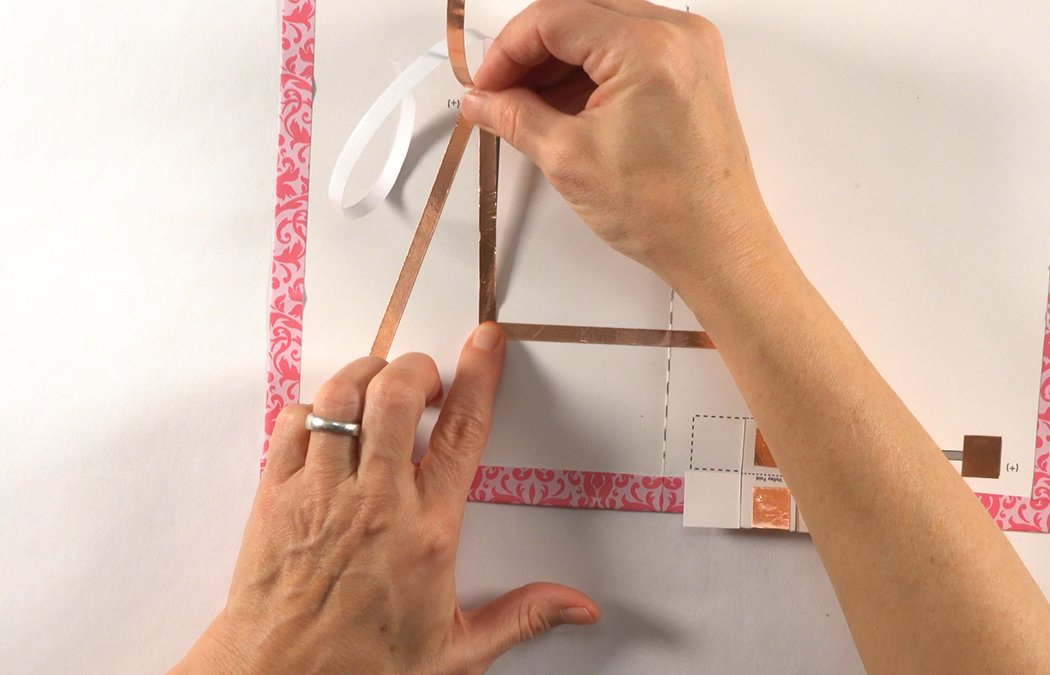
Run the copper down the black (-) line to the corner. Fold the copper back to make and angle.
Fold the copper back over itself. Continue to place it on the (-) black line. Do not cut your copper at the corner.
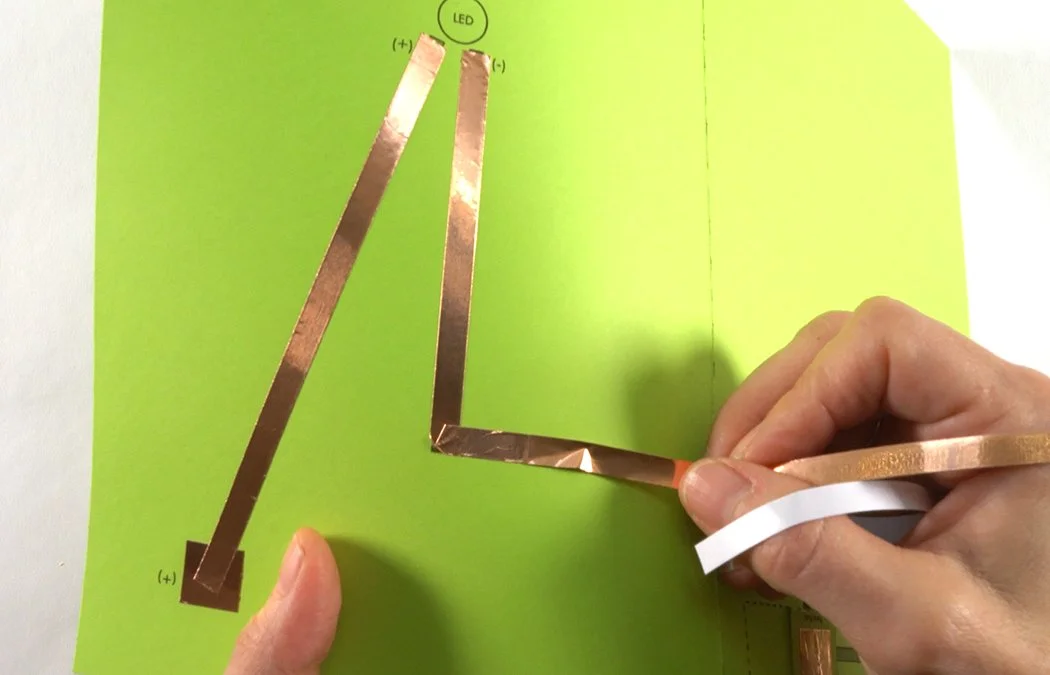
Your corners have folded copper, not cut copper.
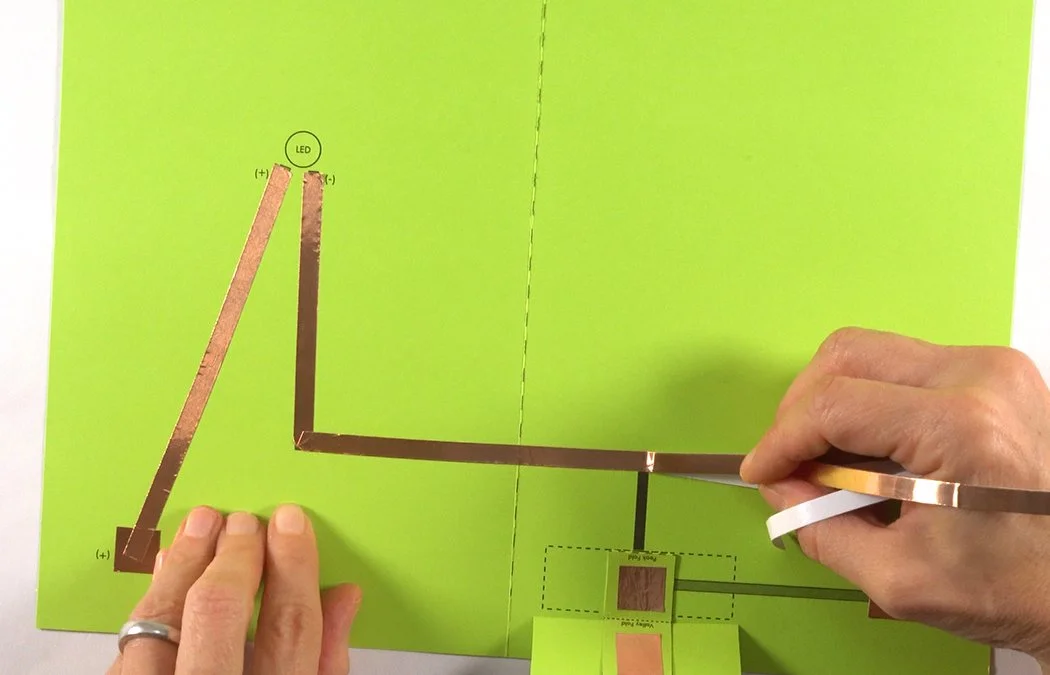
Continue to place the copper to the next corner.
Fold the copper back at an angle. Then fold it back over itself.
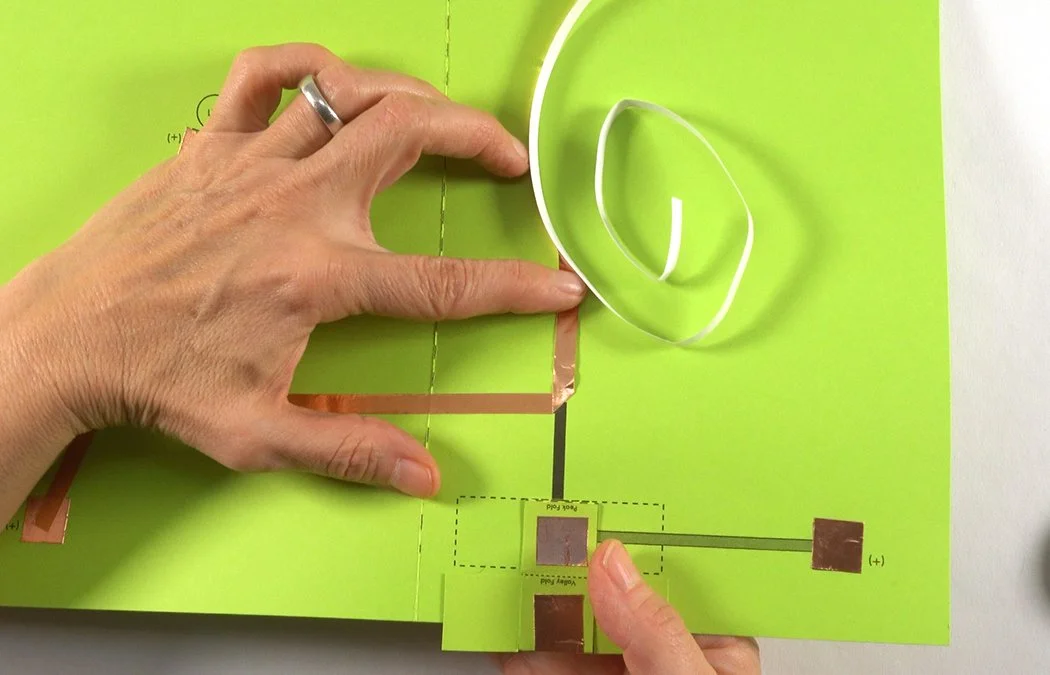
Continue to place your copper until it overlaps the copper square inside the battery box.
Make sure your copper overlaps inside the battery box.
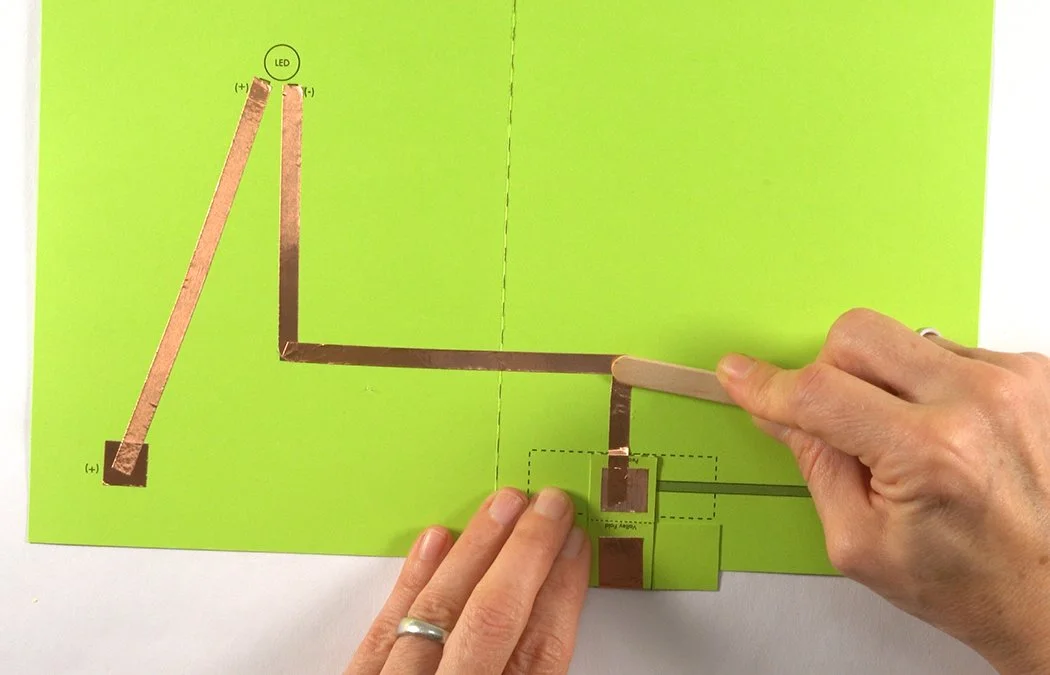
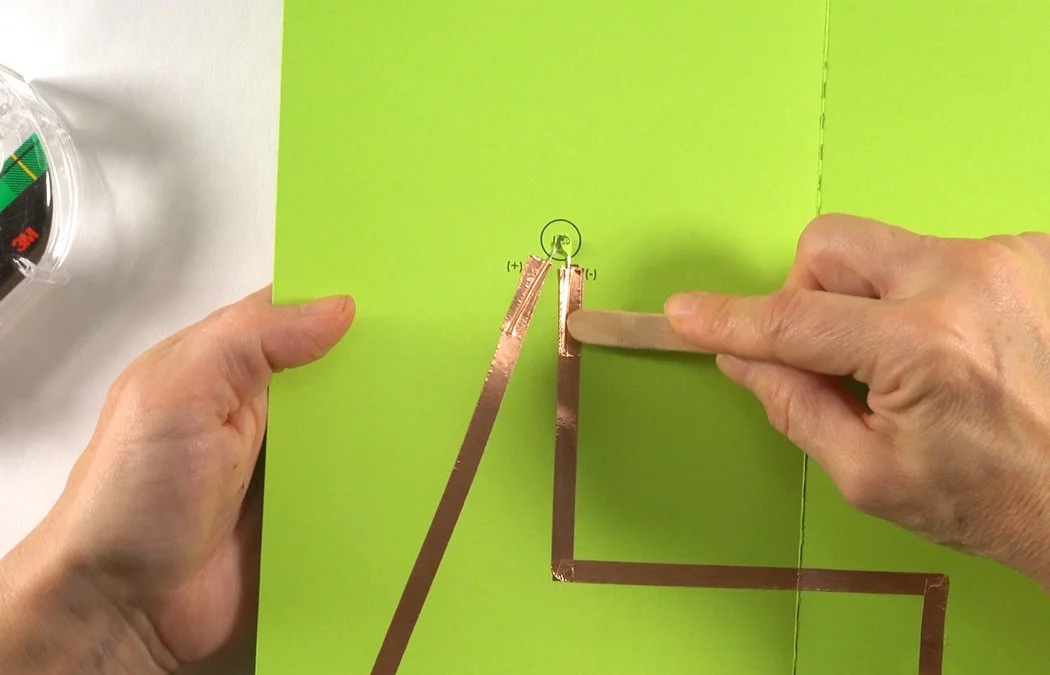
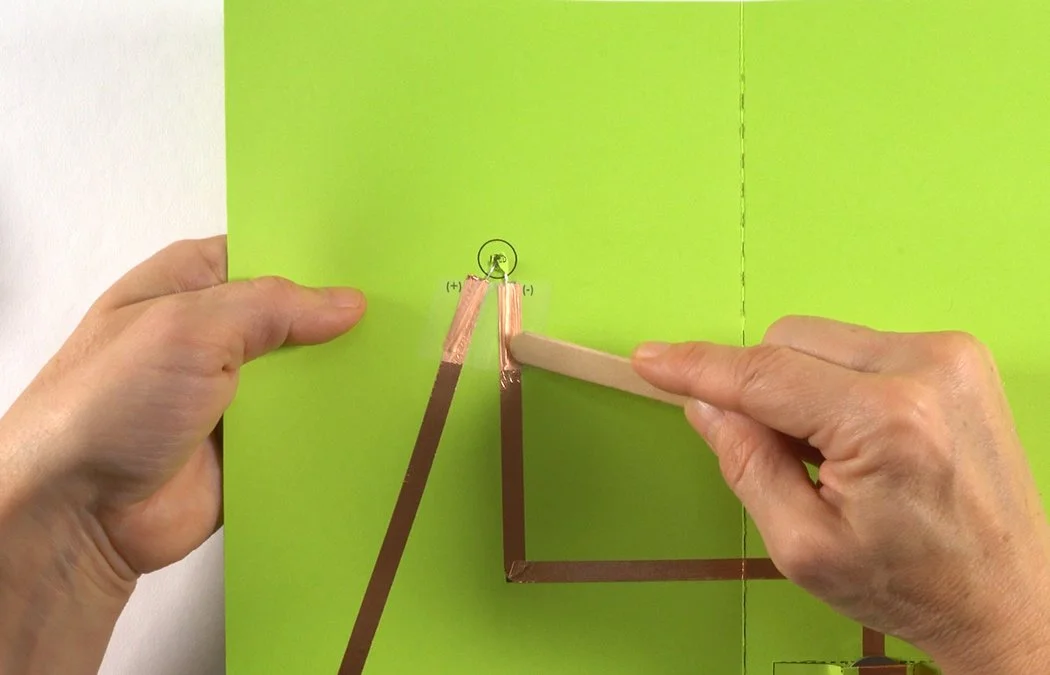
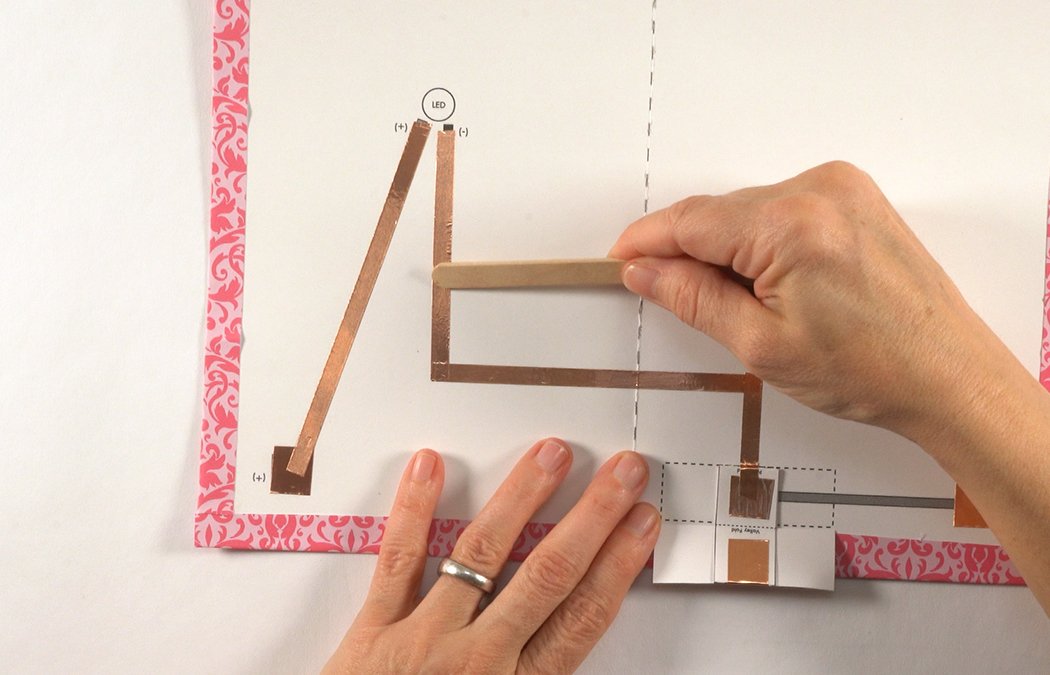
Rub and smooth your copper with a popsicle stick. This is called "burnishing".
Slideshow 2: Add Technology Without Solder
Add an LED light with copper tape & scotch tape.
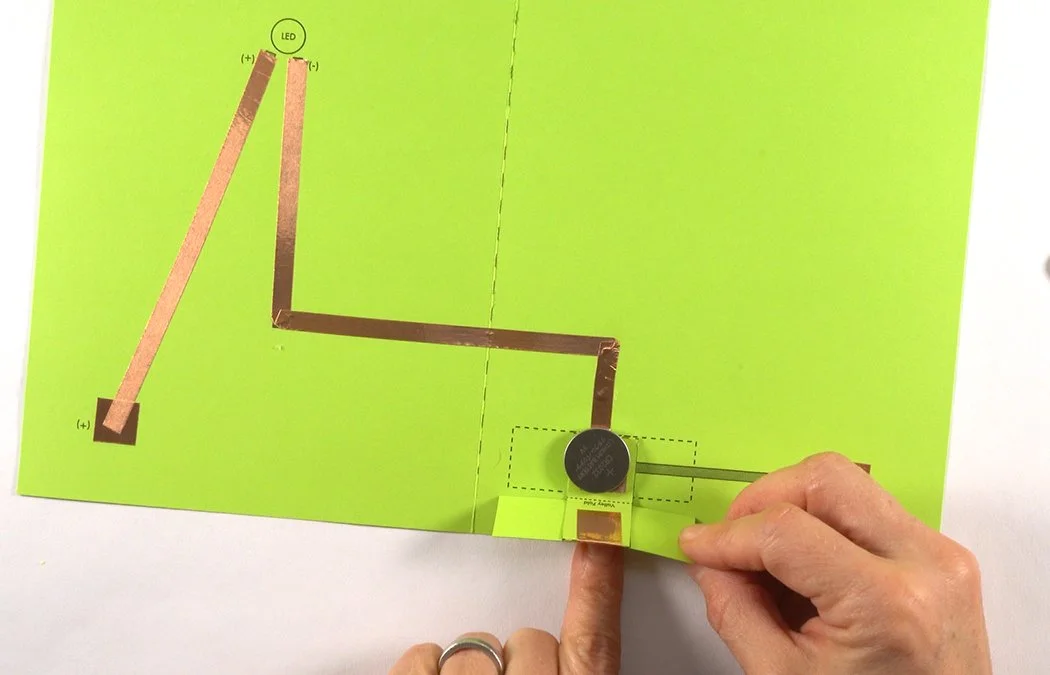
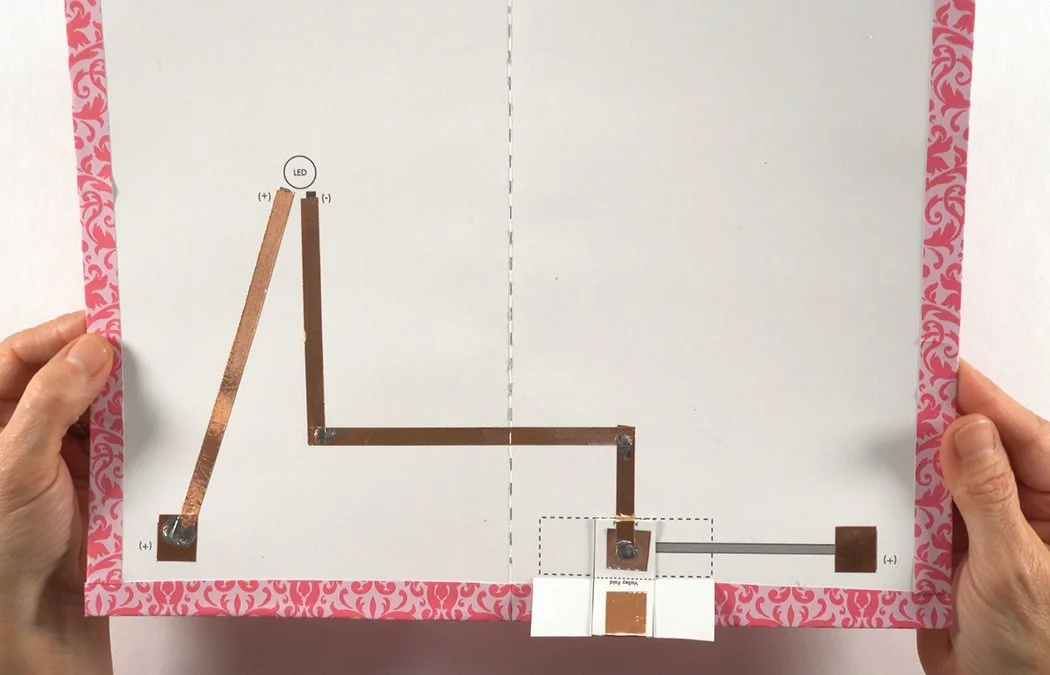
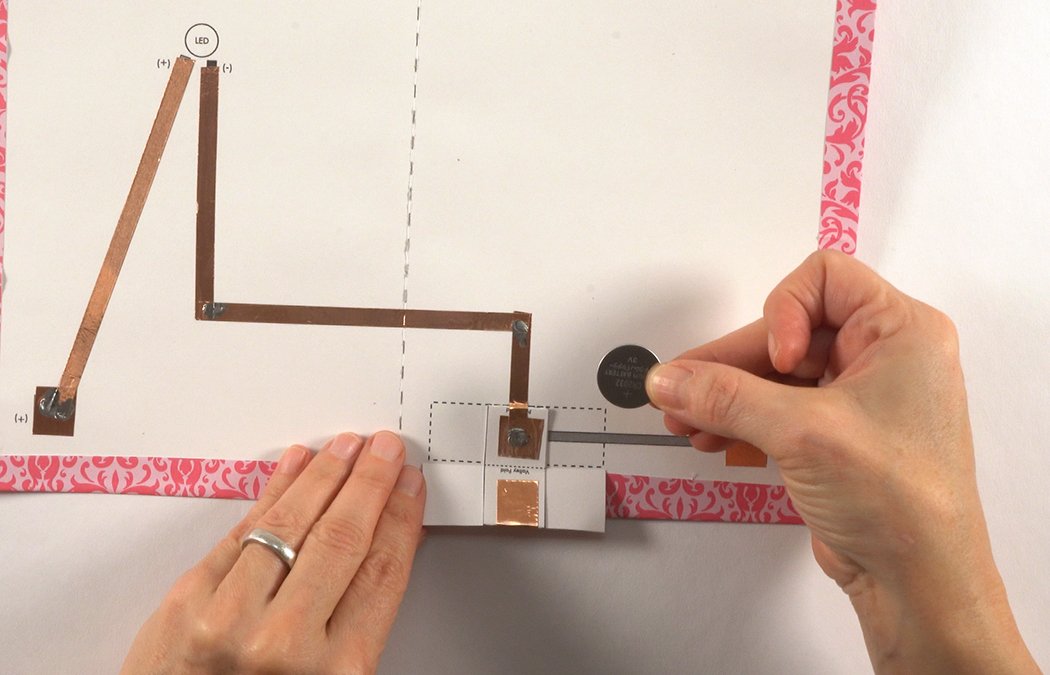
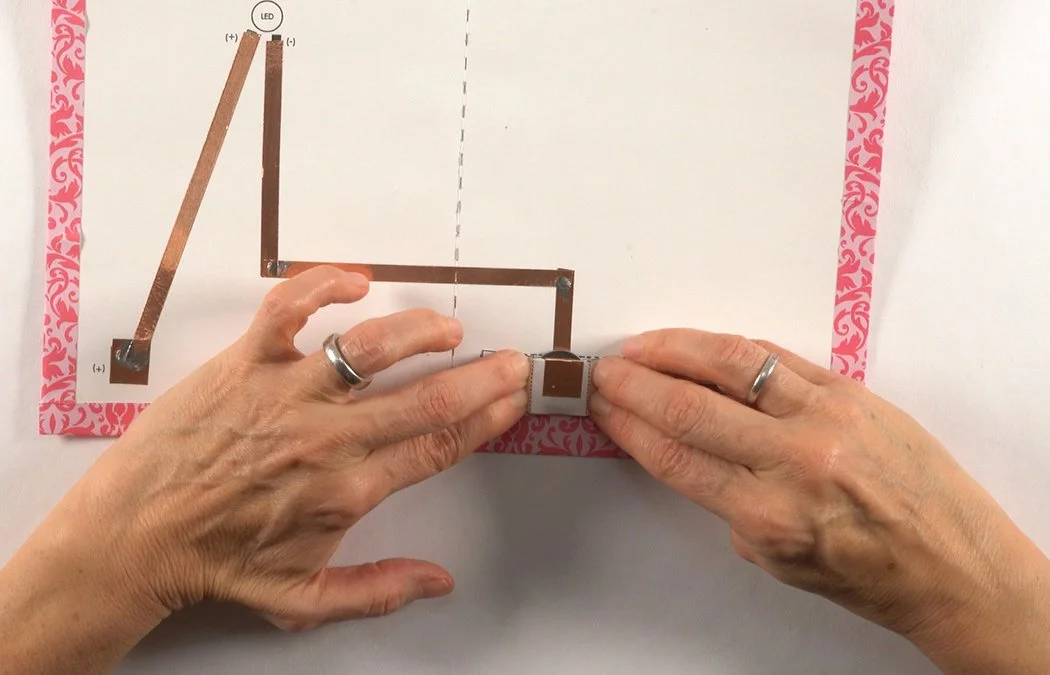
Get a CR2032 battery. Place it inside your battery box with the (+) side up.
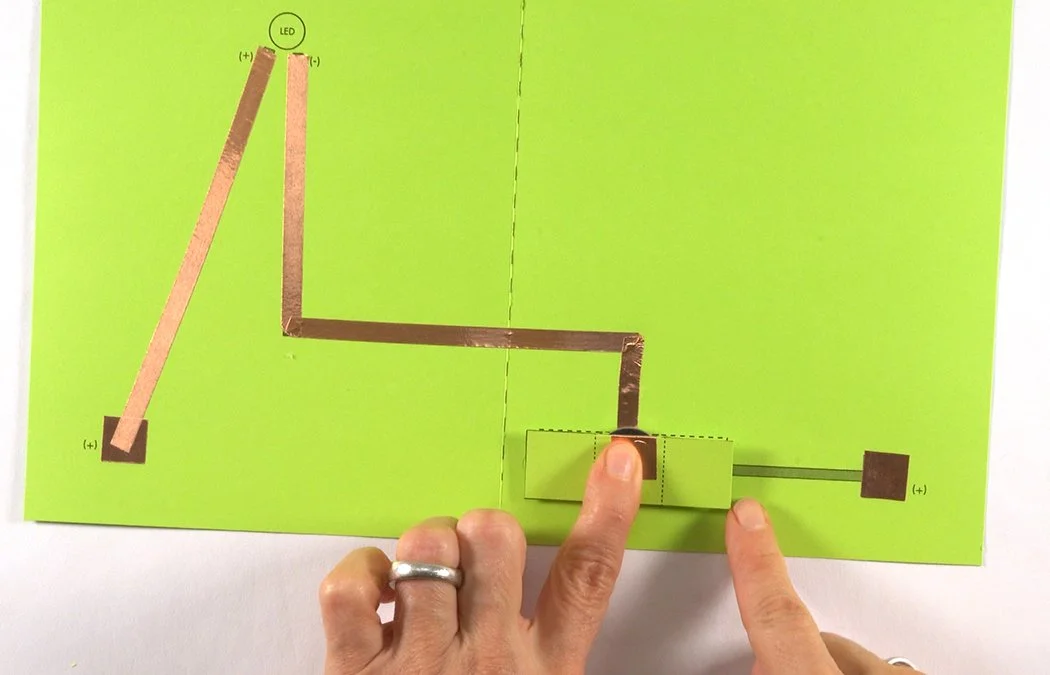
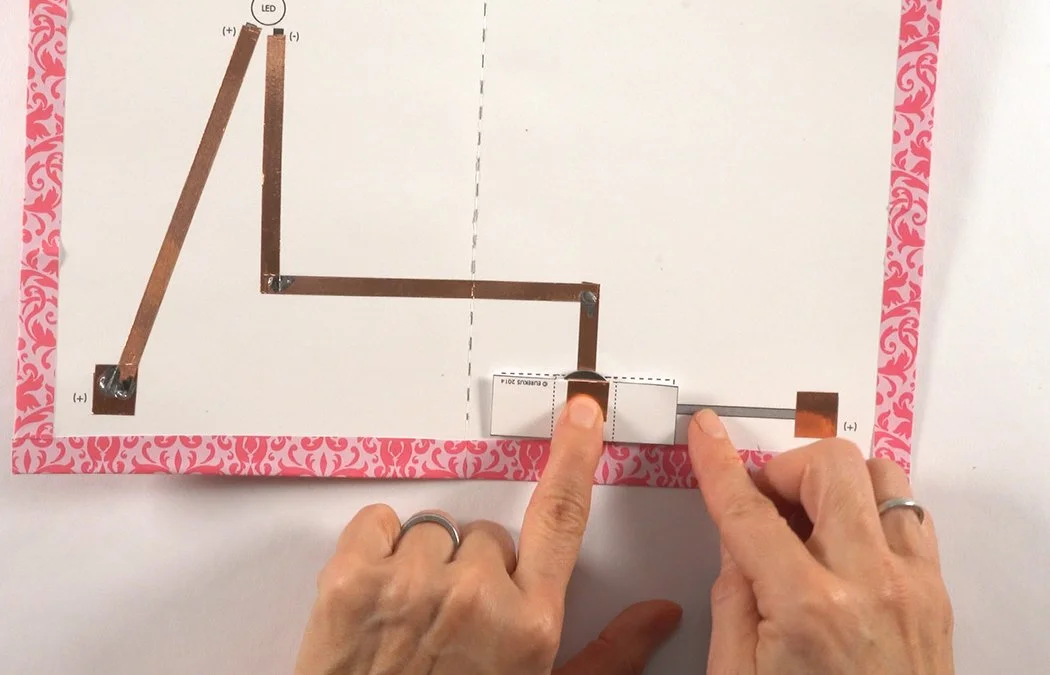
Fold the T-tab over to make a pocket.
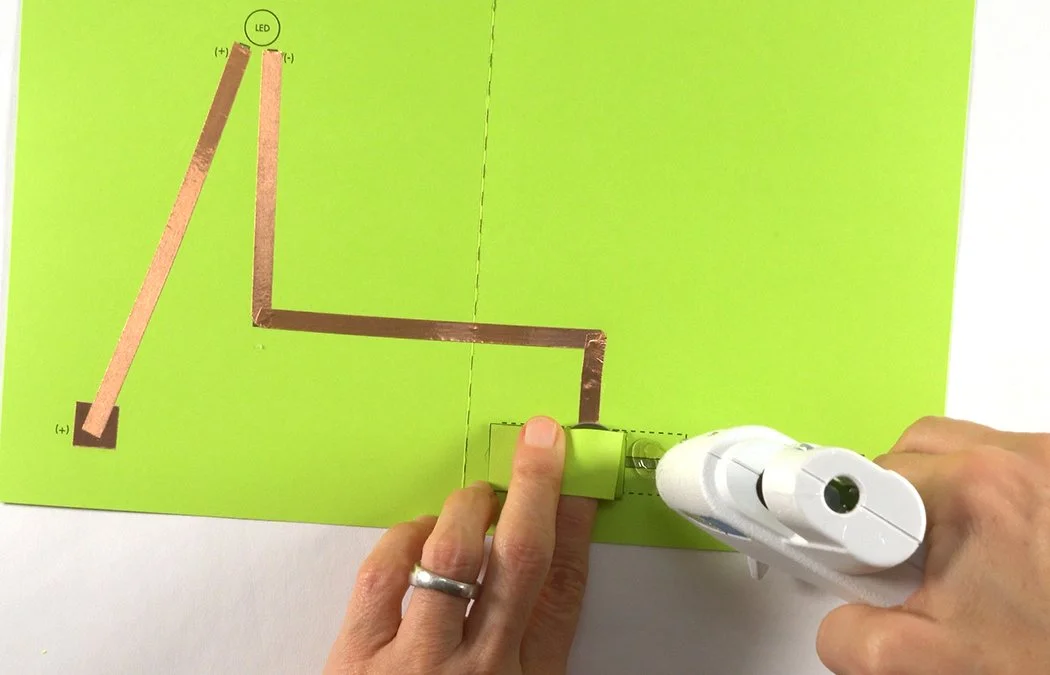
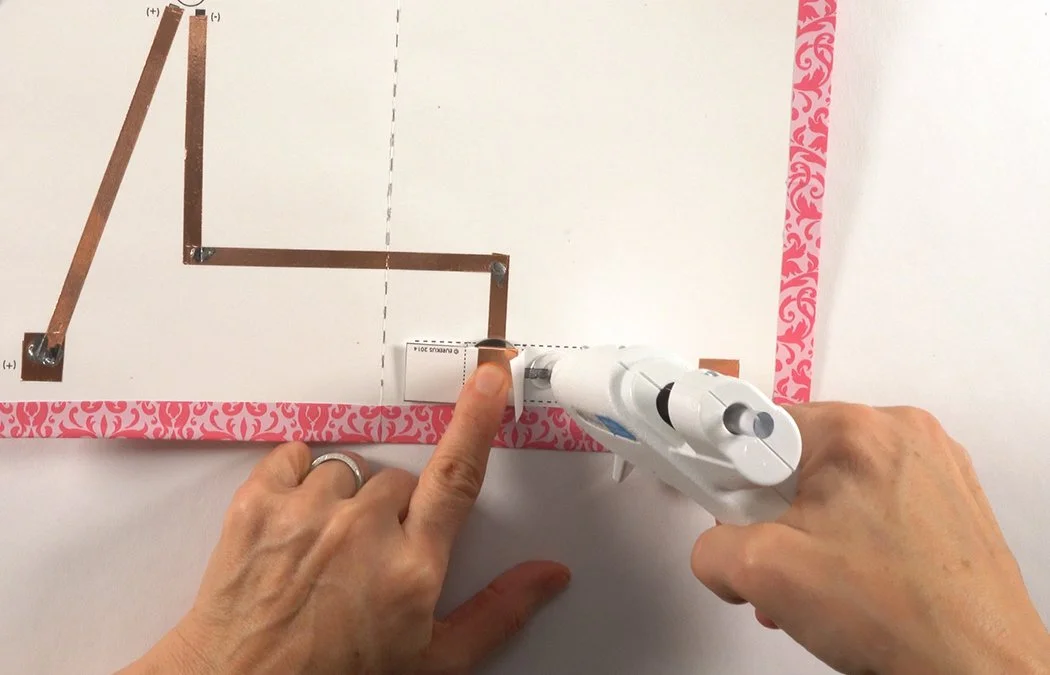
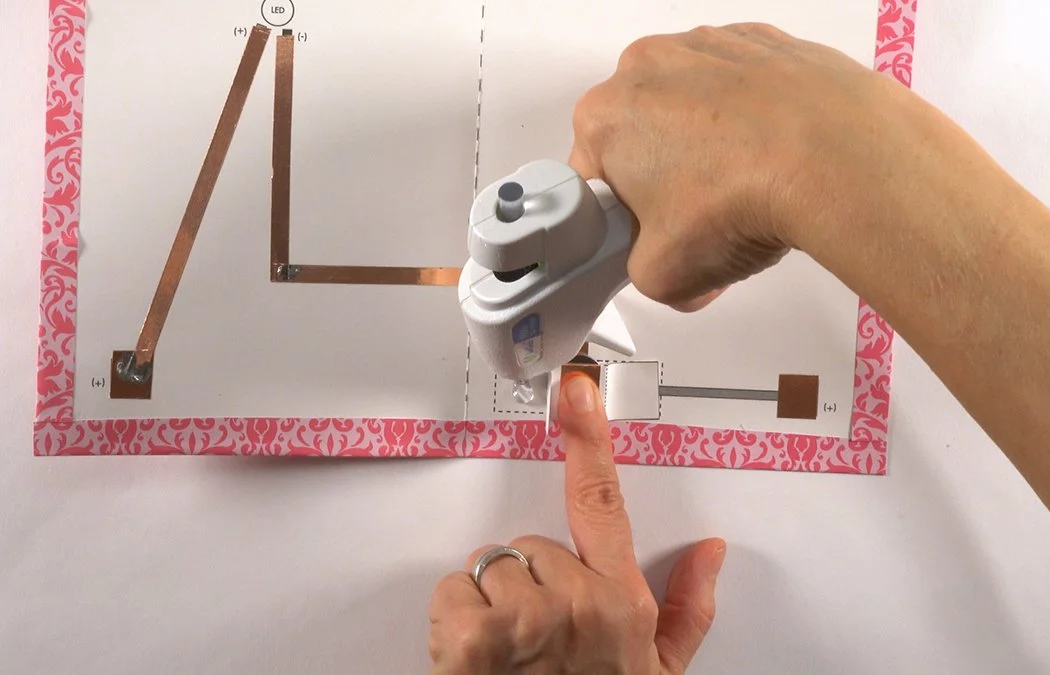
Hold the battery tightly in the pocket. Lift up 1 tab and place hot glue underneath.
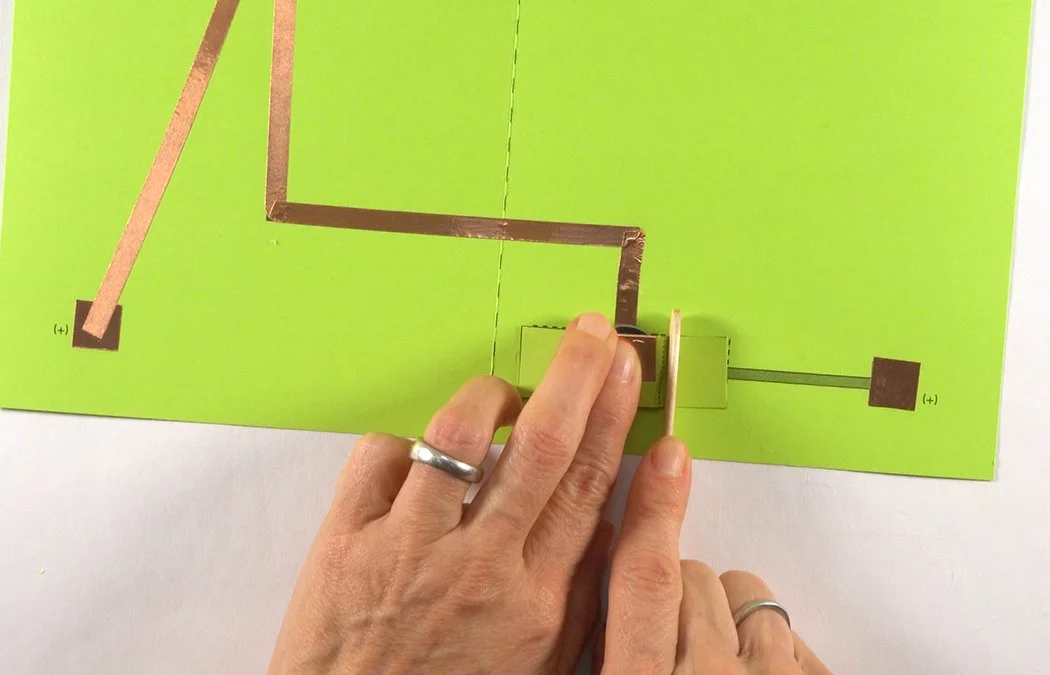
Place the tab in the hot glue. You can use a popsicle stick to press it down.
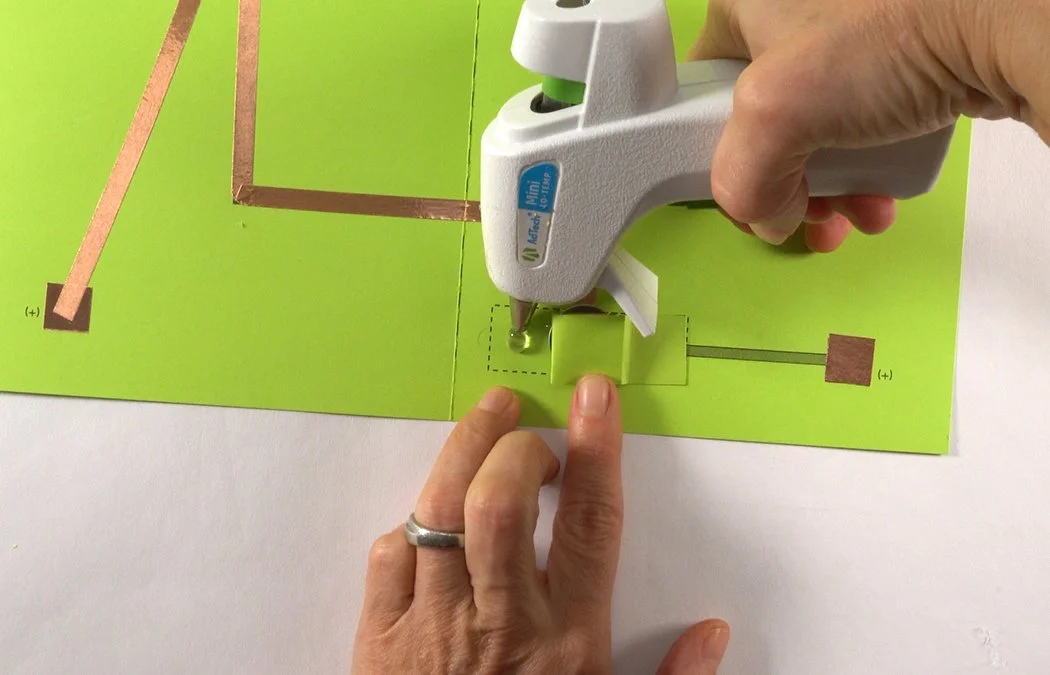
Lift your other tab and place hot glue underneath.
Press the tab with a popsicle stick to secure. Make sure the battery pocket is tight. If it is too loose, your can insert a folded piece of copper or metal paperclip to increase conductivity.
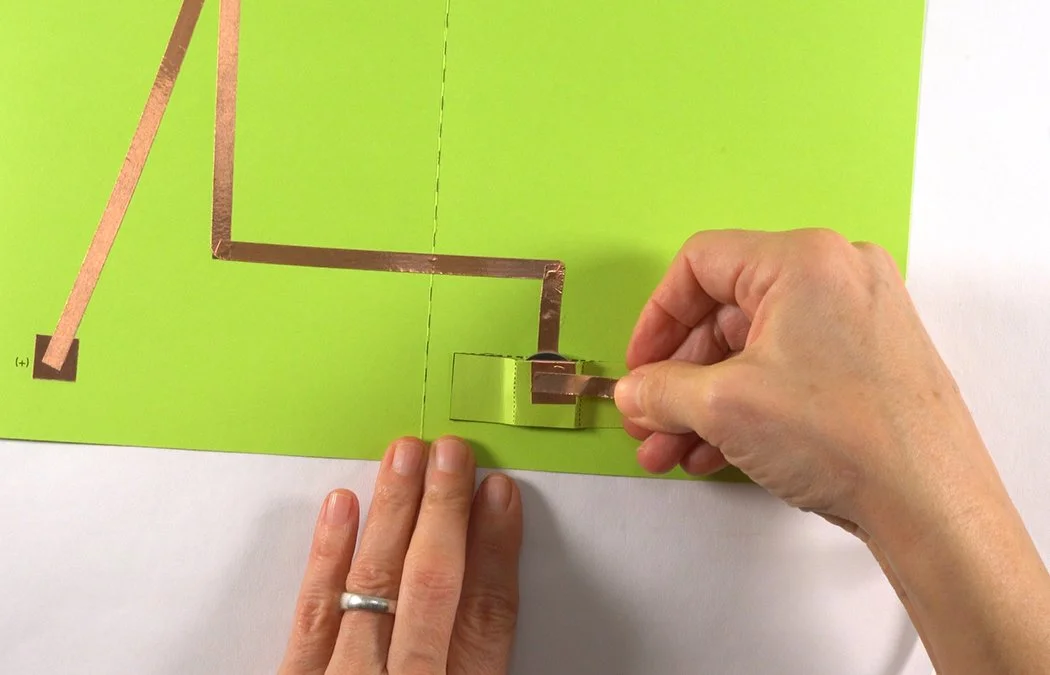
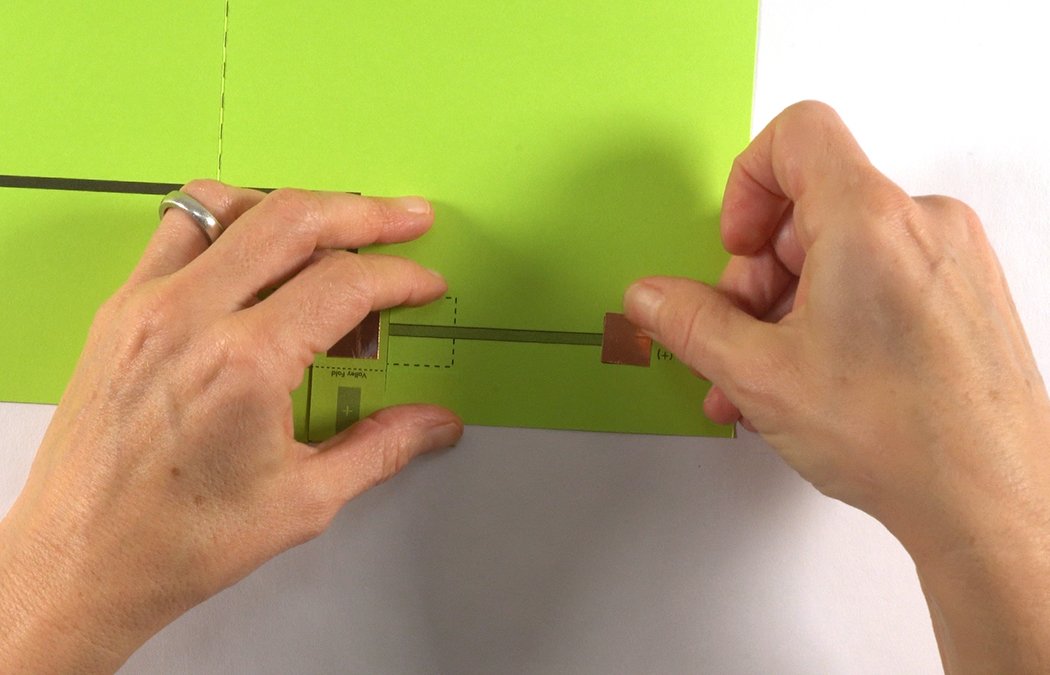
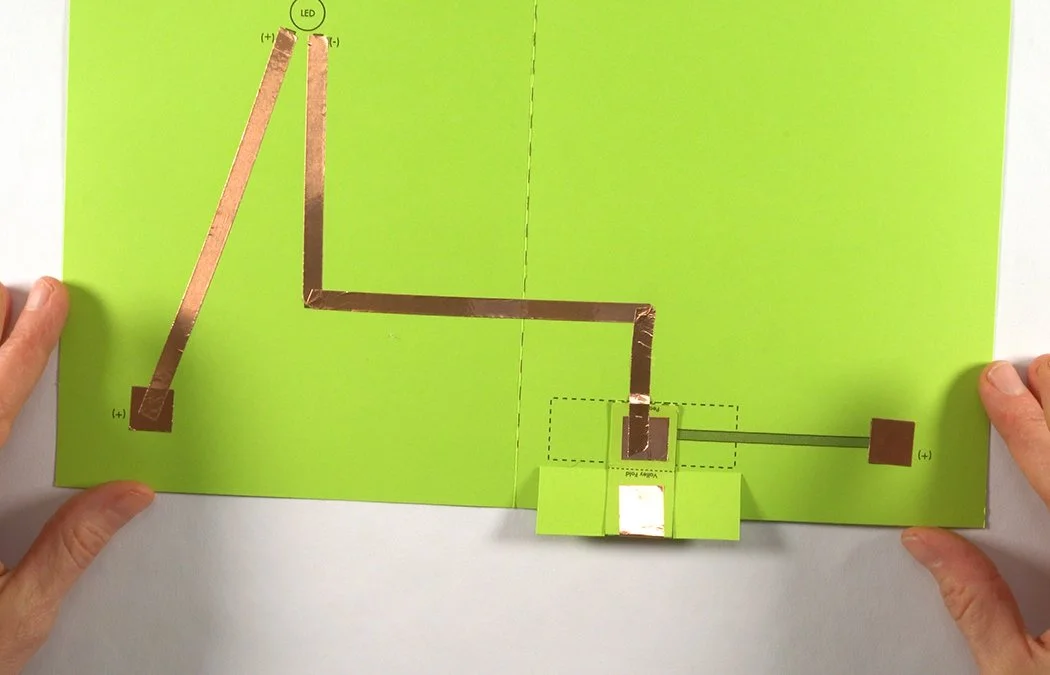
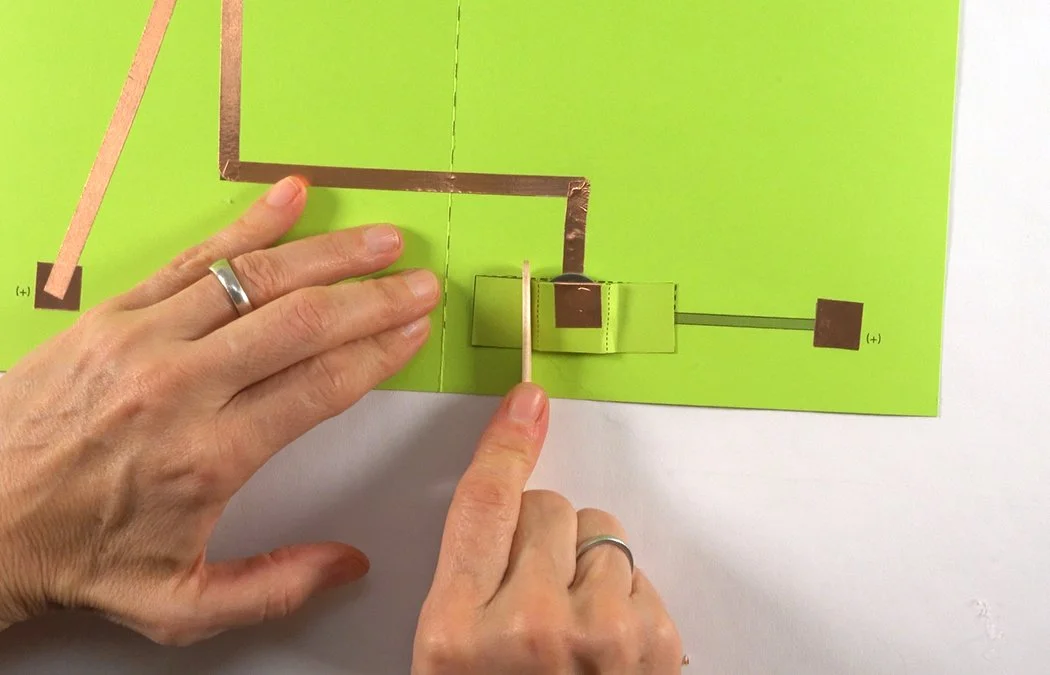
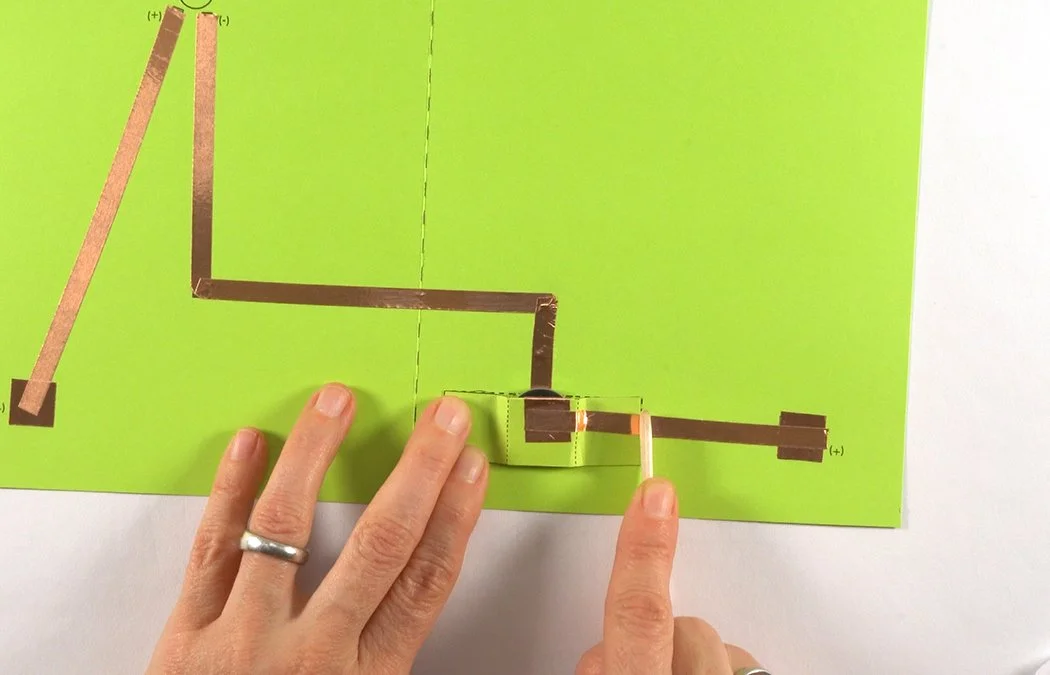
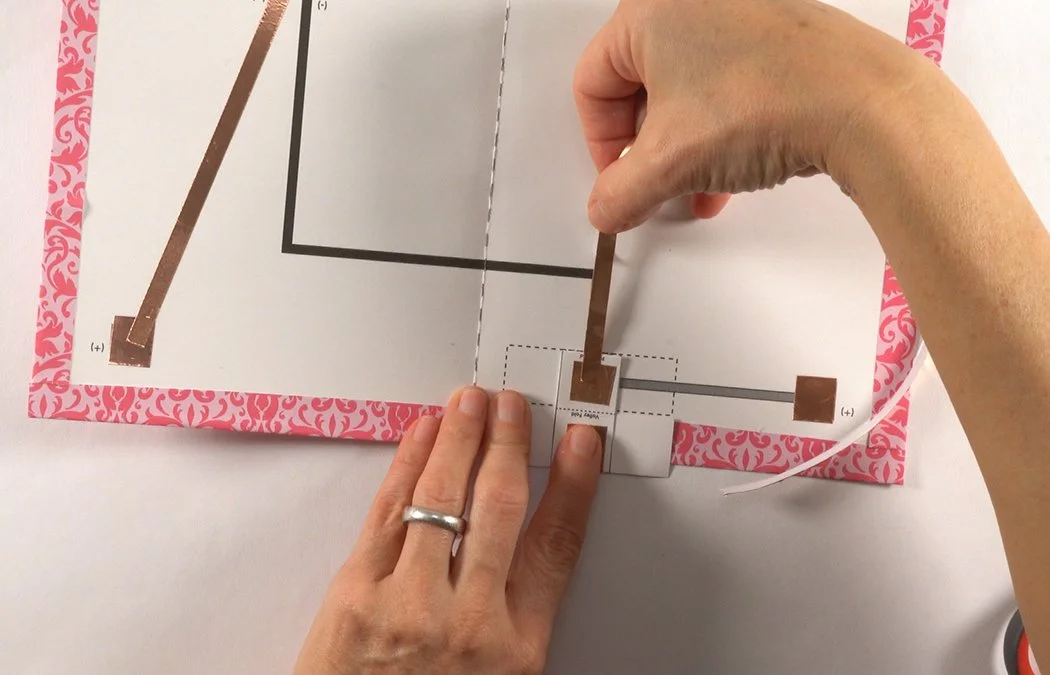
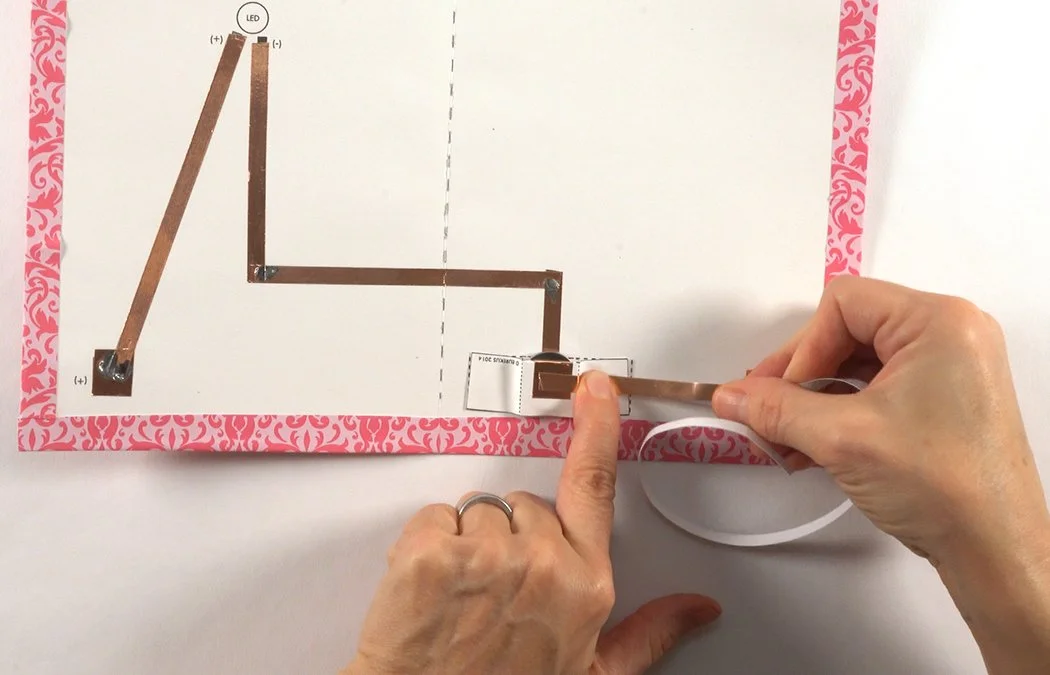
Get a strip of 1/4" copper tape. Remove a bit of backing and stick it to the copper on the outside of the battery box.
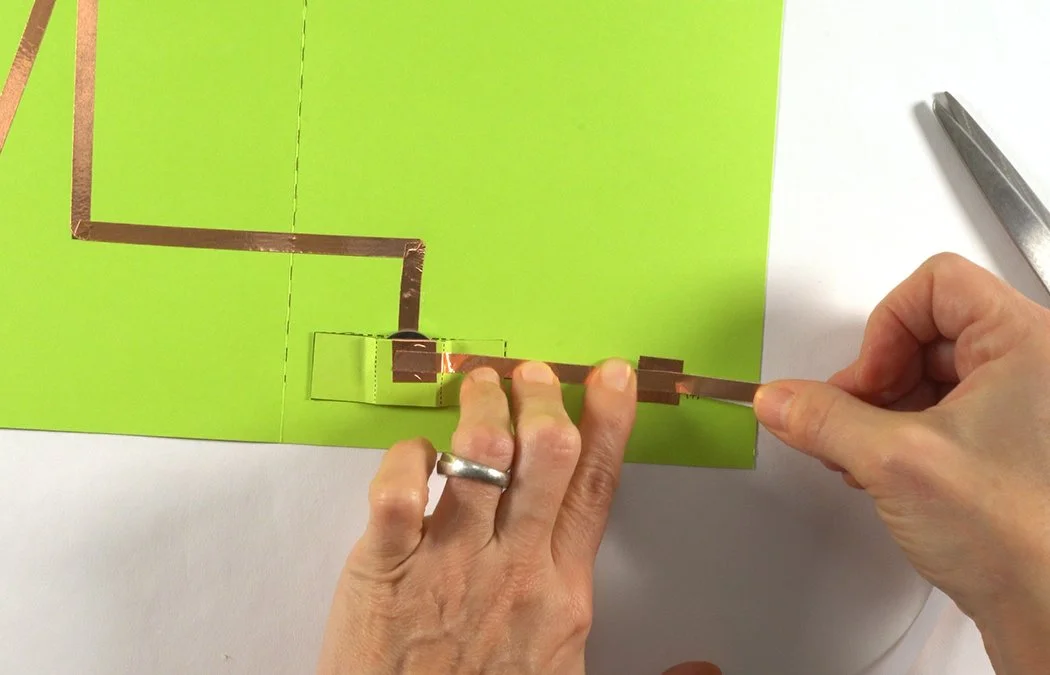
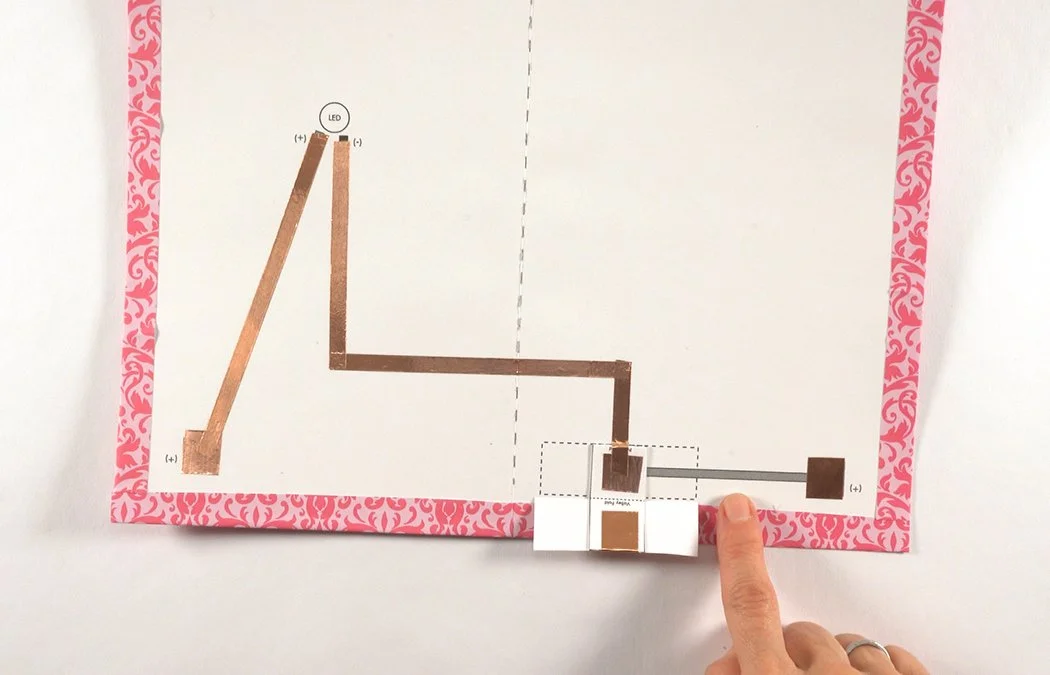
Place the copper over the (+) grey diagram to the switch pad on the right.
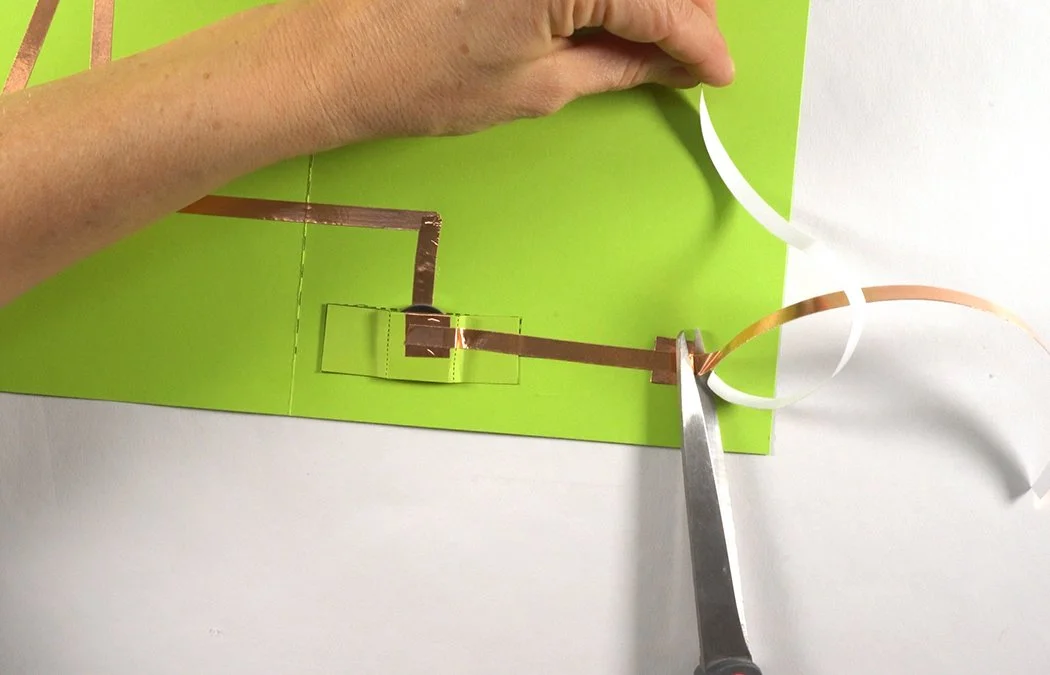
Trim your copper. Make sure it overlaps on the switch pad.
Burnish your copper with a popsicle stick.
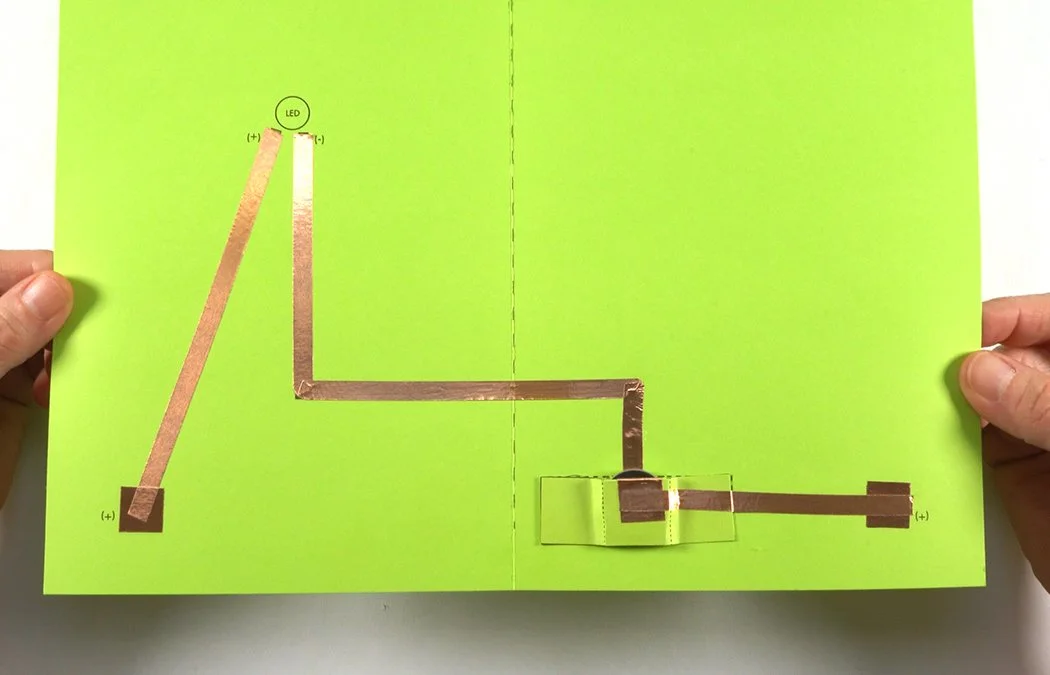
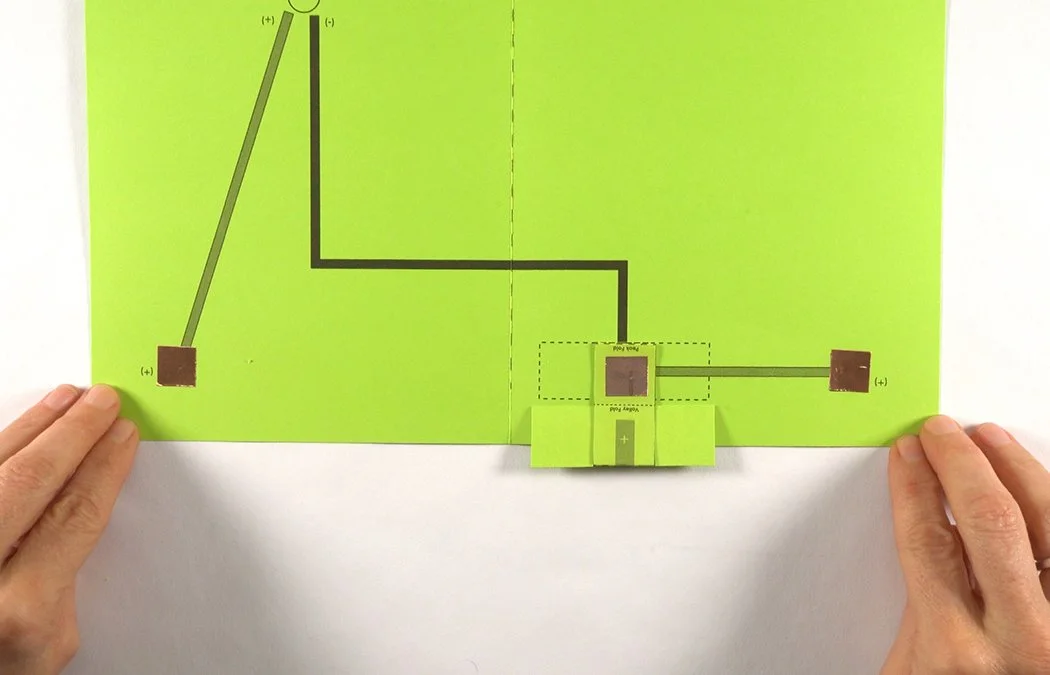
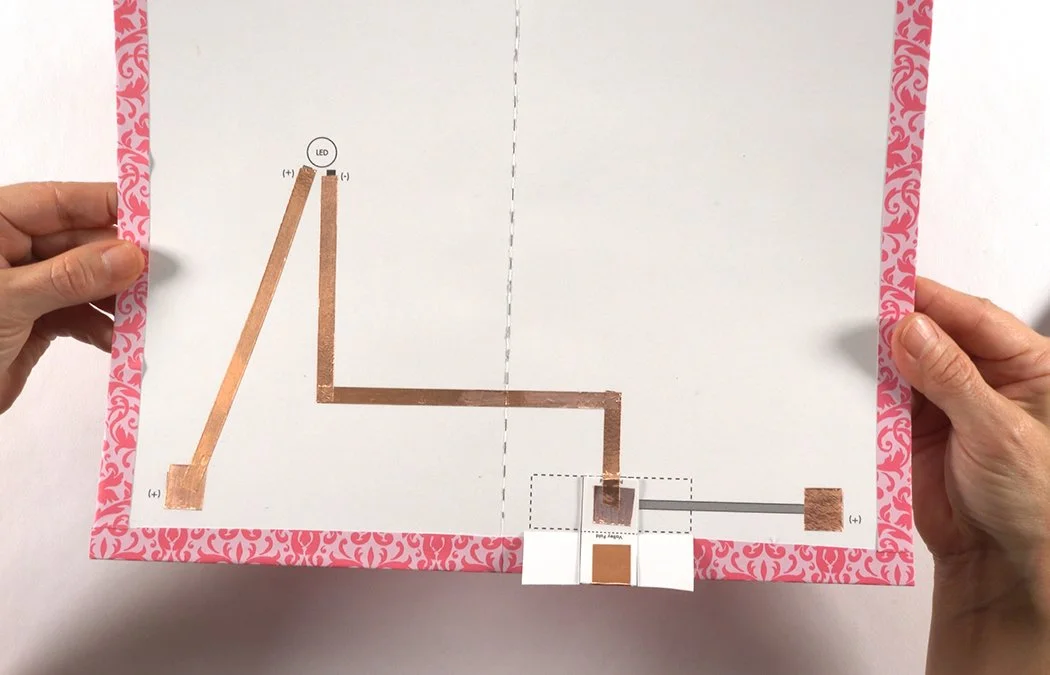
Your tape circuit is now complete. Make sure there are no tears or breaks. If there is, place a copper tape "bridge" over the break.
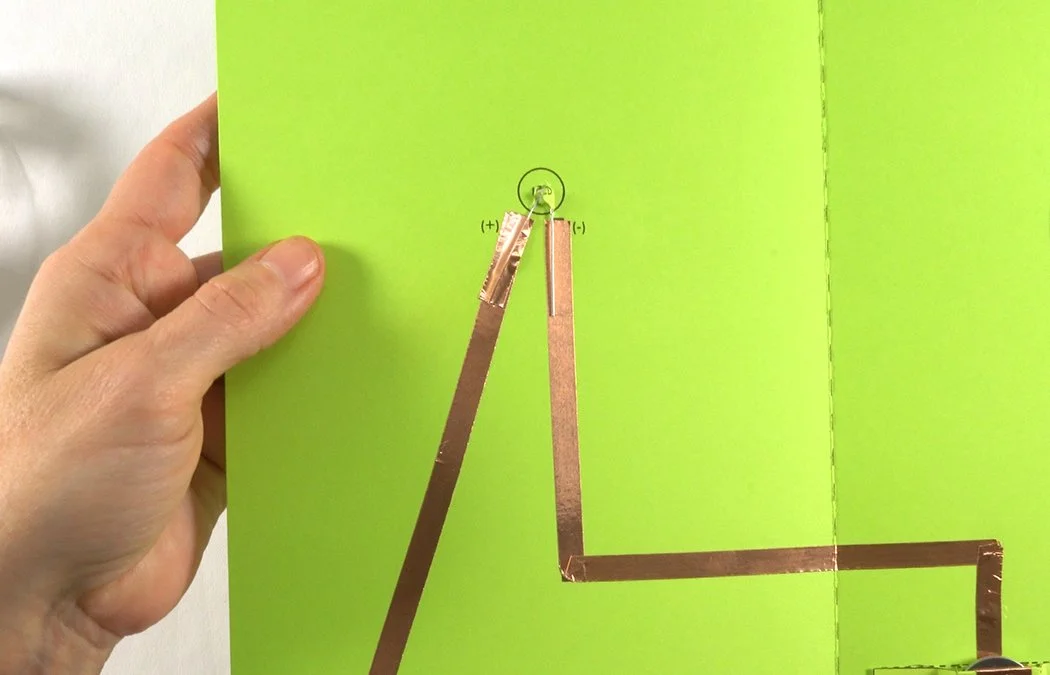
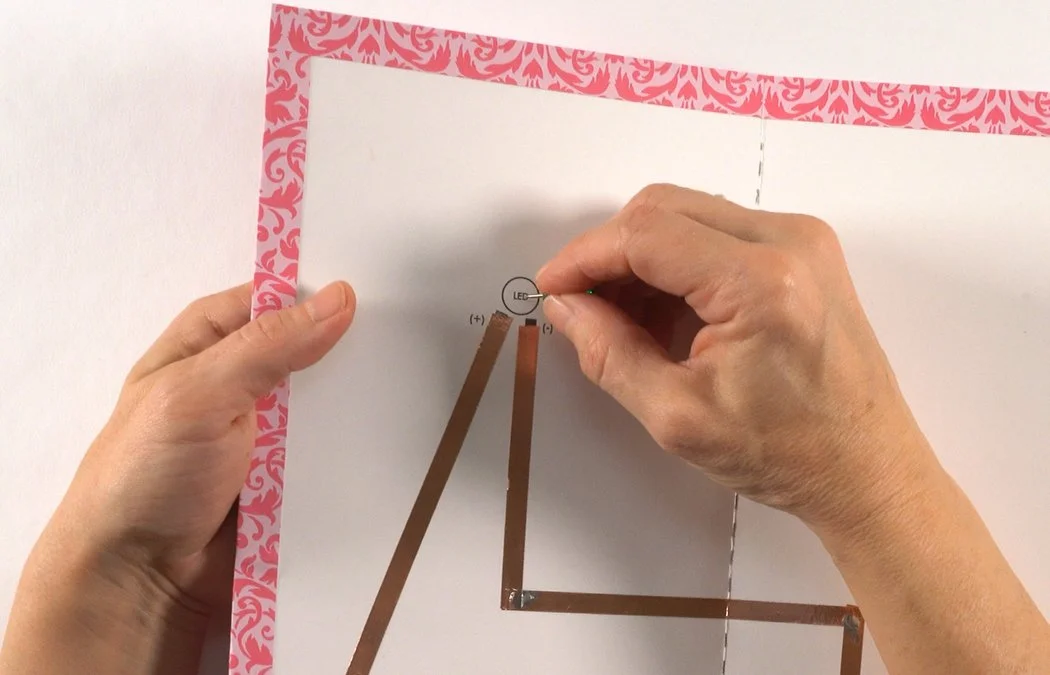
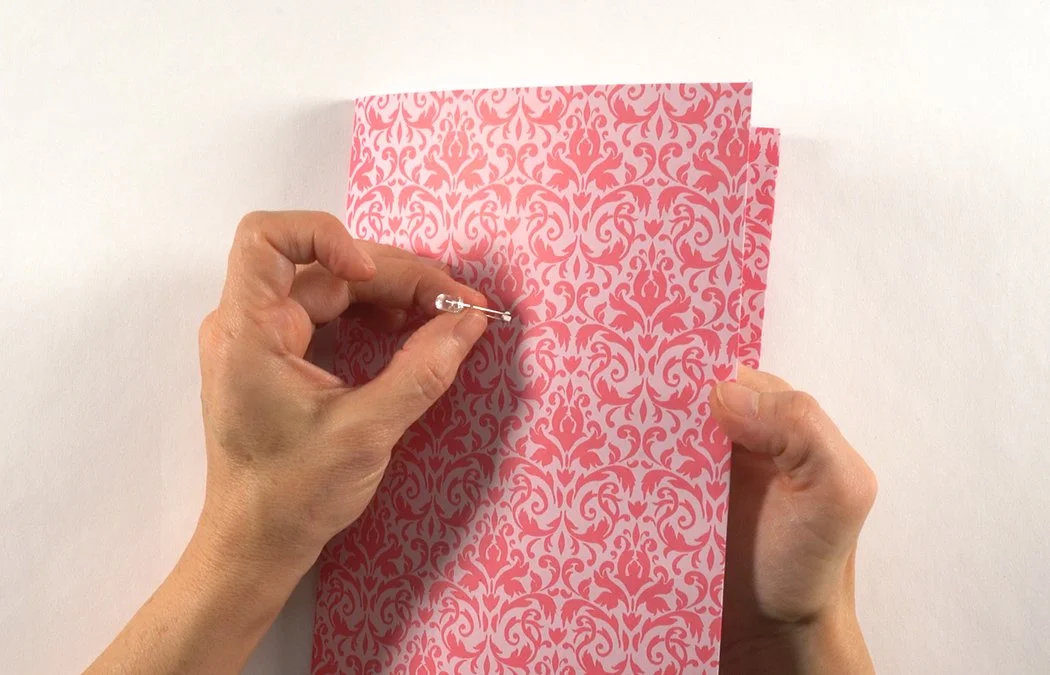
Poke a hole in your card where it says "LED". You can use a thumb tack or needle.
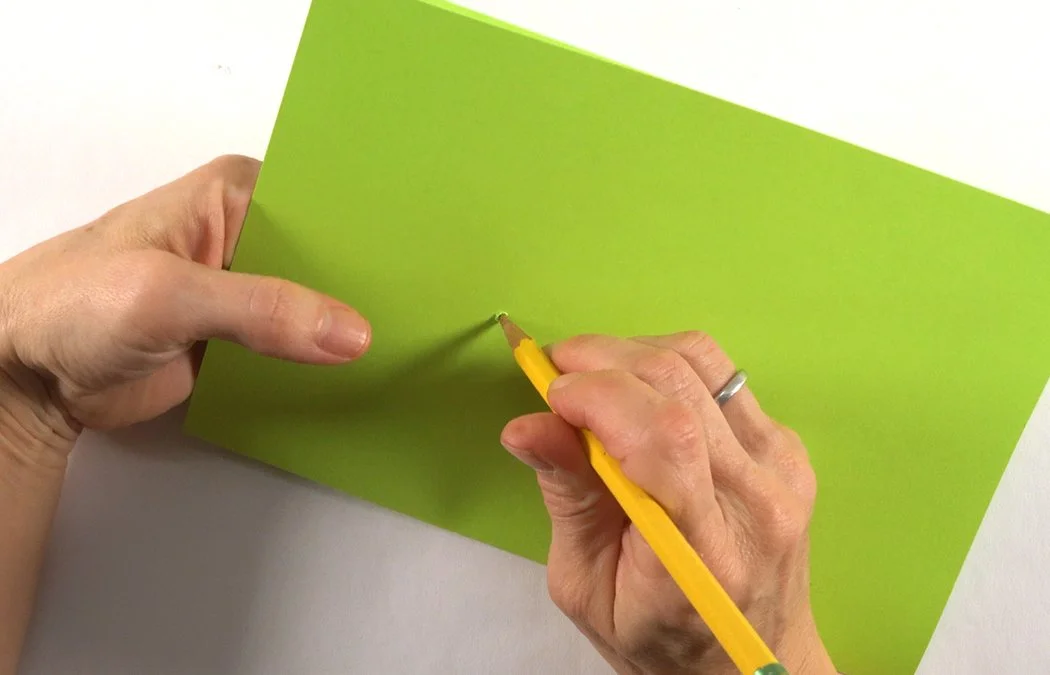
Insert your pencil from the front and twist to make your hole bigger.
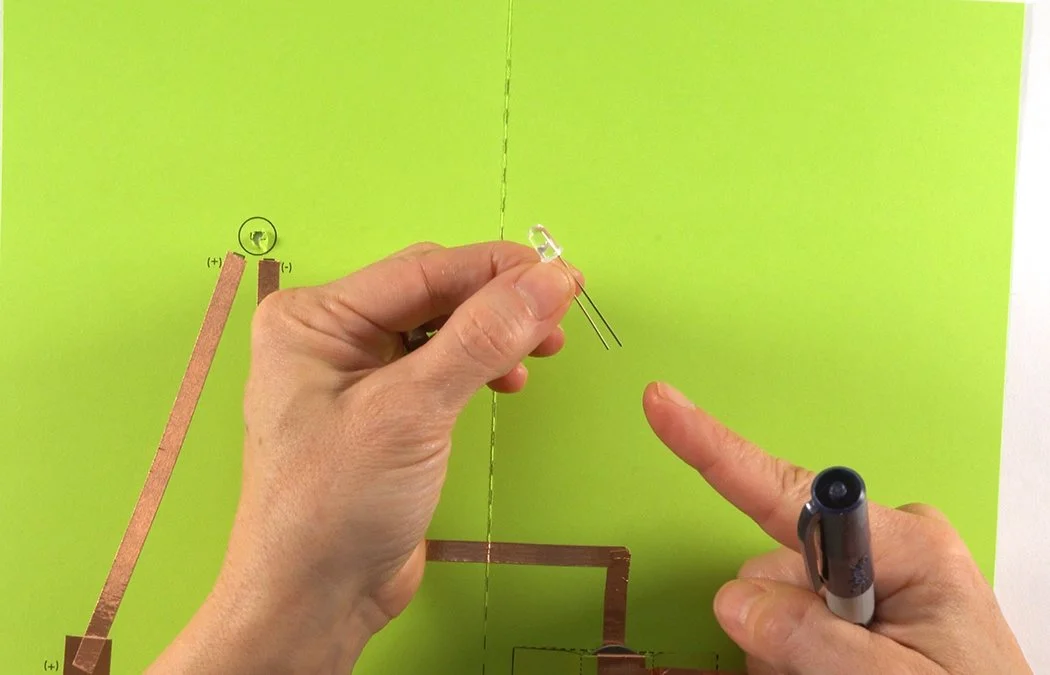
Get an LED light. The longer wire lead is (+).
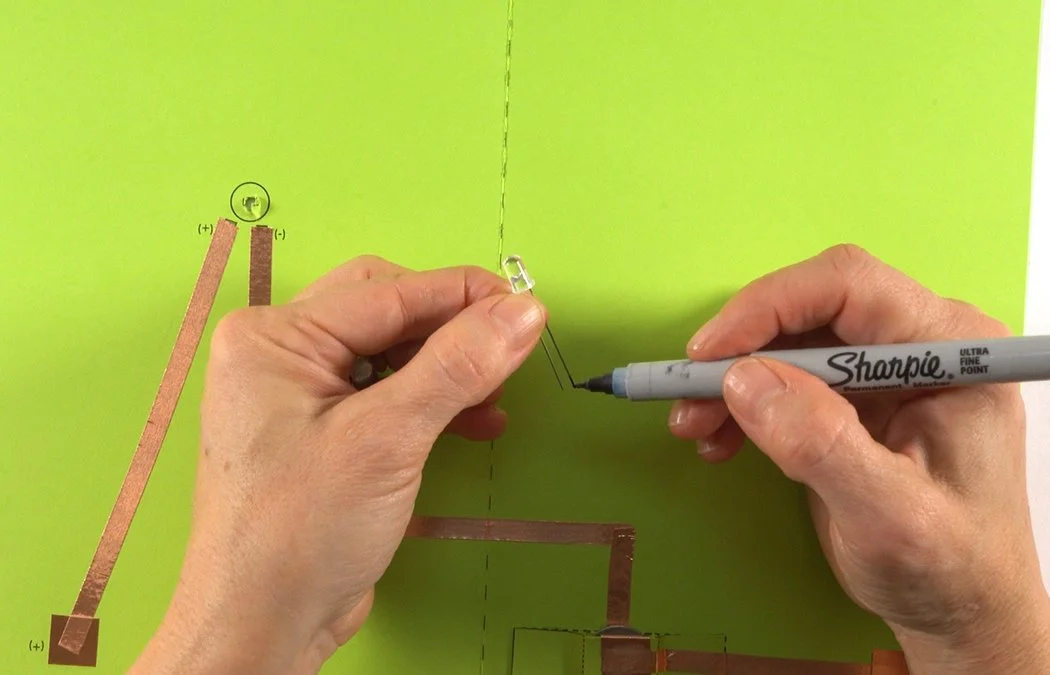
You can mark the (+) lead with a Sharpie to keep track of it.
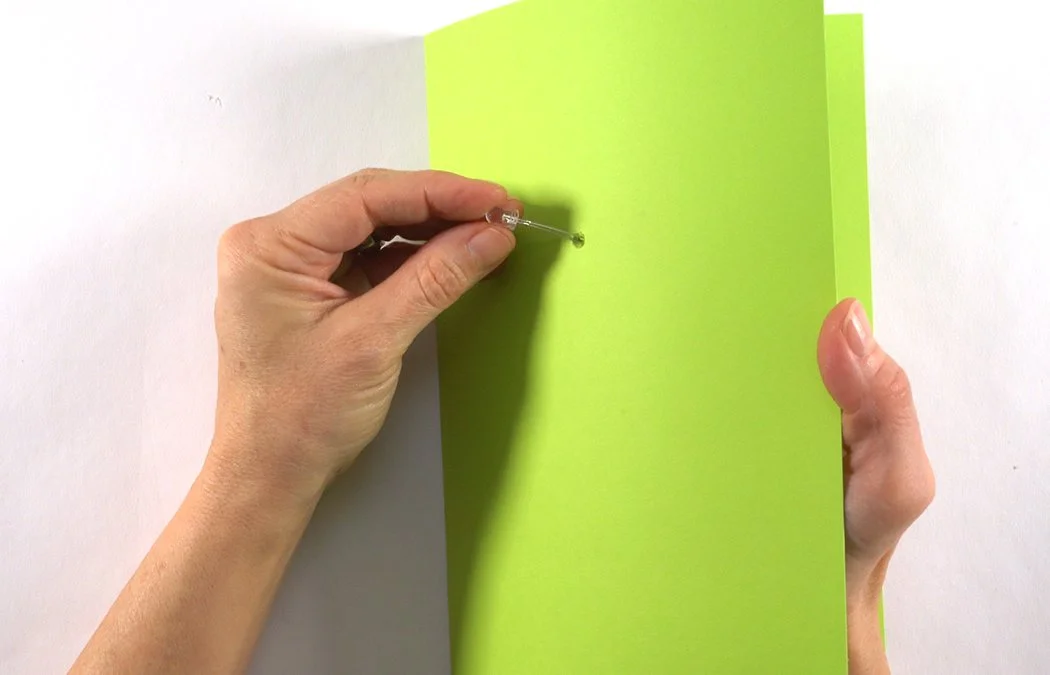
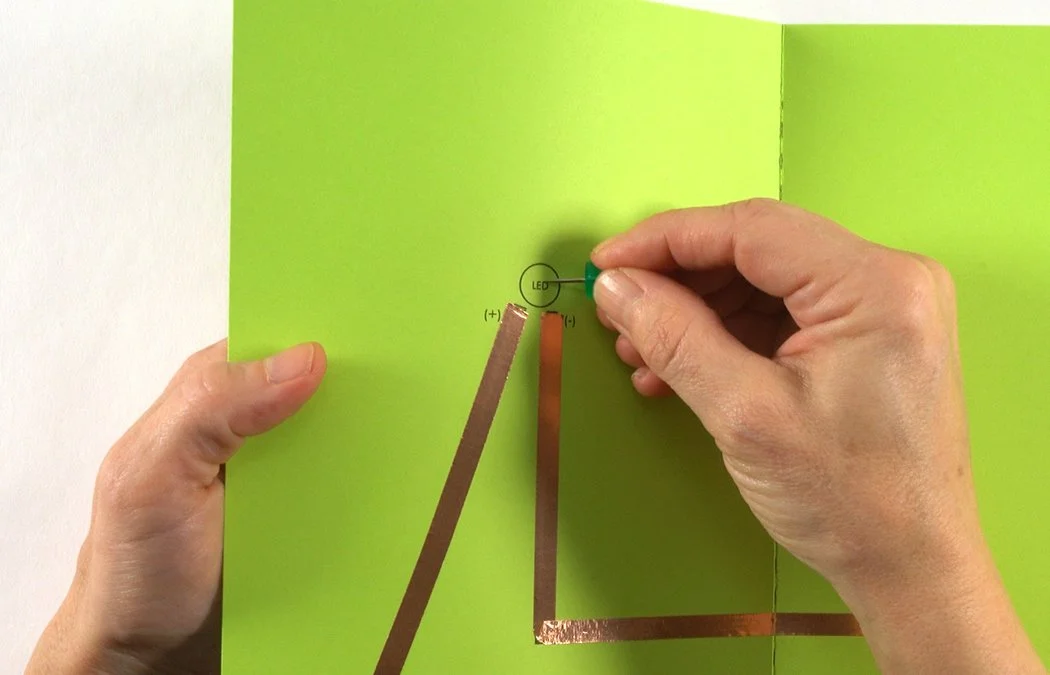
Insert the LED wires into the card from the front blank side.
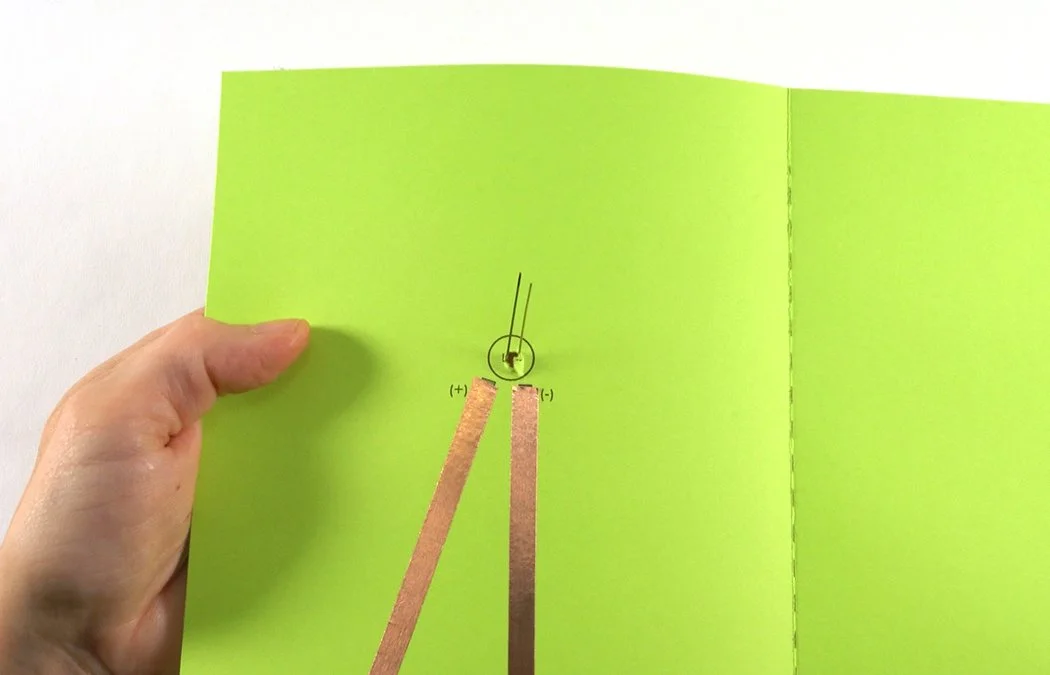
Twist the leads until the longer (+) wire faces the (+) side of your circuit.
Bend the leads down until they touch the copper. The (+) lead should touch the (+) copper. The (-) lead should touch the (-) copper.
Make sure your leads are on the proper piece of copper tape. If not, the light will not work unless you flip your battery.

Cut (2) 1" pieces of copper tape. Remove the backing.
Stick the copper directly over one wire.
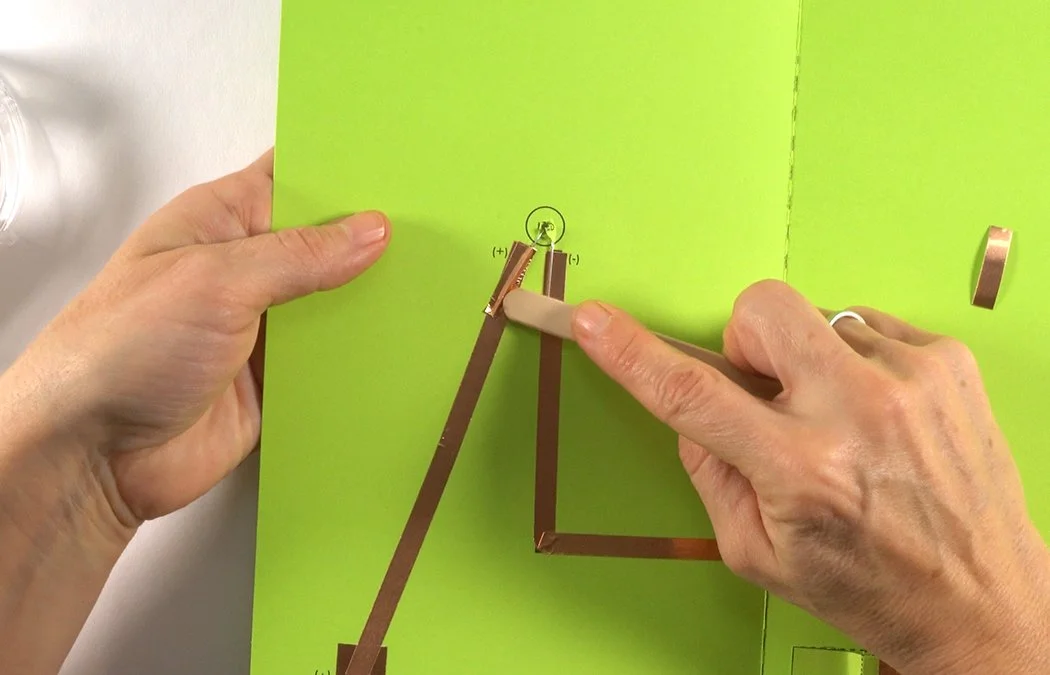
Burnish the copper well. The wire lead should now be between 2 pieces of copper.
Remove the copper from a 2nd copper tape strip.
Place it directly over the other LED lead. Burnish well
Make sure both wires are between the 2 pieces of copper.
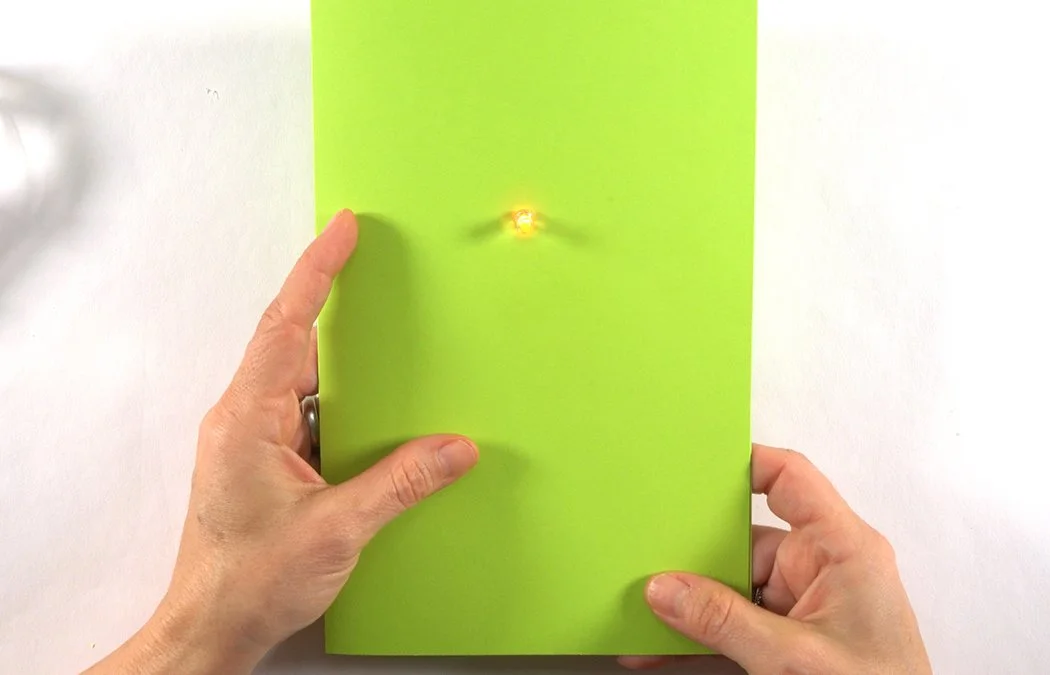
Close your card and press the right corner copper pads together test the light. If it does not turn on, squeeze your battery box, too. (A loose battery box is the most common reason a light won't work.)
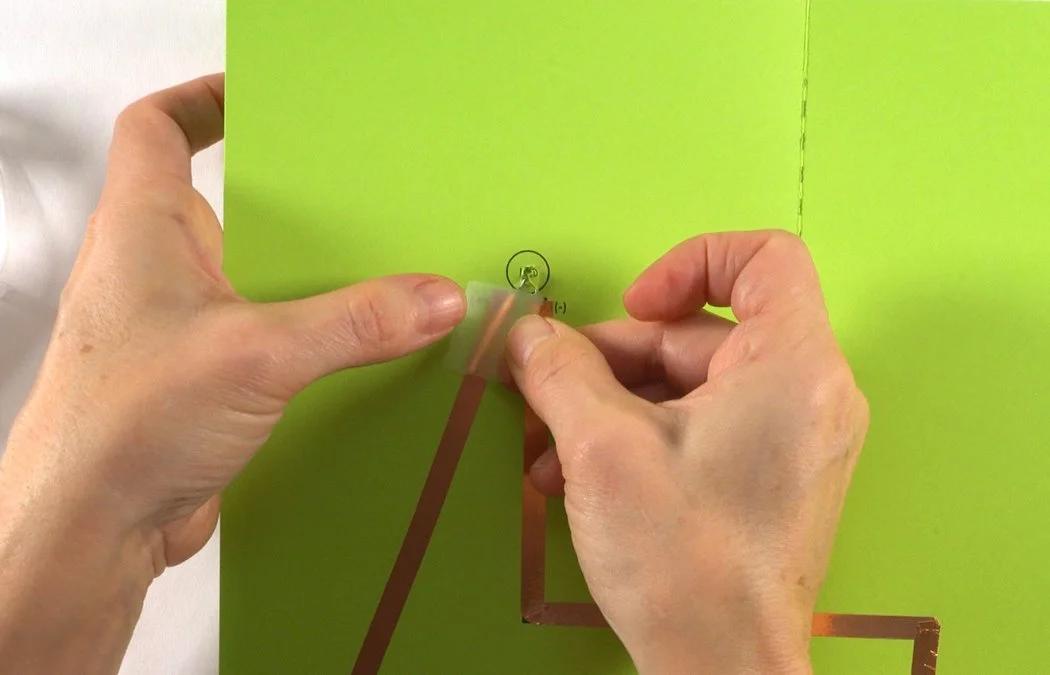
Make any adjustments. You can check out the Trouble-Shooting Tips, too. Once your light is working, place scotch tape over the copper and leads.
Burnish the copper and tape.

Your card tech is complete. If you need to fix anything, check out our Trouble-Shooting Tips.
Close the card and press the right corner to connect the switch pads. Decorate with marker, paper and decorative items.
Slideshow Instructions - Complex Version
Slideshow 1: Create Your Base Circuit
Prep your circuit & decorate with scrapbook paper.

Follow this slideshow to make cards with solder. We'll also show you how to add decorative paper. Collect your supplies.
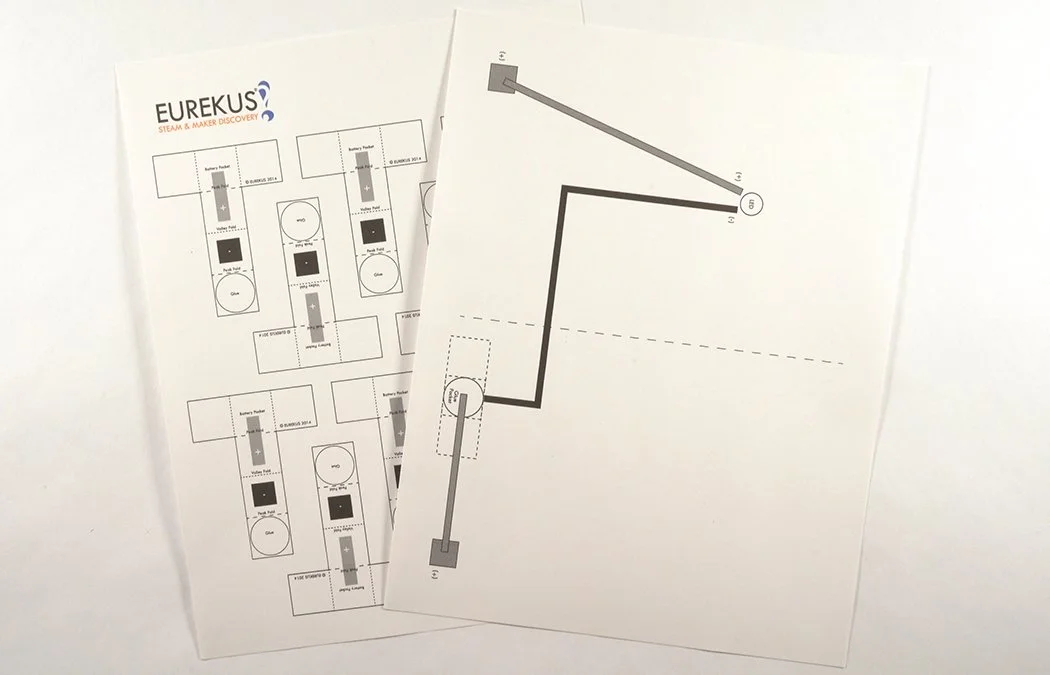
Make sure the card and battery box templates are printed onto cardstock.
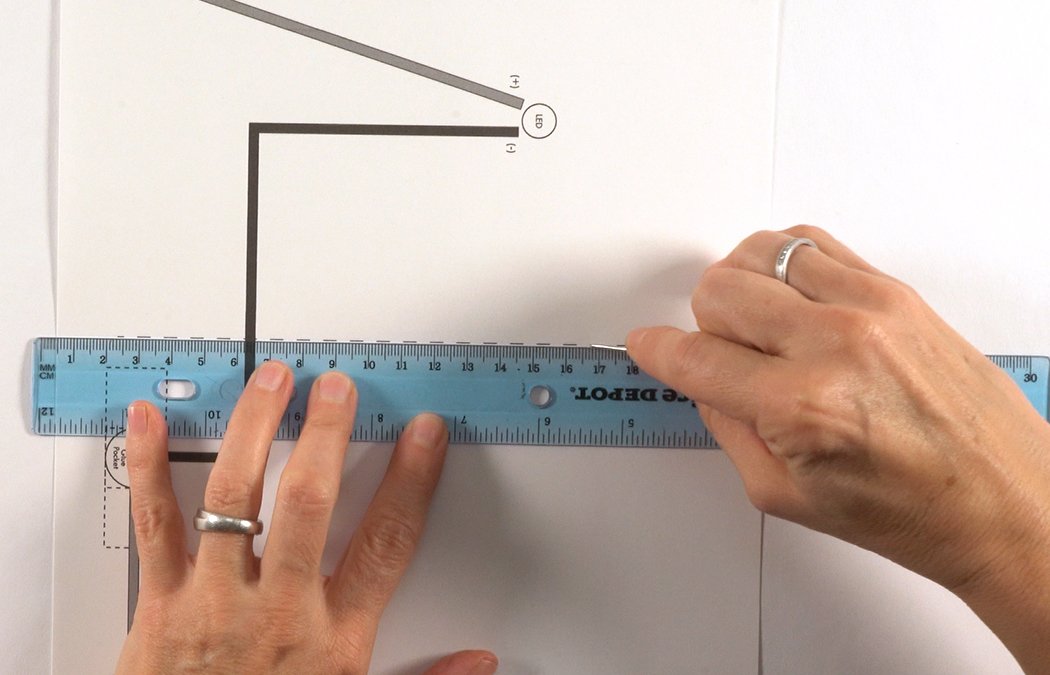
You can score the center line of your card template to get a crispy fold. Line-up a ruler with the dashed line. Run an embroidery needle down the ruler to indent the paper.
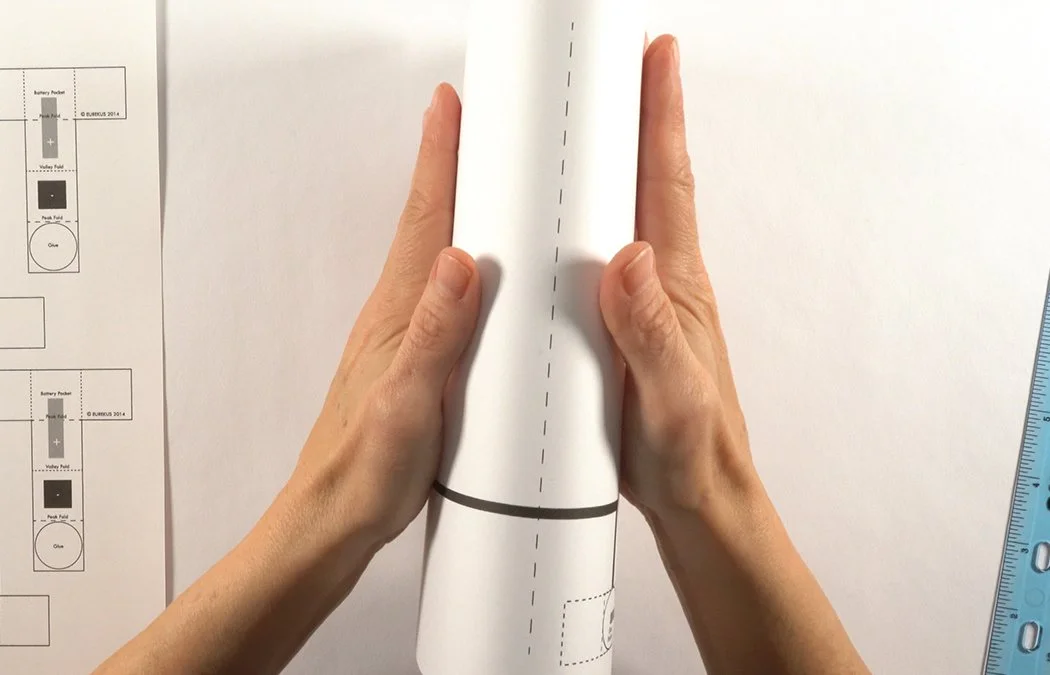
Fold the card in half looking at the diagrams.
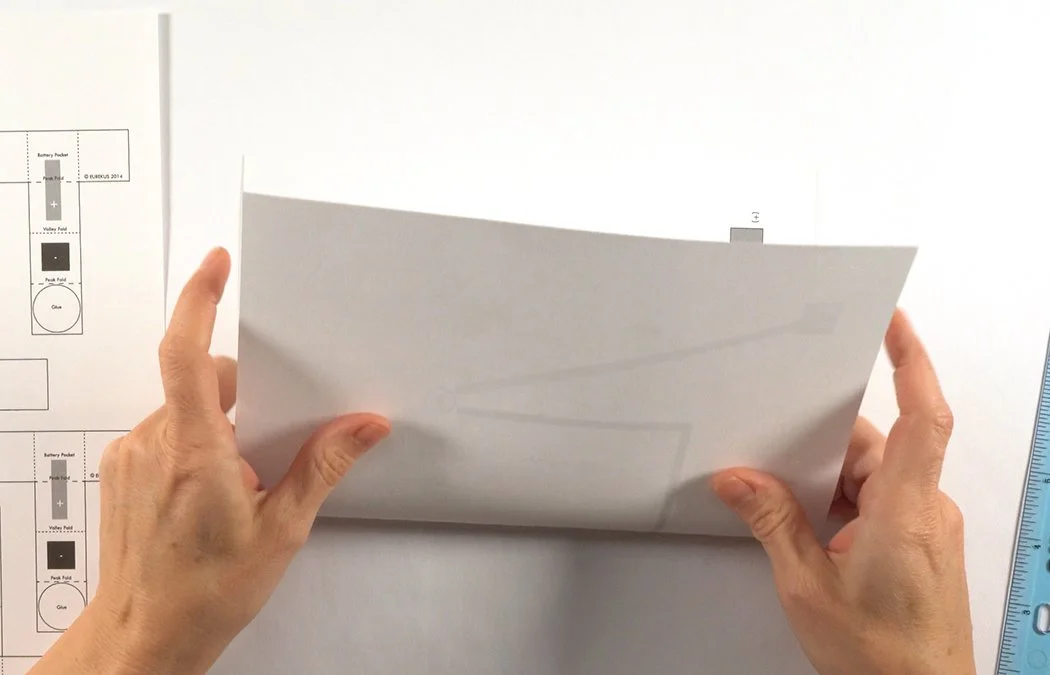
Then fold the card the other direction to see the blank side.
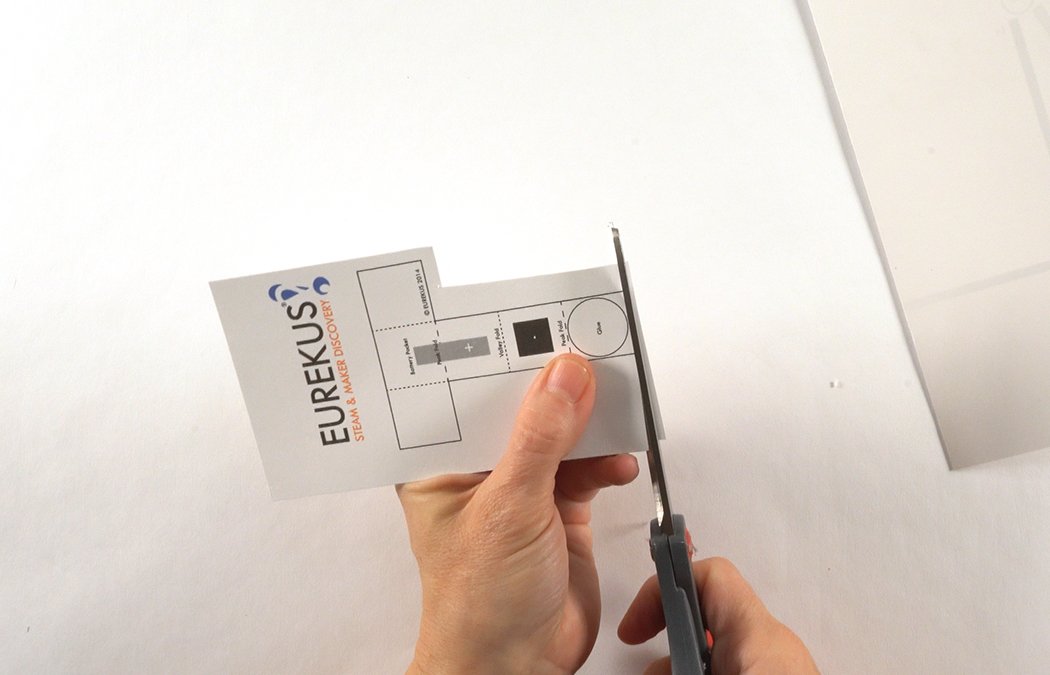
Cut our your T shaped battery box template along the solid black perimeter line.
Fold the end dashed line into a peak fold.
Fold the center dashed line into a valley fold.
Fold the dashed line by the T-tab into a peak fold.
You have made an accordion fold with an M shape.

Flip your battery box over to see the blank side. Mark X's & O's as shown.
Place glue stick along the center of the T.
Fold the end panel over to glue X to X.
Fold the T-tab over to glue O to O.

You've made a smaller T shape. Make sure you can see the diagrams on both sides.
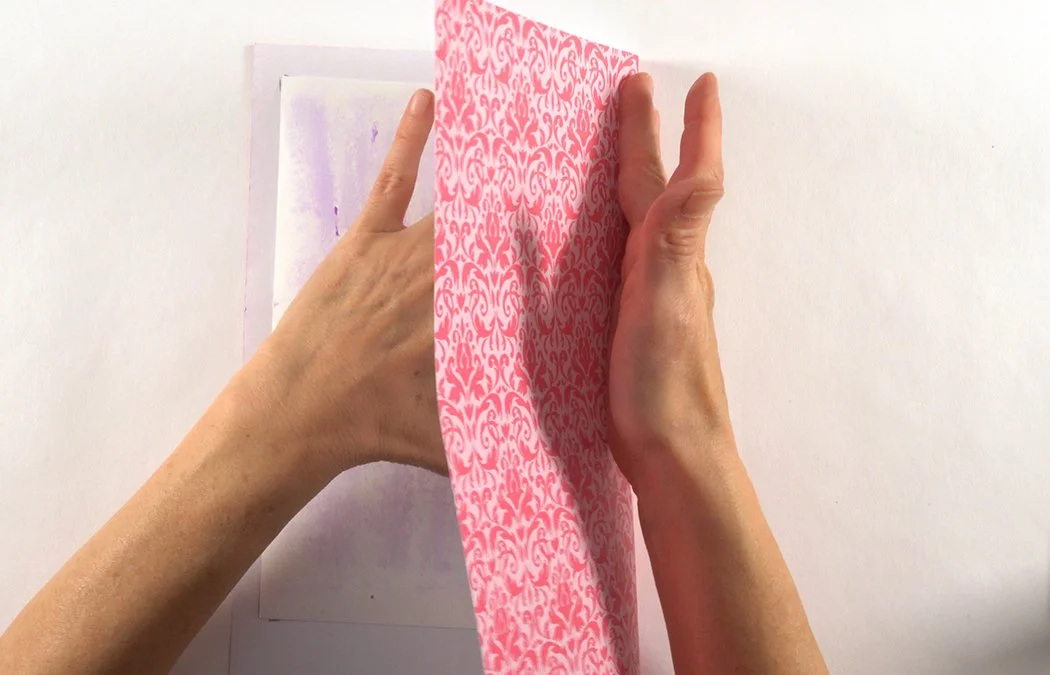
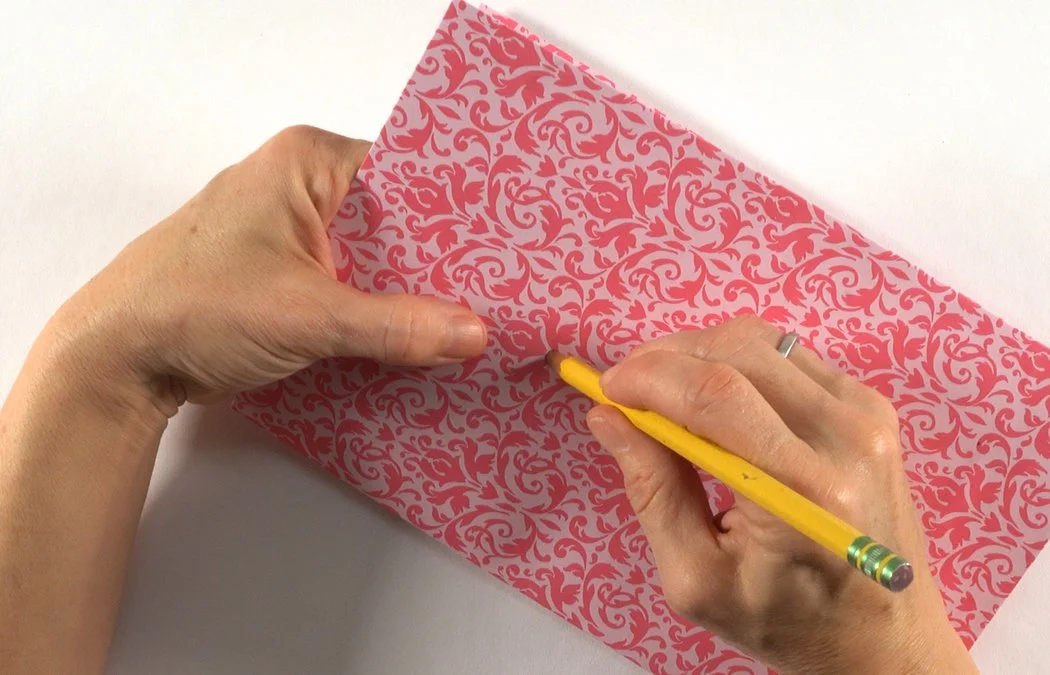
If you want to add decorative paper, get your card template and paper of your choice.
Place your template onto the back of your scrapbook paper. Mark the corners to get about a 1/2" boarder.
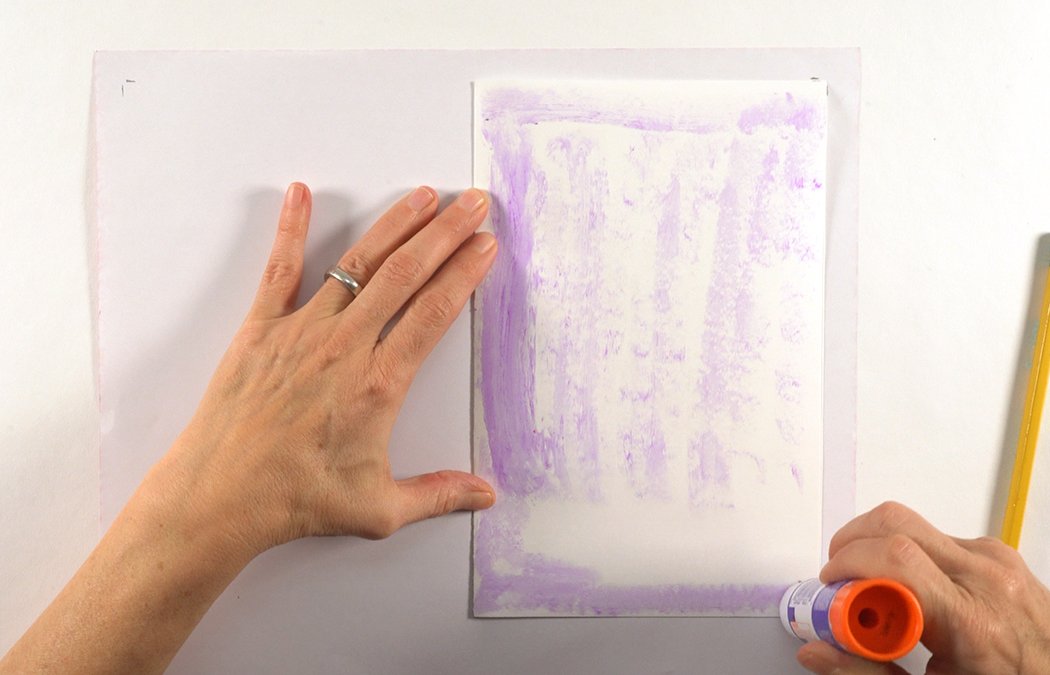
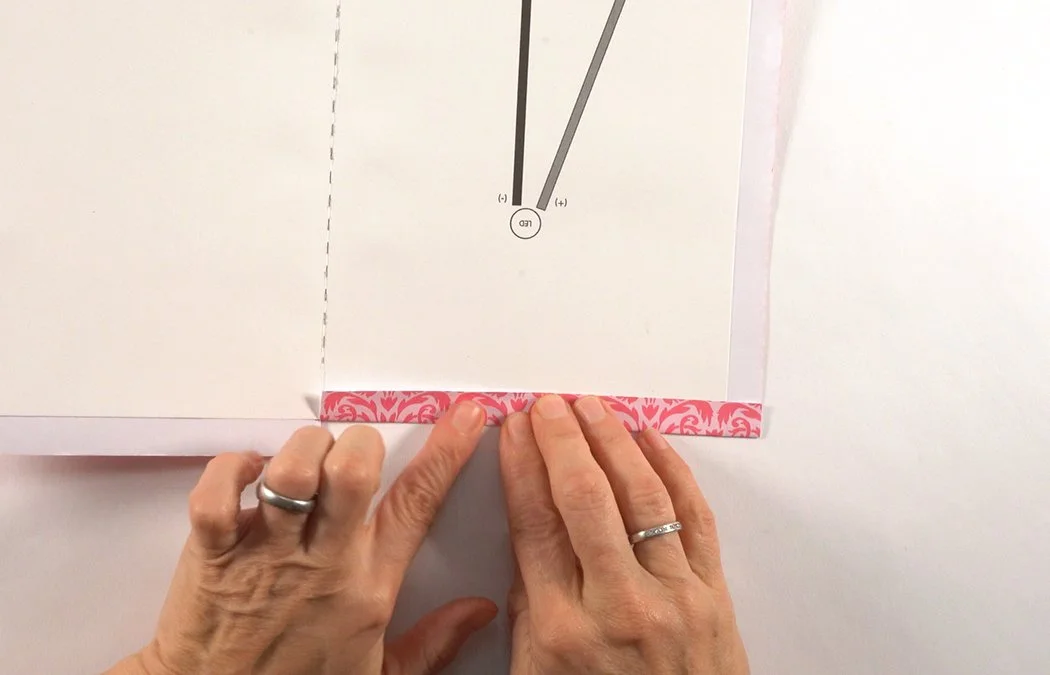
Place glue stick all over the front of the card.
Stick the card to the paper. Line it up with the corner registration marks you made.
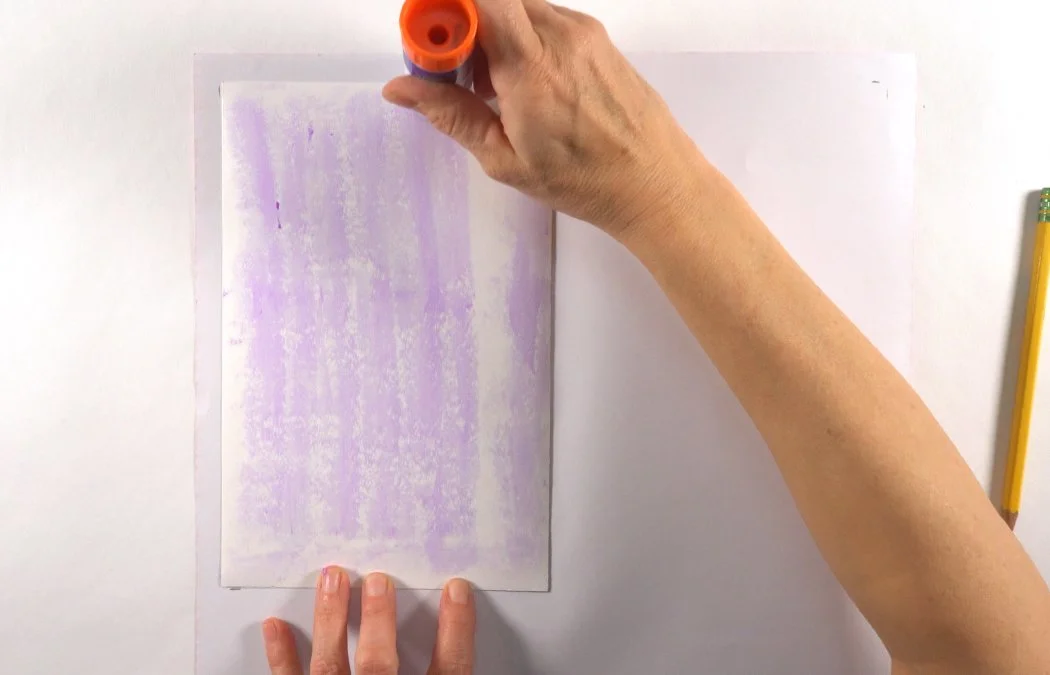
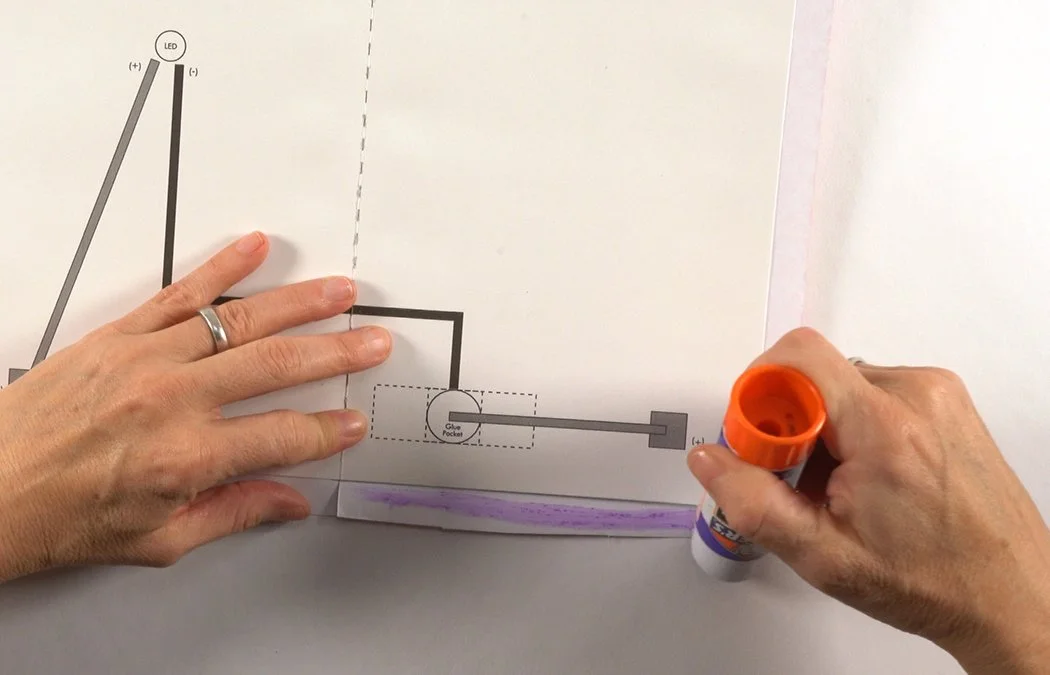
Fold the card over. Add glue stick to the back of the card.
Fold the paper over to stick to the back side. This technique will prevent getting lumps in your paper at the fold.
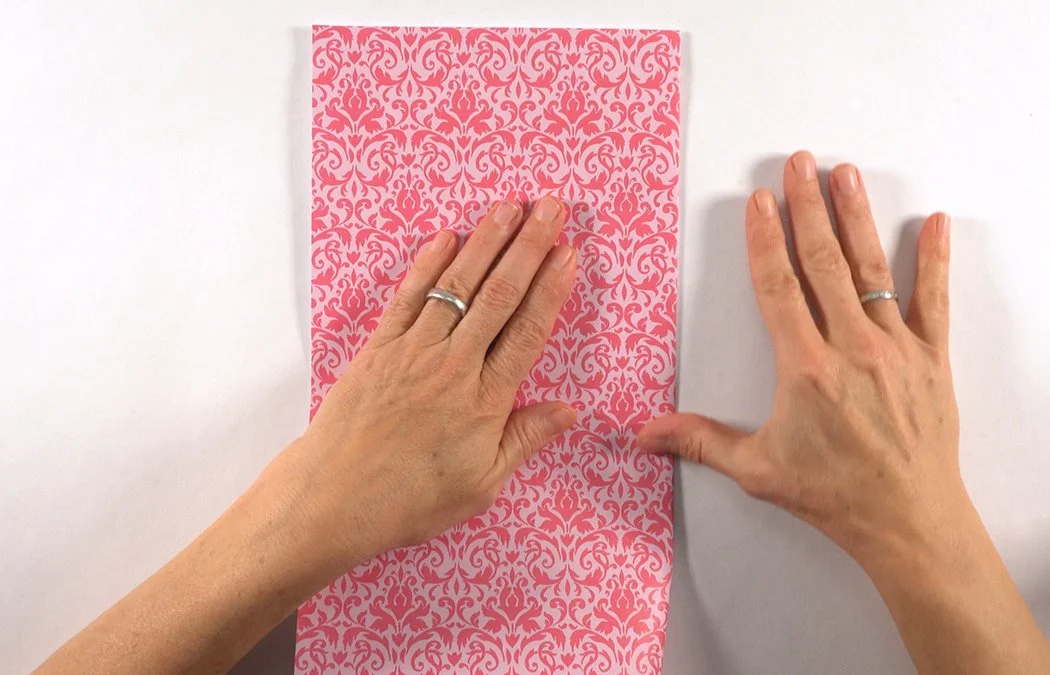
Press and smooth your paper.
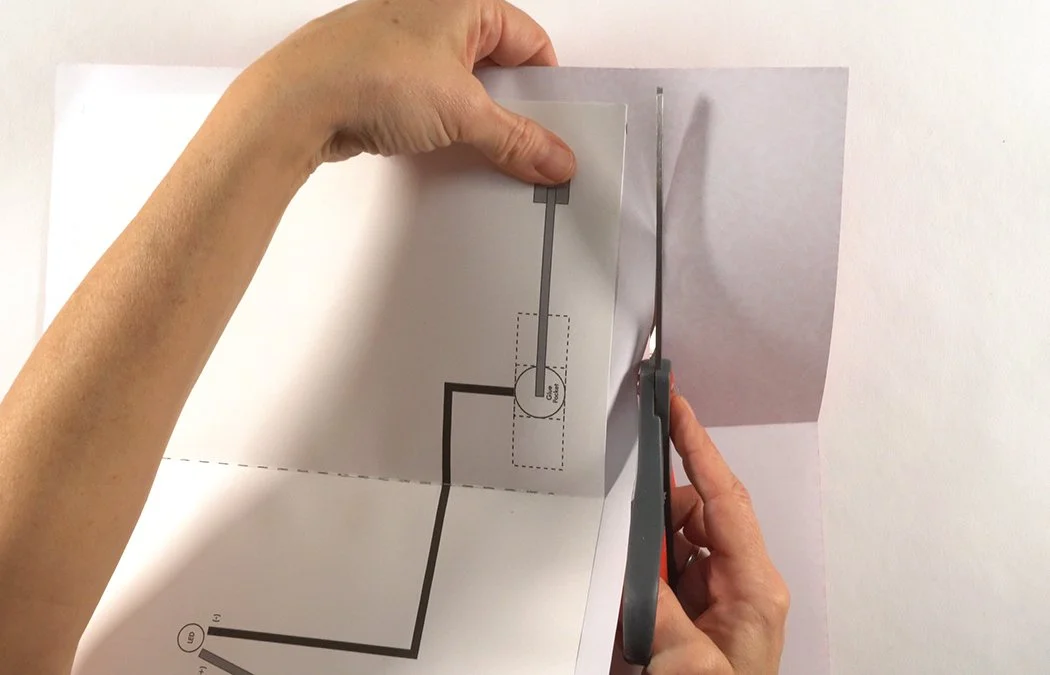
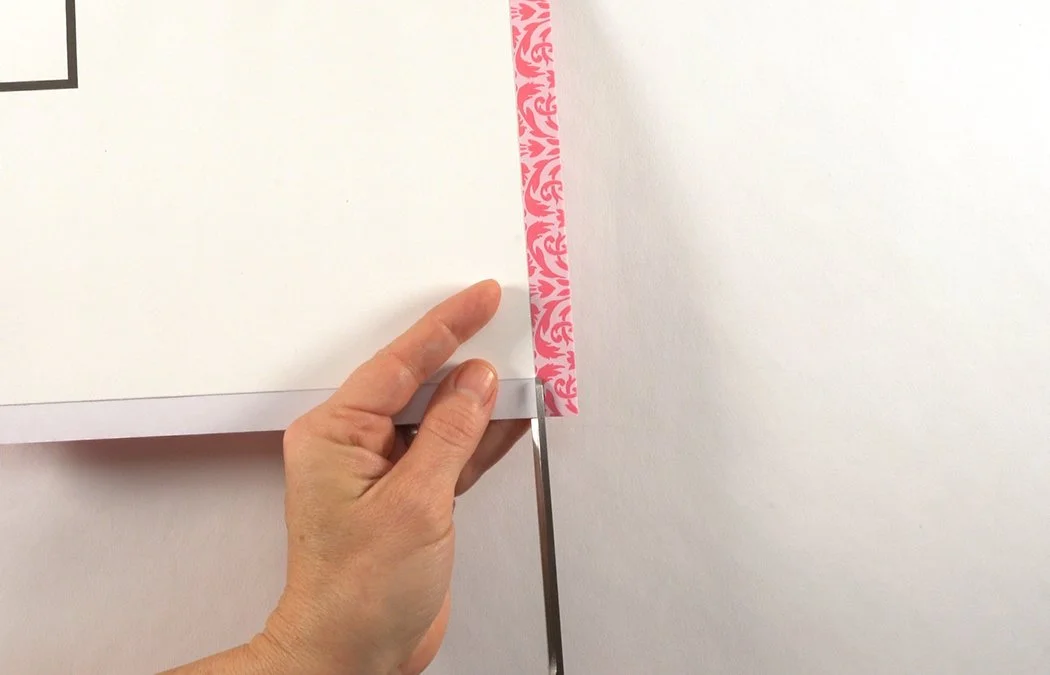
Cut a 1/2" boarder in your paper.
Cut the folds in the paper border at the center line.
Fold the paper over to make a tab.
Add glue stick to the paper tab and secure to the card.
Cut little squares out of paper at the corners. This will make it easier to fold & glue.
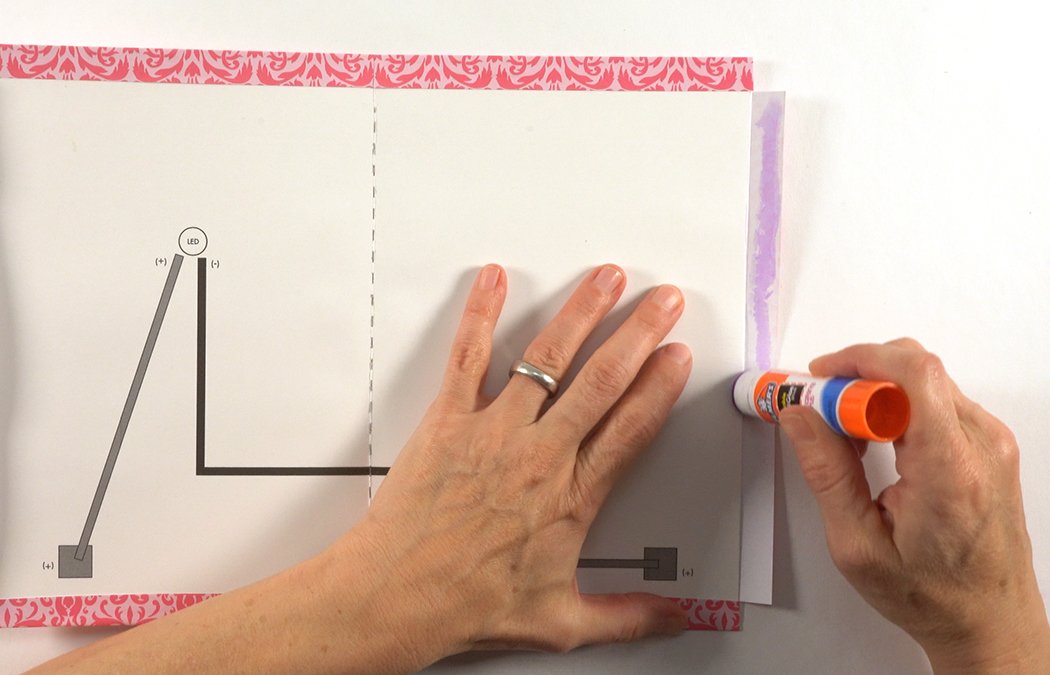
Place glue stick on each paper border tab.
Fold and secure the tabs to the card.
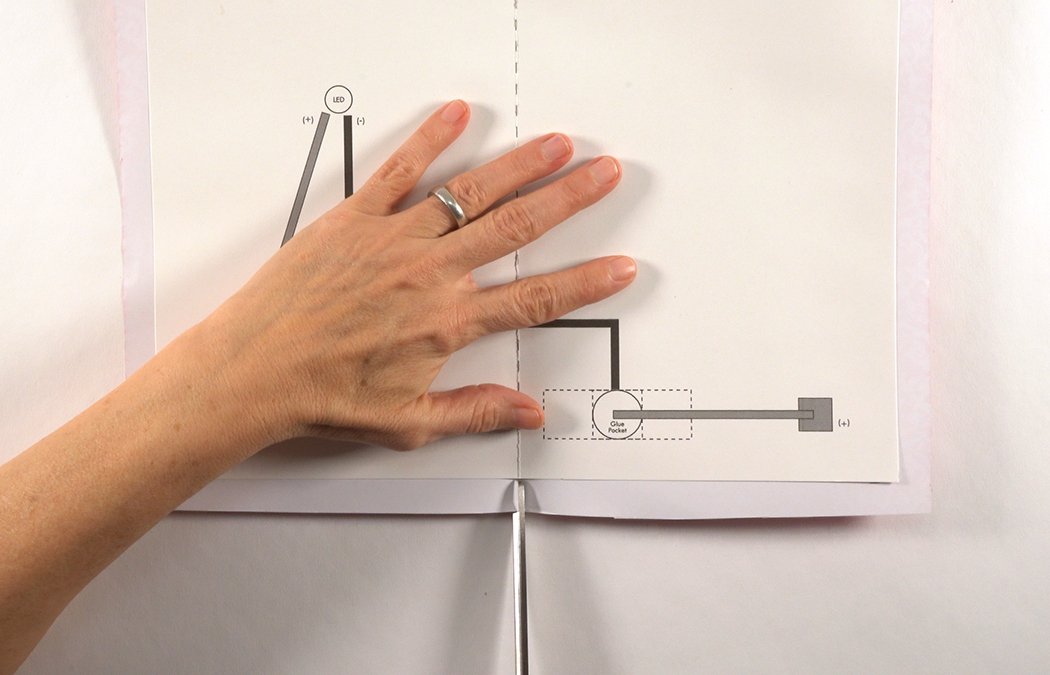
Make sure you can still see all your diagrams.
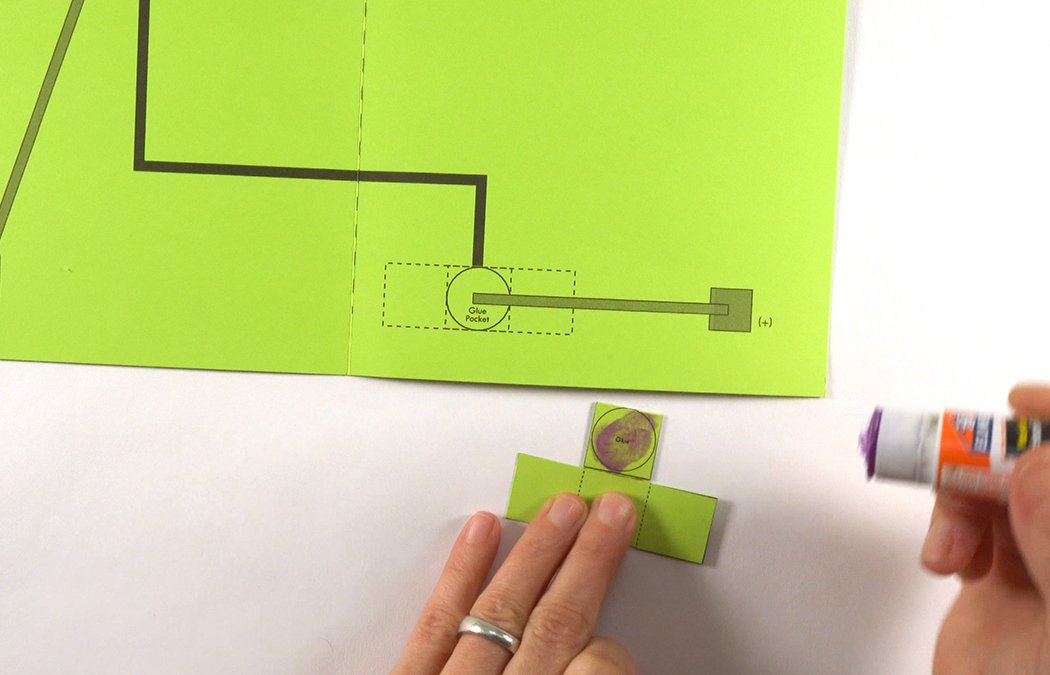
Get your battery box. Place glue in the circle.
Add the battery box to the circle on your template. Make sure the fold faces down towards the edge of the card.
Cut (3) 1/2" x 1/2" copper tape squares. Remove the white backing.
Place 1 copper square on the black (-) square inside the battery box.
Place 1 copper square on the grey (+) square diagram in the right corner.
Place the last copper square on the left grey (+) square diagram. The corner copper squares make switch pads. When you fold the card and touch them, your light will come on!
Cut a 1/2" x 1 1/4" copper rectangle.

Place it directly over the grey (+) rectangle inside the battery box. Make sure neither copper gets too close to the dashed fold line.
Wrap the end of the copper to the other side along the grey diagram.
Get a strip of the thinner 1/4" copper tape.
Stick the copper over the left copper switch pad. Make sure the copper overlaps.
Run the copper up the (+) line to the LED circle.
Trim the copper under the circle. Do NOT get copper inside the circle.
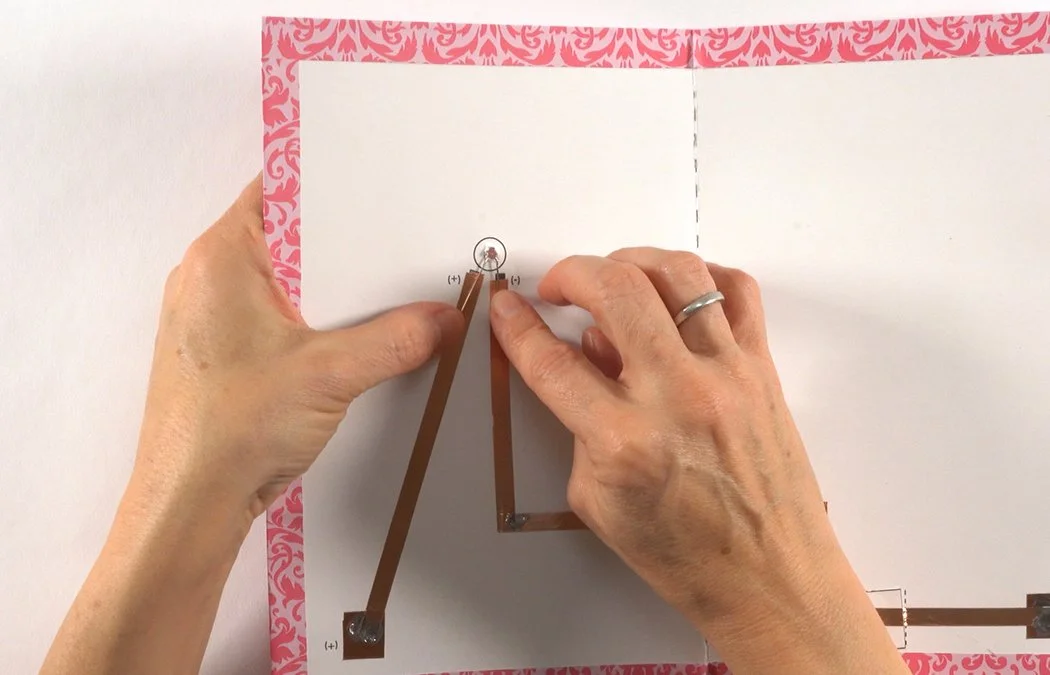
Get another piece of 1/4" copper tape. Remove a bit of backing.
Place the copper directly over the copper square inside the battery box.
Place copper over the (-) black line to the corner. Trim at the corner.
Overlap your copper at the corner. Run it along the (-) black line to your next corner.
Trim at the corner.
Overlap the copper at the corner.
Place copper over the black (-) line to the LED circle. Trim under the circle. Make sure the (-) copper does not touch the (+) copper line!
Rub and burnish your copper with a popsicle stick.
Do not worry about the last grey (+) line. You will finish this after you solder.
Your basic circuit is done. Go to the next slideshow to add tech and solder.
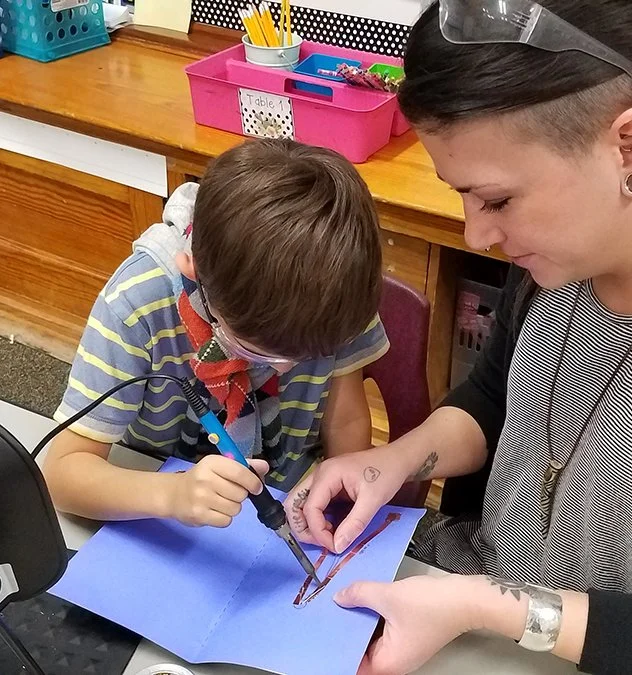
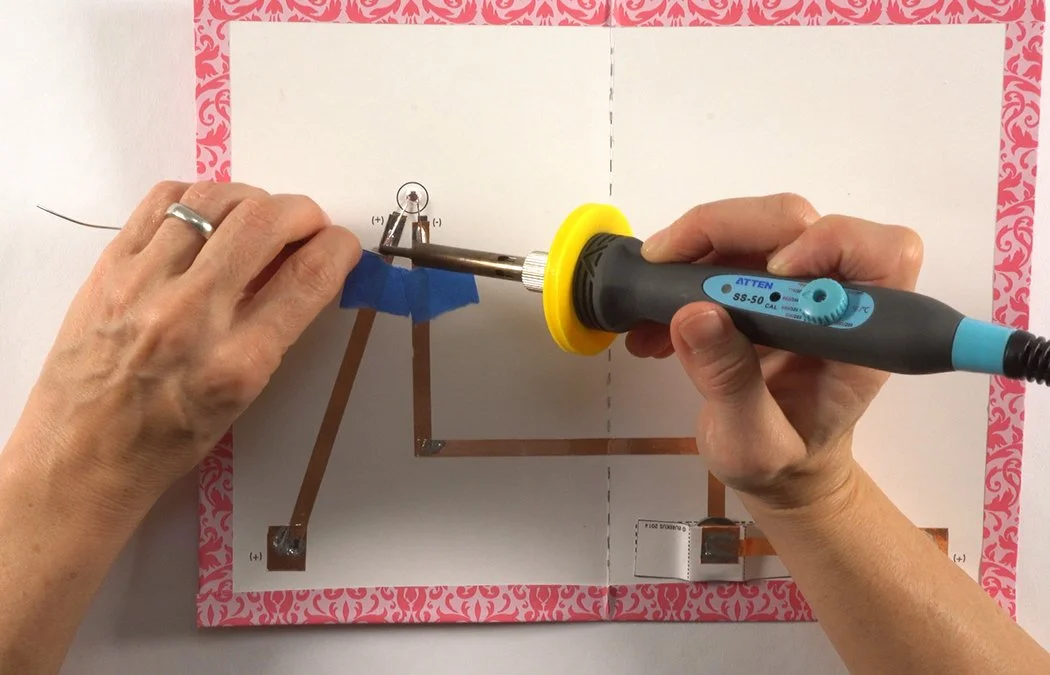
Slideshow 2: Solder & Add Technology
Add an LED light using cool soldering techniques.
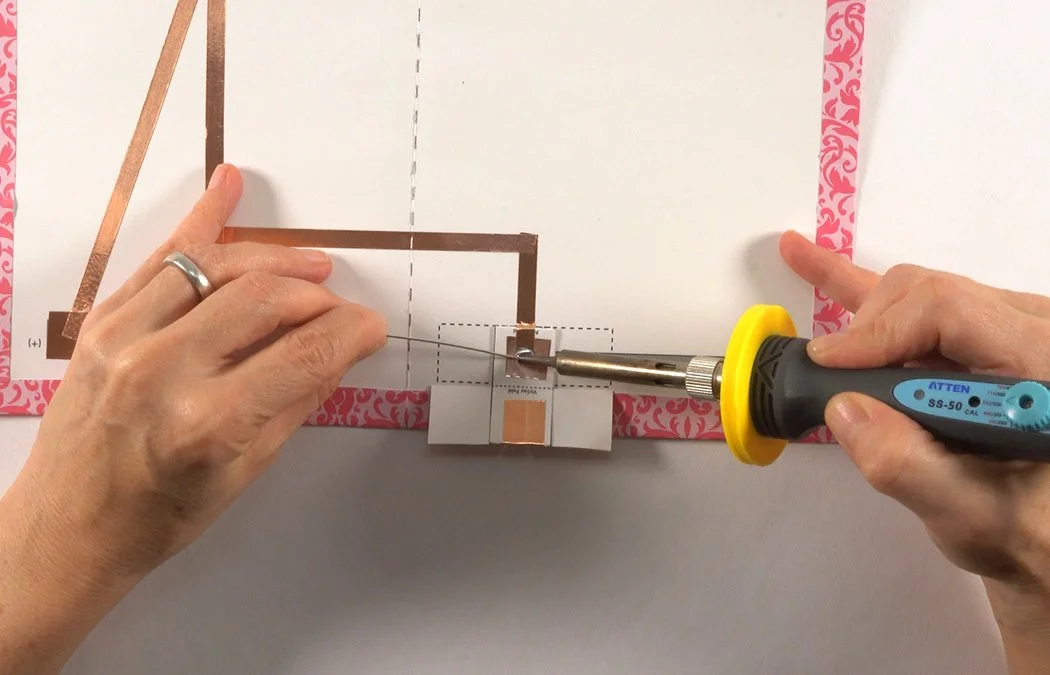
Follow this slideshow to add tech with soldering. Solder where the copper overlaps inside the battery box.
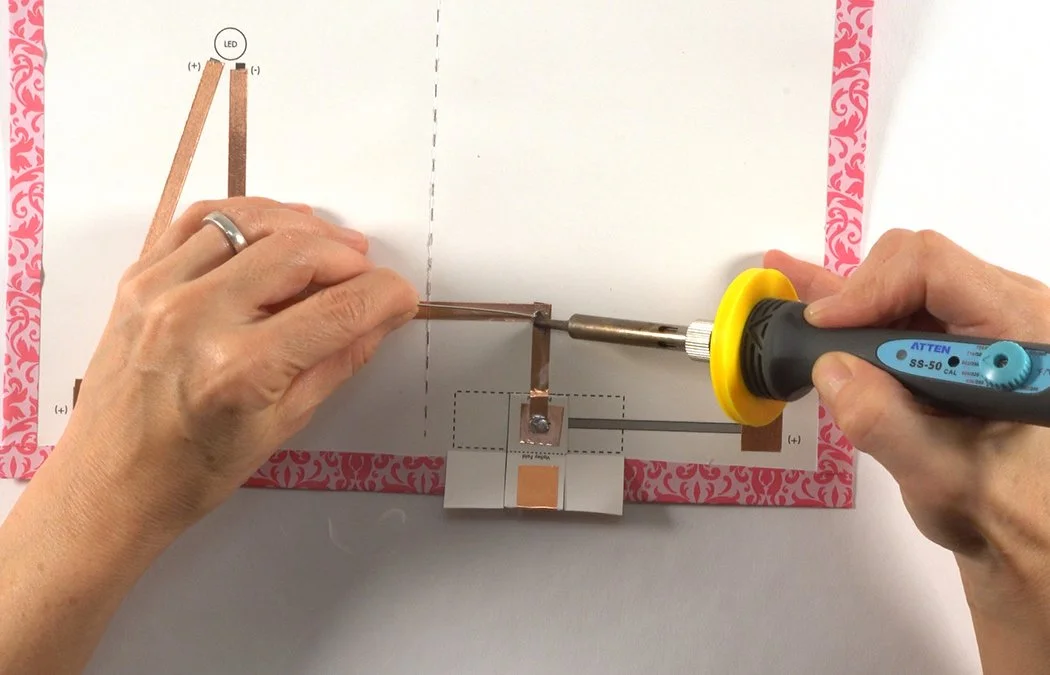
Solder where the copper overlaps at corner above the battery box.
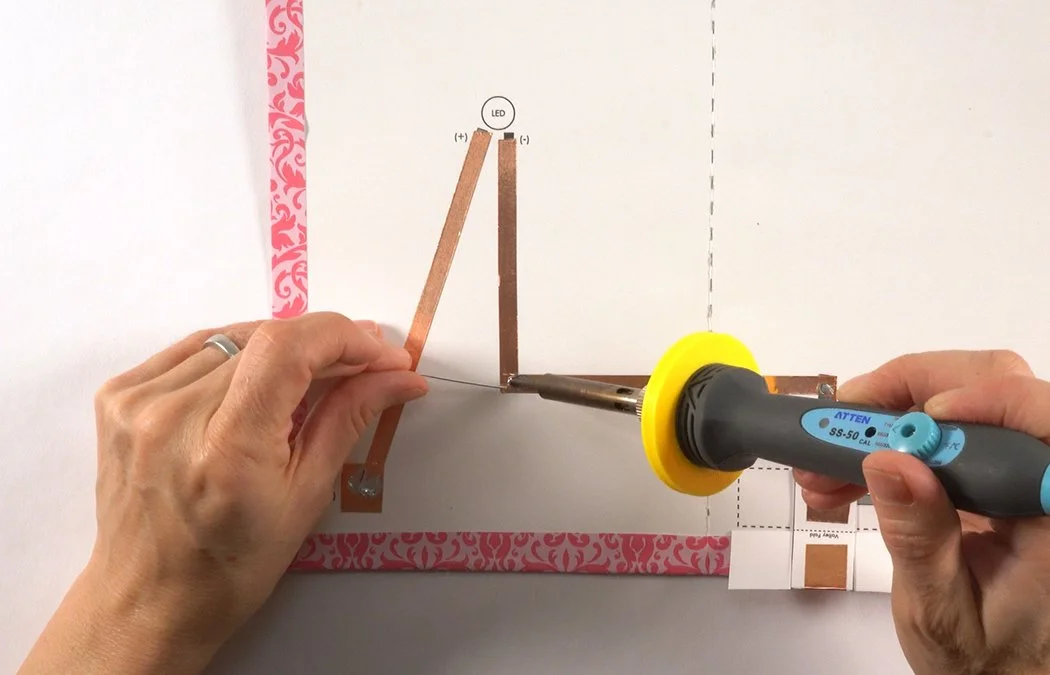
Solder where the copper overlaps at corner under the LED light.
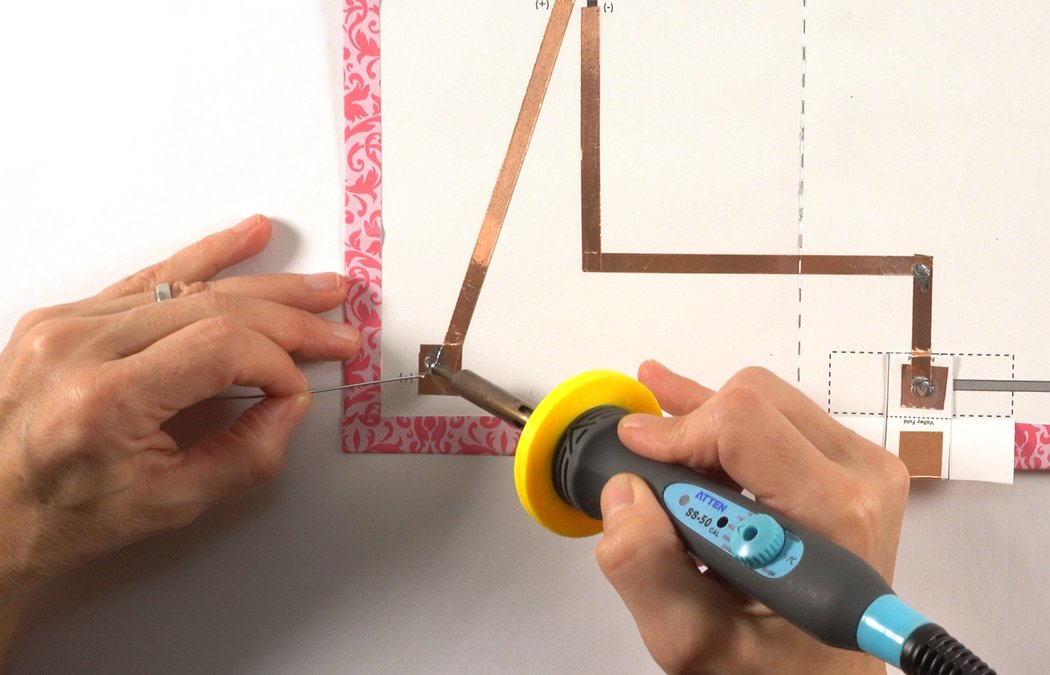
Solder where the copper overlaps at the left corner switch pad.
Make sure there are no rips or tears in your copper. If there are, add a copper tape "bridge" and solder to repair.
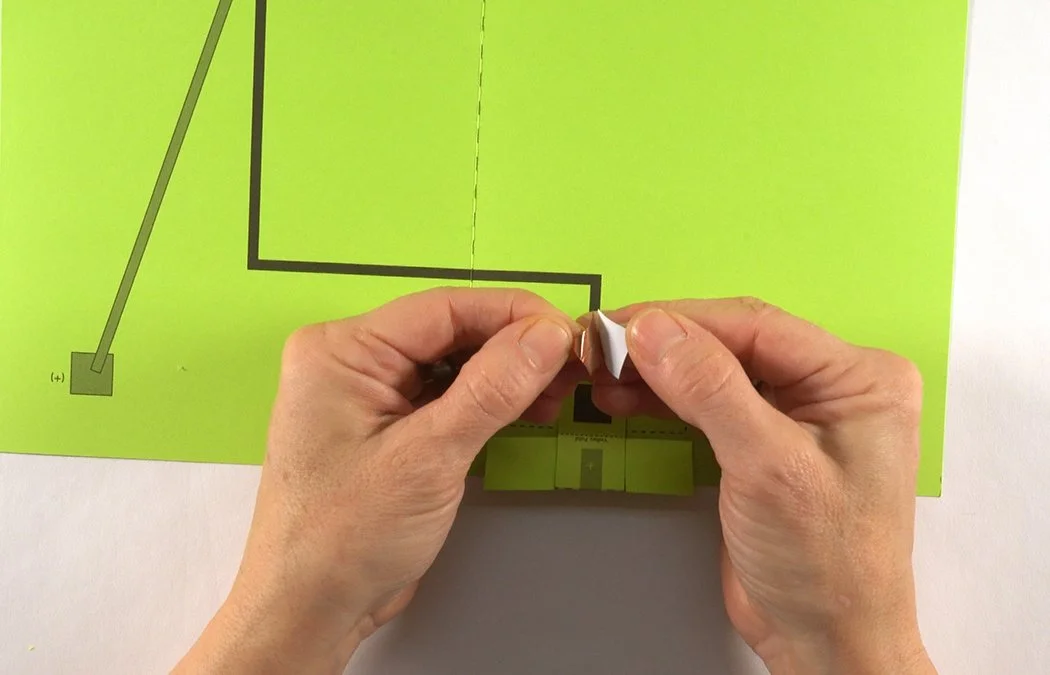
Get your CR2032 battery. Place it over the copper square inside the battery box, (+) side up.
Fold the T-tab over the battery to make a pocket.
Hold the battery tightly in the pocket. Add hot glue under 1 paper tab.
Press the tab into the glue to make a pocket.
Lift the other tab and add hot glue.
Press down the tab to make a tight pocket. If your pocket is not tight enough, insert a folded piece of copper or metal paperclip to increase conductivity.
Get a 1/4" copper strip. Remove a bit of backing and stick it to the copper on the outside of the battery pocket.
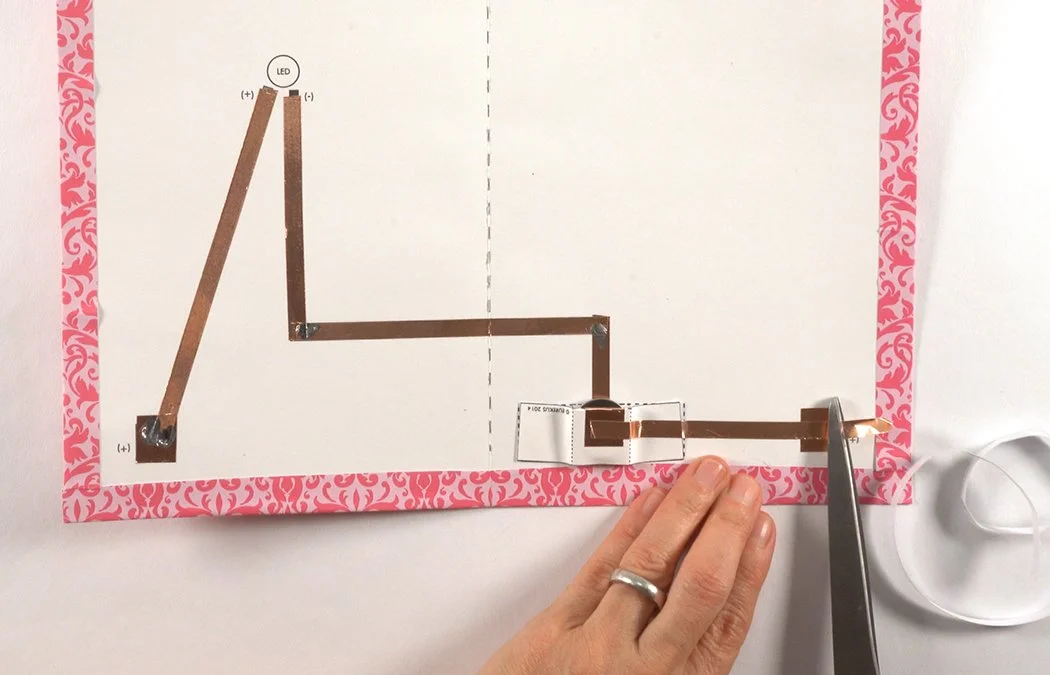
Place the copper over your last grey (+) line. Stick it to the right corner copper switch pad. Trim the copper.
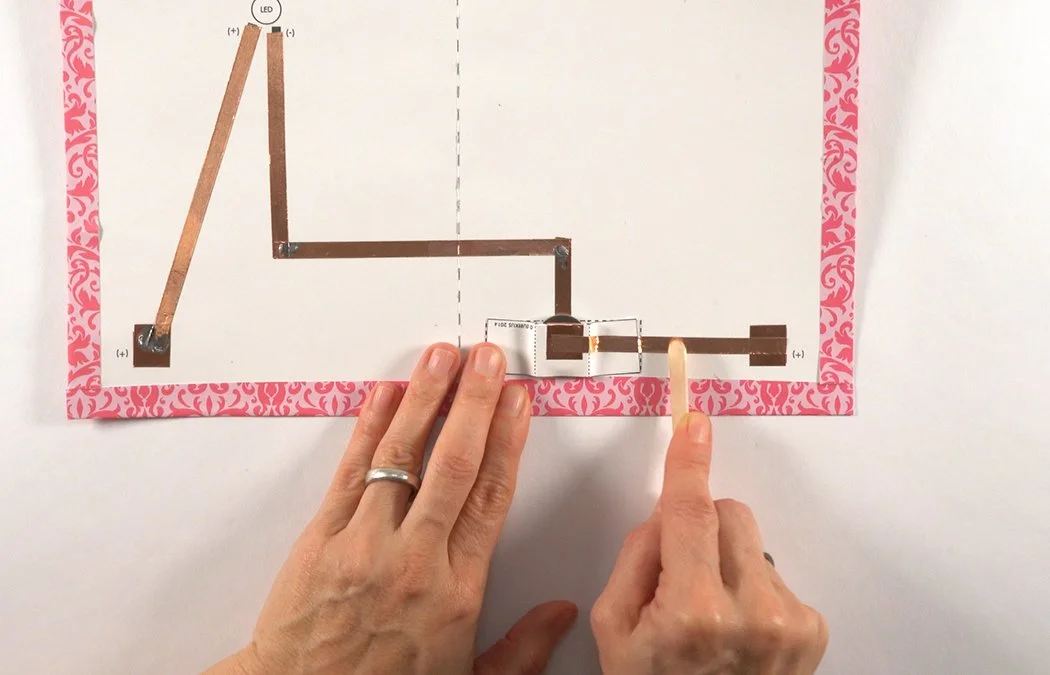
Smooth and burnish your copper with a popsicle stick.
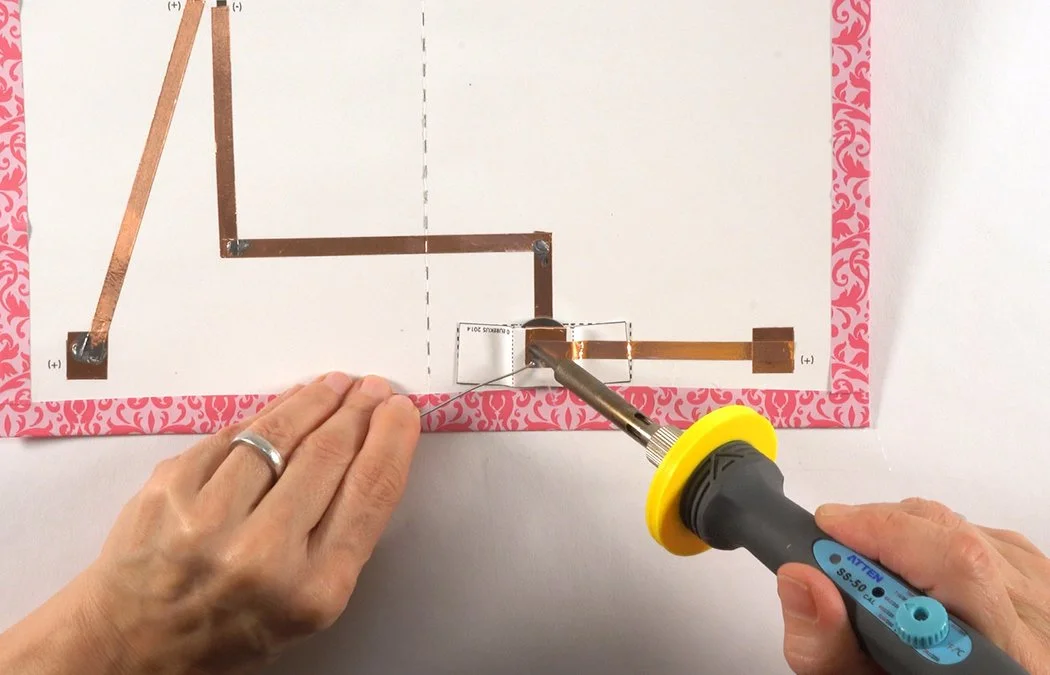
Solder where the copper overlaps on the outside of the battery box.
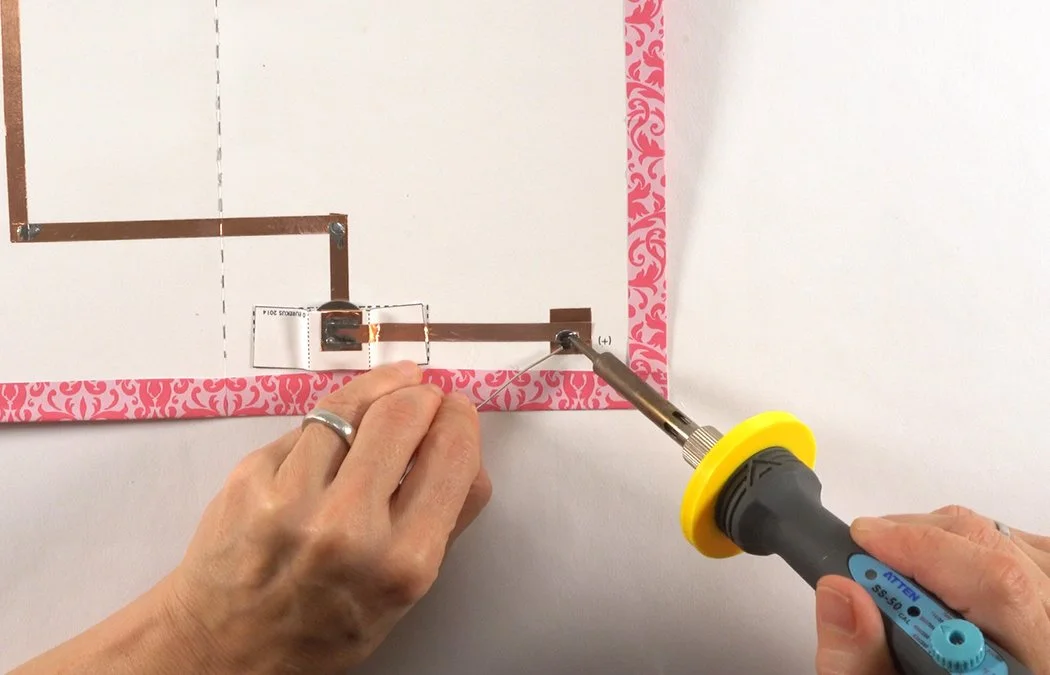
Solder where the copper overlaps on the right corner switch pad.
Check for breaks and solder anywhere the copper has been cut.
Poke a hole in the LED circle diagram with a thumb tack or needle.
Insert your pencil and twist to make your hole bigger.
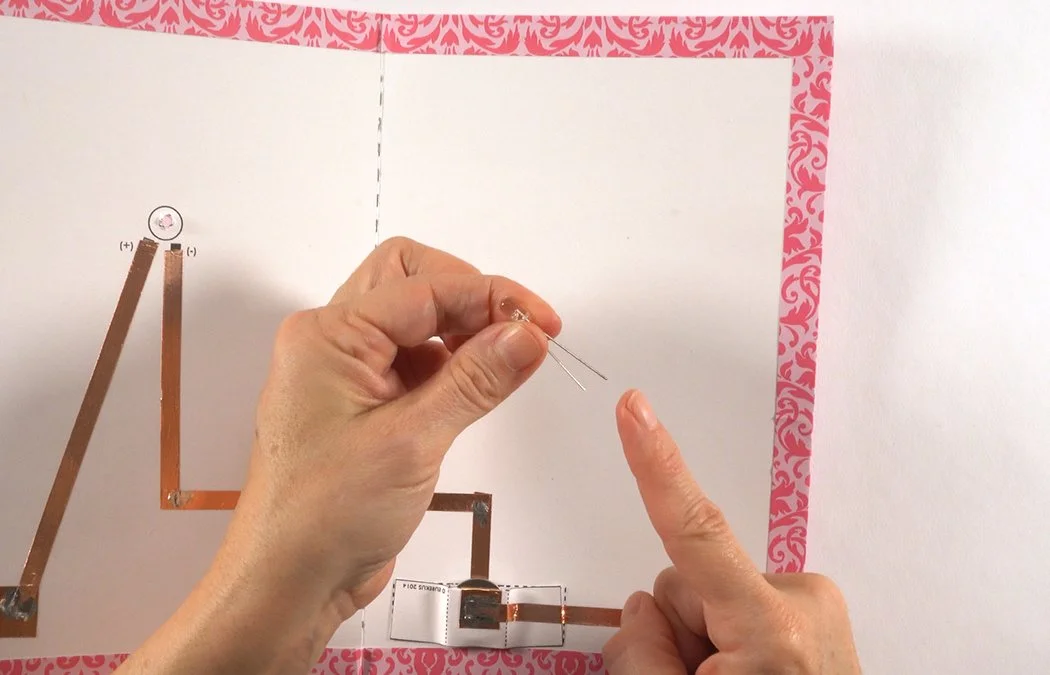
Get an LED light. The longer wire lead is (+).

You can mark the LED lead with a Sharpie to keep track.
Insert the LED from the front of the card.

Twist the leads so the (+) lead is facing the (+) copper.
Bend both leads down to the copper. The (+) lead must touch the (+) copper. The (-) lead must touch the (-) copper.
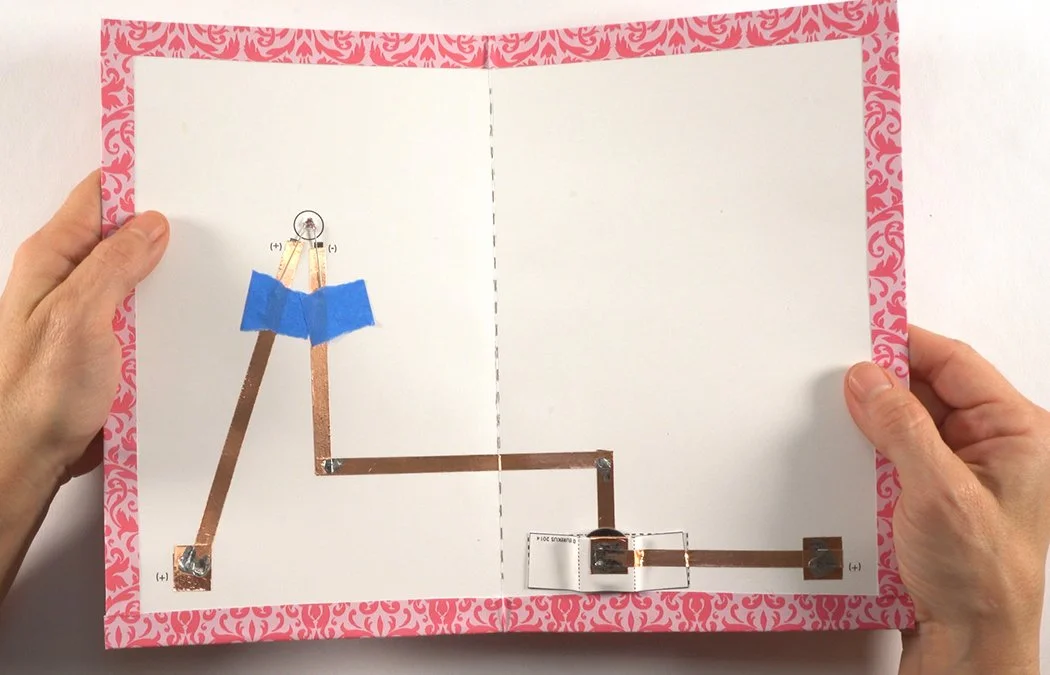
Secure the leads with blue tape or masking tape.
Solder each lead to the copper tape.
Make sure the leads are facing the right direction and are secured to the copper. Make sure the (+) and (-) copper do NOT touch.
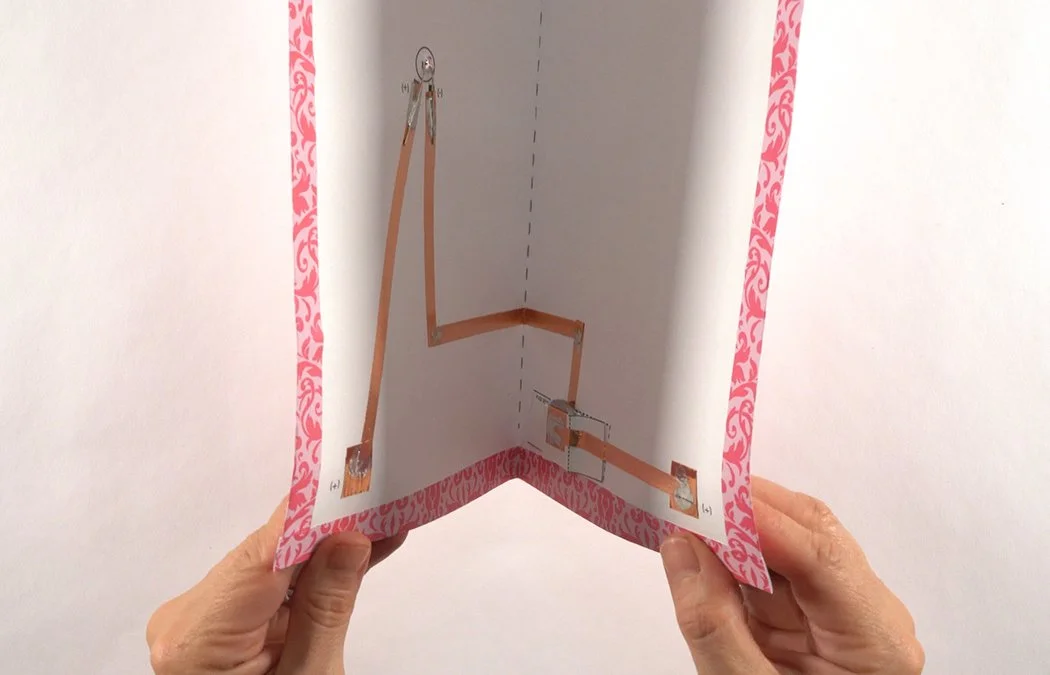
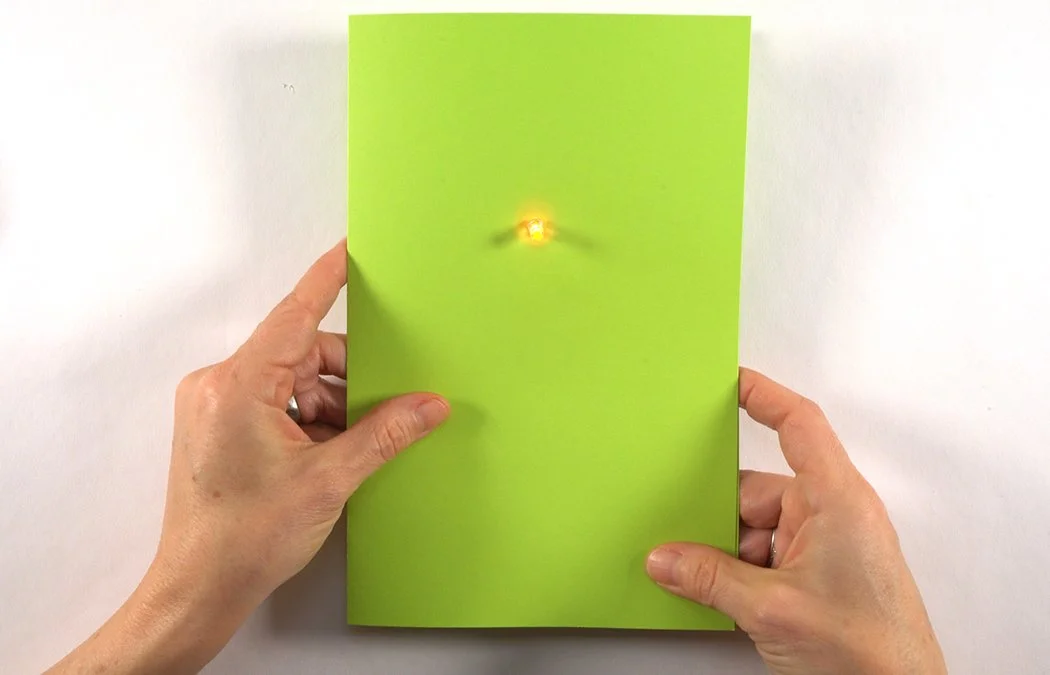
Close your card so that the corner switch pads touch.
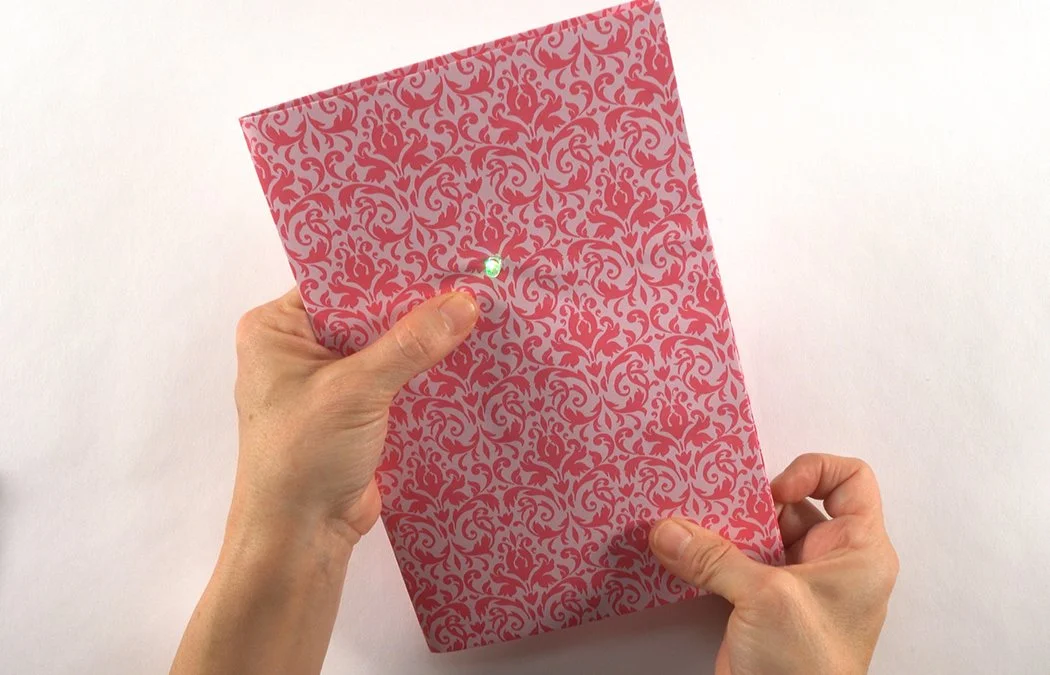
Your light should turn on. If it doesn't, most likely your battery box is loose. Press it to check. Look at our Trouble-Shooting Tips, too.

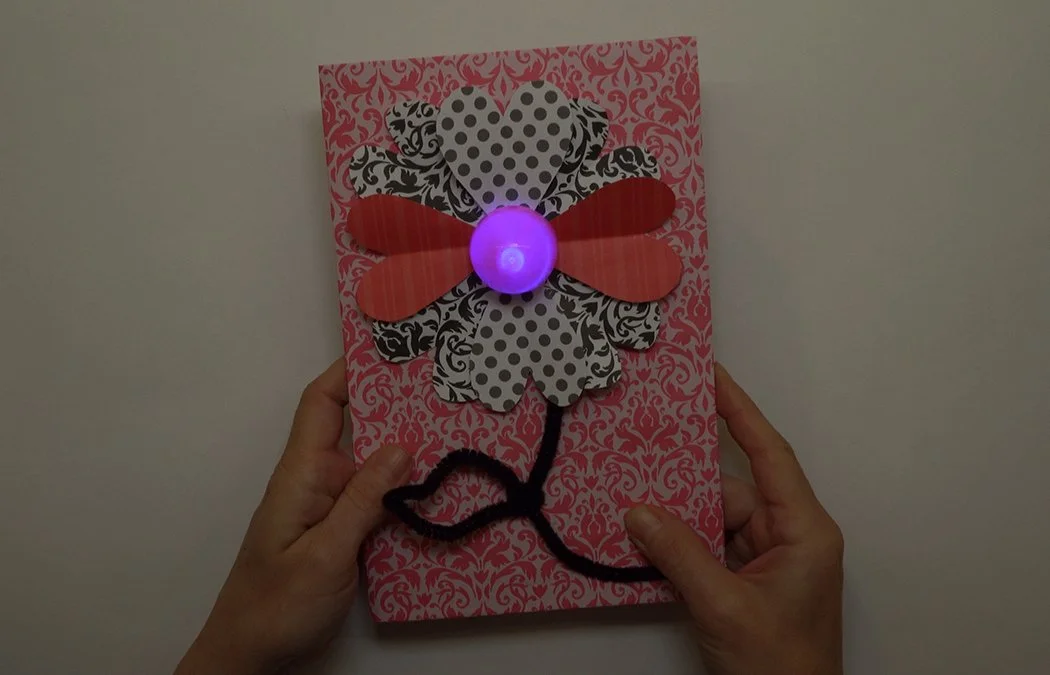
Transparent items like Easter Eggs and straws make great additions and make your light glow brighter.
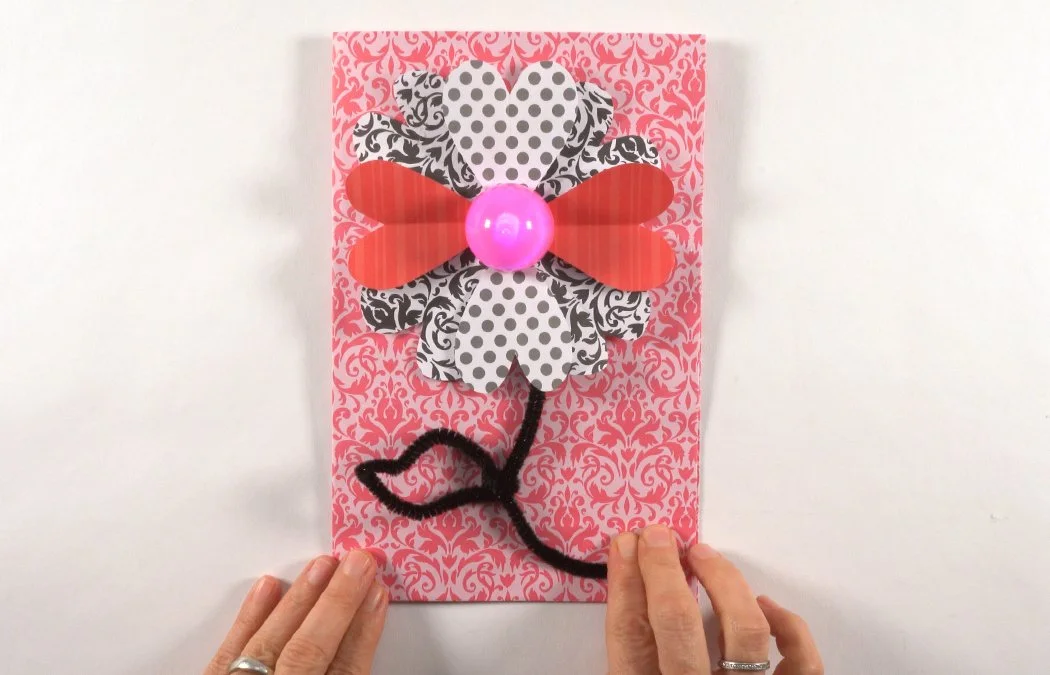
Decorate your card and add cool elements. Be creative!
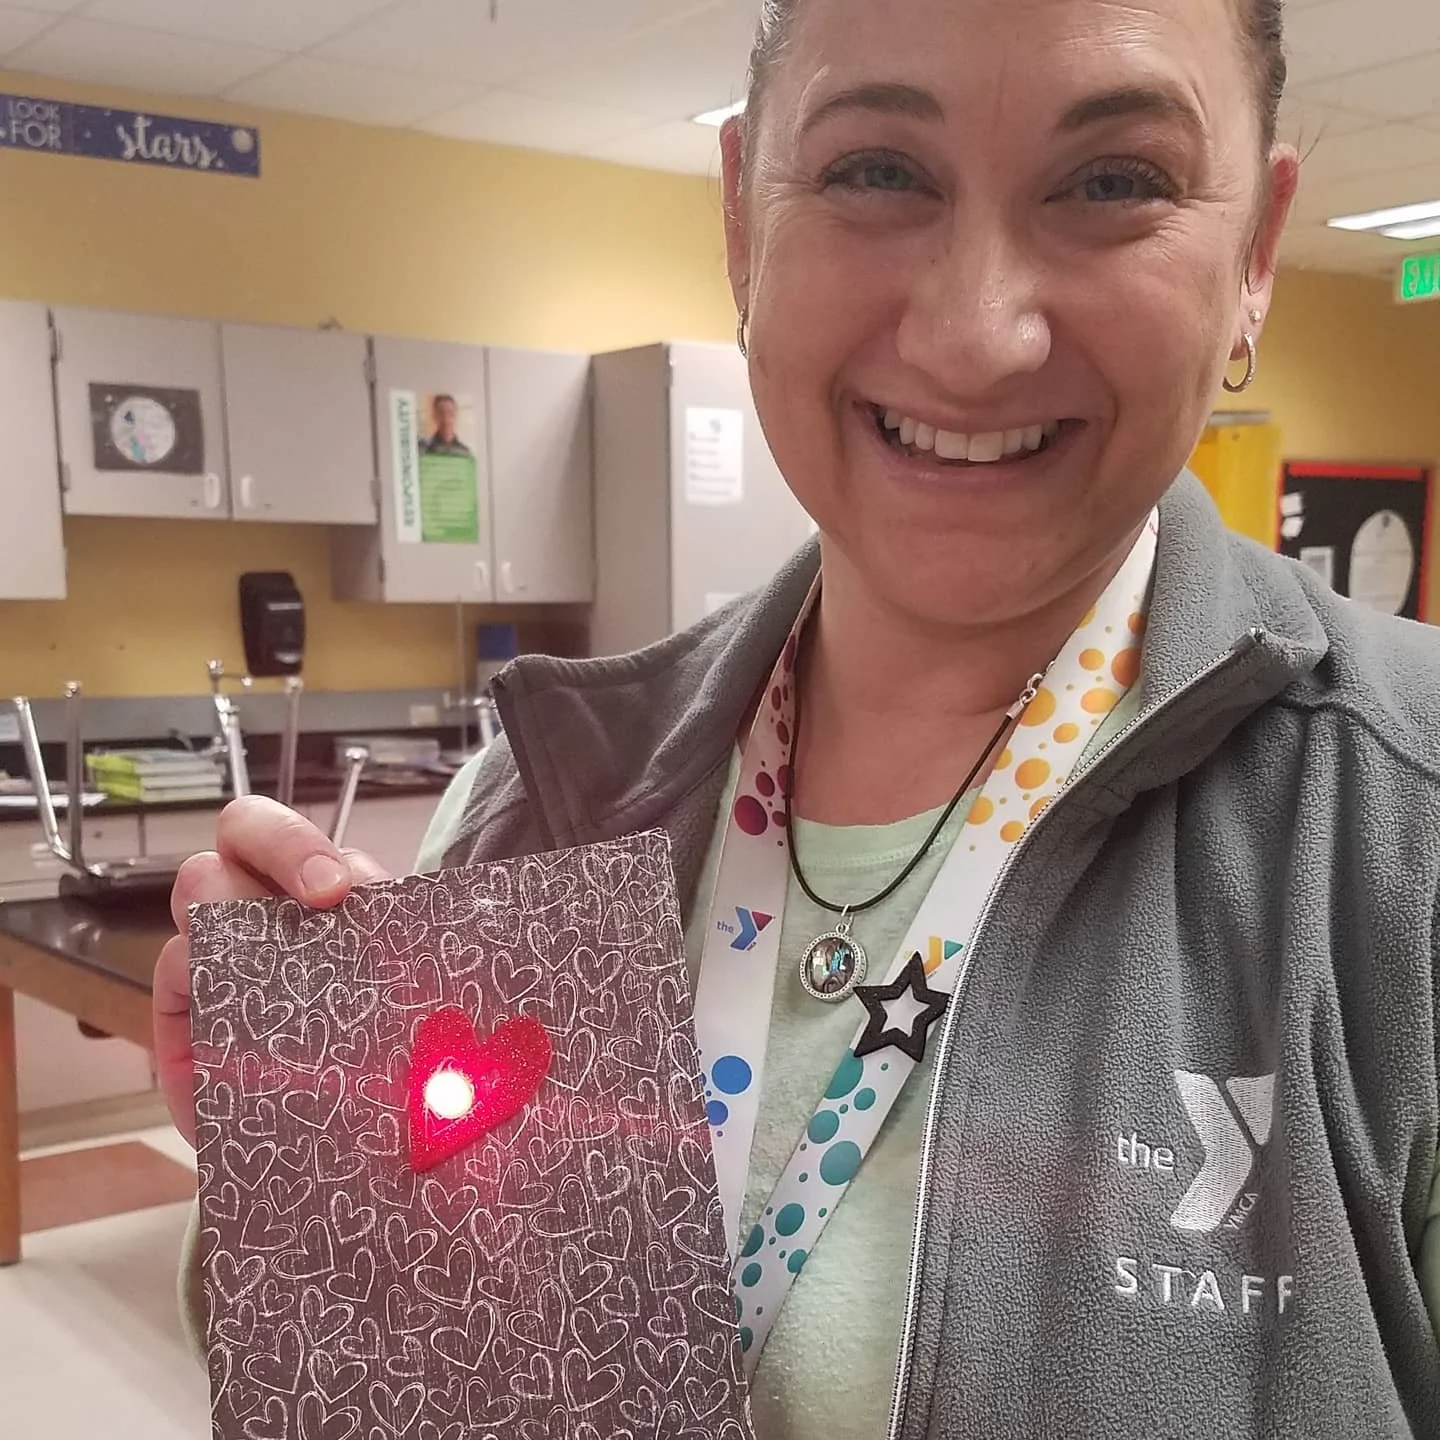
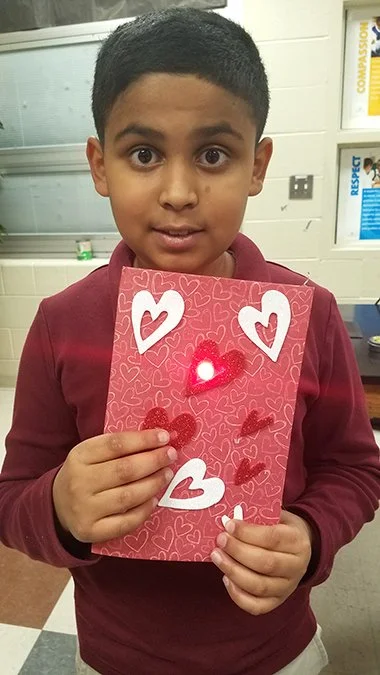
Show, share & celebrate your work!
Trouble-Shooting Tips

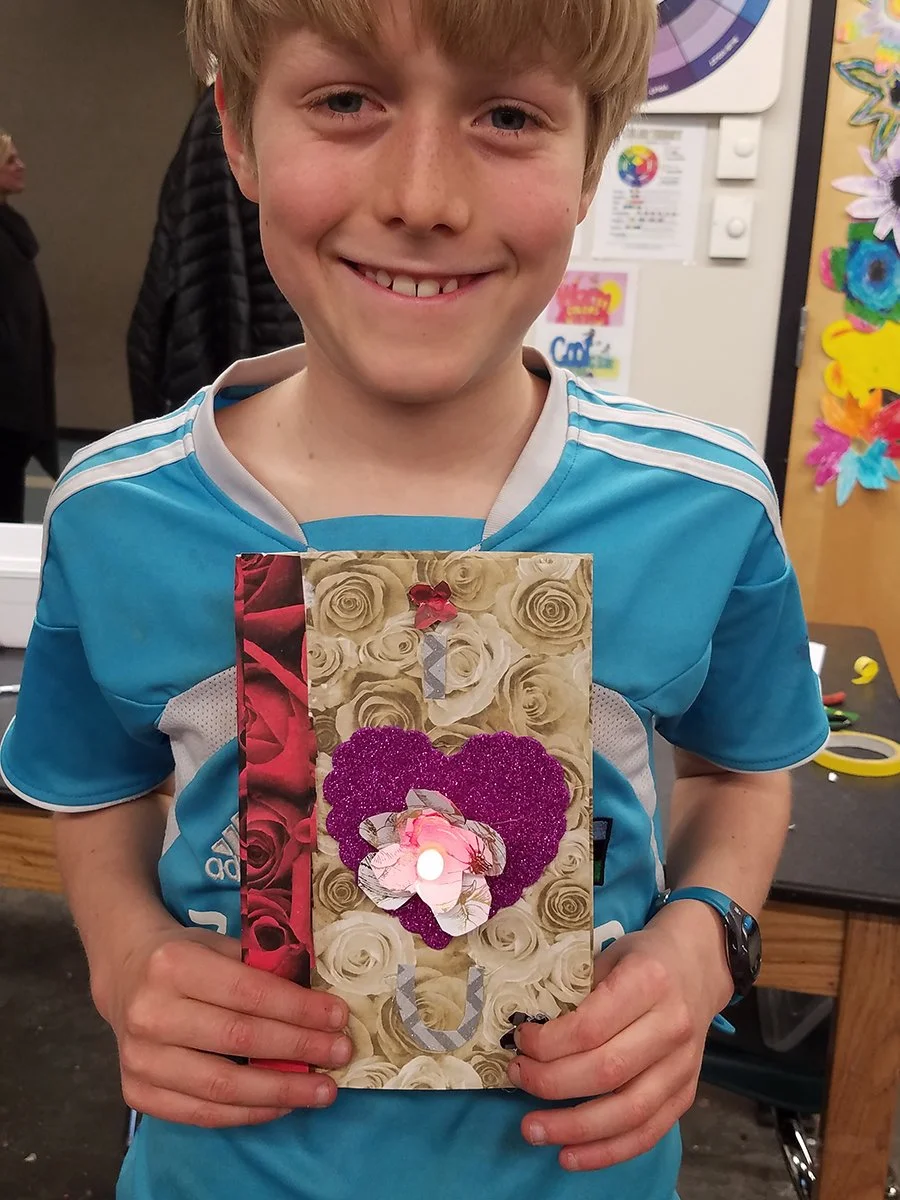
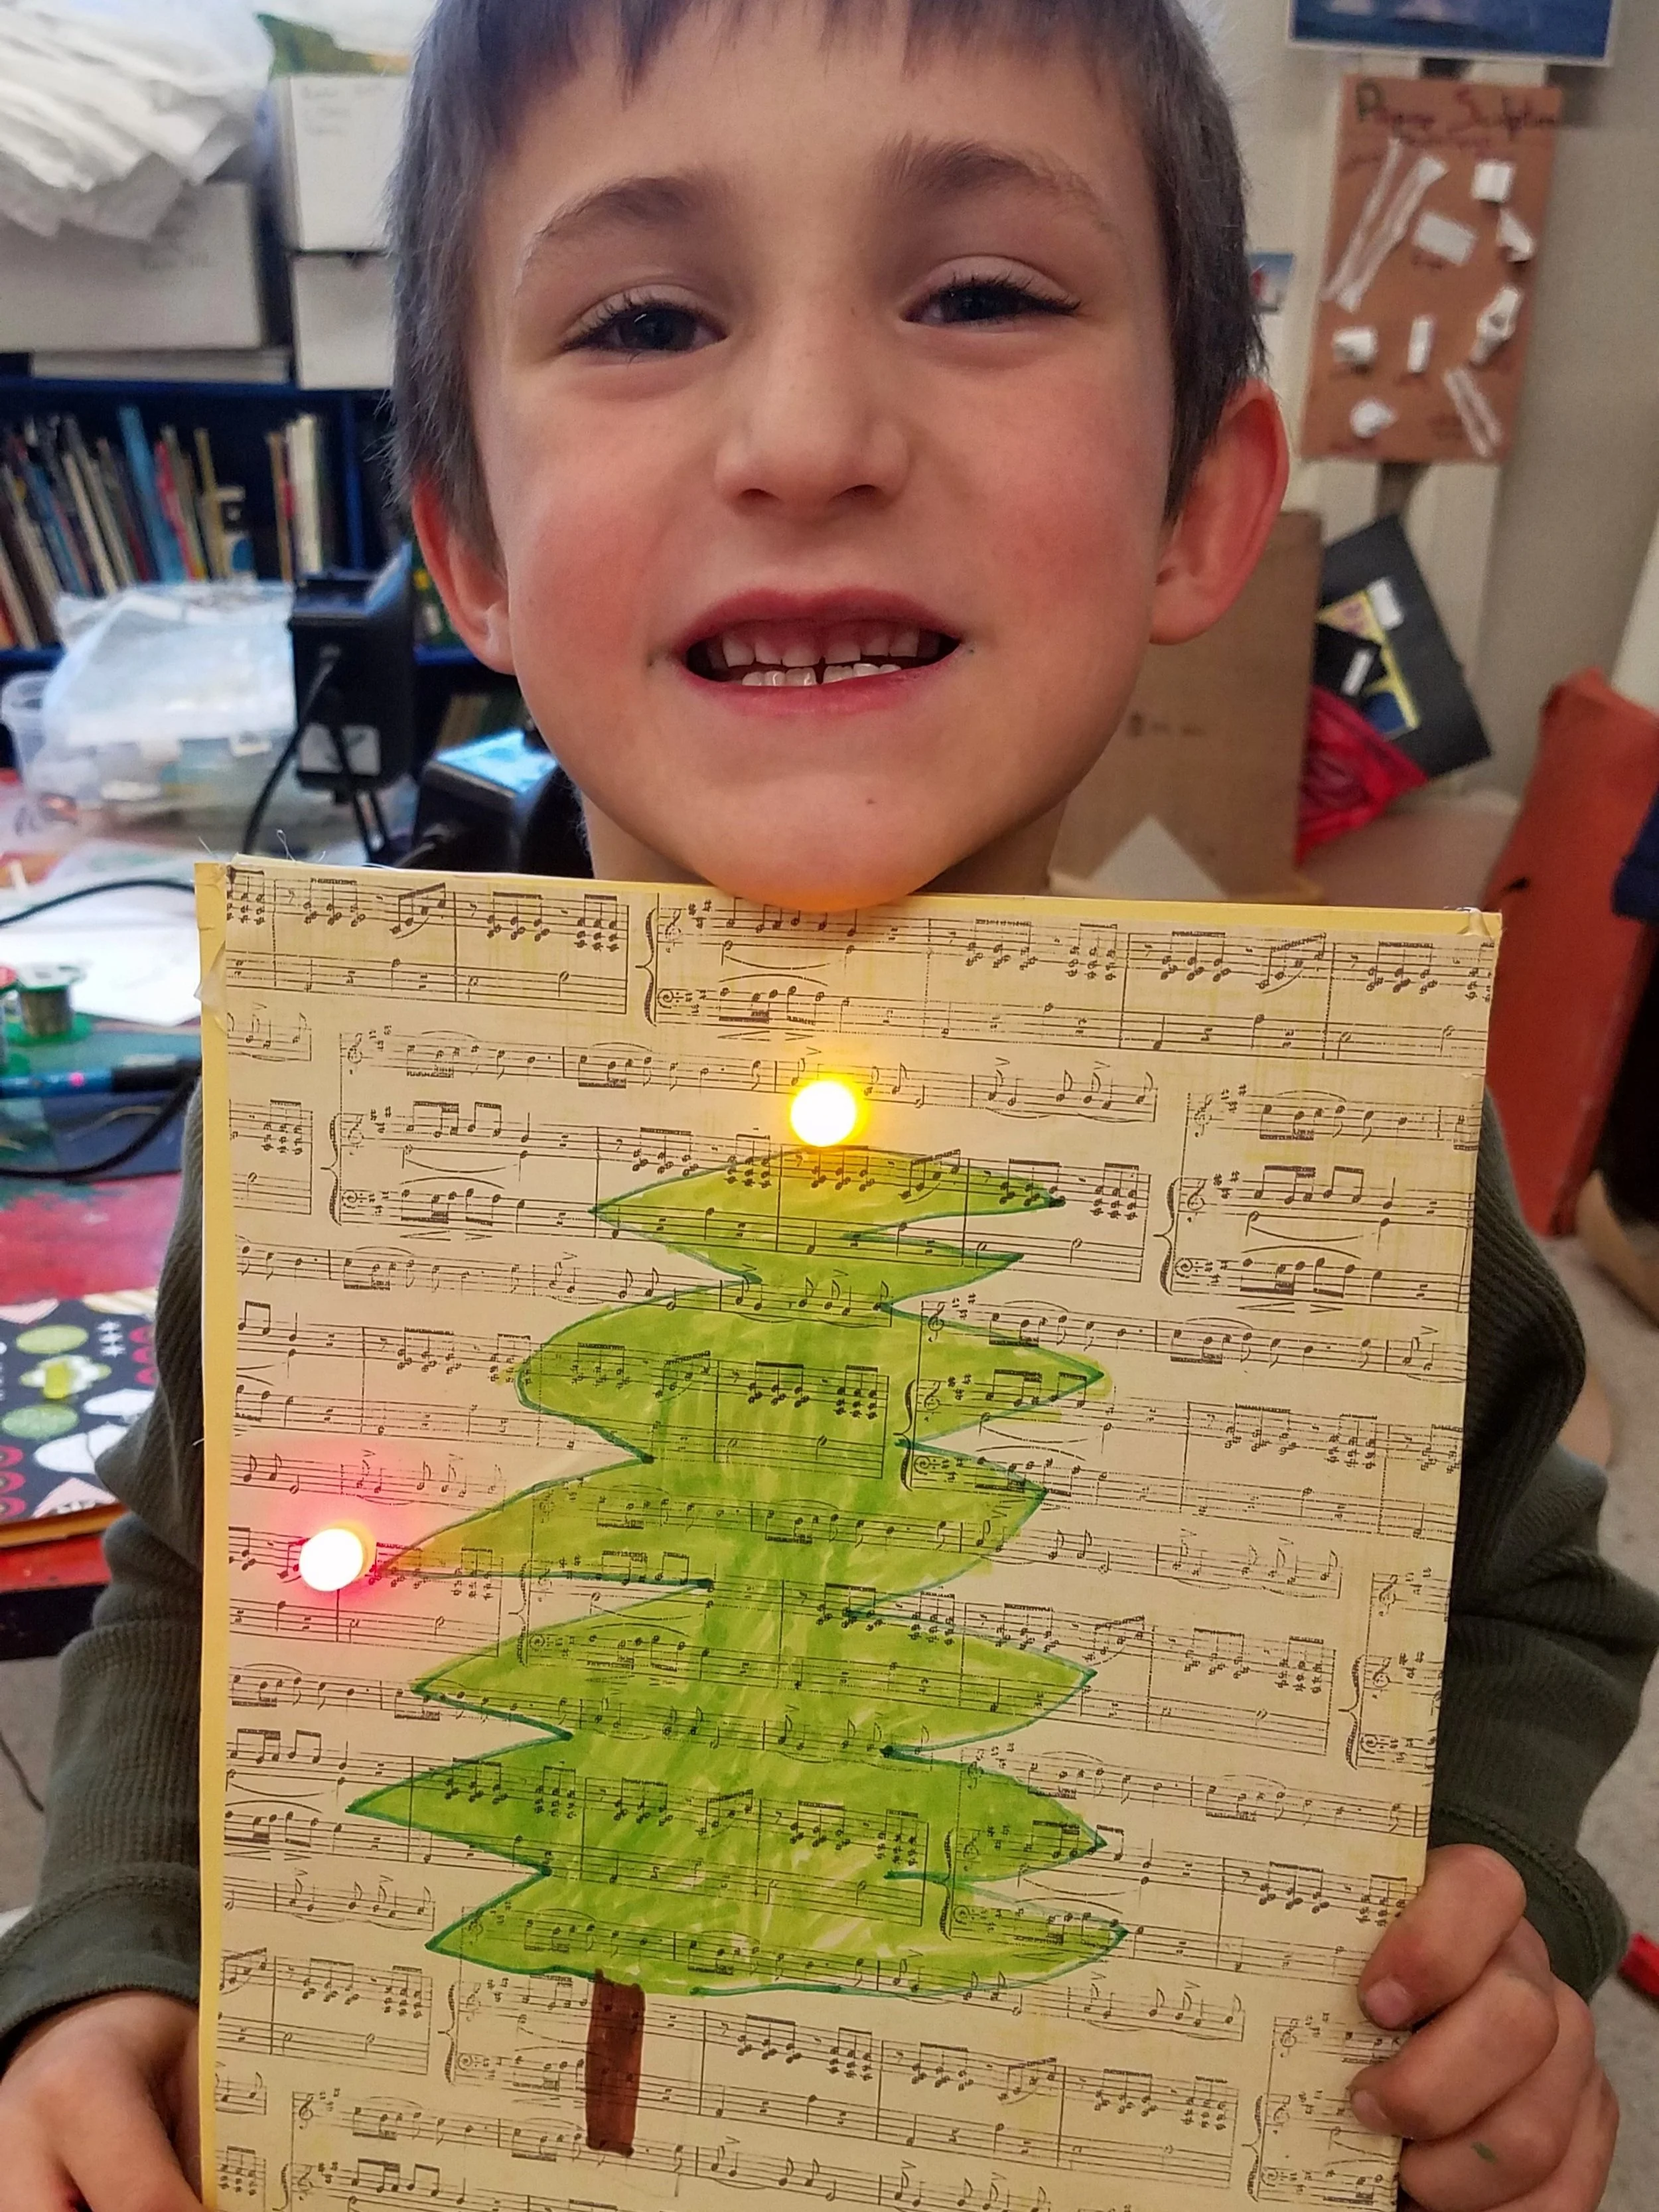
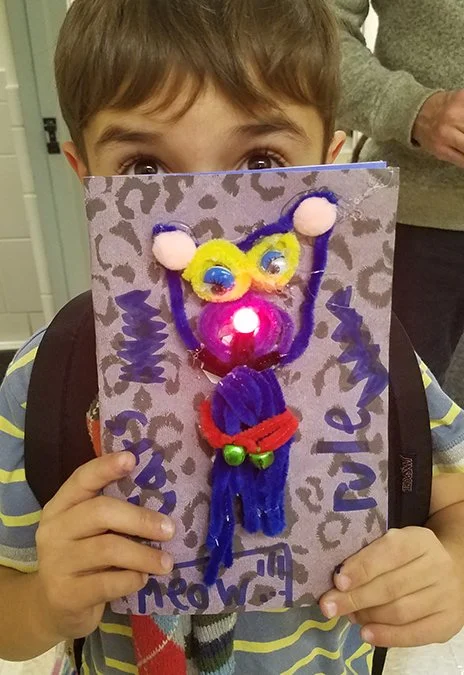
STEAM In Action
Check out these awesome examples of student work!
COPYRIGHT NOTICE:
This curriculum is developed and owned by Eurekus LLC. The instructional webpage and any associated materials are for use by our customers only. No portion of the curricula, lessons, templates and instructional materials may be copied, shared or distributed without the expressed written permission of Eurekus. © EUREKUS LLC, 2018