
NASA’S SIMPLE MACHINES SHOEBOX ROVER
Explore Mission Design & Engineering
Investigate mission design and engineering through kinetic making! Explore simple & complex machines while crafting rovers & instruments. Design internal automata systems to drive motions and make creations move. This program is packed with skill-building ~ mechanical engineering, design-thinking, geometry, measurement and storytelling. Designed with all learners in mind, you only need basic & up-cycled supplies.
Designed by Eurekus & McREL International for NASA’s Discovery & New Frontiers Programs
-
K-12th Grade
Adult Learners
-
4-6 hours depending on how you implement the art project
Chunk out in phases line the video tutorials below
-
Space Science
Engineering
Math
Art
Storytelling
-
In-class, Hybrid or Online Learning
Implementation Steps


Overview
-
Watch the Introductory videos to explore how Shoebox Rover activates engineering and the design process in exciting, authentic ways.
Using basic & and re-purposed materials, this program was created to inspire robust and equitable discovery for all learners & spaces. Highly flexible and scalable, explore our videos and resources to adapt this program to spark your unique community.
-
This program has an extensive suite of teaching tools. Download the planners, templates and resources below.
Then follow our instructional Maker videos as you implement the program. We recommend chunking out the activity in multiple phases like the tutorials.
-
Download the Supply Planner below. Shoebox Rover uses many basic cooking and craft materials for rigorous engineering learning. Feel free to collect your own up-cycled supplies and be inventive with your engineering.
Our special marking templates allow you to use any size shoebox with a lid. We’ve included links to order supplies in the planner.
-
You can customize this program to ignite content and scale for diverse learners. Here are some ideas of how educators have adapted the lessons.
Pick a NASA world and design a Shoebox Rover to explore key science questions.
Work in small groups to design rovers in teams.
Pick a place on Earth to investigate and design terrestrial rovers.
Build a special summer camp immersive experience.
Augment STEM classes & Makerspaces while diving deep into the Design Process.
Activate a semester-long simple machines unit while building rovers in phases. Augment with our Simply Machines projects, research, writing & experiments.
Excite geometry investigations while using our 3D shape templates to design rover instruments.
Incorporate circuits, LEDs, motors and electronics for middle & high school learners.
Scaffold with NASA’s Art & The Cosmic Connection to ground your investigation in planetary science inquiry.
Scaffold with our Goldilock’s Planet Project to activate Earth science discovery.
Connect engineering systems to human senses ~ How do missions see, hear, speak, move & touch?
-
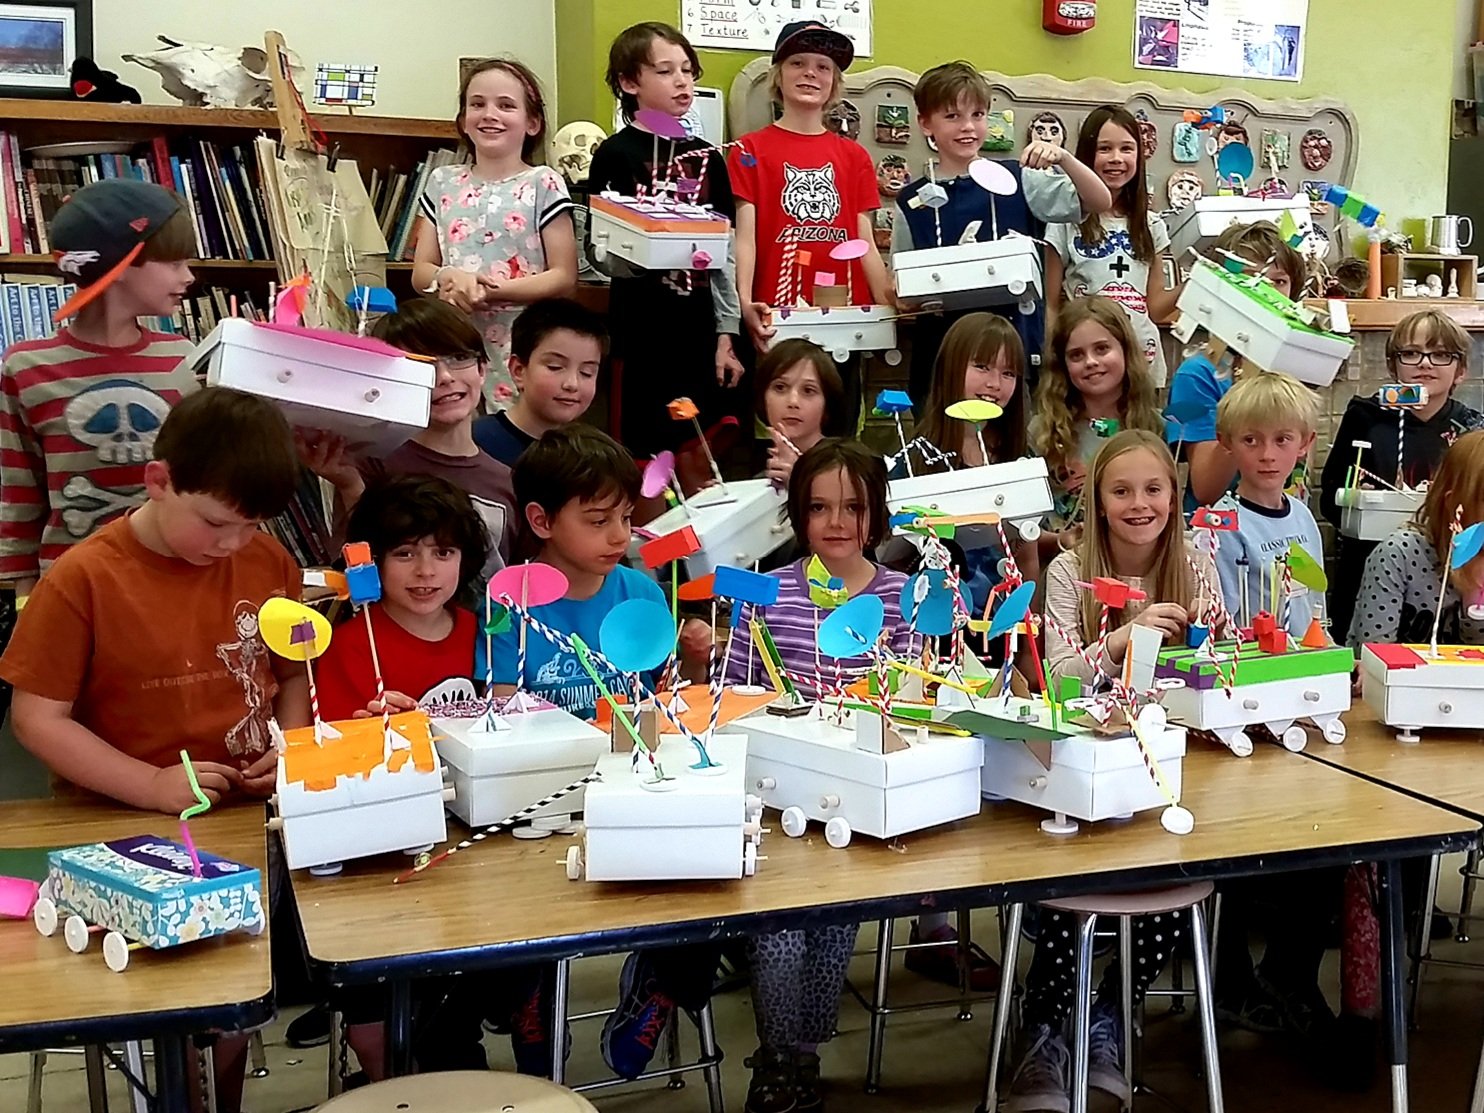
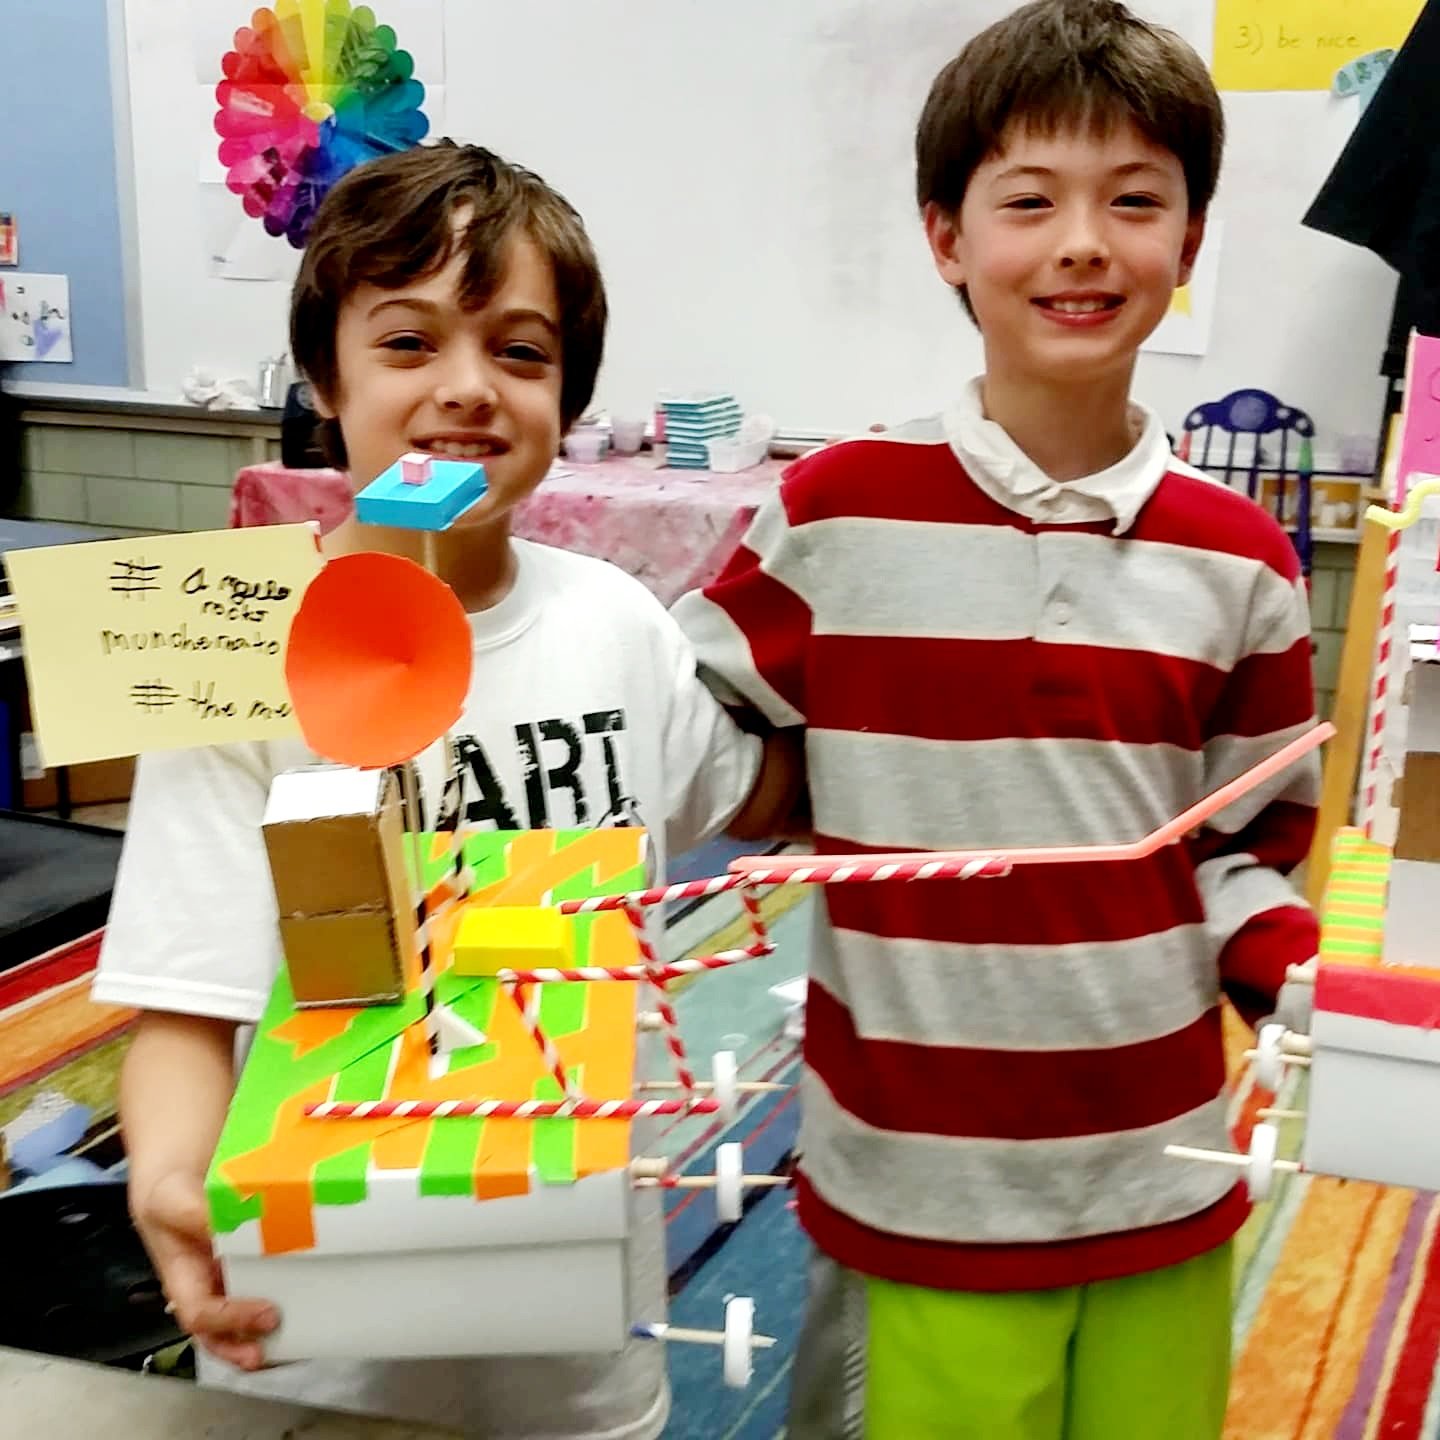
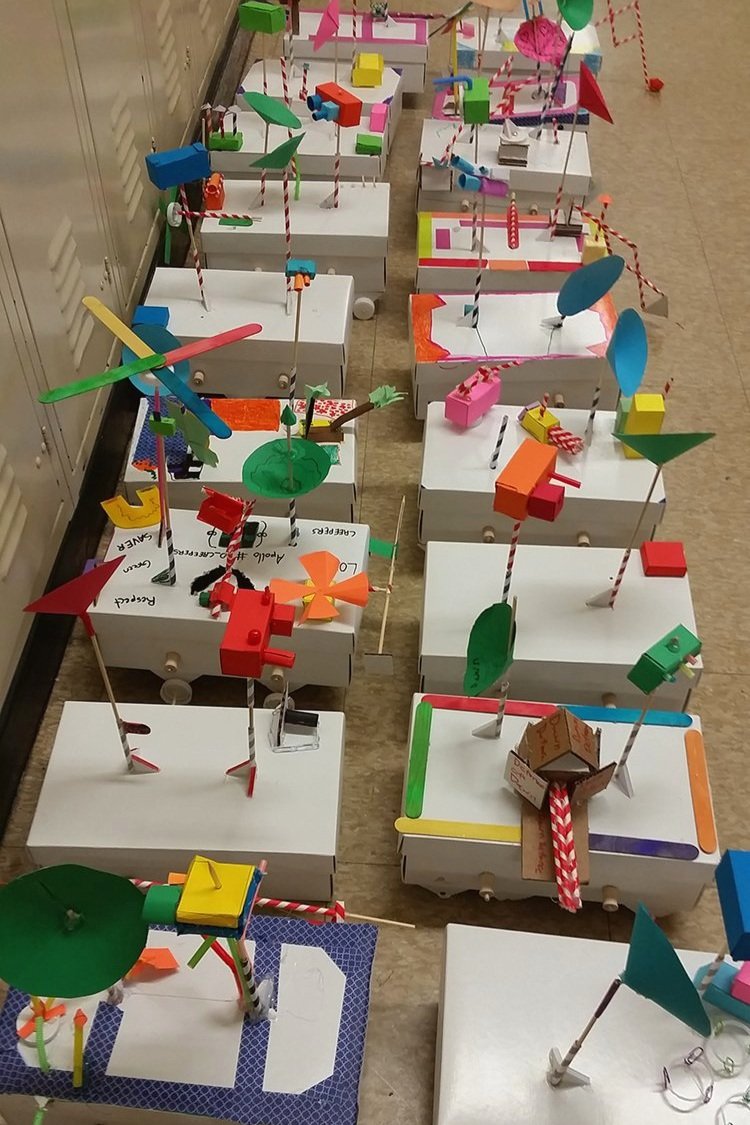
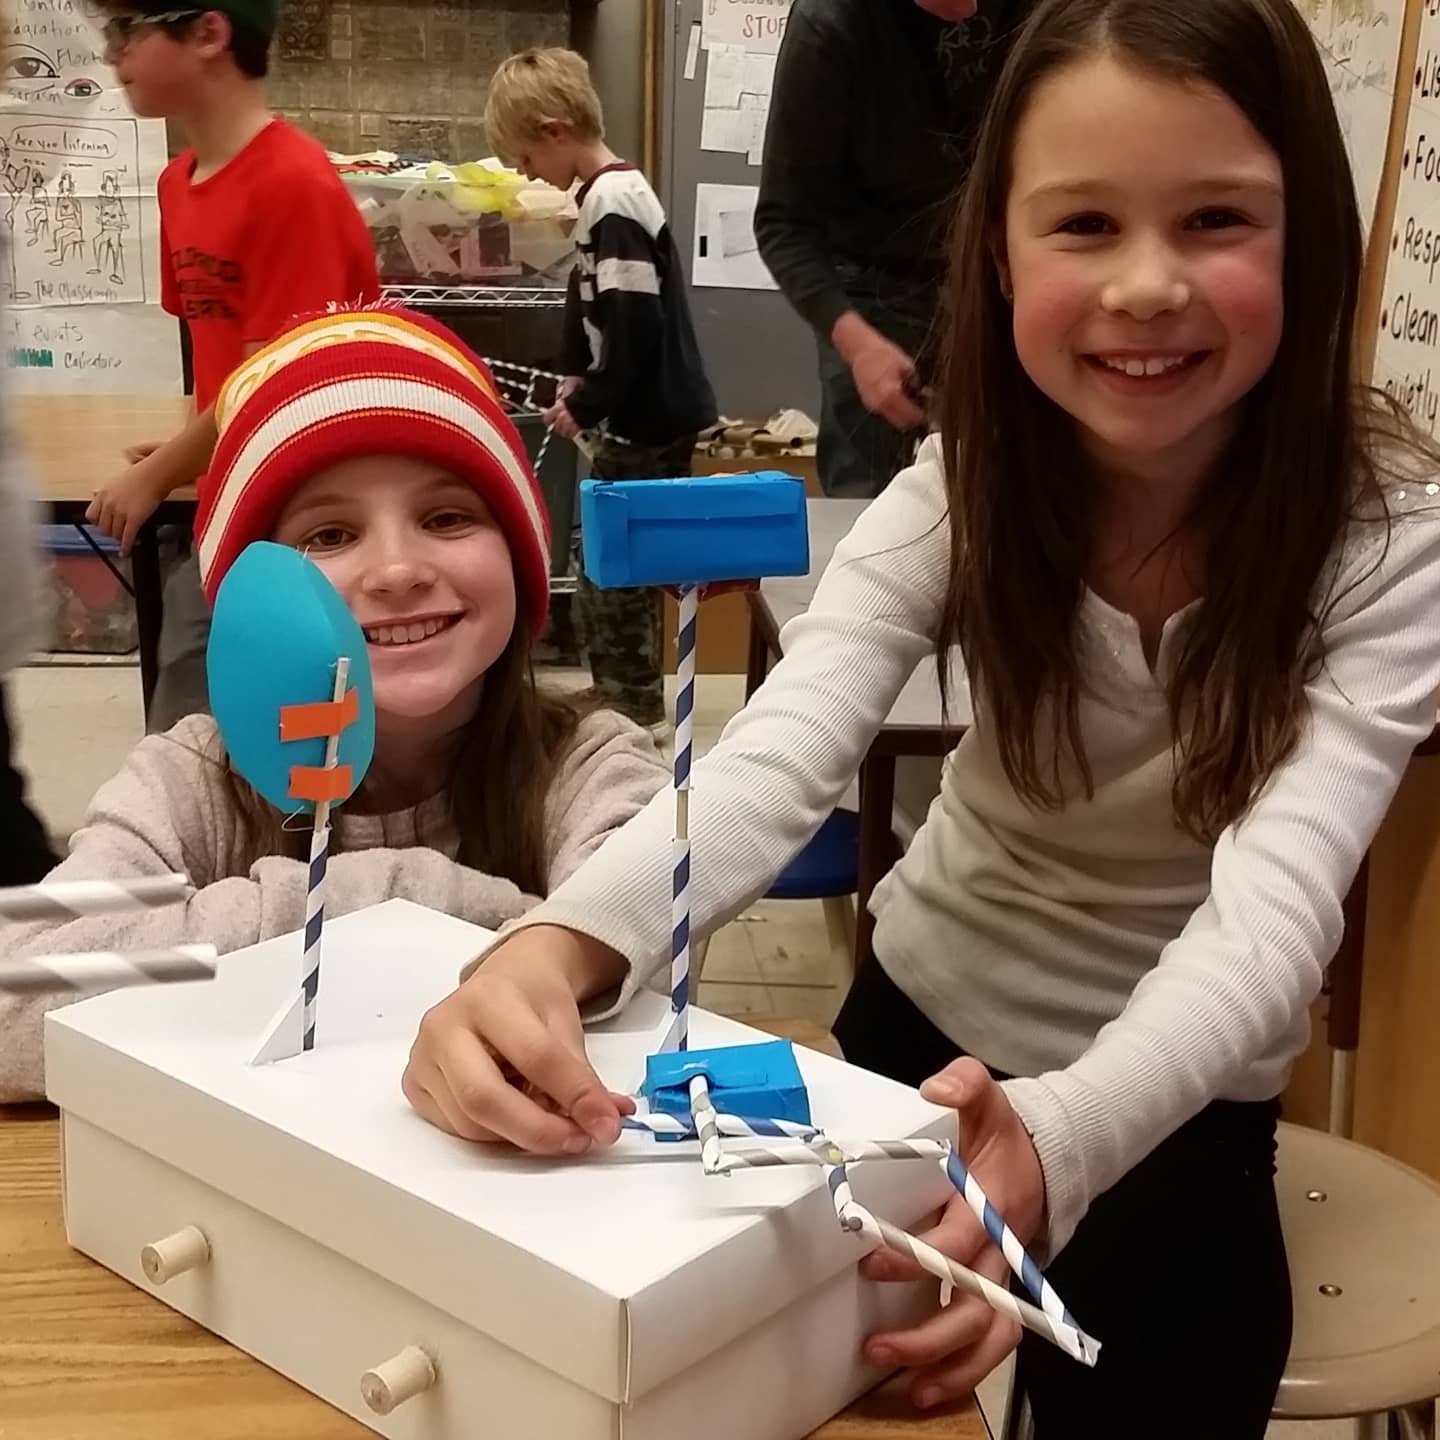
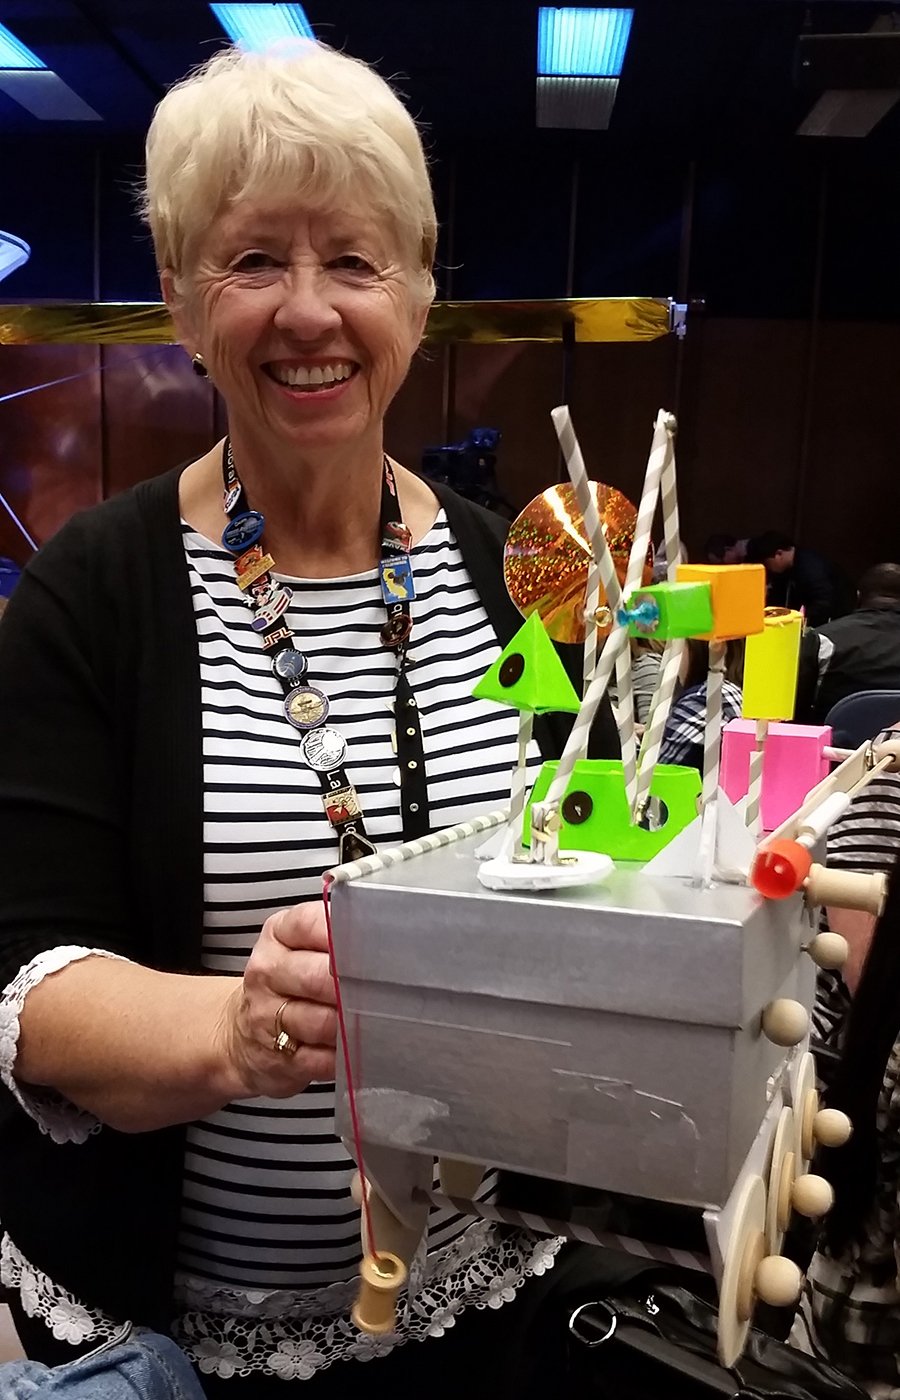
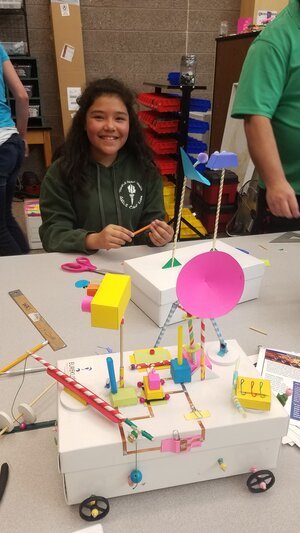
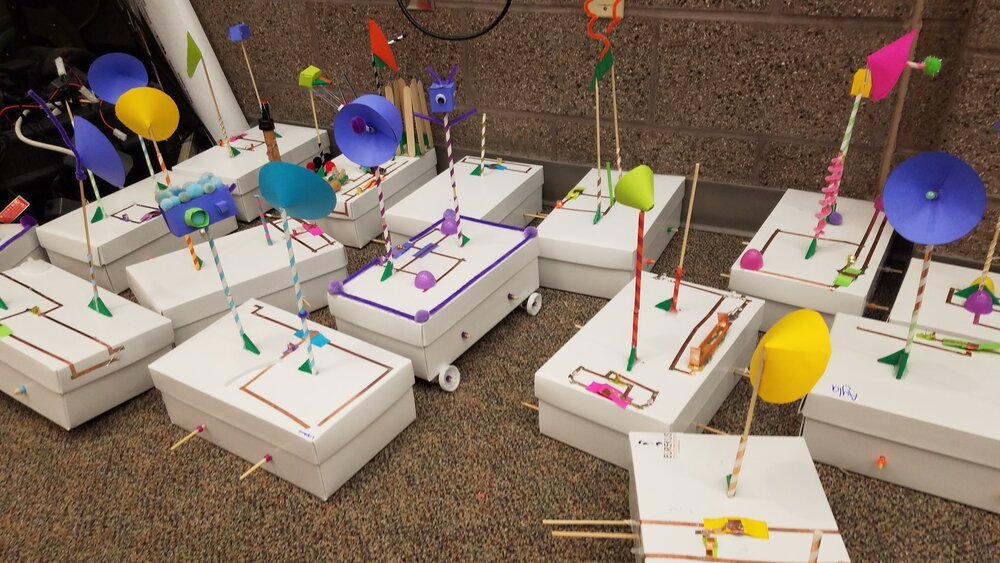
Have a ball exploring and creating with your learners. Check out our gallery of student work to get inspired!
Resources, Planners & Handouts
Get Resources
-
Check out the following resources to get started.
-
-
Print our set of step-by-step instructions to help guide the making process.
Print our Inspiration Decks to help inspire students as they design & build.
-
Use the following templates to mark your box holes for designing Automata systems. You can use any size box with a lid. Or, you can order white shoeboxes from Uline. The video tutorials will give detailed instructions measuring and marking.
Print templates onto legal sized paper and mount on a rigid surface like matte board or file folders.
-
Shoebox Rover integrates great with geometry lessons. Download our 3D shape templates to create rover instruments while exploring math concepts. Print onto colored cardstock.
Combined Shapes (print 1/maker if you have limited materials or budgets)

Automata Circle Options:
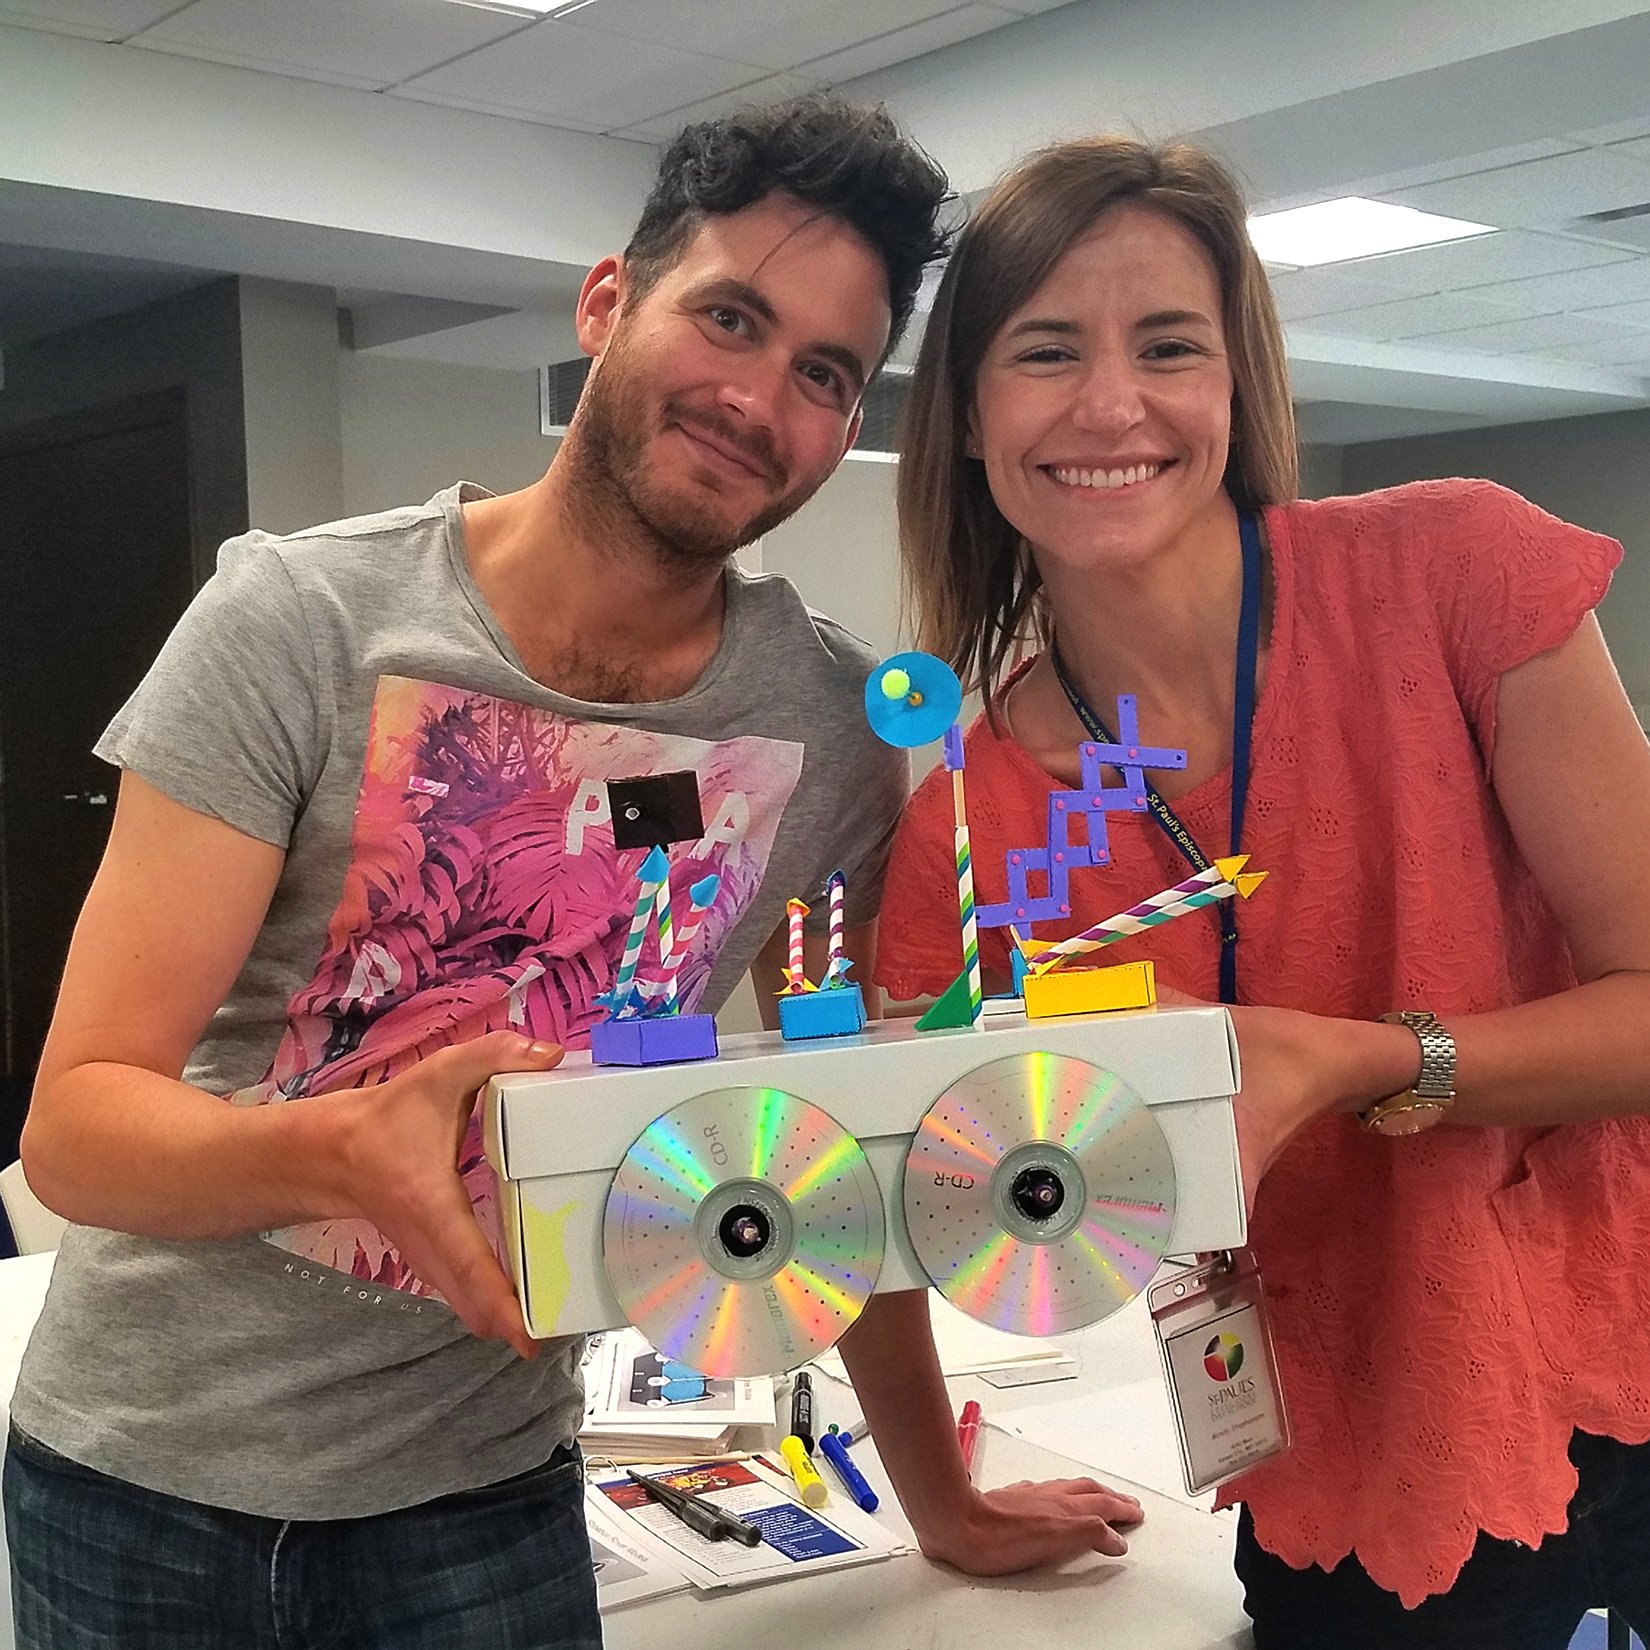
You can use several types of circles for your Automata systems. We prefer and offer die-cut, 2-wall cardboard which are rigid and strong. You can also use 6mm foam circles, but they are more expensive and are sometimes harder to find. If you have a Laser or Die Cutter, you can make your own. Some partners like to cut them out of wood, you just need a rigid surface. Kids can also cut their own cardboard circles.
READY, SET, MAKE!
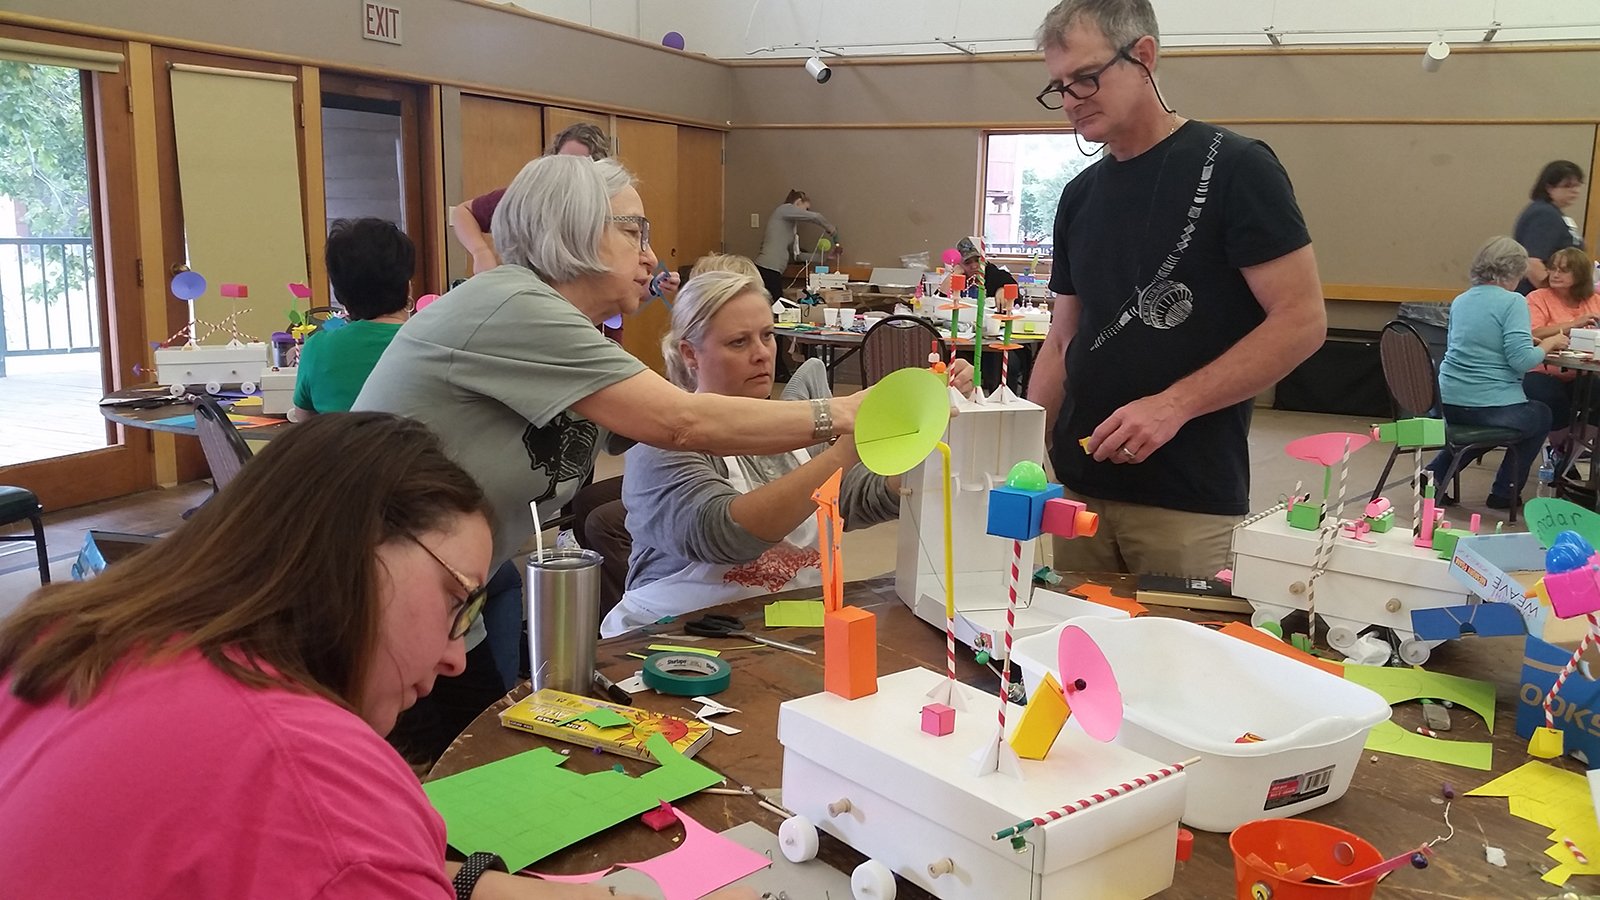
Follow the videos & presentations below to learn the program & make classroom examples before implementing with learners. You can also show students these tutorials to help guide them as they create. Shoebox Rovers are meant to be implemented in phases over several class periods - design a full week immersion, summer camp or even a semester of STEAM fun. Every rover is unique and the process fosters true student-led inquiry. Encourage ideas, curiosity, collaboration & problem-solving! And, remember to embrace failure as an inherent part of the design process.
PHASE 1: Explore The Program
Shoebox Rover In Action
Watch the following videos of Shoebox Rover being implemented with students and teachers to get you started & inspired.
Rover Pilot at Polaris Elementary
Eurekus Launches Rovers at NASA STEAM Experience
Rover PD At Think 360 Arts
PHASE 2: Ask Big Questions
Art & The Cosmic Connection
All NASA missions begin with curiosity and guiding science questions. So, we highly recommend starting your investigation with our NASA program Art & The Cosmic Connection. This will help ground your design and engineering in real planetary science inquiry.
Learners will explore the solar system through art-making and unpack geologic stories. Then they can pick a world to inspire the design of their rover. You can also use the mission planner to guide your investigation.
Where do you want to explore? How do you want to discover? What are your big science questions?
PHASE 3: Mark Your Shoebox
Prepare Your Box
Your first step is to assemble your box and mark holes for your interior automata system. Use the Box Marking Templates to mark any size box, but it must have a removeable lid. The video will show you how to use a standard 4”x7”x12” box.
If you are using a recycled box, mark a line around the center of your box. Then use the registration marks on the templates to measure from the center line. Your top holes will hold your motion axles. You side holes will hold your drive axles.
Fold & Mark Your Box
More NASA Tips
PHASE 4: Engineer Automata
Design A Moving System
Once your box is marked, it’s timed to play with Automata! Create a wheel and axle system that drives motion. The motion axles on the top of your box will move instruments that you design later. This is the most challenging part of the activity, so remember failure is an important part of the learning process.
Make Straw Braces
Design Drive Wheels
Add Motion Wheels
More Automata Tips
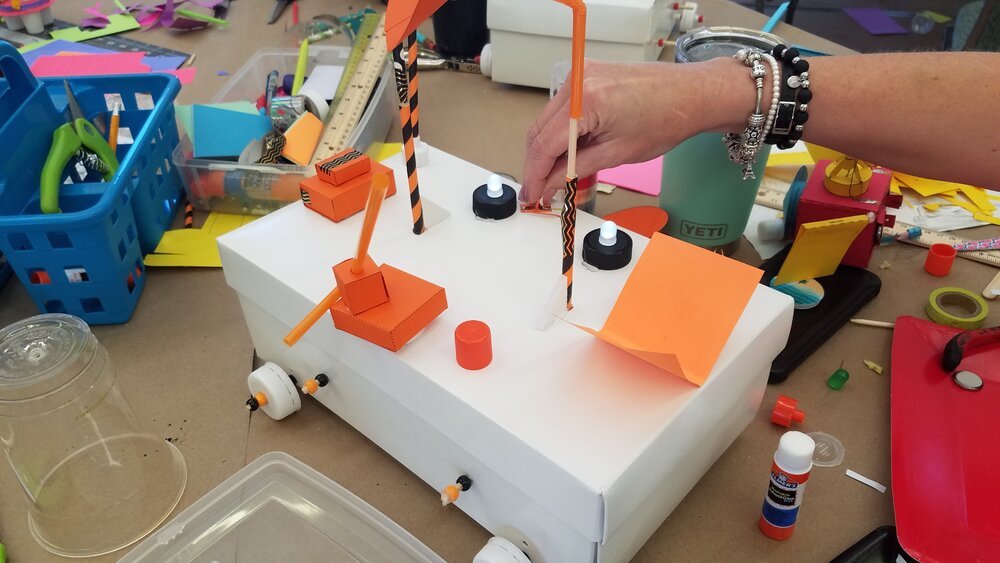
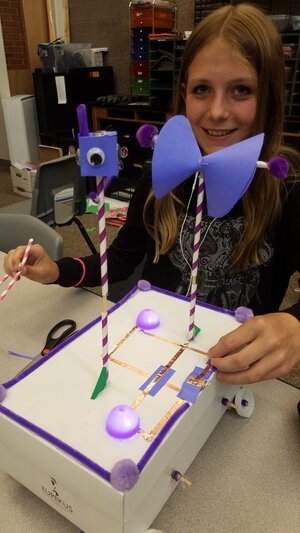
PHASE 5: Design Moving Instruments
Create Instruments While Exploring Geometry
Once your Automata system is working, it’s time to design instruments to go on your top motion axles. Your instruments will move up & down or round & round depending on how you crafted your Automata. Use the Combined Shape and/or Individual Shape Templates to convert 2D shapes into 3D forms. Think about how missions “see” and “hear” - design cameras, telescopes, spectrometers, radar imagers, communication devices, antennas or other instruments.
Cones & Prisms: Transform 2D to 3D Shapes
Design A Moving Camera
PHASE 6: Invent Locomotion
Wheels, Axles Or Other Movement
Now, it’s time for a great design challenge: How will your mission “move”? Be creative and invent a locomotion system. Think deeply about the surface of the world your rover will explore. You can experiment with wheels & axles for a solid surface like the Moon or Mars. But, what if you land on Europa or Titan? Perhaps, your rover needs treads, skis or a raft. Wheels & axles are also great for designing mounts to hold other instruments.
Design Wheels & Axles
Create A Swivel Mount
PHASE 7: Explore Levers & Wedges
Make With Simple Machines
Explore simple machines to design more tools & instruments. You can use our Lever Practice Template to design a simple scissor lever and complex lever arm with a scooper. Give your learners design challenges: Make a system using levers to achieve a real-world task - lever robot arm, hinged door, sample collection tool, etc. You can also design a scooper, which is a wedge, to go onto your lever arm. Remember to check out our NASA Mission Inspiration Decks to spark imaginations.
Make A Simple Lever Template
Design A Custom Lever
Make A Complex Lever & Scooper
Design A Wedge Shovel
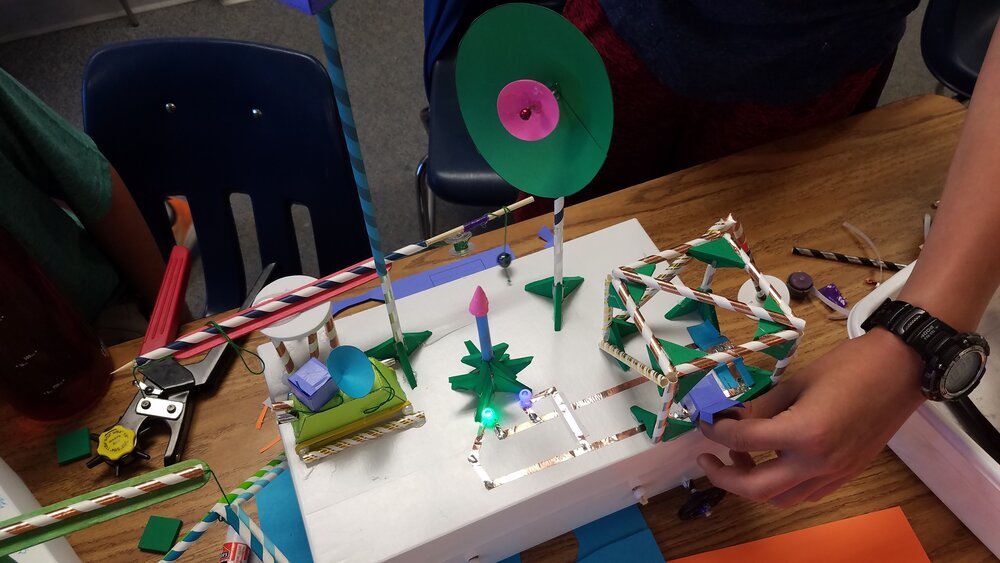
PHASE 8: Craft Pulleys & Other Systems
Design More Simple & Complex Machines
As students progress through the project, the making process greatly sparks creativity and inquiry. By now, your learners are probably off and running with their own questions and design ideas. We will often give students a daily challenge: 1) Design a pulley system; 2) Craft a device using inclined planes; 3) Invent a complex machine; 4) Create a drill using a screw, etc. A great goal is for students to incorporate all six simple machines plus a complex machine in their final designs.
Make A Simple Pulley Arm
Final Assembly
Design A Complex Pulley System
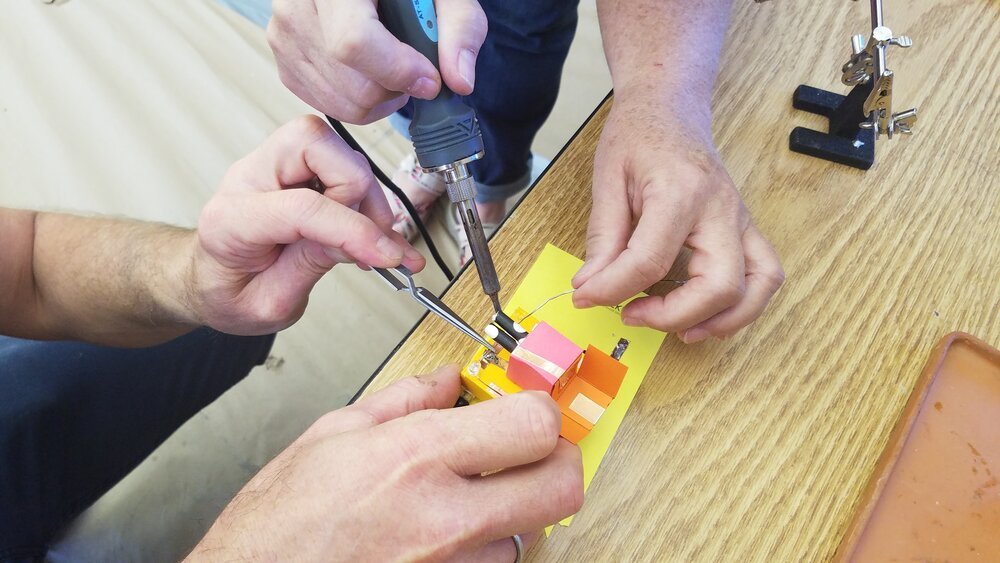
Technology Extension
Add Circuits & Electronics for Deeper Investigations
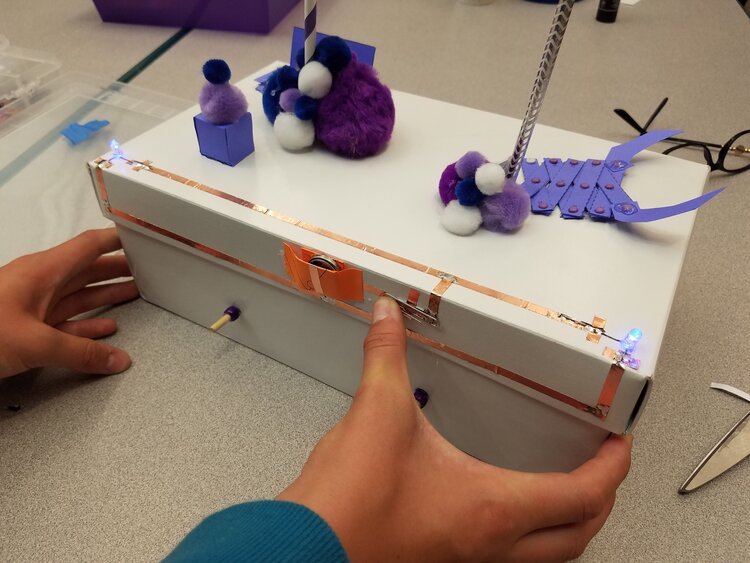
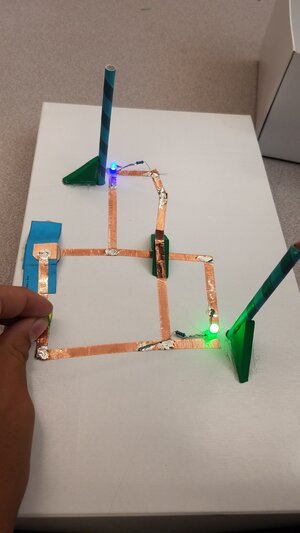
Students love the chance to add technology to their creations! Enhance your Shoebox Rovers with tape circuits, LED lights & motors. Learners love adding cool gizmos to their designs while building crucial engineering skills. Enjoy the student slideshow below to get creative ideas. And, we’ve included templates & video tutorials for adding a simple battery base or more complex tape circuit designs.
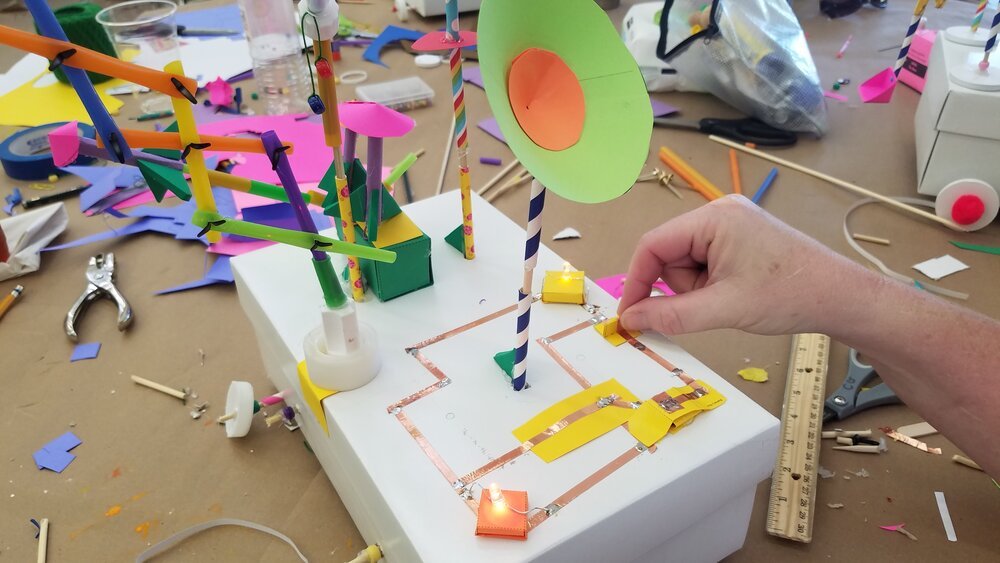


Circuits & LED Lights - Video Tutorials
Simple Battery Base (No Soldering)
Create A Custom Circuit: Video 1